
clang-format安装配置与vscode支持
文章目录calng-format安装centos下clang-format安装ubuntu下clang-format的安装vscode支持clang-formatclang-format使用参考文献calng-format安装centos下clang-format安装centos 的yum仓库中并没有clang-format的安装包,需要更新repo源:sudo yum install cento
文章目录
calng-format安装
centos下clang-format安装
centos 的yum仓库中并没有clang-format的安装包,需要更新repo源:
sudo yum install centos-release-scl-rh
之后下载clang-format:
sudo yum install llvm-toolset-7-git-clang-format
但是这个时候,clang-format安装的位置不在系统的PATH变量中,所以我们需要更新PATH变量。首先找到我们安装的clang-format文件夹:
sudo find / -name *clang-format*
...
821-llvm-toolset-7-git-clang-format-5.0.1-4.el7-x86_64
/opt/rh/llvm-toolset-7/root/usr/bin/clang-format
/opt/rh/llvm-toolset-7/root/usr/bin/git-clang-format
...
得到clang-format的路径/opt/rh/llvm-toolset-7/root/usr/bin/clang-format之后,编辑/etc/profile文件,添加如下两条环境变量信息:
# 添加llvm clang-format路径
export LLVM_HOME=/opt/rh/llvm-toolset-7/root/usr
export PATH=$PATH:$LLVM_HOME/bin
之后使配置生效:
source /etc/profile
ubuntu下clang-format的安装
这个直接从apt仓库安装:
sudo apt-get install clang-format
vscode支持clang-format
直接搜索商店安装如下clang-format插件: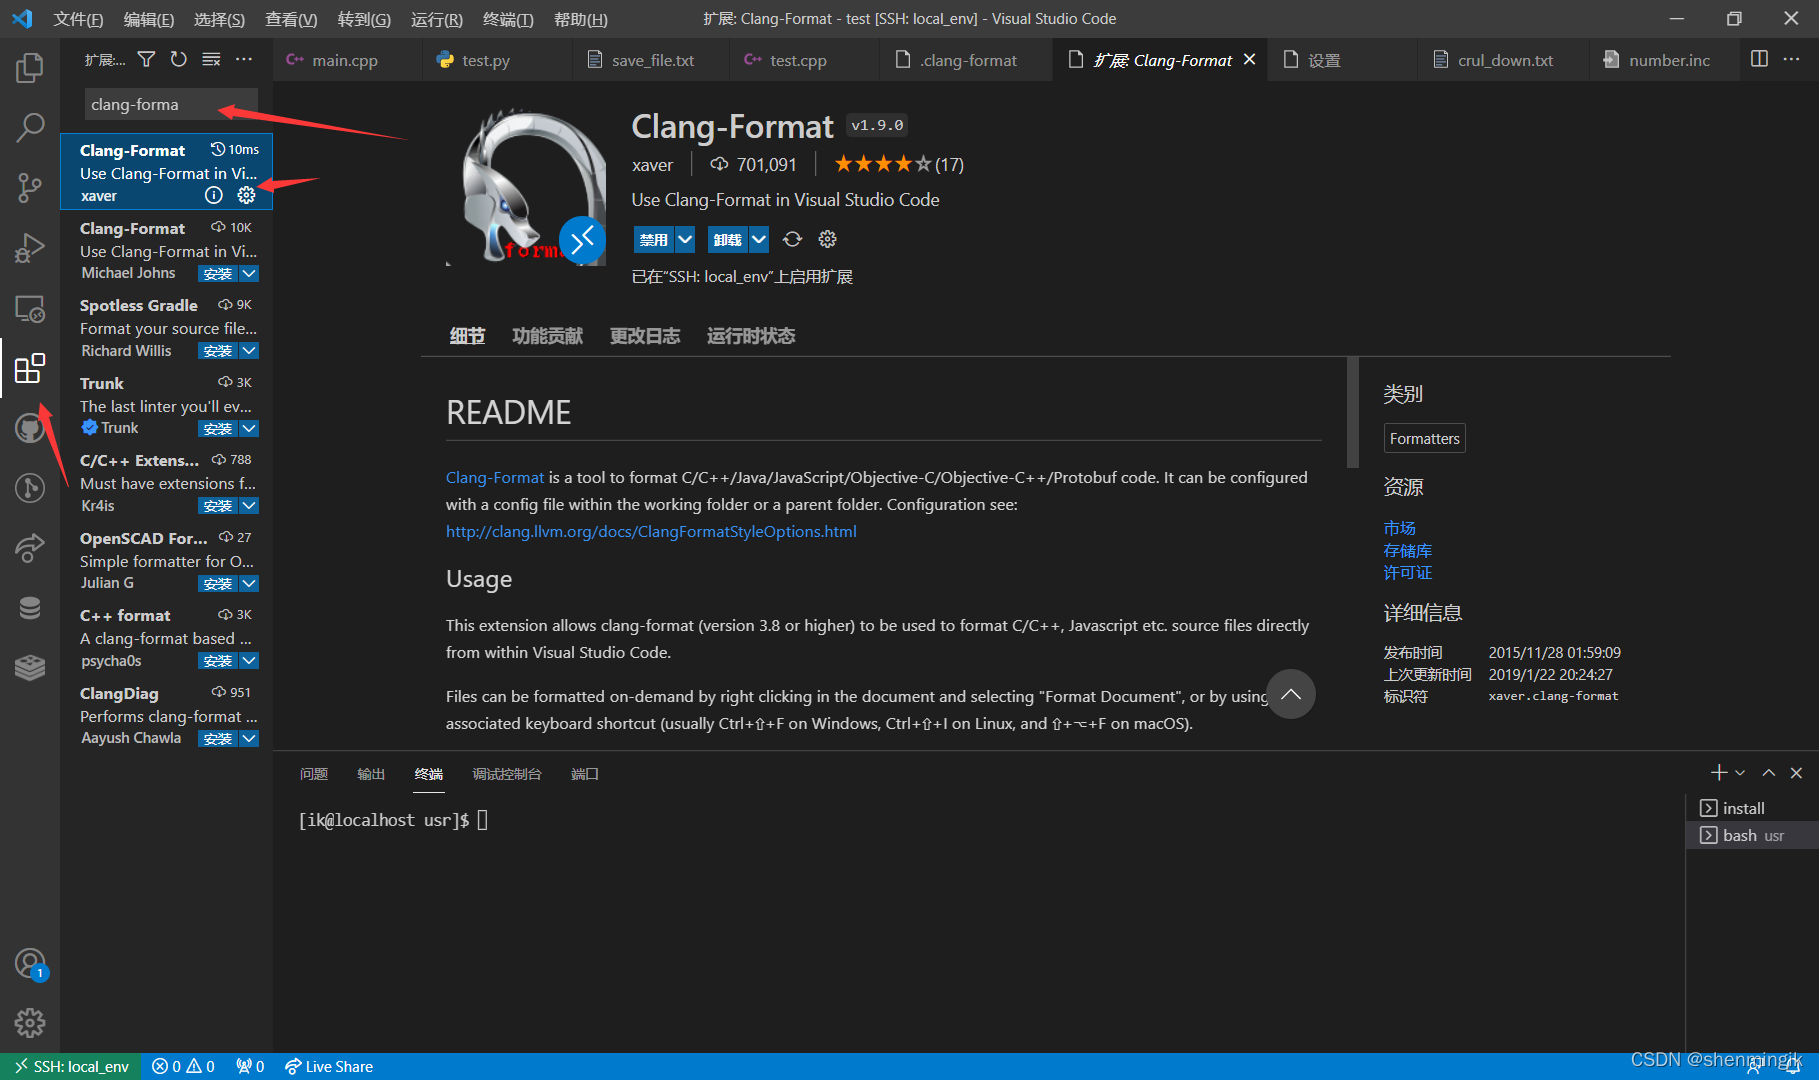
clang-format使用
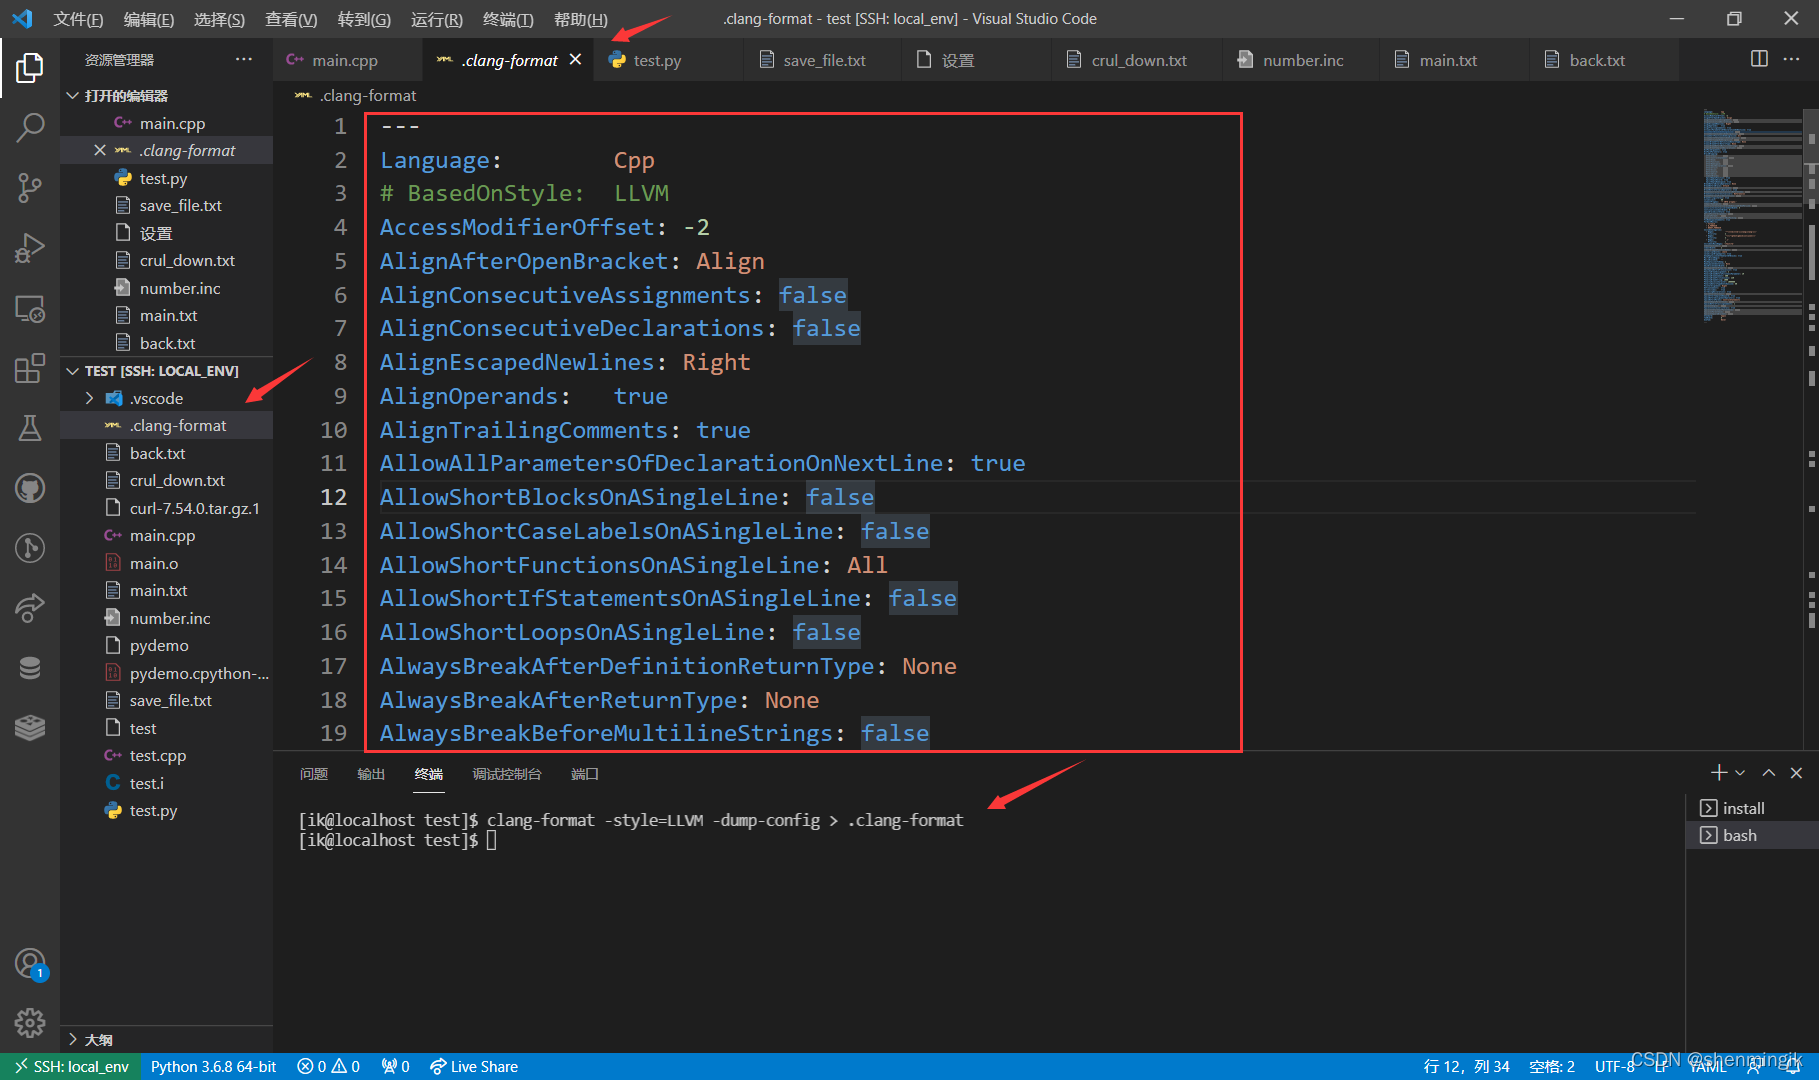
输入以下命令就会按照llvm的格式在在当前路径下生成.clang-format文件。
[ik@localhost test]$ clang-format -style=LLVM -dump-config > .clang-format
clang-format内部原生支持五种格式:
- LLVM
- Chromium
- Mozilla
- WebKit
我们可以在vscode中输入快捷点ctrl+shift+p打开设置面板,之后在输入框输入clang-format,找到style选项: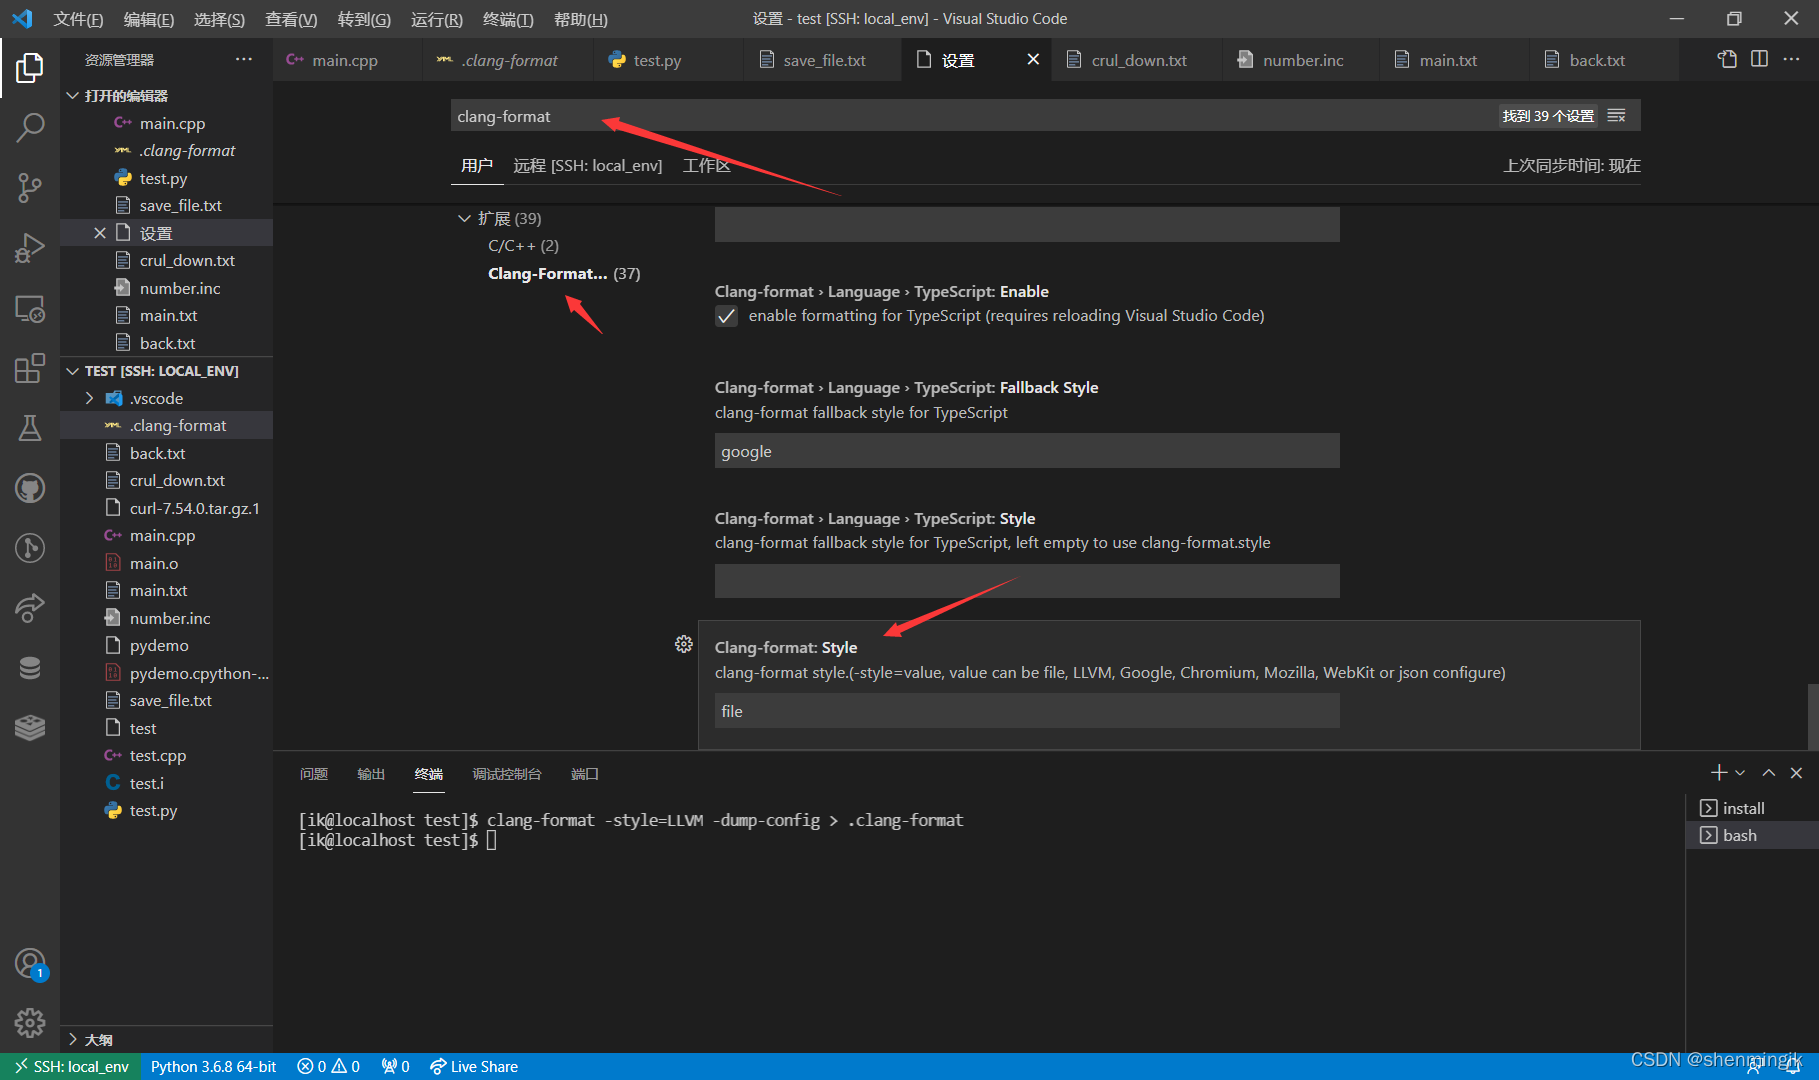
可以看到这里的文件格式是file,其表示按照我们自己定义的.clang-format文件格式来,下面是吴咏炜老师使用的clang-format配置:
---
# BasedOnStyle:  WebKit
AccessModifierOffset: -4
AlignConsecutiveAssignments: false
AlignConsecutiveDeclarations: true
AlignEscapedNewlinesLeft: false
AlignOperands:   true
AlignTrailingComments: true
AllowAllParametersOfDeclarationOnNextLine: true
AllowShortBlocksOnASingleLine: false
AllowShortCaseLabelsOnASingleLine: false
AllowShortFunctionsOnASingleLine: Empty
AllowShortIfStatementsOnASingleLine: false
AllowShortLoopsOnASingleLine: false
AlwaysBreakAfterDefinitionReturnType: None
AlwaysBreakAfterReturnType: None
AlwaysBreakBeforeMultilineStrings: false
AlwaysBreakTemplateDeclarations: Yes
BinPackArguments: true
BinPackParameters: true
BraceWrapping:
  AfterClass:      false
  AfterControlStatement: false
  AfterEnum:       false
  AfterFunction:   true
  AfterNamespace:  false
  AfterObjCDeclaration: false
  AfterStruct:     false
  AfterUnion:      false
  BeforeCatch:     true
  BeforeElse:      false
  IndentBraces:    false
BreakBeforeBinaryOperators: false
BreakBeforeBraces: Custom
BreakBeforeTernaryOperators: true
BreakConstructorInitializers: BeforeColon
ColumnLimit:     76
CommentPragmas:  '^ IWYU pragma:'
ConstructorInitializerAllOnOneLineOrOnePerLine: true
ConstructorInitializerIndentWidth: 4
ContinuationIndentWidth: 4
Cpp11BracedListStyle: true
DerivePointerAlignment: false
DisableFormat:   false
ExperimentalAutoDetectBinPacking: false
ForEachMacros:   [ foreach, Q_FOREACH, BOOST_FOREACH ]
IncludeCategories:
  - Regex:           '^<.*\.hpp>$'
    Priority:        3
  - Regex:           '^<.*\.h>$'
    Priority:        1
  - Regex:           '^<'
    Priority:        2
  - Regex:           '.*'
    Priority:        4
IncludeIsMainRegex: '(_test)?$'
IndentCaseLabels: false
IndentWidth:     4
IndentWrappedFunctionNames: false
KeepEmptyLinesAtTheStartOfBlocks: false
MaxEmptyLinesToKeep: 1
NamespaceIndentation: Inner
PenaltyBreakBeforeFirstCallParameter: 19
PenaltyBreakComment: 300
PenaltyBreakFirstLessLess: 120
PenaltyBreakString: 1000
PenaltyExcessCharacter: 1000000
PenaltyReturnTypeOnItsOwnLine: 60
PointerAlignment: Left
ReflowComments:  true
SortIncludes:    true
SpaceAfterCStyleCast: false
SpaceBeforeAssignmentOperators: true
SpaceBeforeParens: ControlStatements
SpaceInEmptyParentheses: false
SpacesBeforeTrailingComments: 2
SpacesInAngles:  false
SpacesInContainerLiterals: true
SpacesInCStyleCastParentheses: false
SpacesInParentheses: false
SpacesInSquareBrackets: false
Standard:        Latest
TabWidth:        4
UseTab:          Never
...
我们将其写入.clang-format(clang-format需要在工作根目录下)文件,之后在想要格式化的文件中使用快捷键ctrl+shift+i就可以了格式化文档了。
参考文献
[1] 吴咏炜.现代C++实战30讲.极客时间

汇聚全球AI编程工具,助力开发者即刻编程。
更多推荐


 5
5 0
0- 0


 已为社区贡献1条内容

所有评论(0)