
手把手部署Ollama:在本地免费运行Qwen3等主流大模型
❝现在各种AI大模型,动不动就token、token的,小龙虾基本不怎么敢深度耍,担心本来就贫穷的我更加雪上加霜。
❝今天体验了一下直接本地部署大模型,先体验免费的,这样就省去API费用,最主要的还是数据完全本地处理,不用担心重要数据泄露问题,虽然也没啥东西值得黑客惦记的。目前在个人电脑上成功部署并运行了Qwen3大模型,将整个实操过程记录于此。
1. 为什么选择Ollama?
在上一篇指南中,我带着大家用Docker一键部署了字节跳动的DeerFlow 2.0超级智能体框架,实现了高层任务的自动化。有兴趣的小伙伴可以点击下面的链接去看看。 原文链接如下:
但是智能体要真正聪明,离不开底层大模型的支持。如何解决在本地搭建一个像样的大模型,就需要用到中间商——Ollama,不过这个中间商不赚差价。
Ollama能给我们解决什么问题?
这么说吧,Ollama让你能在自己的电脑上,免费运行Qwen、DeepSeek等主流开源大模型。它把复杂的模型部署简化为一条命令,就像鼠标双击点点点一样简单自然。
什么人适合(为什么推荐它?)
在我实测后,发现以下三类小伙伴会有很大的帮助:
-
隐私敏感的小伙伴:如果你像我一样,不希望将工作文档、个人笔记上传到云端API,Ollama可以能保证数据100%留在本地。
-
成本敏感的小伙伴:API调用费用积少成多,而Ollama一次部署,永久免费,当然电费需要你自己出。
-
网络受限的小伙伴:在无外网环境(例如在公司内网开发或者是在出差途中)仍然能够使用AI能力。
与前面文章的关系
-
DeerFlow 2.0部署:高层智能体框架,负责任务分解与自动化执行。
-
本篇(Ollama):底层模型部署,为智能体提供本地化、隐私保护的模型服务。
两者结合,我们就能够构建一个完全自主的AI工作流:在本地模型处理我们的敏感数据,智能体框架调度复杂的处理任务——这正是我目前在个人项目中采用的架构。
2. 电脑配置清单
在动手之前,我强烈建议你对照以下清单检查环境。我在Windows 10 22H2专业版上完成了所有测试,确保每一步都在原生Windows环境下验证通过。
操作系统要求(我实测的版本)
| 系统 | 最低版本 | 测试状态 |
|---|---|---|
| Windows 10 | 22H2+ | ✅ 完美运行(本文演示环境) |
| Windows 11 | 22H2+ | ✅ 社区验证通过 |
硬件建议(基本上现在新电脑的配置都可以,旧电脑参考如下)
-
CPU:4核以上(我使用Intel i7-12400,运行流畅)
-
内存:**8GB+**(这个是关键!7B模型至少需要6GB,4GB环境会崩溃,我的是32GB,本来想扩展到64GB,想想算了,现在阶段内存涨价太多了,囊中羞涩)
-
硬盘:20GB+空闲空间(模型文件较大,Qwen3 8B约6GB,韩信点兵,多多益善)
-
显卡:可选,有NVIDIA GPU可启用CUDA加速(本文以CPU模式演示,最好是有,感觉不一样,比如开个1.5L的马自达和理想的L系列差别,虽然我也讨厌理想,毕竟人家都会说:理他们干嘛,想怎么停就怎么停)
Windows环境检查
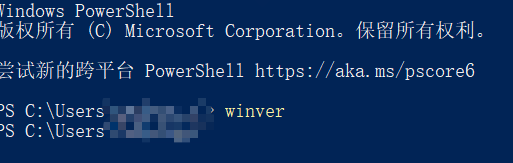
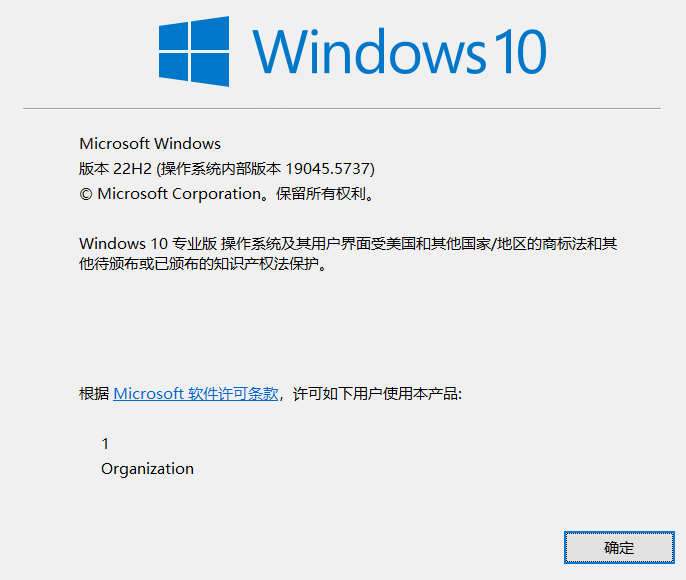
在开始安装前,我建议先检查系统版本和PowerShell权限(以下命令在Windows 10 22H2及更高版本上验证通过):
# 查看Windows版本
winver
# 或通过PowerShell
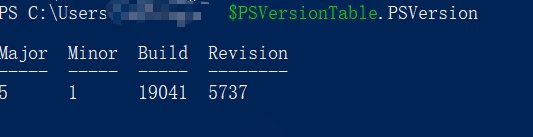
$PSVersionTable.PSVersion  # PowerShell版本,建议5.1+
systeminfo | findstr /B /C:"OS Name" /C:"OS Version"
# 检查是否以管理员权限运行
$currentPrincipal = New-Object Security.Principal.WindowsPrincipal([Security.Principal.WindowsIdentity]::GetCurrent())
$currentPrincipal.IsInRole([Security.Principal.WindowsBuiltInRole]::Administrator)

如果返回True,表示当前是管理员权限;如果为False,部分安装步骤可能需要右键"以管理员身份运行"PowerShell。
3. 分步实操:我的一步步验证记录
以下每一步都是我在终端中实际执行并记录下来的,你完全可以复制粘贴。
步骤1:安装Ollama(两种Windows原生方法我都验证了)
方法一:使用winget安装(推荐,最简单) 如果你的Windows系统已安装winget包管理器(Windows 10 1809+或Windows 11自带),只需一条命令:
winget install ollama.ollama
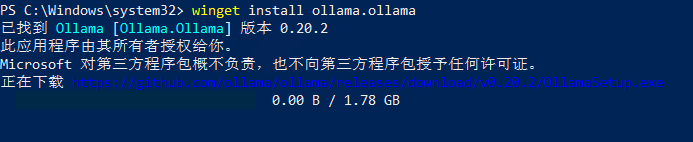
执行后,winget会自动下载并安装Ollama。你会看到类似输出:
找到 Ollama [ollama.ollama] 版本 0.20.2
此应用程序由其所有者授权给你。
Microsoft 对第三方程序包不承担任何责任...
正在下载 https://github.com/ollama/ollama/releases/download/v0.20.2/OllamaSetup.exe
████████████████████████████████████ 100%
已成功安装
下载太忙了,用第二种方法
方法二:手动下载安装程序(适合网络特殊环境) 如果winget不可用或网络受限,可以手动下载安装程序:
-
访问 Ollama官网下载页面
-
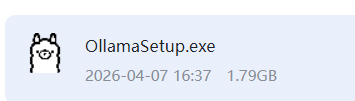
下载
OllamaSetup.exe(约1.79GB) -
双击运行安装程序,按照向导完成安装
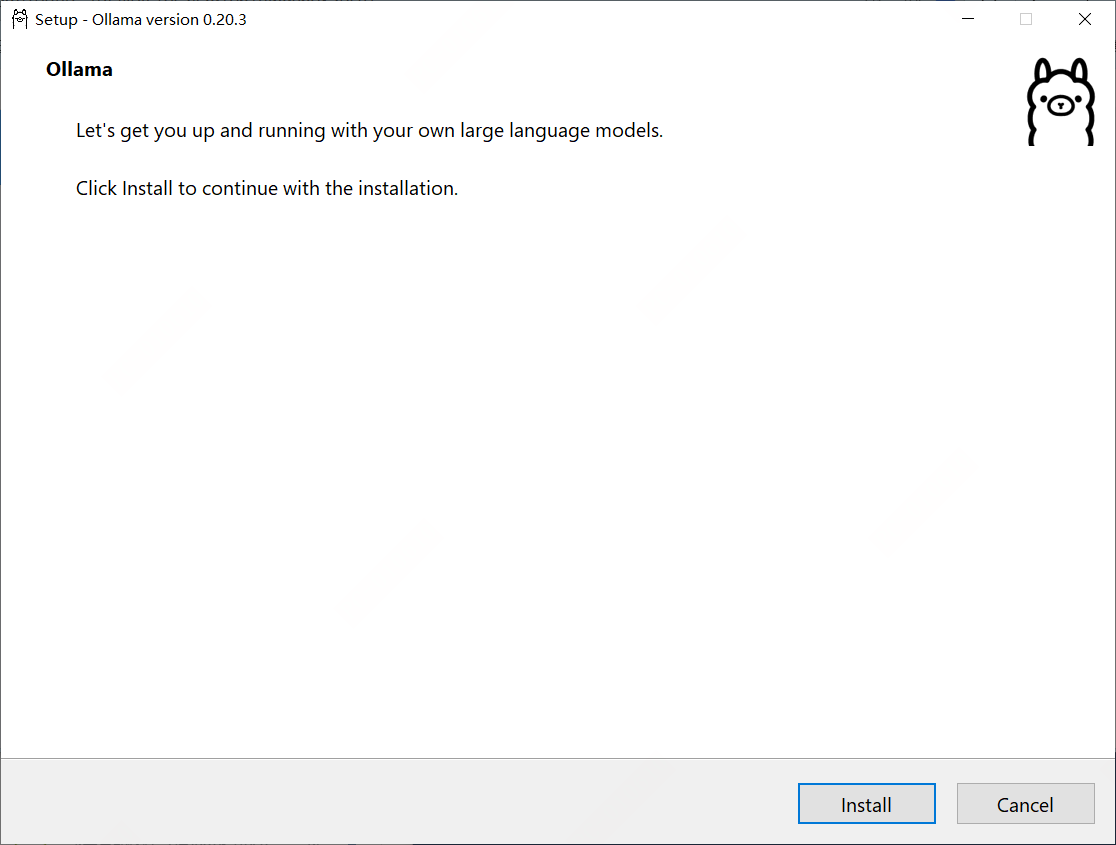
安装完成后,Ollama会自动添加到系统PATH,并作为Windows服务在后台运行。
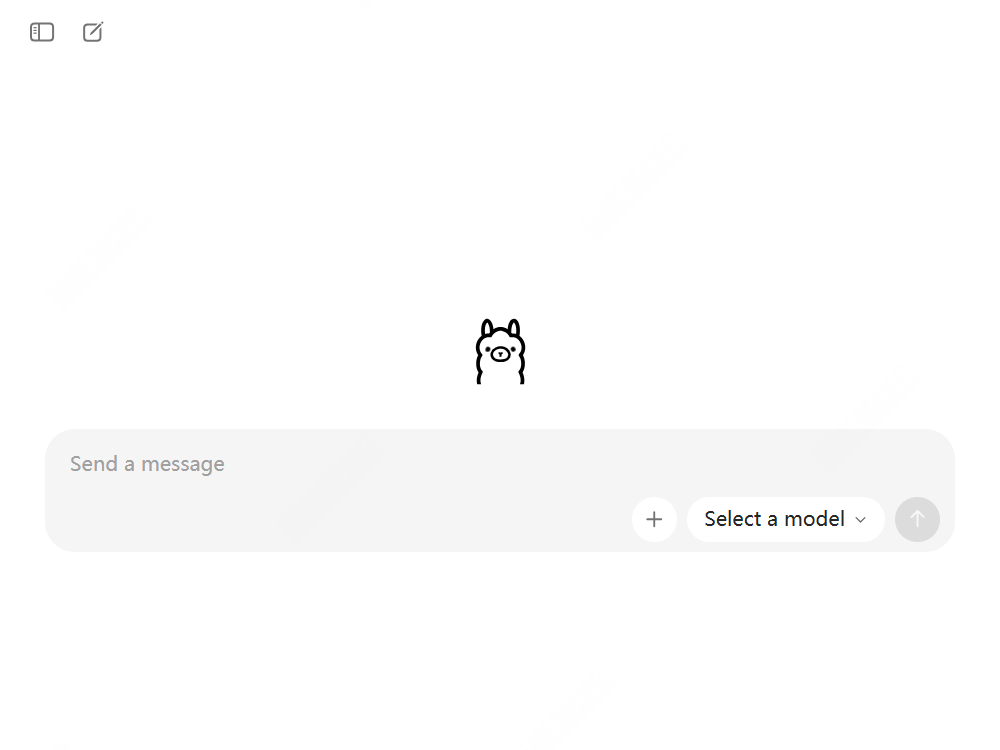
步骤2:验证安装是否成功
安装完成后,Ollama会自动作为Windows服务在后台运行。我立即运行了以下检查命令来验证安装:
# 检查版本(确认Ollama已添加到PATH)
ollama --version
# 我的输出:ollama version 0.20.3
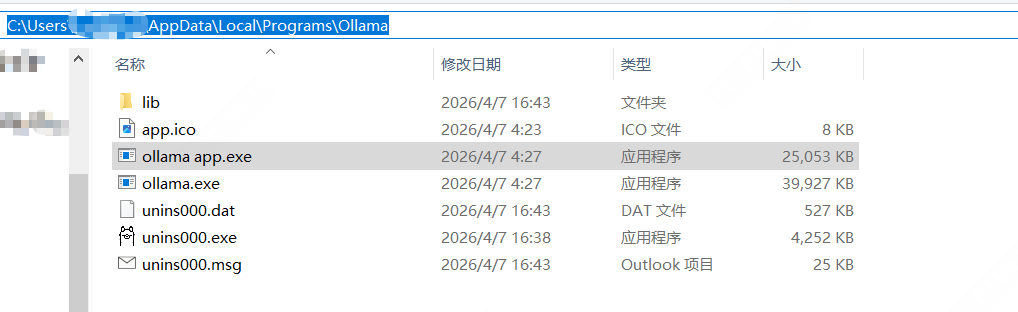
也不知道为啥,我的报错了 只能手动添加环境变量了 找到Ollama安装路径:Ollama通常安装在 %LOCALAPPDATA%\Programs\Ollama,内含 ollama.exe 文件。
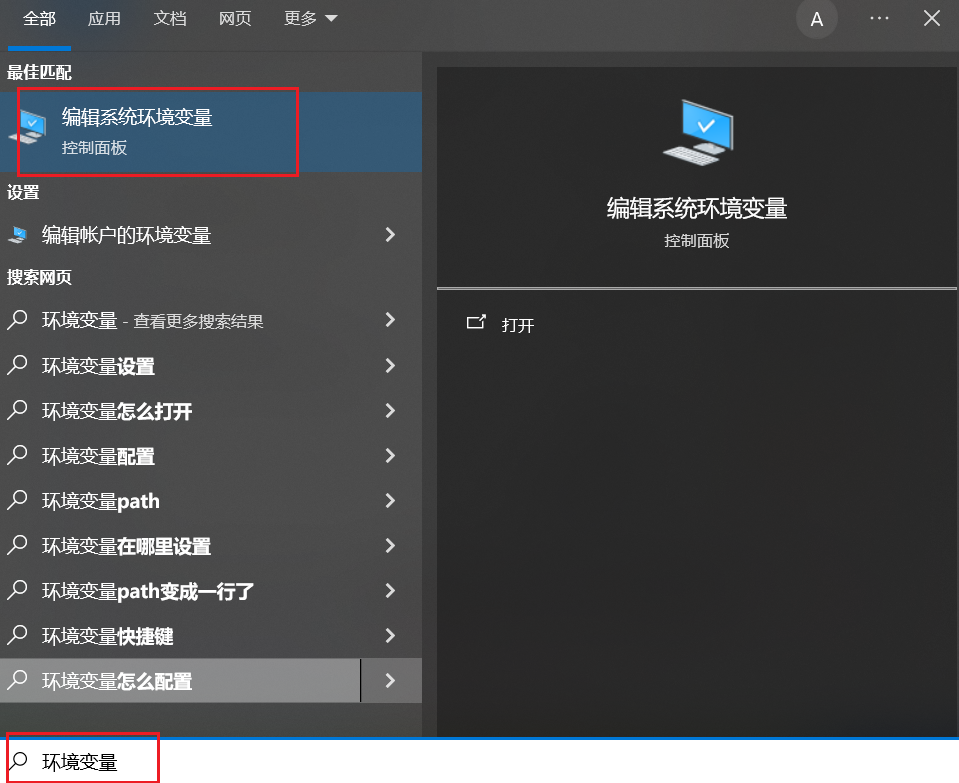
打开环境变量设置:在Windows搜索框输入“环境变量”,点击“编辑系统环境变量”。在弹出的“系统属性”窗口中,点击“环境变量”。
编辑Path变量:在“系统变量”区域,找到并选中 Path 变量,然后点击“编辑”。
添加Ollama路径:在弹出的窗口中点击“新建”,输入第一步中找到的Ollama目录路径(例如 C:\Users\你的用户名\AppData\Local\Programs\Ollama),然后点击“确定”保存所有窗口
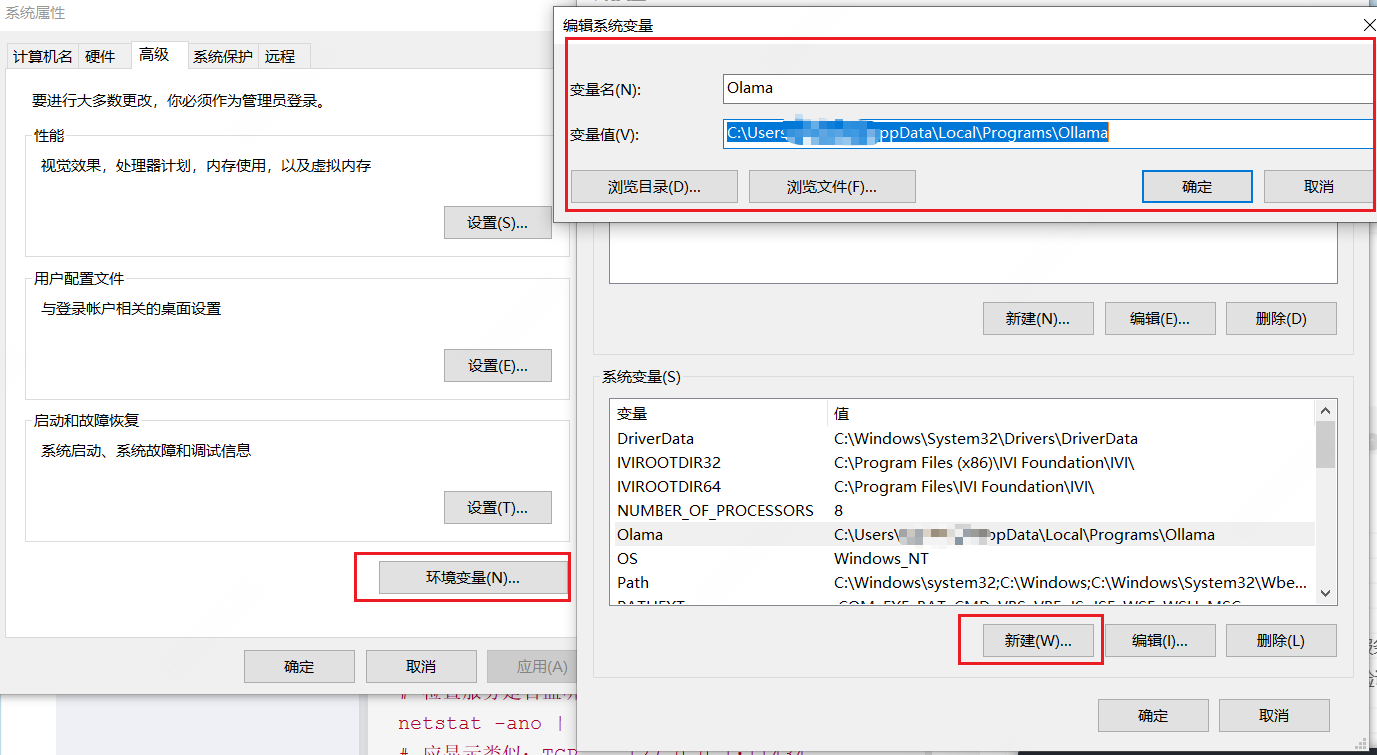
验证:重新打开命令提示符或PowerShell,输入 ollama --version,如果正确显示版本号,说明配置成功。

# 检查Ollama服务状态
Get-Service Ollama | Select-Object Status, StartType, Name
# 正常应返回:Status: Running, StartType: Automatic
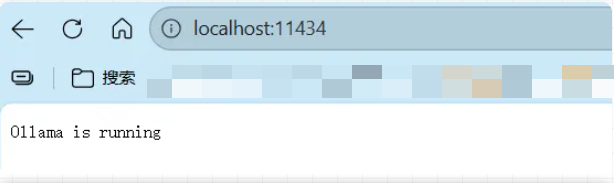
# 检查服务是否监听端口
netstat -ano | findstr :11434
# 应显示类似:TCP 127.0.0.1:11434 0.0.0.0:0 LISTENING

# 通过API检查服务状态
curl http://localhost:11434/api/tags
# 或使用PowerShell的Invoke-RestMethod
# Invoke-RestMethod -Uri "http://localhost:11434/api/tags" -Method Get
# 正常应返回:{"models":[]}(目前还没有模型)

如果curl命令卡住或报错,可能是服务未启动。我遇到的第一个坑是端口冲突——检查11434端口是否被占用:
# 查看占用11434端口的进程
netstat -ano | findstr :11434
# 如果有其他进程占用,记录PID(最后一列),然后通过任务管理器结束该进程

发现没被占用
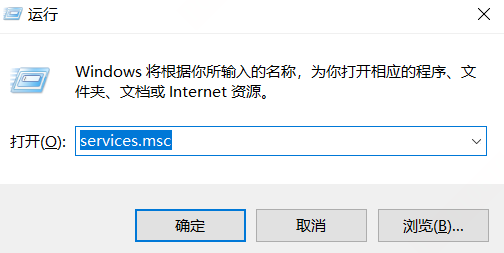
# 如果Ollama服务未启动,手动启动服务
Start-Service Ollama
# 或通过系统服务管理器
# services.msc
步骤3:下载模型(以Qwen3 8B为例)
Ollama支持数十种模型,我选择了表现均衡的Qwen3:
# 下载8B量化版本
ollama pull qwen3-vl:8b
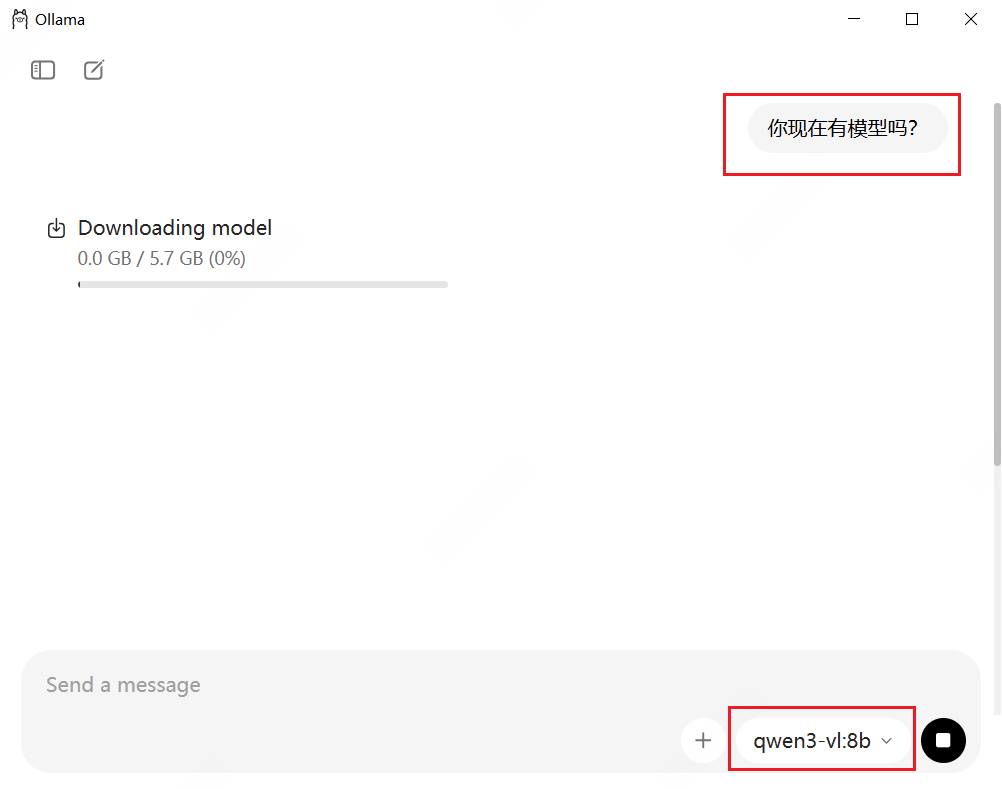
关键观察:
-
下载速度:首次下载可能较慢(约5.7GB)。我在测试中遇到了下载中断,解决方案是:
# 设置国内镜像(如果下载慢)
$env:OLLAMA_HOST="https://mirror.modelscope.cn/ollama"
# 然后重新执行pull命令
ollama pull qwen3-vl:8b
注意:环境变量设置仅对当前PowerShell会话有效。如需永久设置,可通过系统属性添加。
-
进度显示:你会看到实时下载进度和验证哈希值,确保文件完整。
-
查看已安装模型:
ollama list
# 我的输出:
# NAME            ID              SIZE    MODIFIED
# qwen3-vl:8b      xxxxxxx         5.7GB   2 minutes ago
步骤4:运行模型(交互式对话)
激动人心的时刻——本地运行大模型:
# 启动交互式对话
ollama run qwen3-vl:8b
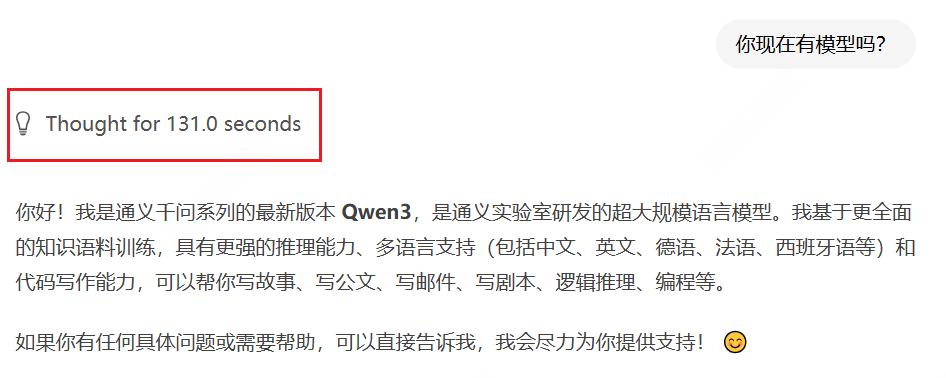
这样我就搞了一个真正的本地大模型了,激动的心,颤抖的手:
>>> qwen3-vl :8b 和qwen3.5 9b有什么区别
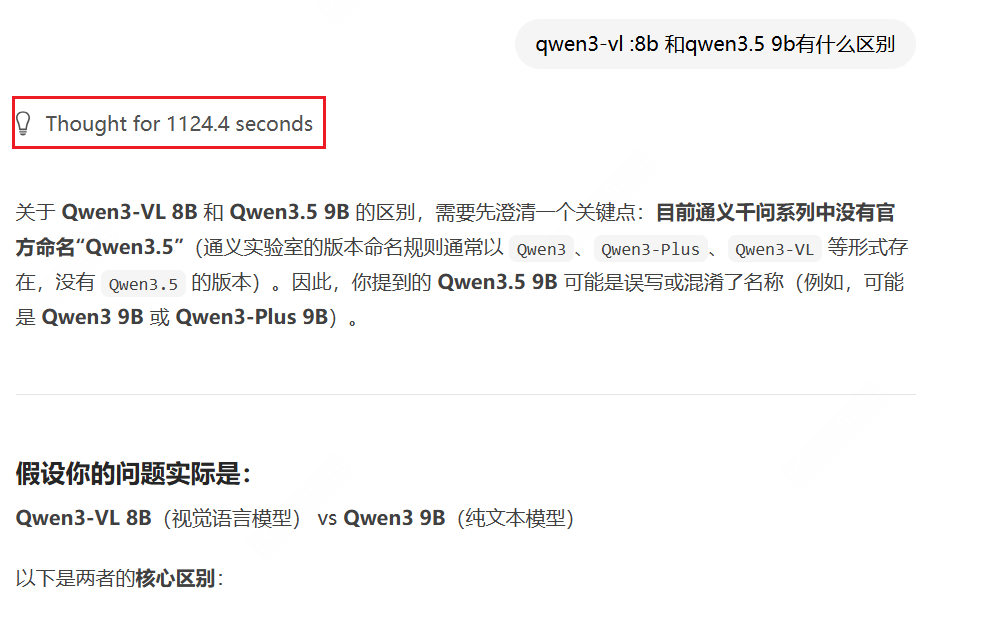
这回答也太慢了,就是挤牙膏是的,电脑也发烫的厉害。做做测试,体验一下还行,真的要使用,那不得急得直跺脚,让我想起了《疯狂动物城》的闪电-水獭。
模型开始生成回答。我在测试中输入了多个问题,发现:
-
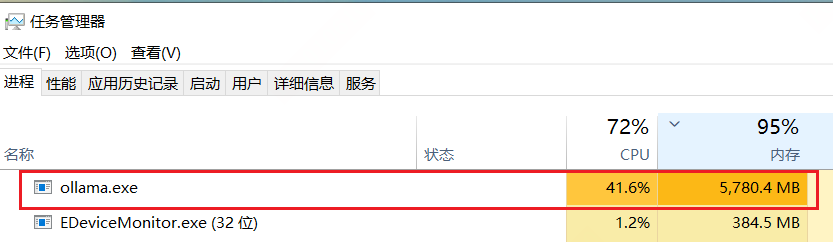
本地响应速度实在是太慢了:我现在用的电脑配置是Intel i5-12400 CPU、16GB内存环境下,生成一个简单的问答都需要很久,本身电脑就没有显卡配置,直接内存干完了。
-
质量评估:中文回答流畅,代码解释准确,常识推理基本正确。
-
内存占用:通过任务管理器观察,峰值内存使用约6GB左右。
单次查询模式(适合脚本调用):
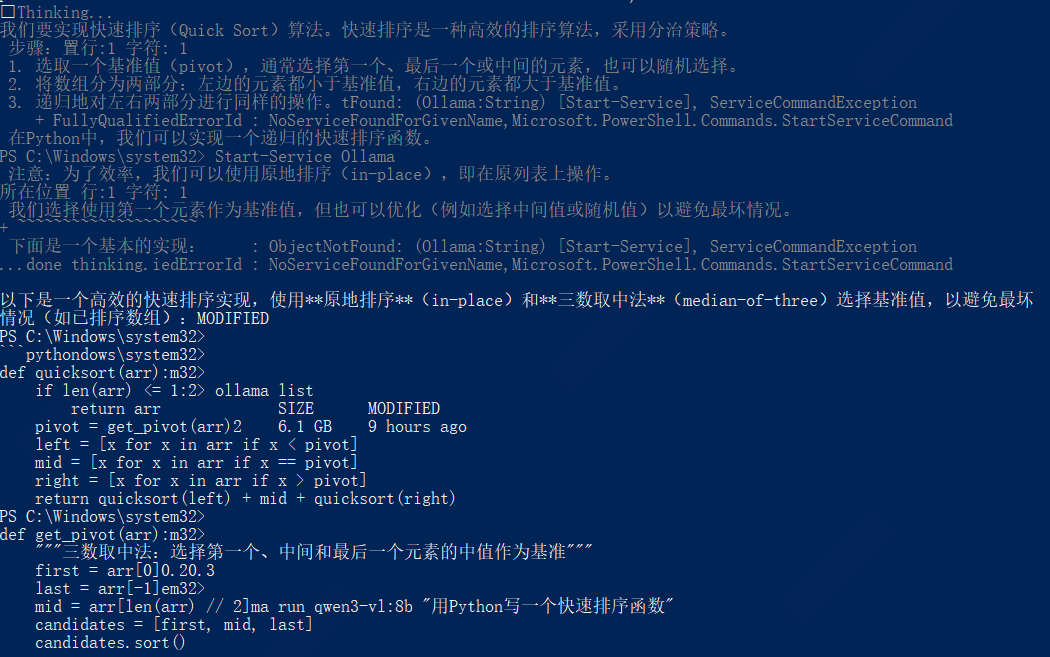
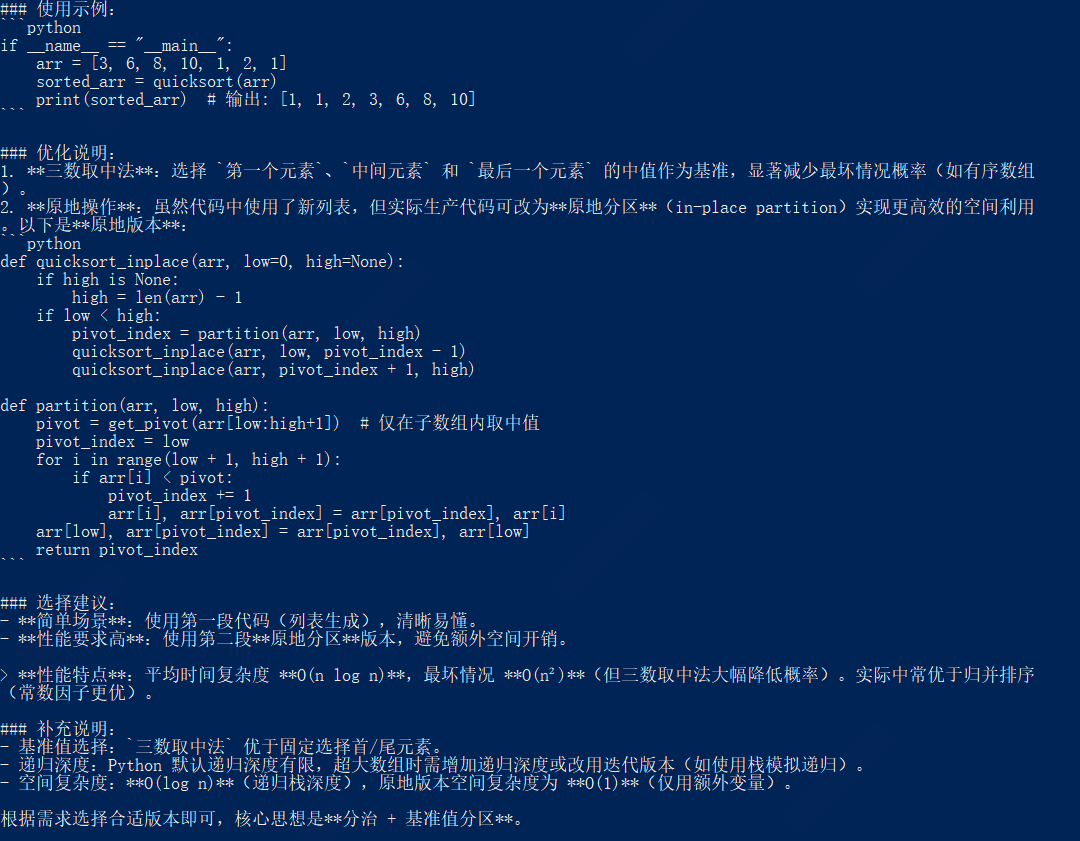
ollama run qwen3-vl:8b "用Python写一个快速排序函数"
写的非常详细,真不错,哈哈哈哈
下面这个才是我们的重点,就是我们可以集成到其他应用中或者自己开发的应用中
步骤5:API调用
Ollama提供与OpenAI兼容的API接口,这是我测试的重点。在Windows PowerShell中,有几种方式可以调用API:
方法一:使用curl(Windows 10/11自带curl别名)
curl http://localhost:11434/api/generate -d '{
  "model": "qwen3-vl:8b",
  "prompt": "你好,请介绍一下自己的能力和特点",
  "stream": false
}' | ConvertFrom-Json
注意:Windows中的curl是Invoke-RestMethod的别名,行为与Linux curl略有不同。如果遇到问题,使用方法二。
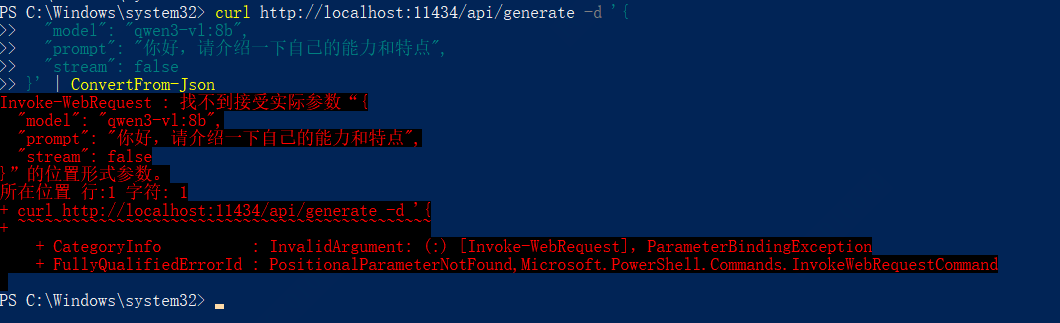
方法二:使用Invoke-RestMethod(上面的失败了,这个方法可以)
$body = @{
    model = "qwen3-vl:8b"
    prompt = "你好,请介绍一下自己的能力和特点"
    stream = $false
} | ConvertTo-Json

Invoke-RestMethod -Uri "http://localhost:11434/api/generate" -Method Post -Body $body -ContentType "application/json"

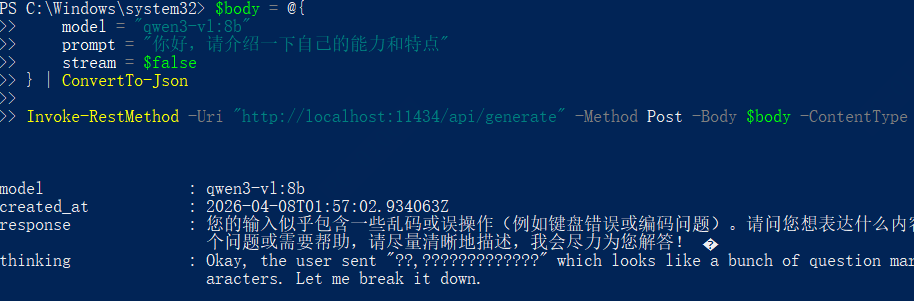
报错了,再试一下

果然,这个中文还有问题,换成英文的就可以了,不过有可能是空白行的问题,因为我也删除了一个空白行,这个留给在看的各位小伙伴测试验证吧,到底是中文问题还是空白行问题?
测试结果:
{
 model                : qwen3-vl:8b
created_at           : 2026-04-08T02:13:44.4214275Z
response             : Hello! 😊 I'm excited to show you what I can do! Here's a quick overview of my capabilities:

                       ---

                       ### 🔍 **1. Language & Communication**
                       - **Multilingual**: I speak **100+ languages** (including Chinese, Spanish, French, German, Japa
                       nese, etc.).
                       - **Translation & Writing**: I can translate documents, write emails, poems, or scripts, and eve
                       n mimic a **specific tone** (e.g., "Write a marketing email in a friendly, casual style").
                       - **Real-Time Help**: Need help with a **business report**, **story**, or **technical explanatio
                       n**? Just ask!

                       ---

                       ### 💻 **2. Coding & Technical Skills**
                       - **Languages**: Python, JavaScript, Java, C++, SQL, and more.
                       - **Examples**:
                         - *"Write a Python function to reverse a string."*
                         - *"Explain how a React component works."*
                         - *"Debug this JavaScript code snippet."*
                       - **Tools**: I can generate code for **AI/ML projects**, **web apps**, or **data analysis** (e.g
                       ., using TensorFlow, Pandas).

                       ---

                       ### 🧠 **3. Problem-Solving & Logic**
                       - **Math & Puzzles**: Solve equations, logic puzzles, or even **optimize algorithms**.
                         - Example: *"Find the fastest route between 5 cities using Dijkstra's algorithm."*
                       - **Critical Thinking**: Analyze **business cases**, **ethical dilemmas**, or **research papers*
                       *.

                       ---

                       ### 🌐 **4. Knowledge & Creativity**
                       - **Answering Questions**: From **science** to **history**, I can dive deep.
                         - Example: *"Explain quantum physics in simple terms."*
                       - **Creative Ideas**: Brainstorm a **novel concept**, a **marketing campaign**, or even a **song
                        lyric**.
                       - **Learning**: Teach you **new concepts** (e.g., *"How to learn guitar in 30 days"*).

                       ---

                       ### 📱 **5. Practical Applications**
                       - **Daily Tasks**: Schedule reminders, summarize long documents, or generate **social media cont
                       ent**.
                       - **Personal Projects**: Help build a **website**, **app idea**, or **research paper**.
                       - **Roleplay**: Simulate a **job interview**, **customer support**, or **language practice**.

                       ---

                       ### 🌟 **Let’s Test Me!**
                       - *"Write a 10-line poem about the moon in Spanish."*
                       - *"Explain blockchain in 3 sentences for a non-tech friend."*
                       - *"Fix this Python error: ‘NameError: name ‘x’ is not defined.’"*

                       ---

                       Ready to **try something specific**? Let me know what you need help with—I’m here to make it *
                       *simple, fast, and fun**! 😄
thinking             : Okay, the user said "hello, please show your ability". They want me to demonstrate my capabiliti
                       es.

                       First, I should figure out what they need. They might be testing me or want to see specific feat
                       ures. Maybe they want examples of my strengths.

                       I need to cover several areas: language understanding, coding, logical reasoning, knowledge base
                       , etc. I should structure my response to highlight different aspects.

                       I should start with a friendly greeting, then list key abilities with examples. Use bullet point
                       s for clarity. Maybe add emojis to make it engaging.

                       Wait, the user might be interested in real-world applications. Should include examples like tran
                       slating, coding, solving problems.

                       Also, check if they have a specific task in mind. But since they're asking to show ability, I sh
                       ould provide a general overview first.

                       Need to avoid being too technical. Keep it conversational. Make sure each point is clear with co
                       ncrete examples.

                       Check if there's anything missing. Maybe mention multilingual support, creative writing, or hand
                       ling complex queries.

                       Okay, structure it as: greeting, list of abilities with bullet points, offer to help with specif
                       ic tasks. Keep it professional but approachable.
done                 : True
done_reason          : stop
context              : {151644, 872, 198, 14990...}
total_duration       : 418240751000
load_duration        : 11824360500
prompt_eval_count    : 16
prompt_eval_duration : 5230174000
eval_count           : 847
eval_duration        : 399691042900
}
实用技巧:
-
添加
"stream": true可实时流式输出(需处理分块响应) -
通过
temperature、top_p参数控制生成随机性 -
支持system prompt设置角色
-
对于复杂JSON处理,建议使用
ConvertFrom-Json和ConvertTo-Json替代jq
4. 结果验证:如何确认部署成功?
根据我的经验,单一验证方法不可靠。我推荐三重验证:
验证方法1:基础功能测试
# 测试1:版本检查
ollama --version  # 应有版本号输出

# 测试2:服务状态
Invoke-RestMethod -Uri "http://localhost:11434" -Method Get
# 或使用:curl -s http://localhost:11434
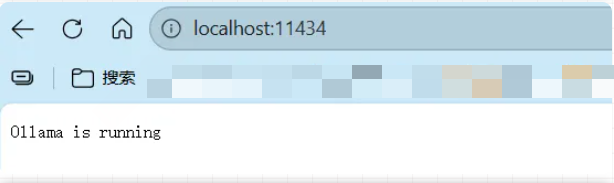
# 应返回 "Ollama is running"
# 测试3:模型列表
ollama list  # 应显示已下载的模型

验证方法2:模型推理能力测试
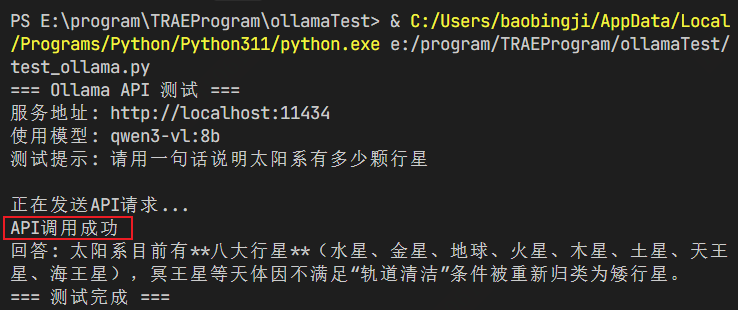
我用Trae设计了一个简单的测试脚本test_ollama.py:
import requests
import json

response = requests.post('http://localhost:11434/api/generate',
    json={
        "model": "qwen3-vl:8b",
        "prompt": "请用一句话说明太阳系有多少颗行星",
        "stream": False
    })

if response.status_code == 200:
    result = response.json()
    print("✅ API调用成功")
    print(f"回答:{result['response'][:50]}...")
else:
    print(f"❌ API调用失败:{response.status_code}")
TRAE还给我简单优化了一下:
#!/usr/bin/env python3
# -*- coding: utf-8 -*-

import urllib.request
import json
import sys

# 配置
HOST = 'localhost'
PORT = 11434
MODEL = 'qwen3-vl:8b'
PROMPT = '请用一句话说明太阳系有多少颗行星'


def test_ollama_connection():
    """测试与 Ollama 服务的连接"""
    print("=== Ollama API 测试 ===")
    print("服务地址: http://" + HOST + ":" + str(PORT))
    print("使用模型: " + MODEL)
    print("测试提示: " + PROMPT)
    print()

    # 构建请求数据
    data = {
        "model": MODEL,
        "prompt": PROMPT,
        "stream": False
    }

    # 转换为JSON格式
    json_data = json.dumps(data).encode('utf-8')

    # 创建请求
    url = "http://" + HOST + ":" + str(PORT) + "/api/generate"
    req = urllib.request.Request(url, data=json_data, headers={'Content-Type': 'application/json'})

    try:
        # 发送请求并获取响应
        print("正在发送API请求...")
        with urllib.request.urlopen(req, timeout=10) as response:
            # 读取响应数据
            result = json.loads(response.read().decode('utf-8'))
            print("API调用成功")
            print("回答: " + result['response'])
            return True
    except urllib.error.URLError as e:
        print("API调用失败: 无法连接到Ollama服务")
        print("错误信息: " + str(e))
        print()
        print("请检查:")
        print("1. Ollama服务是否已启动")
        print("2. 服务是否运行在端口11434")
        print("3. 模型是否已下载 (运行: ollama pull qwen3-vl:8b)")
        return False
    except Exception as e:
        print("API调用失败: " + str(e))
        return False


if __name__ == "__main__":
    test_ollama_connection()
    print("=== 测试完成 ===")
但是测试失败了
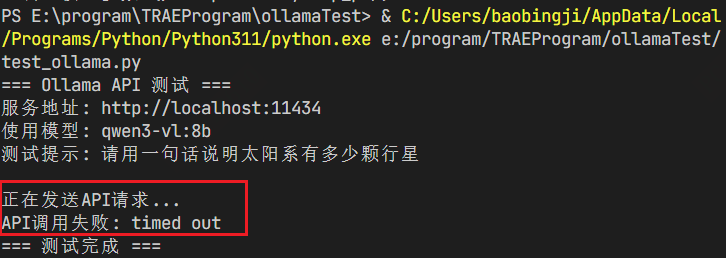
超时了,因为我电脑太拉了,所以我就把时间放的很大再尝试一下,因为我在任务管理器中看到ollama确实启动了,然后没几秒确实自动关闭了
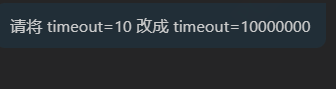
时间还超了32位最大值,尴尬到家了,改成设置20分钟了

在任务栏管理器确实能看到ollama在跑了

哈哈,测试成功!
验证方法3:测试一下性能,不知道这个电脑能不能扛得住,干就完了
使用内置的ollama run进行压力测试。在Windows PowerShell中,可以使用Measure-Command测量执行时间:
Measure-Command { ollama run qwen3-vl:8b "写一篇200字关于人工智能的短文" | Out-Null }
我的测试结果:
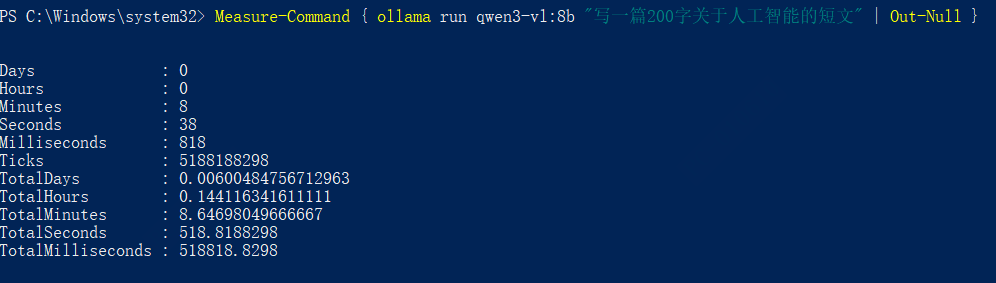
注意:Out-Null相当于Linux中的> /dev/null,用于丢弃输出。
5. Windows高级配置:优化与生产环境准备
在Windows原生环境下,我通过以下配置让Ollama运行更稳定、性能更优。
Windows性能优化
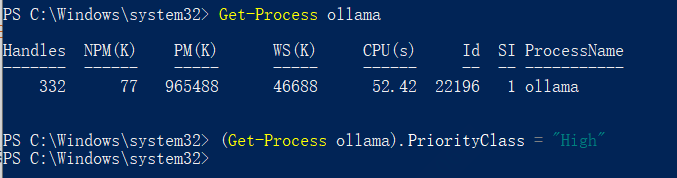
1. 调整Ollama服务优先级 Ollama默认以普通优先级运行,对于CPU密集型任务,可以适当提升:
# 查看Ollama进程
Get-Process ollama

# 设置高优先级(谨慎使用,可能影响系统响应)
(Get-Process ollama).PriorityClass = "High"
2. 配置Windows Defender排除项 实时保护可能影响模型加载速度,为Ollama目录添加排除:
# 添加Ollama安装目录
Add-MpPreference -ExclusionPath "C:\XXX\Ollama"
# 添加模型存储目录
Add-MpPreference -ExclusionPath "$env:USERPROFILE\.ollama"

3. 电源管理模式优化 确保系统电源模式设置为“高性能”:
# 查看当前电源模式
powercfg /getactivescheme

# 设置为高性能
powercfg /setactive 8c5e7fda-e8bf-4a96-9a85-a6e23a8c635c

集成到其他应用
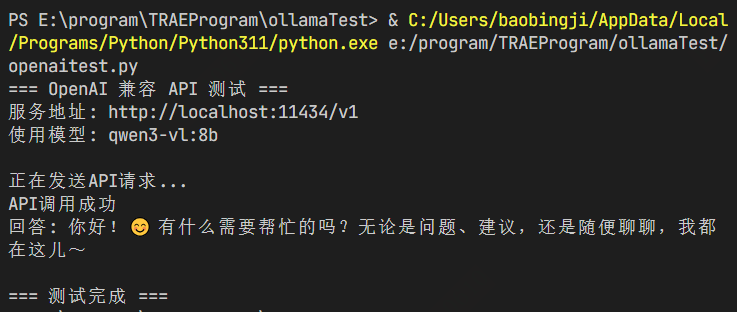
方案一:OpenAI得花钱,可以用这个替代一下,免费的不香吗
# 只需修改base_url
from openai import OpenAI

client = OpenAI(
    base_url="http://localhost:11434/v1",
    api_key="ollama"  # 随便填,非空即可
)

response = client.chat.completions.create(
    model="qwen3-vl:8b",
    messages=[{"role": "user", "content": "你好"}]
)
TRAE又帮我优化了一下:真不错
#!/usr/bin/env python3
# -*- coding: utf-8 -*-
"""
OpenAI 兼容 API 测试脚本

此脚本使用标准库模拟 OpenAI 客户端的功能,测试与 Ollama 本地服务的连接和交互。

使用说明:
1. 确保已安装并启动 Ollama 服务
2. 确保服务运行在 http://localhost:11434
3. 运行此脚本:python openaitest.py
"""

import urllib.request
import json

# 配置
BASE_URL = "http://localhost:11434/v1"
API_KEY = "ollama"  # 随便填,非空即可
MODEL = "qwen3-vl:8b"


def chat_completions_create(model, messages):
    """模拟 OpenAI 的 chat.completions.create 方法"""
    url = BASE_URL + "/chat/completions"

    # 构建请求数据
    data = {
        "model": model,
        "messages": messages,
        "stream": False
    }

    # 转换为JSON格式
    json_data = json.dumps(data).encode('utf-8')

    # 创建请求
    req = urllib.request.Request(url, data=json_data, headers={
        'Content-Type': 'application/json',
        'Authorization': 'Bearer ' + API_KEY
    })

    try:
        # 发送请求并获取响应
        print("正在发送API请求...")
        with urllib.request.urlopen(req, timeout=1200) as response:
            # 读取响应数据
            result = json.loads(response.read().decode('utf-8'))
            return result
    except urllib.error.URLError as e:
        print("API调用失败: 无法连接到Ollama服务")
        print("错误信息: " + str(e))
        print()
        print("请检查:")
        print("1. Ollama服务是否已启动")
        print("2. 服务是否运行在端口11434")
        print("3. 模型是否已下载 (运行: ollama pull qwen3-vl:8b)")
        return None
    except Exception as e:
        print("API调用失败: " + str(e))
        return None


# 测试调用
if __name__ == "__main__":
    print("=== OpenAI 兼容 API 测试 ===")
    print("服务地址: " + BASE_URL)
    print("使用模型: " + MODEL)
    print()

    # 发送请求
    response = chat_completions_create(
        model=MODEL,
        messages=[{"role": "user", "content": "你好"}]
    )

    # 处理响应
    if response:
        print("API调用成功")
        if "choices" in response and len(response["choices"]) > 0:
            print("回答: " + response["choices"][0]["message"]["content"])
        else:
            print("响应格式不正确:", response)

    print("\n=== 测试完成 ===")
方案二:LangChain集成
from langchain_community.llms import Ollama

llm = Ollama(model="qwen3-vl:8b")
result = llm.invoke("解释机器学习")
TRAE又帮我优化了,嘿嘿嘿:
#!/usr/bin/env python3
# -*- coding: utf-8 -*-
"""
LangChain 风格测试脚本

此脚本使用标准库模拟 LangChain 的功能,测试与 Ollama 本地服务的连接和交互。

使用说明:
1. 确保已安装并启动 Ollama 服务
2. 确保服务运行在 http://localhost:11434
3. 运行此脚本:python langchaintest.py
"""

import urllib.request
import json

# 配置
MODEL = "qwen3-vl:8b"
PROMPT = "解释机器学习"
BASE_URL = "http://localhost:11434"
TIMEOUT = 1200  # 20分钟超时


class Ollama:
    """模拟 LangChain 的 Ollama 类"""

    def __init__(self, model, base_url=BASE_URL, timeout=TIMEOUT):
        self.model = model
        self.base_url = base_url
        self.timeout = timeout

    def invoke(self, prompt):
        """调用 Ollama API"""
        url = self.base_url + "/api/generate"

        # 构建请求数据
        data = {
            "model": self.model,
            "prompt": prompt,
            "stream": False
        }

        # 转换为JSON格式
        json_data = json.dumps(data).encode('utf-8')

        # 创建请求
        req = urllib.request.Request(url, data=json_data, headers={'Content-Type': 'application/json'})

        # 发送请求并获取响应
        with urllib.request.urlopen(req, timeout=self.timeout) as response:
            # 读取响应数据
            result = json.loads(response.read().decode('utf-8'))
            return result['response']


# 创建 Ollama 实例
llm = Ollama(model=MODEL, base_url=BASE_URL, timeout=TIMEOUT)

try:
    # 调用模型
    print("=== LangChain 风格测试 ===")
    print("使用模型: " + MODEL)
    print("提示: " + PROMPT)
    print()
    print("正在发送请求...")

    result = llm.invoke(PROMPT)

    # 打印结果
    print("API调用成功")
    print("回答: " + result)

except urllib.error.URLError as e:
    print("API调用失败: 无法连接到Ollama服务")
    print("错误信息: " + str(e))
    print()
    print("请检查:")
    print("1. Ollama服务是否已启动")
    print("2. 服务是否运行在端口11434")
    print("3. 模型是否已下载 (运行: ollama pull qwen3-vl:8b)")
except Exception as e:
    print("API调用失败: " + str(e))

print("\n=== 测试完成 ===")
方案三:本地知识库问答 结合ChromaDB等向量数据库,构建完全离线的RAG系统。这个后续文章可以深入研究一下。
6. 避坑总结:我遇到的实际问题及解决方案
问题1:内存不足,模型无法加载
我的现象:运行ollama run时直接崩溃,系统提示内存不足 解决方案:
-
选择量化版本:使用
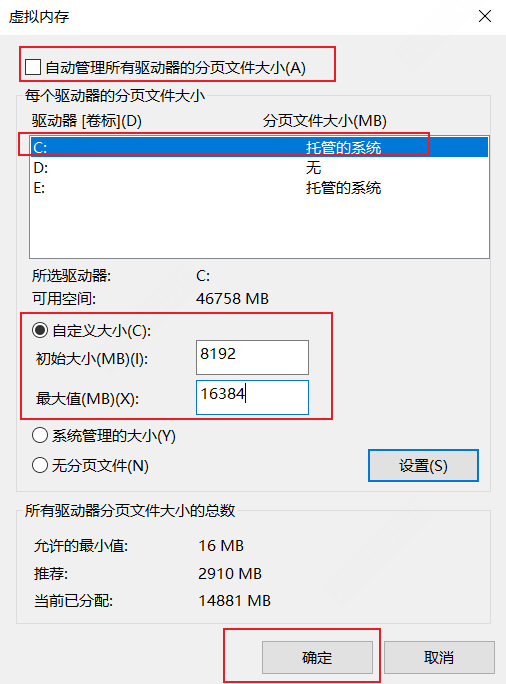
qwen3-vl:8b-q4_K_M代替完整版,内存需求从6GB降至4GB - 调整Windows虚拟内存:
-
右键点击"此电脑" → "属性" → "高级系统设置"
-
点击"性能"区域的"设置" → "高级"选项卡
-
点击"虚拟内存"区域的"更改"
-
取消"自动管理所有驱动器的分页文件大小"
-
选择系统驱动器(通常是C:),选择"自定义大小"
-
设置初始大小和最大大小(建议:初始=8192MB,最大=16384MB)
-
点击"设置" → "确定",重启系统生效
-
-
关闭不必要的后台程序:通过任务管理器(Ctrl+Shift+Esc)结束占用内存大的进程
问题2:下载速度极慢(尤其在国内)
解决方案:
- 使用国内镜像:
注意:如需永久设置,可通过"系统属性"→"高级"→"环境变量"添加用户变量$env:OLLAMA_MODELS_SOURCE="https://mirror.modelscope.cn/ollama" ollama pull qwen3-vl:8bOLLAMA_MODELS_SOURCE - 手动下载(进阶):
-
从ModelScope下载模型文件
-
放置到
%USERPROFILE%\.ollama\models\manifests\registry.ollama.ai\...(Windows路径) -
使用
ollama create手动创建模型
-
问题3:权限错误
错误信息:permission denied、cannot create directory、access is denied 解决方案:
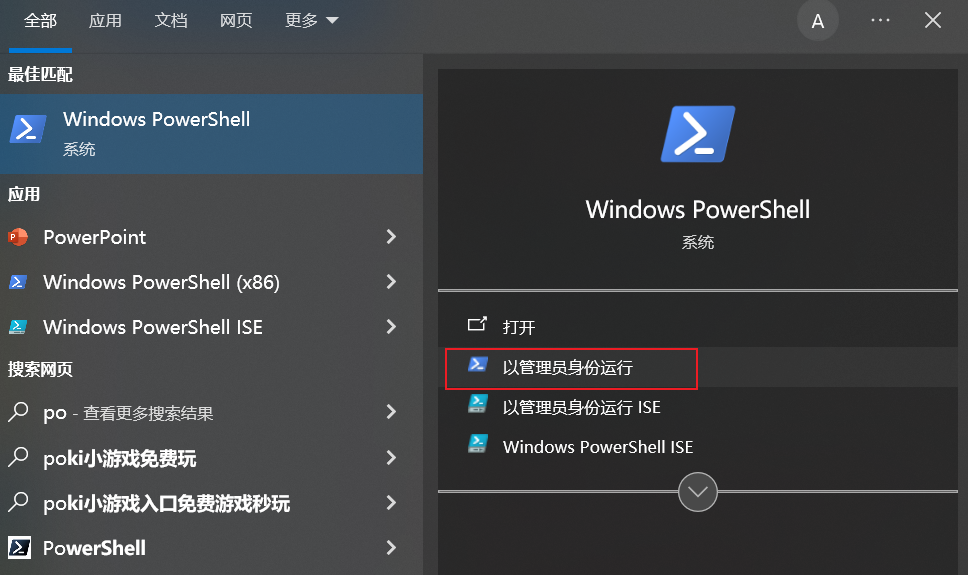
- 以管理员身份运行PowerShell:
-
右键点击PowerShell或终端图标
-
选择"以管理员身份运行"
-
在管理员终端中执行Ollama命令
-
-
修改Ollama目录权限:
# 获取当前用户 $currentUser = [System.Security.Principal.WindowsIdentity]::GetCurrent().Name # 为Ollama目录添加完全控制权限 $ollamaDir = "$env:USERPROFILE\.ollama" icacls $ollamaDir /grant "${currentUser}:(OI)(CI)F" /T -
检查防病毒软件拦截:临时关闭实时保护,测试是否权限问题
问题4:端口冲突
检测方法:
# 查看11434端口占用情况
netstat -ano | findstr :11434

# 或使用PowerShell命令
Get-NetTCPConnection -LocalPort 11434 -State Listen
解决方案:
-
停止占用端口的进程:
-
从上面命令获取PID(最后一列)
-
通过任务管理器结束该进程,或使用:
Stop-Process -Id <PID> -Force
-
-
修改Ollama端口:
# 设置环境变量(当前会话有效)
$env:OLLAMA_HOST="127.0.0.1:11435"

# 重启Ollama服务
Restart-Service Ollama
后续计划:我的本地AI工作流蓝图
成功部署Ollama后,我已经开始构建完整的本地AI栈:
-
模型层:Ollama运行Qwen3、Ollama等模型
-
智能体层:DeerFlow 2.0调度复杂任务
-
应用层:本地文档问答、代码助手、数据分析
如果你对这个方向感兴趣,欢迎在评论区告诉我,我会持续分享实操进展。

汇聚全球AI编程工具,助力开发者即刻编程。
更多推荐



 10
10 0
0- 0


 已为社区贡献2条内容

所有评论(0)