
K8s 集群共享存储架构项目
·
项目描述:搭建双机 NFS + Keepalived 高可用共享存储架构,基于 Kubernetes 部署 Apache 网页服务,实现多 Pod 共享静态资源、存储高可用、业务多副本容错,用于游戏静态资源发布环境。
项目环境:CentOS 7、Kubernetes 1.23、Keepalived、NFS
职责与实现
- 高可用 NFS 存储架构部署
1.1. 两台存储节点部署 NFS 服务,共享目录 /nfs/game,配置 rw、sync、no_root_squash 共享权限,关闭防火墙与 SELinux,安装 nfs-utils 依赖包
1.2. Keepalived 实现 VIP 漂移(VIP:192.168.188.160),NFS1 设 MASTER、优先级 100 并配置 nopreempt 非抢占模式,故障恢复后不抢 VIP;NFS2 设 BACKUP、优先级 90,主节点宕机 VIP 自动漂移至备节点,保障存储不间断 - K8s PV/PVC 持久化存储配置
2.1. 创建静态 PV:容量 5Gi、访问模式 ReadWriteMany(多 Pod 同时读写),回收策略 Retain(删除 PVC 保留数据),挂载参数 hard、nfsvers=4.1,对接 NFS 虚拟 IP 与共享目录
2.2. 创建 PVC:5Gi、RWX 权限,自动匹配绑定 PV,解耦应用与底层存储 - 应用 Deployment 资源编排
3.1. 编写 Deployment,副本数replicas:5,使用 httpd:2.4.67-alpine 镜像,配置 IfNotPresent 镜像拉取策略,容器网页目录 /usr/local/apache2/htdocs 挂载绑定 PVC,所有 Pod 共用 NFS 共享目录,修改资源仅需变更 NFS 文件,无需重启容器 - NodePort 服务发布
4.1. 配置 NodePort 类型 Service,通过标签关联后端 5 个 Pod,内部端口 80 映射容器 80,固定对外端口 30080,集群所有节点 IP+30080 均可访问,Service 内置负载均衡分发流量
| 名称 | IP 地址 |
|---|---|
| master | 192.168.188.140 |
| node1 | 192.168.188.141 |
| node2 | 192.168.188.142 |
| nfs1 | 192.168.188.151 |
| nfs2 | 192.168.188.152 |
nfs1-2 执行
sed -i 's/^SELINUX=.*/SELINUX=disabled/' /etc/selinux/config
setenforce 0
yum -y install nfs-utils rpcbind keepalived unzip
unzip game.zip
mkdir /nfs/
mv game /nfs
chmod -R 777 /nfs/
chown -R nfsnobody:nfsnobody /nfs
echo "/nfs 192.168.188.0/24(insecure,rw,sync,no_root_squash,no_all_squash)" >> /etc/exports
systemctl disable firewalld --now
systemctl enable nfs --now
showmount -e localhost # 列出所有共享目录及其相关信息
cp /etc/keepalived/keepalived.conf /etc/keepalived/keepalived.conf.bak
nfs1 执行
cat > /etc/keepalived/keepalived.conf << 'EOF'
! Configuration File for keepalived

global_defs {
   router_id server1 # 标识
}

vrrp_instance VI_1 {
    state MASTER # 当前为主节点
    interface ens33 # 心跳网卡
    virtual_router_id 80 # 虚拟路由id,主备一致
    priority 100 # 优先级,值越大越优先
    advert_int 1 # 心跳间隔
    nopreempt # 主节点恢复后不会抢占 VIP
    unicast_src_ip 192.168.188.151 # 指定本机真实 IP
    unicast_peer {
        192.168.188.152 # 备节点 IP
    }
    authentication {
        auth_type PASS
        auth_pass 1111 # 认证密码,主备一致
    }
    virtual_ipaddress {
        192.168.188.160 # VIP
    }
}
EOF
nfs2 执行
cat > /etc/keepalived/keepalived.conf << 'EOF'
! Configuration File for keepalived

global_defs {
   router_id server2 # 标识
}

vrrp_instance VI_1 {
    state BACKUP # 当前为备节点
    interface ens33 # 心跳网卡
    virtual_router_id 80 # 虚拟路由ip,主备一致
    priority 90 # 优先级
    advert_int 1 # 心跳间隔
    unicast_src_ip 192.168.188.152 # 本机真实 IP
    unicast_peer {
        192.168.188.151 # 主节点 IP
    }
    authentication {
        auth_type PASS
        auth_pass 1111 # 认证密码,主备一致
    }
    virtual_ipaddress {
        192.168.188.160 # VIP,主备一致
    }
}
EOF
nfs1-2 执行
systemctl enable keepalived.service --now
node1-2 执行
yum install -y nfs-utils
docker pull httpd:2.4.67-alpine
master 执行
cat > /k8s/game.yaml << 'EOF'
apiVersion: v1
kind: PersistentVolume
metadata:
  name: game-nfs-pv
spec:
  capacity:
    storage: 5Gi
  accessModes:
    - ReadWriteMany
  persistentVolumeReclaimPolicy: Retain
  mountOptions:
    - nfsvers=4.1
    - soft # 自动切换
    - timeo=10 # 超时时间
    - retrans=2 # 重试次数
    - noatime # 提升性能
  nfs:
    server: 192.168.188.160 # VIP 地址
    path: /nfs/game

---

apiVersion: v1
kind: PersistentVolumeClaim
metadata:
  name: game-nfs-pvc
spec:
  accessModes:
    - ReadWriteMany
  resources:
    requests:
      storage: 5Gi

---

apiVersion: apps/v1
kind: Deployment
metadata:
  name: httpd-game-server
spec:
  replicas: 5
  selector:
    matchLabels:
      app: httpd-game
  template:
    metadata:
      labels:
        app: httpd-game
    spec:
      containers:
      - name: httpd
        image: httpd:2.4.67-alpine
        ports:
        - containerPort: 80
        volumeMounts:
        - name: game-storage
          mountPath: /usr/local/apache2/htdocs/
        resources:
          requests:
            memory: "64Mi"
            cpu: "50m"
          limits:
            memory: "128Mi"
            cpu: "100m"
        livenessProbe:
          httpGet:
            path: /index.html
            port: 80
          initialDelaySeconds: 15
          periodSeconds: 10
          timeoutSeconds: 5
          failureThreshold: 3
        readinessProbe:
          httpGet:
            path: /index.html
            port: 80
          initialDelaySeconds: 5
          periodSeconds: 5
          timeoutSeconds: 3
          failureThreshold: 2
      volumes:
      - name: game-storage
        persistentVolumeClaim:
          claimName: game-nfs-pvc

---

apiVersion: v1
kind: Service
metadata:
  name: httpd-game-service
spec:
  type: NodePort
  selector:
    app: httpd-game
  ports:
    - name: http
      port: 80
      targetPort: 80
      nodePort: 30080
      protocol: TCP
EOF
master 执行
kubectl create -f /k8s/game.yaml
kubectl	get po,svc,ep
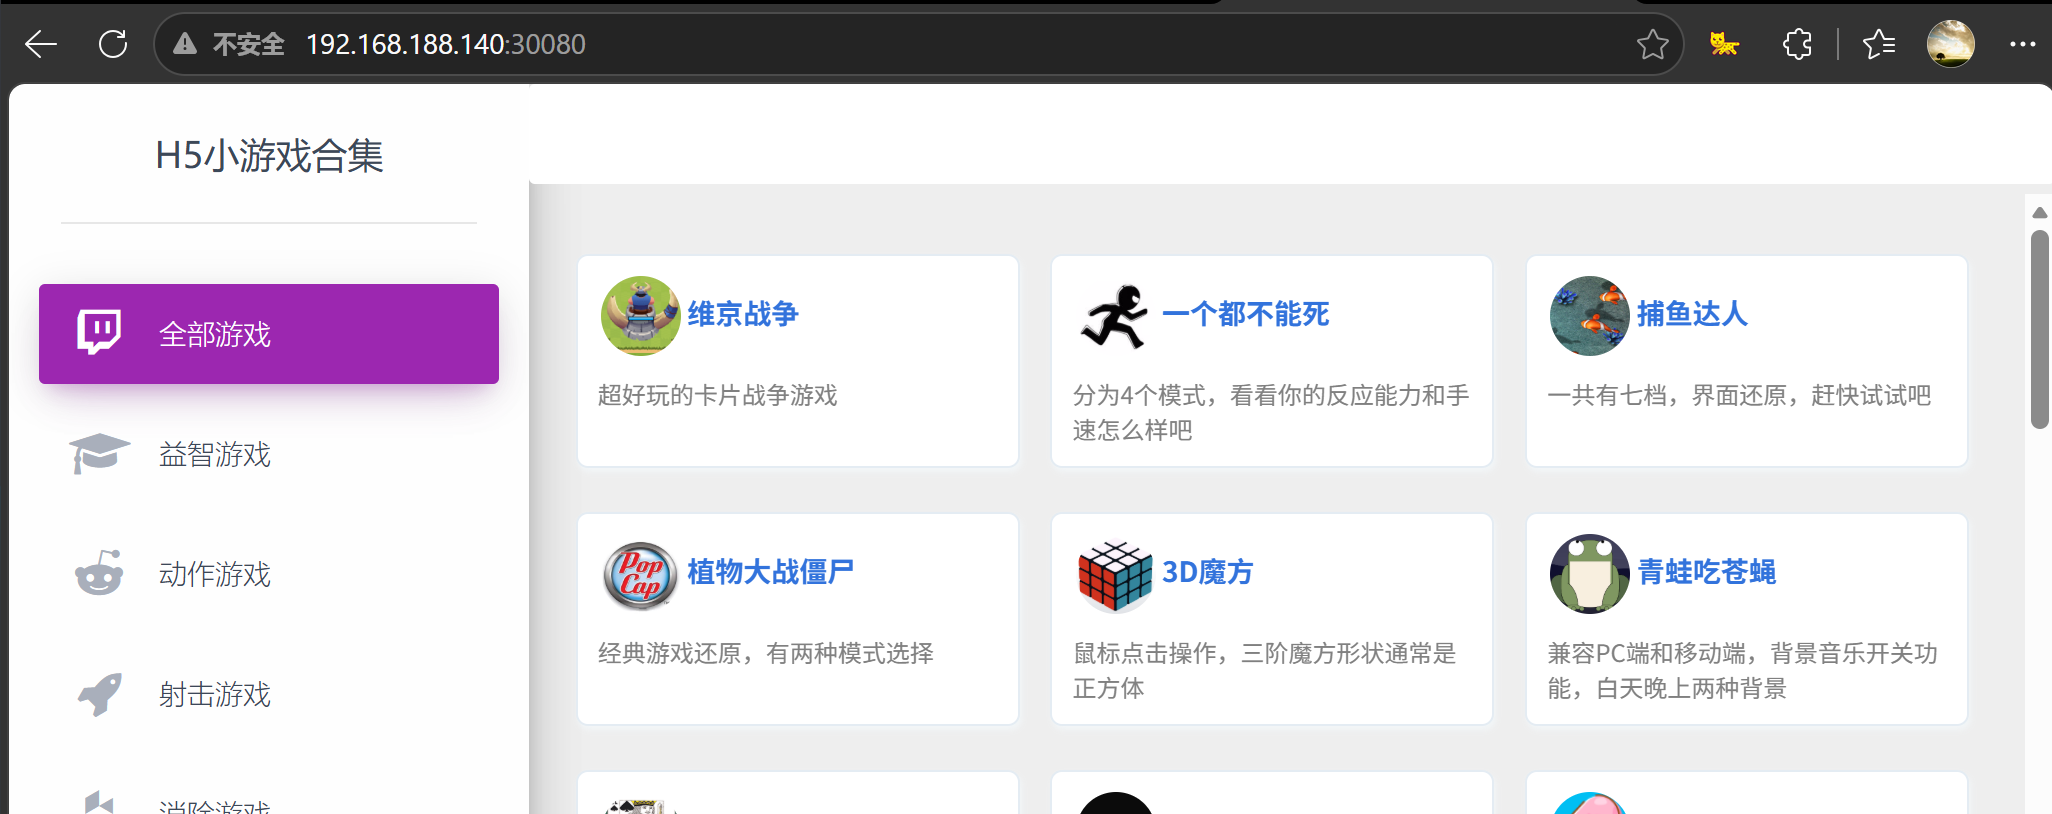
# 可访问 master:30080 页面
master 执行
cat > ~/monitor_pod.sh << 'EOF'
#!/bin/bash
while true
do
    err_num=$(kubectl get pods 2>/dev/null | awk '/^httpd-game-server/ && $2=="0/1"' | wc -l)
    if [ "$err_num" -gt 2 ]; then
        kubectl get pods 2>/dev/null | awk '/^httpd-game-server/ {print $1}' | xargs kubectl delete pod >/dev/null 2>&1
        sleep 15
    fi
    sleep 3
done
EOF

chmod +x ~/monitor_pod.sh
nohup ~/monitor_pod.sh >/dev/null 2>&1 & # 后台静默运行
# pkill -f monitor_pod.sh # 停止监控脚本
缺点:VIP 漂移到 nfs2 后,node 节点无法自动重新连接,此时需要手动删除对应的所有 pod,删除后 deployment 会创建新的 Pod 来满足副本数,新的 Pod 在启动时会重新发起一次 NFS 挂载请求,因为请求的 VIP 已经漂移到了正常工作的 nfs2 上,所以挂载能够继续提供服务
解决方式:关闭 nfs1 后,pod 状态会先转为异常状态,配置死循环的脚本监控到超过两个 pod 为异常状态就删除所有相关的 pod,因为有对应的 deployment,所以 pod 会再次启动,node 节点会重新连接

汇聚全球AI编程工具,助力开发者即刻编程。
更多推荐

 7
7 0
0- 0


 已为社区贡献3条内容

所有评论(0)