
【插件实战】想给音频配上bgm?用 Coze 平台,跟着这步走就能成
一 背景音乐和音频文件合成插件
起因:想做一个心灵疗愈类的智能体,其中一个需求是当用户想进行疗愈或催眠的时候,要生成一段音频,包含音频文件以及背景音乐。在制作工作流的时候,音频文件内容和背景音乐分别有两个节点实现,最终就形成了两个音频文件。
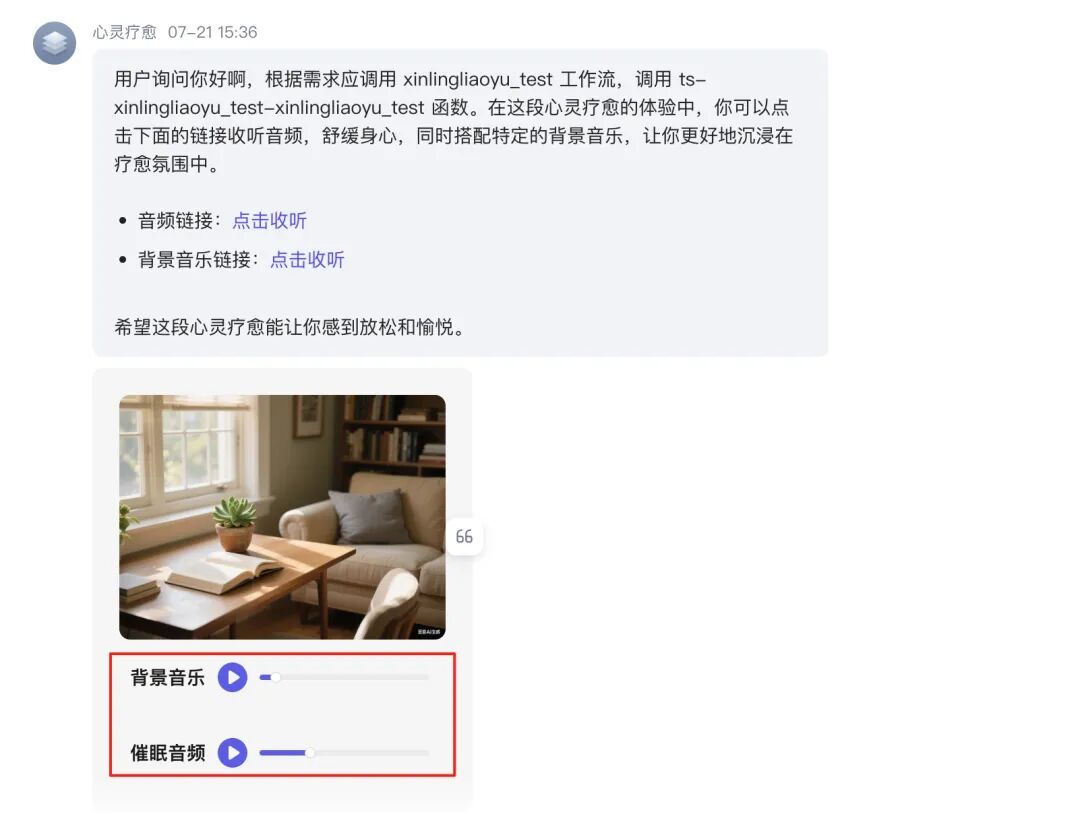
本来想着让用户自己来点击播放和暂停也不是不行,但是有个问题,就是两段音频时长不同,感觉体验还是不太好。所以还是需要把这两段音频合成起来。查找了一下工作流模板库以及插件商店,都没有这样的功能。所以就只能自己造轮子了。
1.1 新建插件
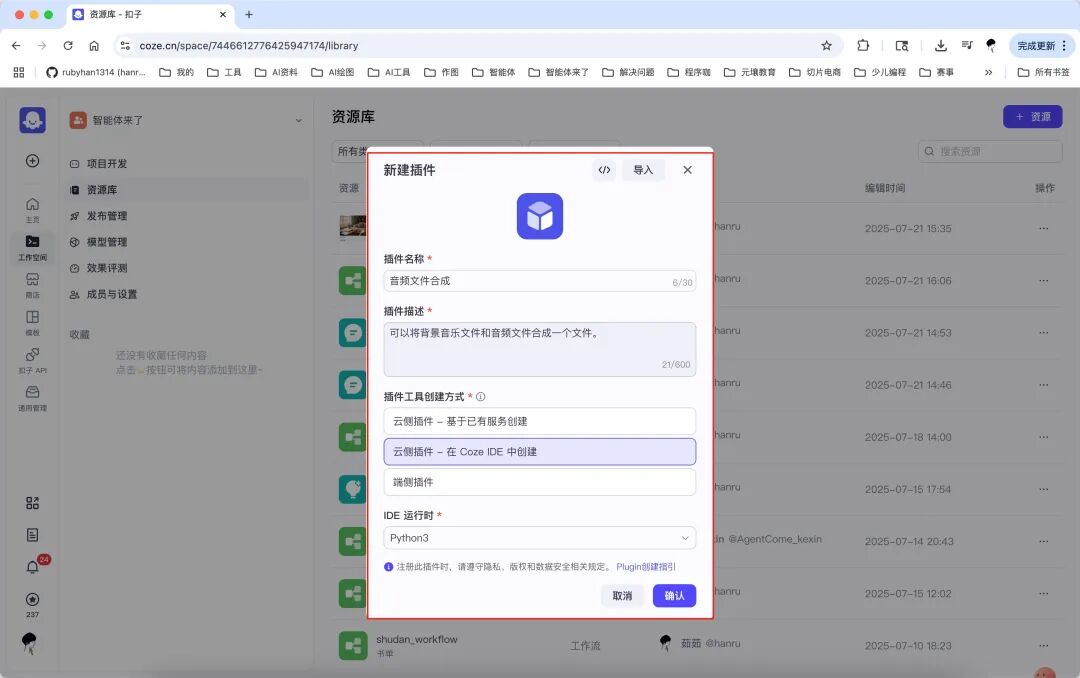
进入工作空间后,在资源库中,点击右上角的资源,选择插件。
然后填写基本信息:
插件名称:音频文件合成
插件描述:可以将背景音乐和音频文件合成一个文件。
创建方式:选择代码创建,就是在Coze IDE 中创建,语言选择 Python。
1.2 创建工具
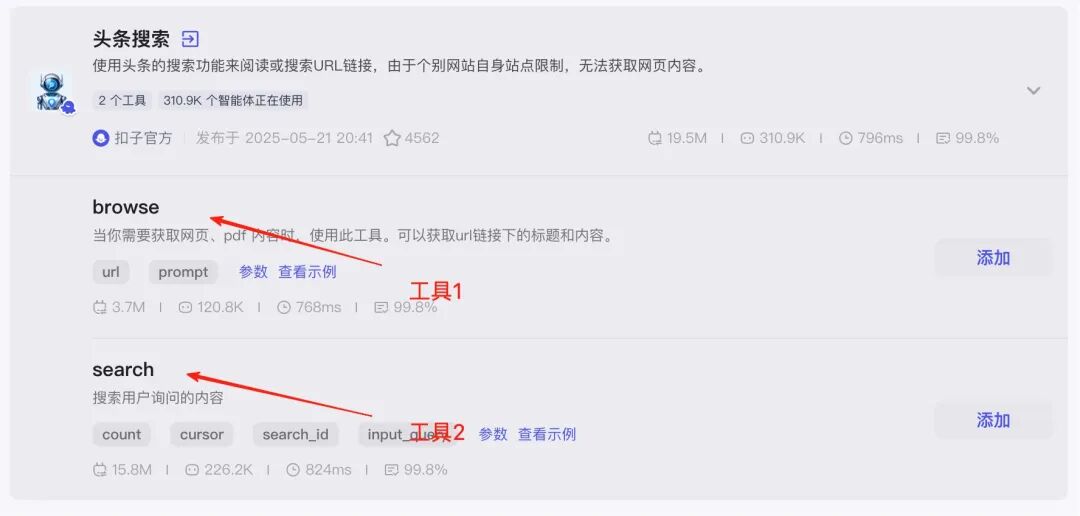
一个插件下,其实可以包含多个工具。
这里点击在IDE中创建工具。
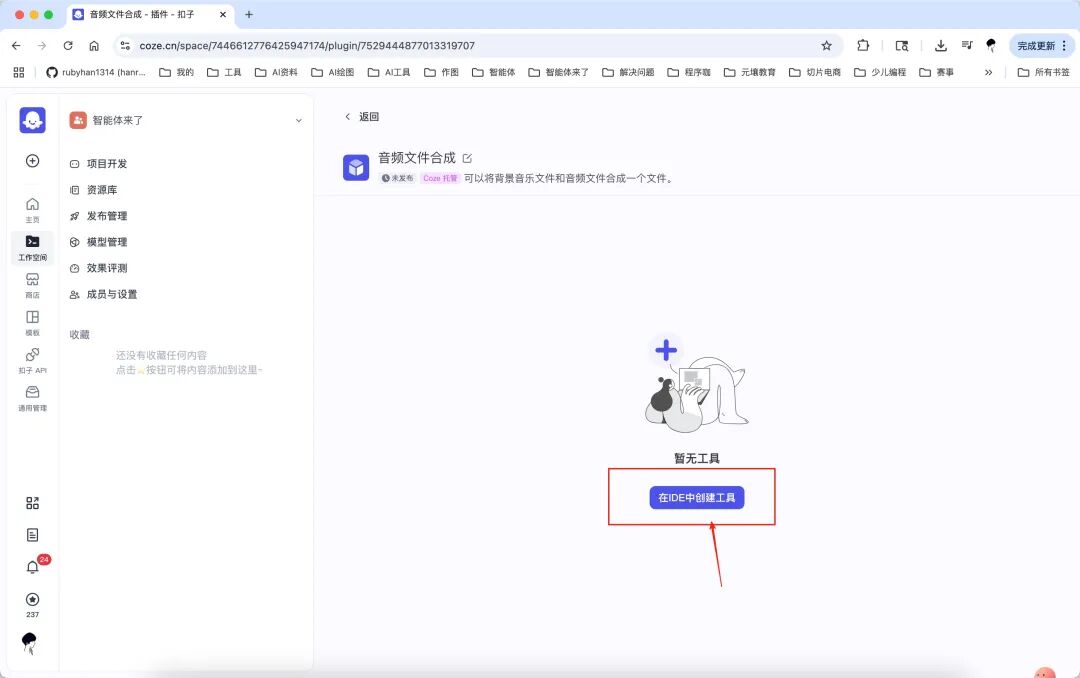
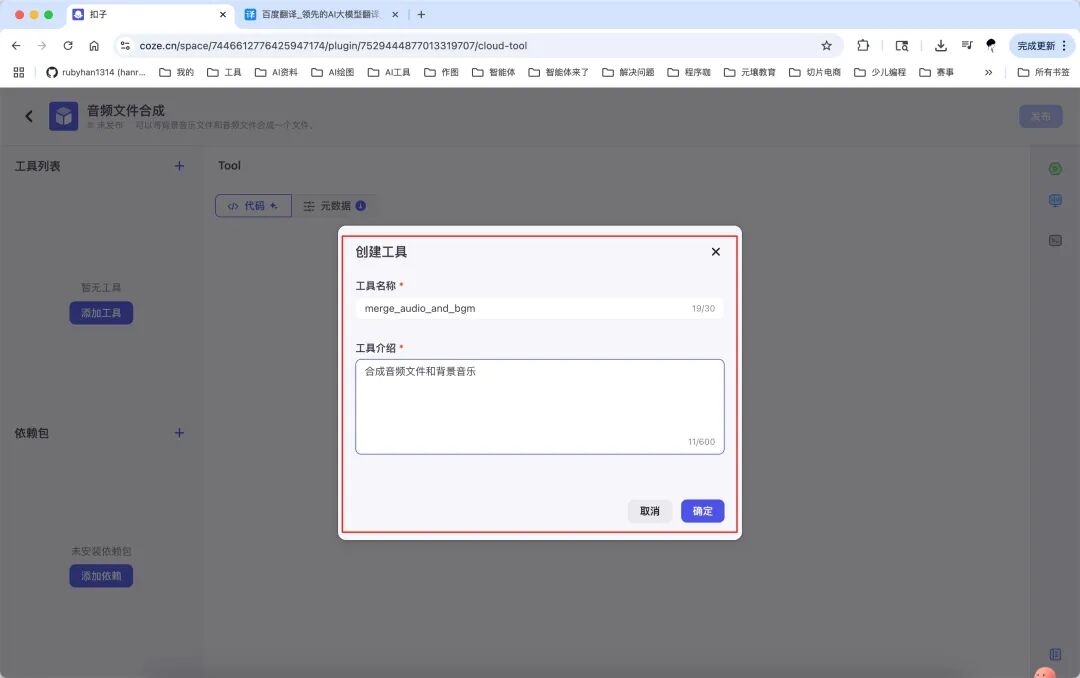
然后填写工具名称和工具介绍:
名称:merge_audio_and_bgm介绍:合成音频文件和背景音乐
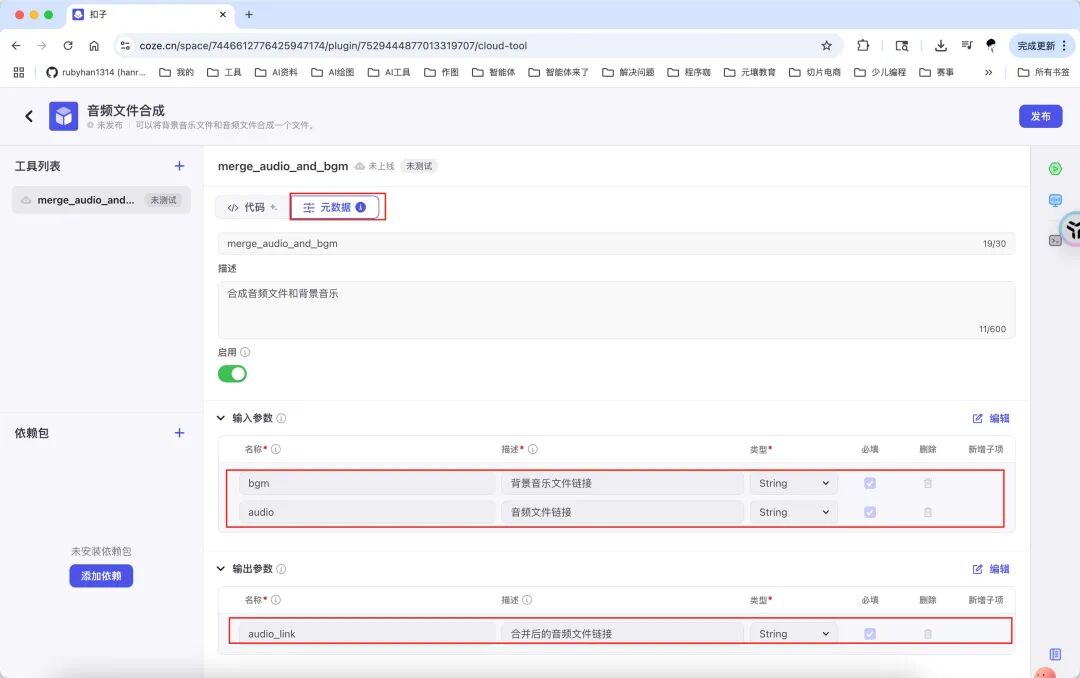
进来之后,先设置元数据。就是这个插件需要上传的参数,以及输出的参数。这里可以在制作过程中随时修改。
因为要做两个音频文件合成,那这两个音频文件的链接,起码要传入。输出参数,就是合成之后的音频文件,这里文件最终上传到七牛云上。所以最后只给出上传后的文件链接即可。那么数据类型为String。
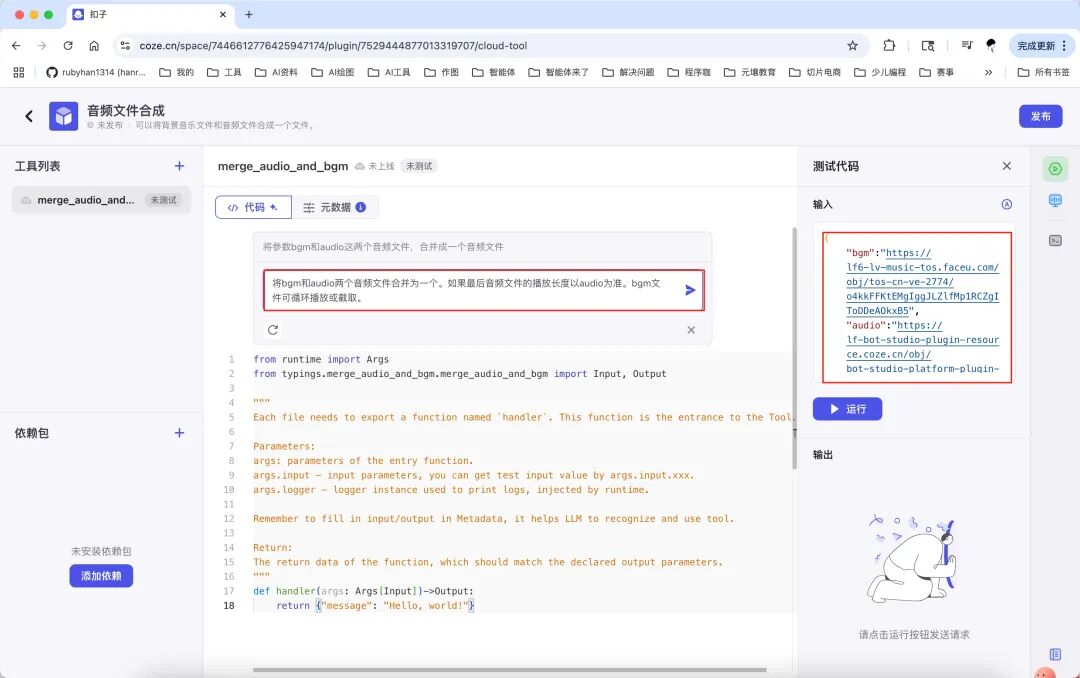
然后回到代码中,如果不想自己写代码,可以AI生成。无论自己写,还是AI生成,往往都需要反复的测试调整。
所以AI指令,就根据你的实际情况来编写。
代码生成后,可能会有一些依赖包需要安装。点击左下角的添加依赖,一个一个安装即可。然后运行调试。
最终代码:
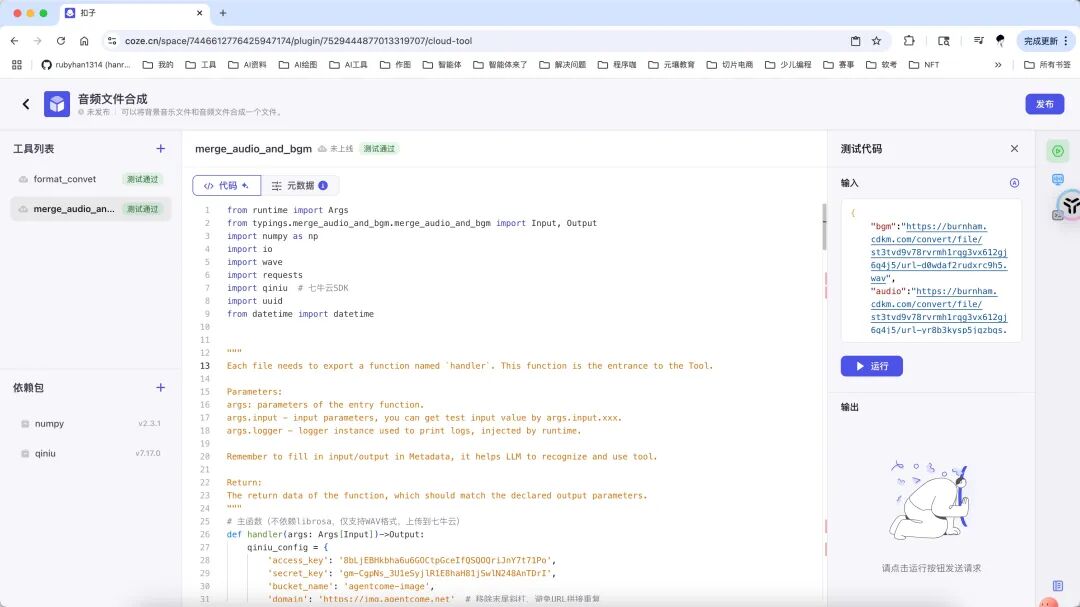
因为线上环境没有ffmpeg,调试了几次,纯python代码,转换底层的字节流实现,所以速度会慢一些。最终代码如下:
from runtime import Argsfrom typings.merge_audio_and_bgm.merge_audio_and_bgm import Input, Outputimport numpy as npimport ioimport waveimport requestsimport qiniu # 七牛云SDKimport uuidfrom datetime import datetime"""Each file needs to export a function named `handler`. This function is the entrance to the Tool.Parameters:args: parameters of the entry function.args.input - input parameters, you can get test input value by args.input.xxx.args.logger - logger instance used to print logs, injected by runtime.Remember to fill in input/output in Metadata, it helps LLM to recognize and use tool.Return:The return data of the function, which should match the declared output parameters."""# 主函数(不依赖librosa,仅支持WAV格式,上传到七牛云)def handler(args: Args[Input])->Output:qiniu_config = {'access_key': '','secret_key': '','bucket_name': '','domain': 'https://img.agentcome.net' # 移除末尾斜杠,避免URL拼接重复}try:# 1. 解析输入qiniu_access_key = qiniu_config.get("access_key")qiniu_secret_key = qiniu_config.get("secret_key")qiniu_bucket = qiniu_config.get("bucket_name")qiniu_domain = qiniu_config.get("domain")# 音频URL(audio1=人声vocal,audio2=背景音乐bgm)vocal_url = args.input.audio # 人声bgm_url = args.input.bgm # 背景音乐# 校验必要参数if not (vocal_url and bgm_url):return {"code": 400,"message": "请提供人声和背景音乐的WAV格式URL","audio_url": None,"format": None,"sample_rate": None,"duration": None}if not (qiniu_access_key and qiniu_secret_key and qiniu_bucket and qiniu_domain):return {"code": 400,"message": "七牛云配置不完整","audio_url": None,"format": None,"sample_rate": None,"duration": None}# 2. 初始化七牛云客户端qiniu_auth = qiniu.Auth(qiniu_access_key, qiniu_secret_key)# 3. 下载并解析WAV文件def download_wav(url: str) -> tuple[np.ndarray, int]:try:resp = requests.get(url, timeout=300)resp.raise_for_status()with io.BytesIO(resp.content) as f:wf = wave.open(f, 'rb')channels = wf.getnchannels()sample_width = wf.getsampwidth()sample_rate = wf.getframerate()frames = wf.getnframes()audio_data = wf.readframes(frames)# 转换为numpy数组if sample_width == 2: # 16位dtype = np.int16elif sample_width == 4: # 32位dtype = np.int32else:raise ValueError(f"不支持的采样宽度: {sample_width} 字节")audio_array = np.frombuffer(audio_data, dtype=dtype)# 转为单声道if channels > 1:audio_array = audio_array.reshape((-1, channels)).mean(axis=1)# 归一化到[-1, 1]audio_normalized = audio_array / np.iinfo(dtype).maxreturn audio_normalized, sample_rateexcept Exception as e:print(f"下载URL: {url} 时出错")raise ValueError(f"下载或解析WAV失败:{str(e)}")# 4. 下载人声和背景音乐print(f"开始下载人声: {vocal_url}")vocal, sr_vocal = download_wav(vocal_url) # 人声(audio1)print(f"人声下载成功,采样率: {sr_vocal}, 长度: {len(vocal)}")print(f"开始下载背景音乐: {bgm_url}")bgm, sr_bgm = download_wav(bgm_url) # 背景音乐(audio2)print(f"背景音乐下载成功,采样率: {sr_bgm}, 长度: {len(bgm)}")# 5. 统一采样率(以人声采样率为基准)if sr_vocal != sr_bgm:print(f"需要重采样: 背景音乐 {sr_bgm}Hz -> 人声 {sr_vocal}Hz")ratio = sr_vocal / sr_bgmnew_length = int(len(bgm) * ratio)x_old = np.arange(len(bgm))x_new = np.linspace(0, len(bgm)-1, new_length)bgm = np.interp(x_new, x_old, bgm) # 重采样背景音乐到人声的采样率sr_bgm = sr_vocal # 统一采样率print(f"重采样完成,背景音乐新长度: {len(bgm)}")# 6. 按规则处理背景音乐(核心逻辑)len_vocal = len(vocal) # 人声长度len_bgm = len(bgm) # 背景音乐长度(已重采样)# 规则1:如果人声长于背景音乐,循环背景音乐直到人声结束if len_vocal > len_bgm:print(f"人声长于背景音乐({len_vocal} > {len_bgm}),开始循环背景音乐")# 计算需要循环的次数和剩余长度loop_count = len_vocal // len_bgm # 完整循环次数remaining = len_vocal % len_bgm # 剩余长度(不足一次循环的部分)# 拼接循环部分+剩余部分(总长度=人声长度)bgm_processed = np.concatenate([bgm] * loop_count + # 完整循环[bgm[:remaining]] # 剩余部分)# 规则2:如果背景音乐长于或等于人声,截取背景音乐与人声等长else:print(f"背景音乐长于或等于人声({len_bgm} >= {len_vocal}),开始截取背景音乐")bgm_processed = bgm[:len_vocal] # 截取前len_vocal长度# 7. 合并人声和处理后的背景音乐# 此时bgm_processed长度已与人声一致,直接叠加combined = (vocal + bgm_processed) / 2.0 # 平均音量避免过载# 归一化(确保音量在合理范围)max_amp = np.max(np.abs(combined))if max_amp > 0:combined = combined / max_amp# 8. 转换为WAV字节流(用于上传)def to_wav_bytes(audio: np.ndarray, sample_rate: int) -> bytes:"""将音频数组转换为WAV格式字节流"""audio_int16 = (audio * 32767).astype(np.int16) # 转为16位整数wav_io = io.BytesIO()with wave.open(wav_io, 'wb') as wf:wf.setnchannels(1) # 单声道wf.setsampwidth(2) # 16位wf.setframerate(sample_rate)wf.writeframes(audio_int16.tobytes())wav_io.seek(0)return wav_io.read() # 返回字节流# 9. 上传到七牛云def upload_to_qiniu(wav_bytes: bytes) -> tuple[str, str]:"""上传WAV字节流到七牛云,返回(文件名, 访问URL)"""# 生成唯一文件名timestamp = datetime.now().strftime("%Y%m%d%H%M%S")file_id = uuid.uuid4().hex[:8]filename = f"myfile/merged_audio_{timestamp}_{file_id}.wav"# 获取上传凭证token = qiniu_auth.upload_token(bucket=qiniu_bucket,key=filename,expires=3600 # 凭证有效期1小时)# 上传字节流ret, info = qiniu.put_data(up_token=token,key=filename,data=wav_bytes)# 校验上传结果if info.status_code != 200:raise Exception(f"七牛云上传失败,状态码:{info.status_code},信息:{info.text_body}")# 拼接URL(避免重复斜杠)domain_clean = qiniu_domain.rstrip('/') # 移除域名末尾斜杠audio_url = f"{domain_clean}/{filename}"return filename, audio_url# 执行上传wav_bytes = to_wav_bytes(combined, sr_vocal)filename, audio_url = upload_to_qiniu(wav_bytes)duration = len(combined) / sr_vocal # 最终时长(与人声时长一致)# 10. 返回结果print("音频合成并上传七牛云成功")return {"code": 200,"message": "音频合成并上传七牛云成功","audio_url": audio_url,"format": "wav","sample_rate": sr_vocal,"duration": round(duration, 2),"filename": filename}except Exception as e:# 打印详细错误信息import tracebackprint(f"处理失败: {str(e)}")traceback.print_exc()return {"code": 500,"message": f"处理失败:{str(e)}","audio_url": None,"format": None,"sample_rate": None,"duration": None,"filename": None}
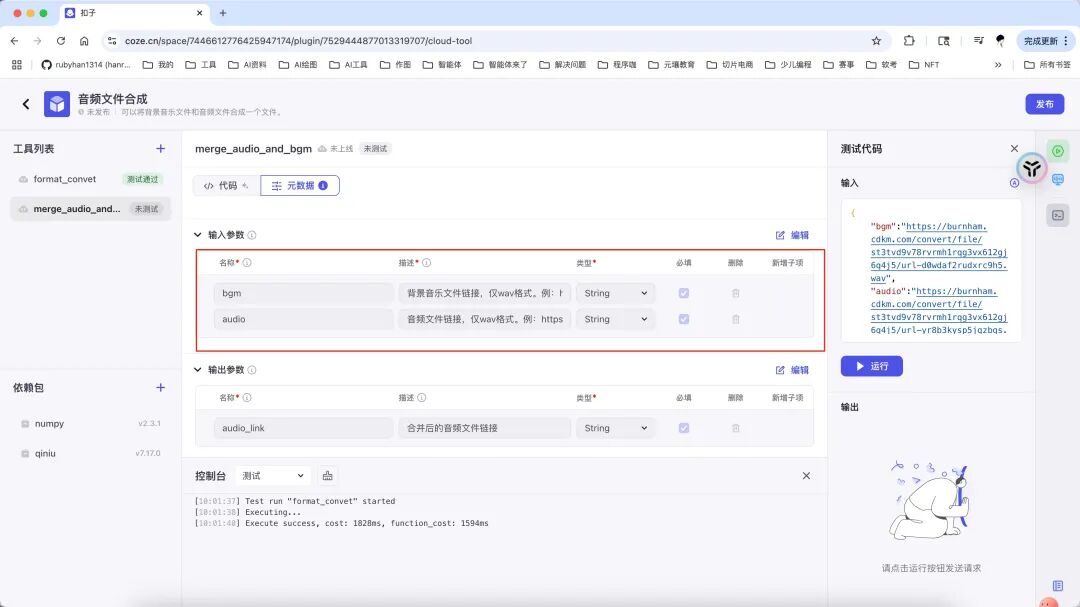
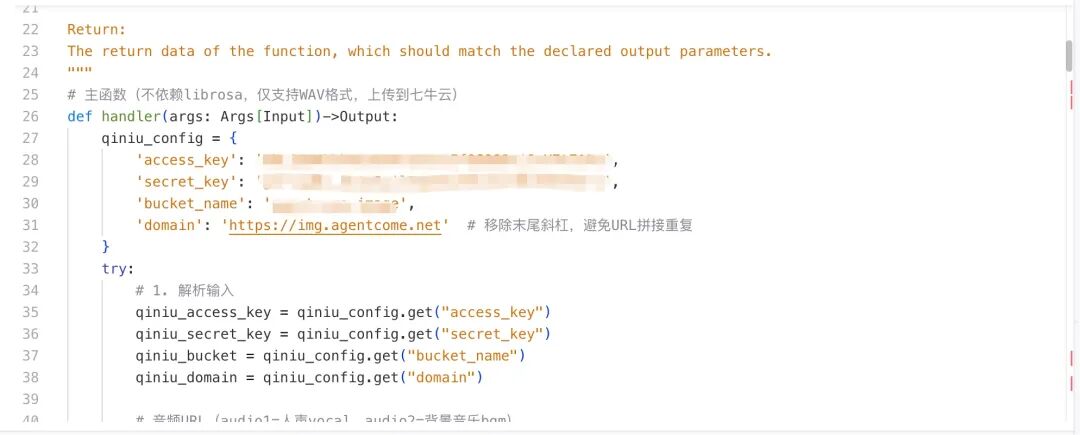
注意:因为是个人使用,所以这里上传七牛云的参数在代码中写死了。如果是想上架插件商店供他人使用,可以设置上传参数,比如上传的平台,不一定是七牛云。还有ak,sk等等。
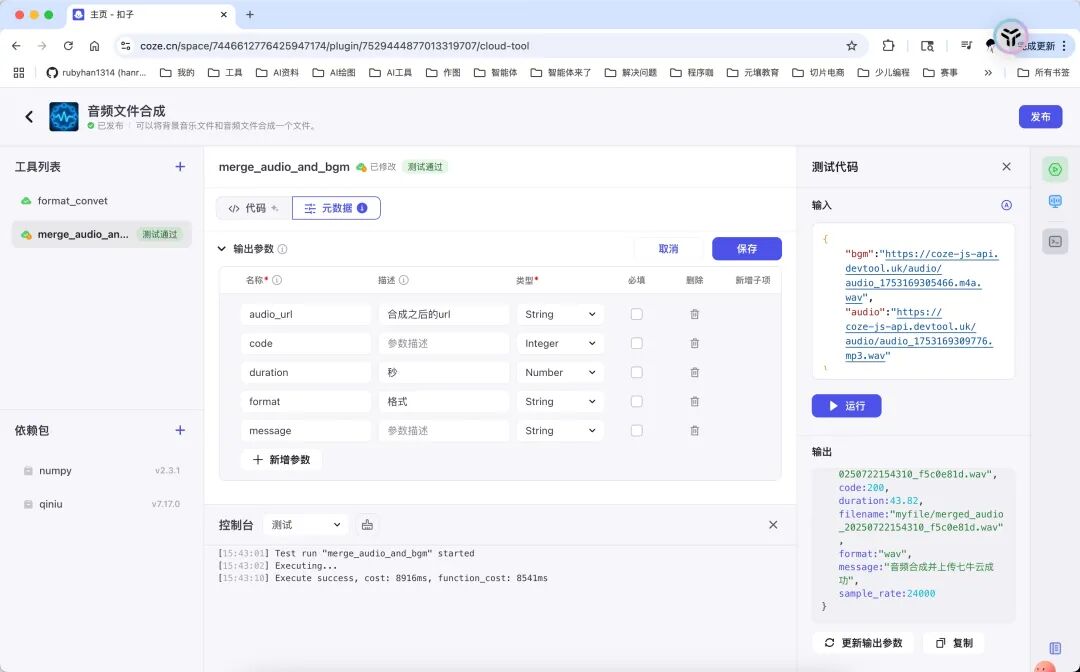
最后还要点击右下角的更新输出参数,保证代码中的参数和元数据中的输出参数对应上。有些参数觉得没用,也可以去掉。
二 音频格式转换工具
上面的背景音乐和音频文件合成工具,因为要避过ffmpeg,所以最终的实现是纯python代码。但是也有一个弊端,就是只能处理wav格式。那我们就再添加一个工具,用来实现音频文件的类型转换,比如把mp3格式转为wav,或者把wav转换为mp3。
2.1 创建工具
工具的创建方式同上。
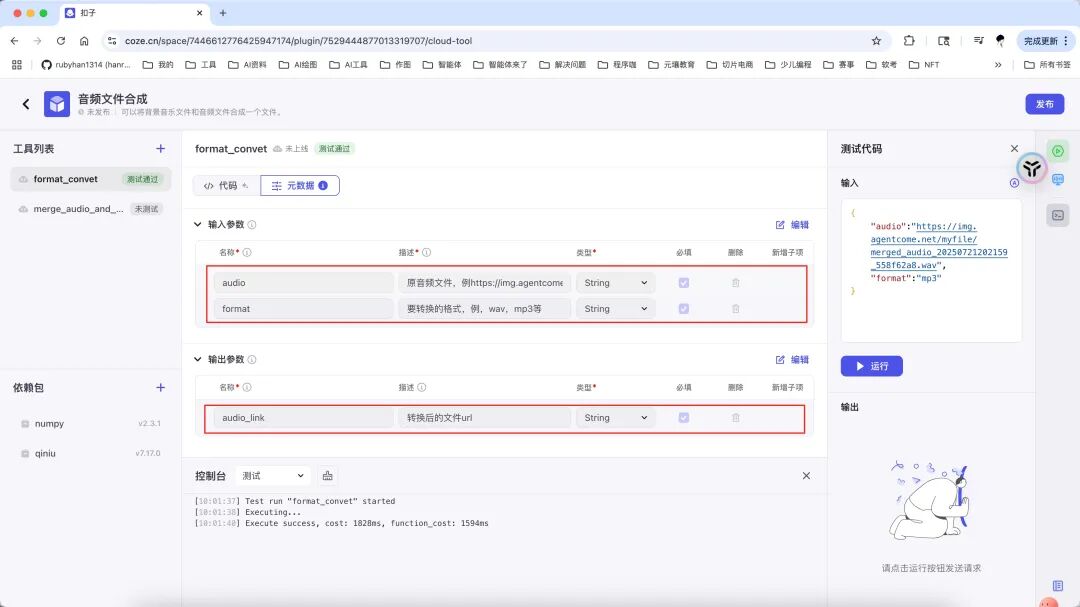
设置输入参数和输出参数。
2.2 代码实现
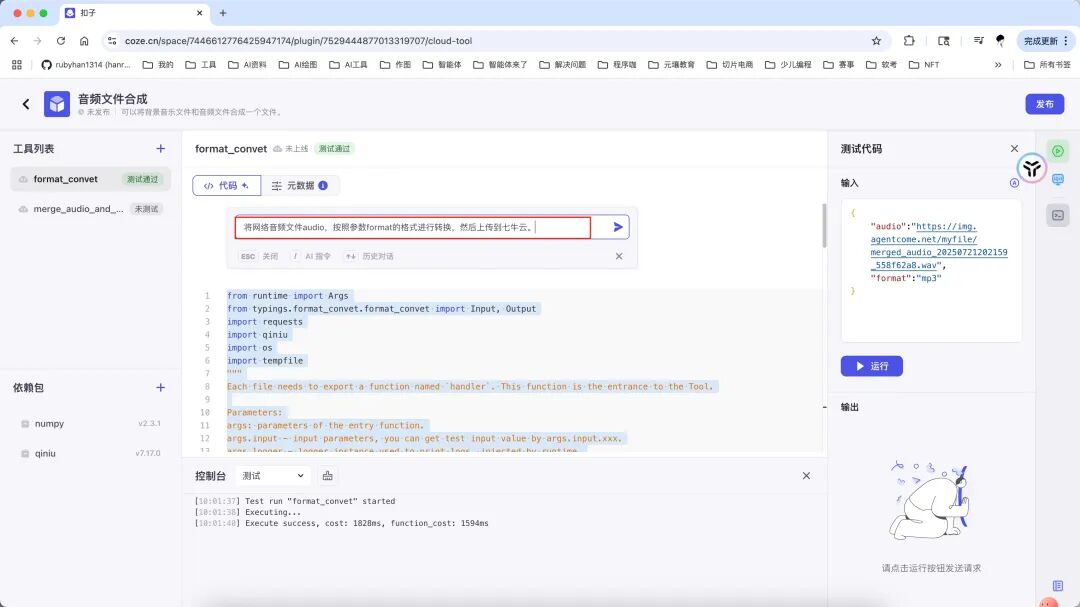
这里还是让AI写代码。写完之后的代码,反复调试即可。最终代码如下:
from runtime import Argsfrom typings.format_convet.format_convet import Input, Outputimport requestsimport qiniuimport osimport tempfile"""Each file needs to export a function named `handler`. This function is the entrance to the Tool.Parameters:args: parameters of the entry function.args.input - input parameters, you can get test input value by args.input.xxx.args.logger - logger instance used to print logs, injected by runtime.Remember to fill in input/output in Metadata, it helps LLM to recognize and use tool.Return:The return data of the function, which should match the declared output parameters."""def handler(args: Args[Input])->Output:# 配置七牛云信息,需要替换为实际值access_key = ''secret_key = ''bucket_name = ''domain = 'https://img.agentcome.net'# 初始化七牛云客户端q = qiniu.Auth(access_key, secret_key)# 下载音频文件try:response = requests.get(args.input.audio)response.raise_for_status()except requests.RequestException as e:return {"message": f"Failed to download audio: {str(e)}"}# 创建临时文件with tempfile.NamedTemporaryFile(delete=False, suffix='.tmp') as temp_in:temp_in.write(response.content)input_path = temp_in.name# 从原音频 URL 中获取文件名original_filename = os.path.basename(args.input.audio)# 移除原文件名的后缀filename_without_ext = os.path.splitext(original_filename)[0]# 组合新的文件名,使用原文件名并修改后缀new_filename = f'{filename_without_ext}.{args.input.format}'# 模拟音频格式转换,实际需要替换为真实的转换逻辑output_path = input_path + f'.{args.input.format}'try:# 这里是伪代码,实际需要使用音频处理库进行格式转换# 示例:假设转换逻辑是将文件复制并重命名with open(input_path, 'rb') as f_in, open(output_path, 'wb') as f_out:f_out.write(f_in.read())except Exception as e:os.unlink(input_path)return {"message": f"Failed to convert audio: {str(e)}"}# 生成上传凭证token = q.upload_token(bucket_name)# 使用原文件名修改后缀后的新文件名作为上传文件名,并添加 myfile/ 前缀key = f'myfile/{new_filename}'# 上传文件到七牛云try:ret, info = qiniu.put_file(token, key, output_path)if info and info.status_code == 200 and ret and 'key' in ret:audio_link = f'{domain}/{key}'return {"audio_link": audio_link}else:error_msg = info.error if info and hasattr(info, 'error') else "Unknown error"return {"message": f"Failed to upload file to Qiniu: {error_msg}"}except Exception as e:return {"message": f"Upload to Qiniu failed: {str(e)}"}finally:# 清理临时文件if os.path.exists(input_path):os.unlink(input_path)if os.path.exists(output_path):os.unlink(output_path)
三 发布 & 上架
测试之后没啥问题,就可以发布了。
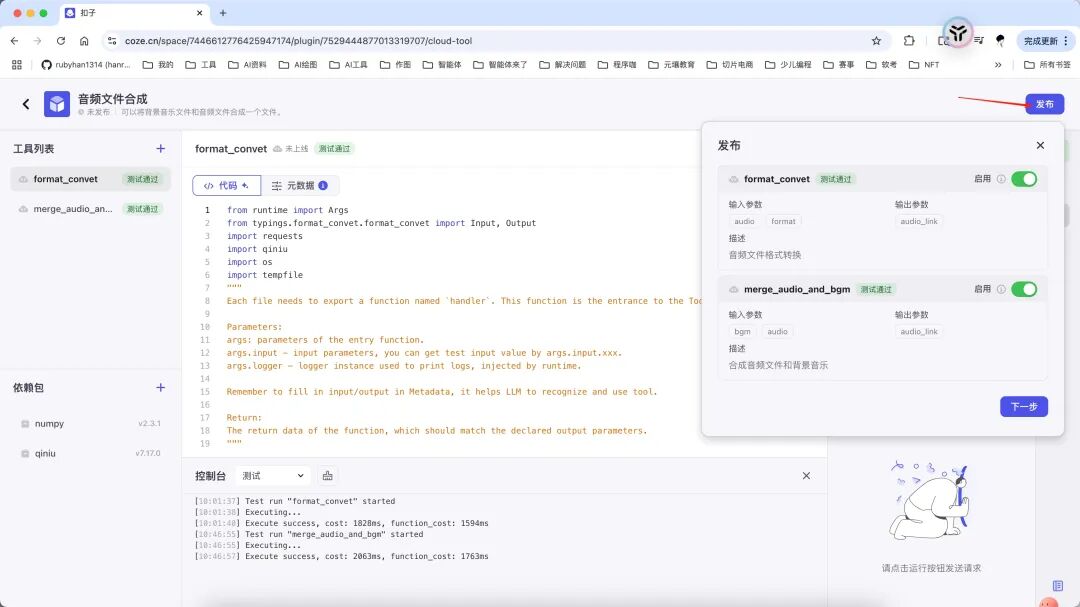
如果发布之后,还想供其他人使用,可以上架插件商店。
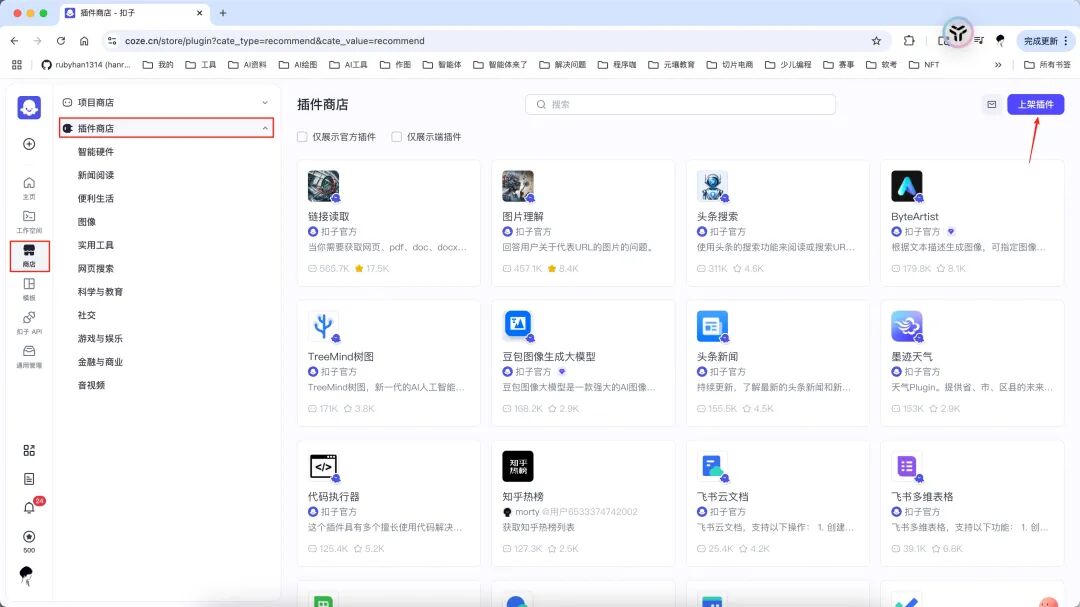
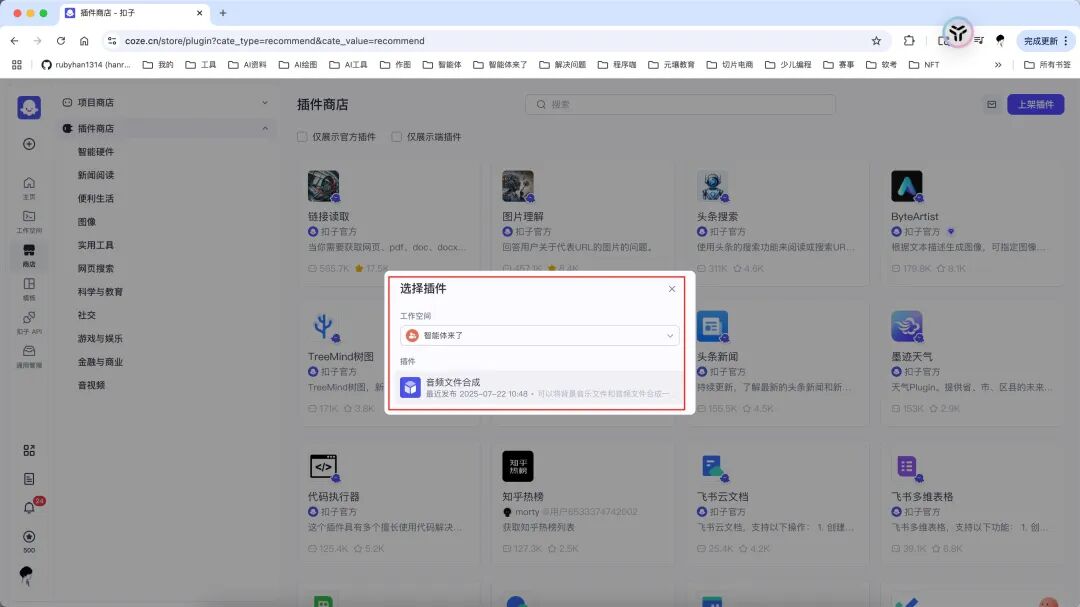
这里有个小注意事项,就是插件图标要换成自己的,不要使用默认,不然很容易审核不过。
没有就让豆包设计一个。
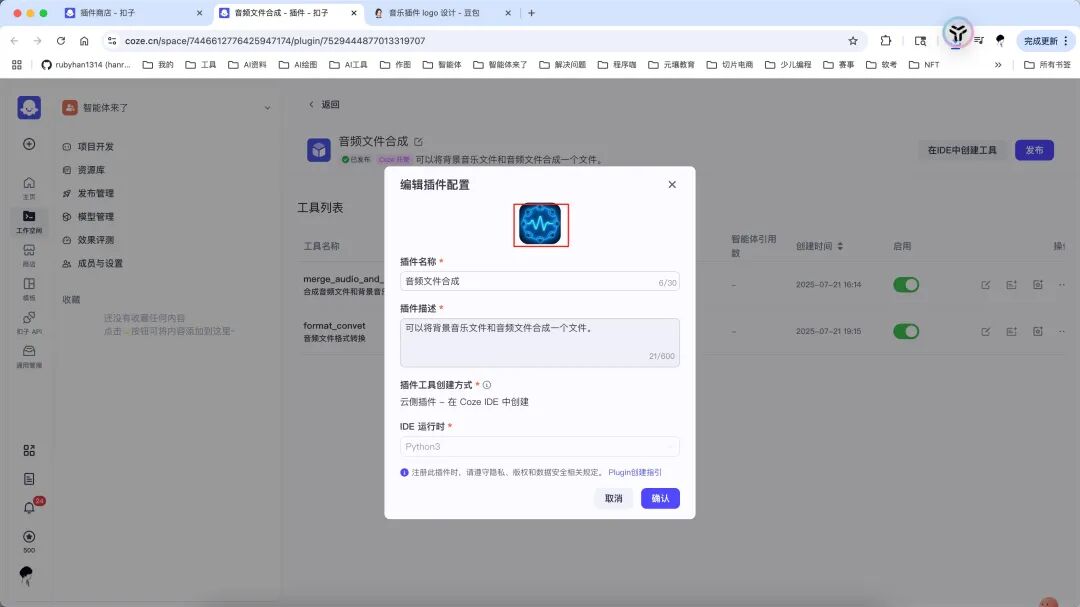
然后插件需要重新发布。
重新上架,等待审核。
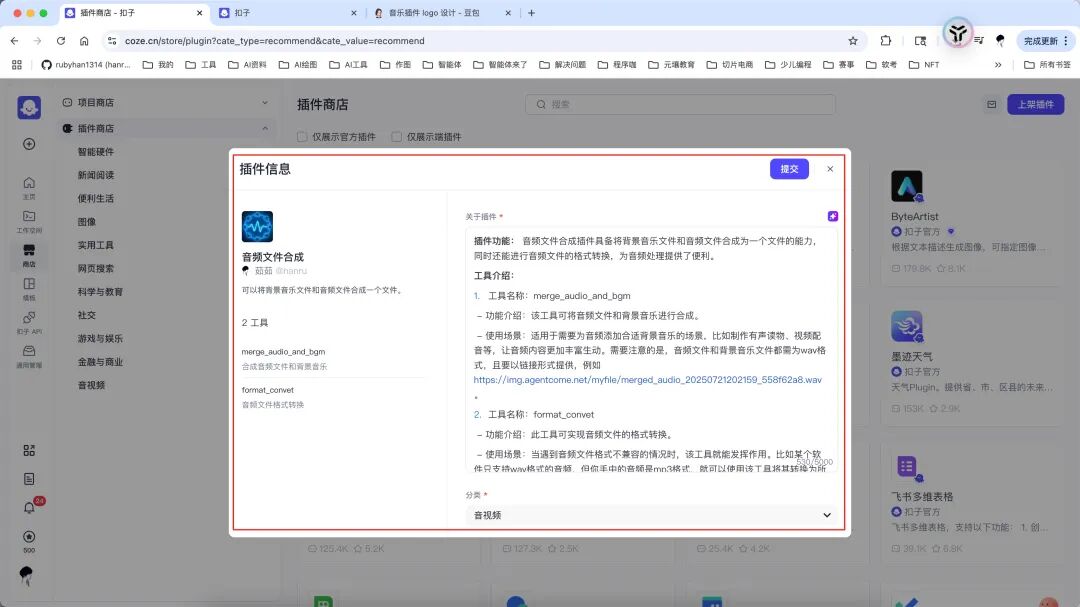
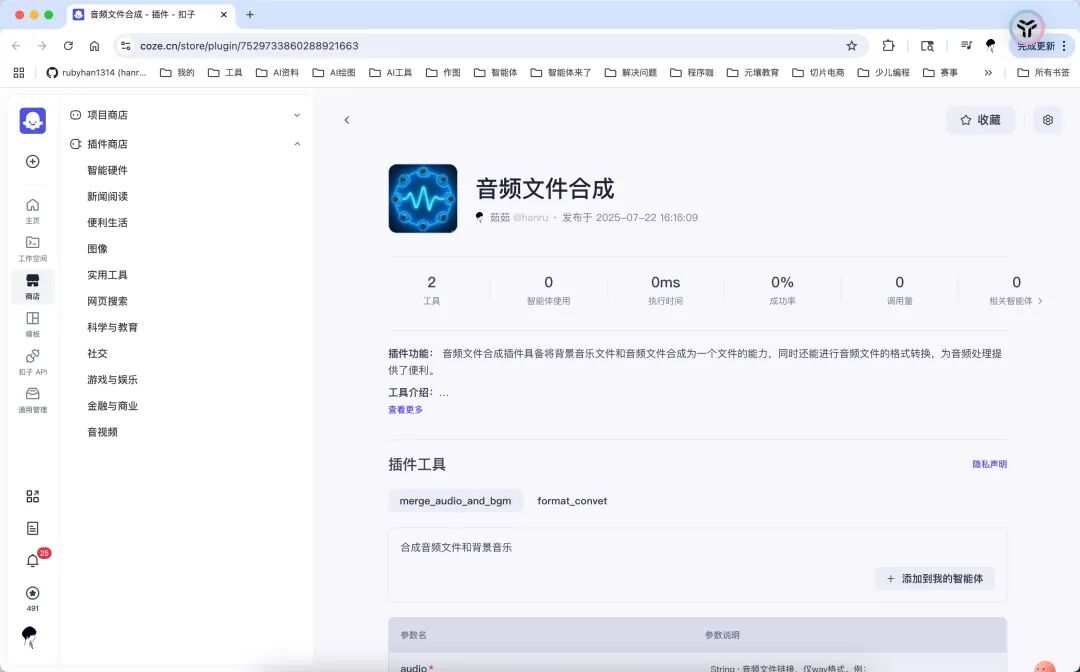
审核还是需要等一会儿的,审核通过之后,就可以分享给其他人使用啦

汇聚全球AI编程工具,助力开发者即刻编程。
更多推荐



 9
9 0
0- 0


 已为社区贡献6条内容

所有评论(0)