
Linux——网络基本概念
·
目录
只有认知的突破💫才能带来真正的成长💫编程技术的学习💫没有捷径💫一起加油💫

🍁感谢各位的观看🍁欢迎大家留言🍁咱们一起加油🍁努力成为更好的自己🍁
Linux网络
网络模型
OSI七层网络模型,如下图所示。
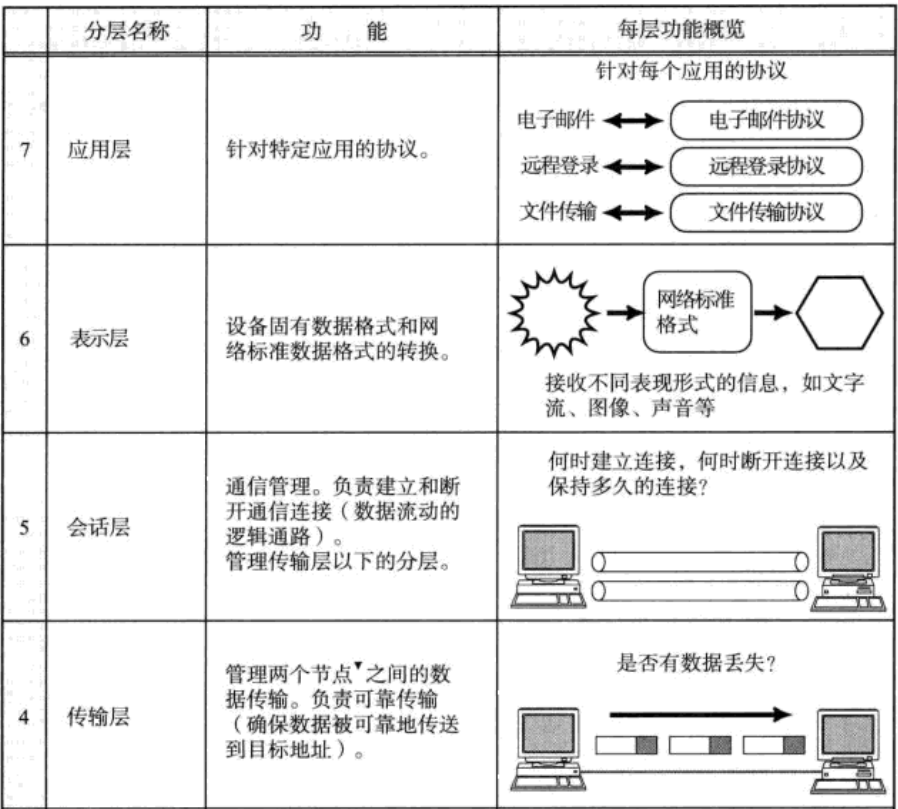
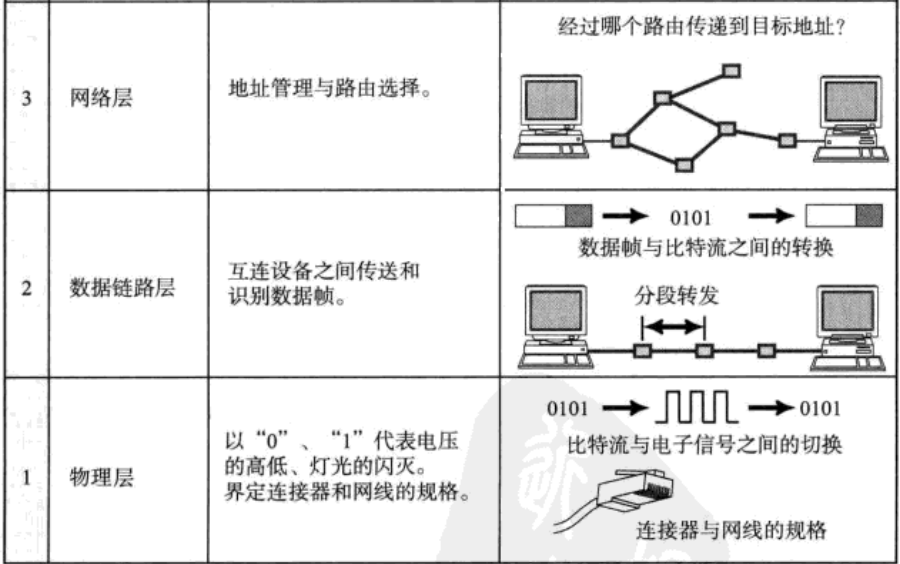
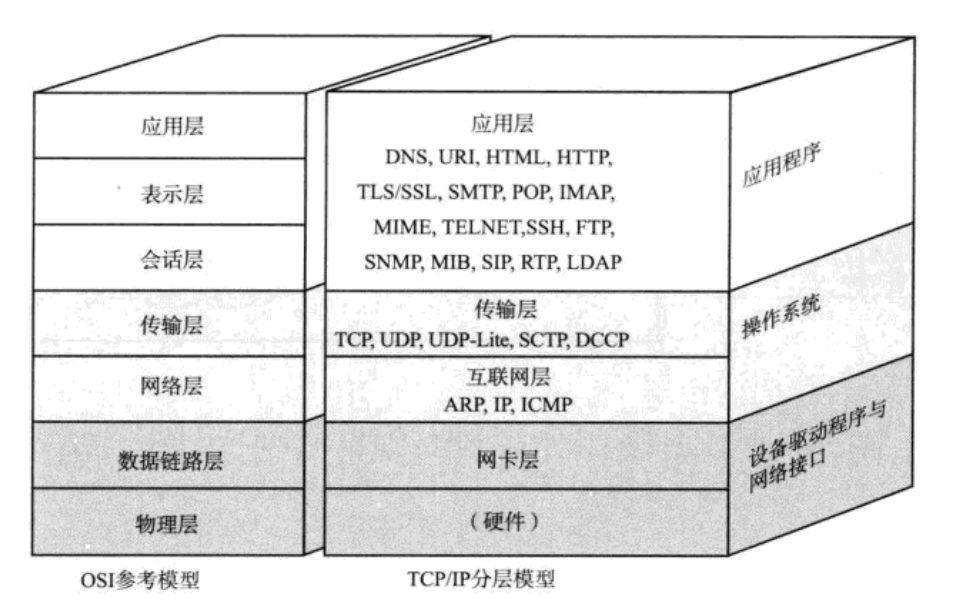
其实落地只有五层模型——TCP/IP五层模型。
-
物理层:网卡。
-
数据链路层:含有以太网,令牌环网,无线LAN。功能:数据碰撞检测。
-
网络层:管理IP。
-
传输层:TCP/UDP传输协议。
-
应用层:各种应用协议。常用且有名的是:http/https协议。
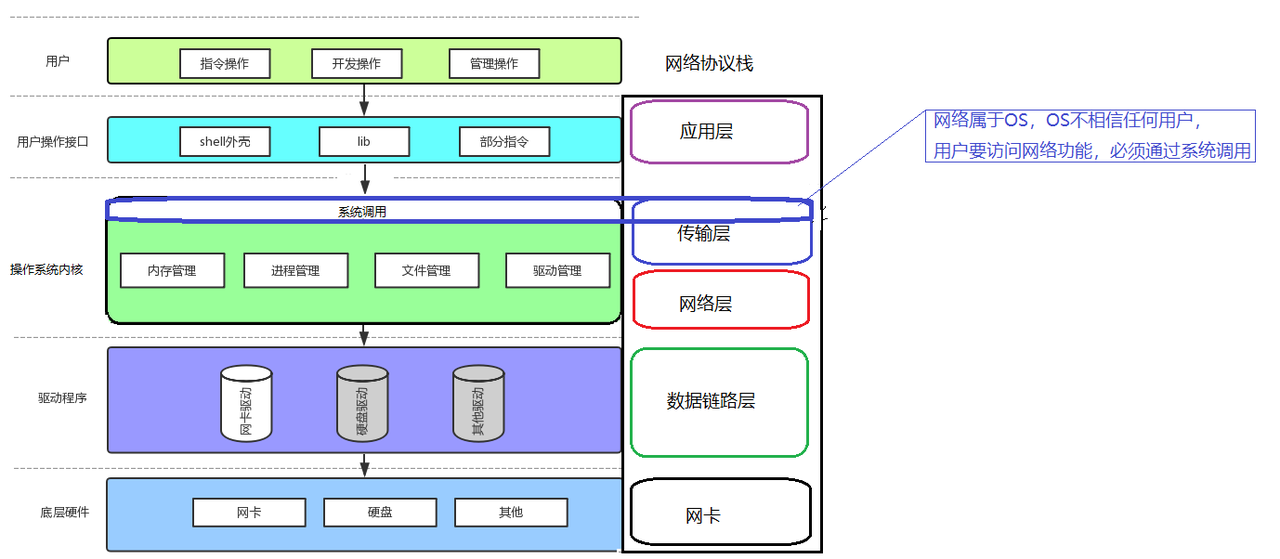
系统和网络的关系
网络依附于系统,其中传输层和网络层被内置到系统内核中了,如下图所示的关系。
协议
在网络的每层模型中,都有每层对应的协议,每层的协议都是一样的,只有这样才能进行完整且正确的通信。
协议的本质就是一个个结构体/类。如下所示的代码——请求和响应的协议。
#pragma once
#include <iostream>
#include <string>
#include <jsoncpp/json/json.h>

class Request
{
public:
    Request()
    {
        _x = _y = _oper = 0;
    }
    // 序列号对象
    bool Serialize(std::string *out)
    {
        //1. 手写 "_x" "_oper" "_y" --- 字符串拼接转换
        //2. 现成工具

        Json::Value root;
        root["x"] = _x;
        root["y"] = _y;
        root["oper"] = _oper;

        Json::StyledWriter writer;
        *out = writer.write(root);
        if(out->empty())
            return false;
        return true;
    }

    // 反序列化对象
    bool Deserialize(std::string &in)
    {
        Json::Reader reader;
        Json::Value root;
        bool ret = reader.parse(in, root);
        if(!ret)
            return false;

        _x = root["x"].asInt();
        _y = root["y"].asInt();
        _oper = root["oper"].asInt();

        return true;
    }
    int X()
    {
        return _x;
    }
    int Y()
    {
        return _y;
    }
    char Oper()
    {
        return _oper;
    }
    ~Request()
    {
    }

// private:
public: // 加快速度
    // x oper y -- 约定1
    int _x;        //请求协议
    int _y;
    char _oper;
};


class Response
{
public:
    Response():_result(0), _code(0)
    {
    }
      // 序列号对象
    bool Serialize(std::string *out)
    {
        //1. 手写 "_x" "_oper" "_y" --- 字符串拼接转换
        //2. 现成工具

        Json::Value root;
        root["result"] = _result;
        root["code"] = _code;

        Json::StyledWriter writer;
        *out = writer.write(root);
        if(out->empty())
            return false;
        return true;
    }

    // 反序列化对象
    bool Deserialize(std::string &in)
    {
        Json::Reader reader;
        Json::Value root;
        bool ret = reader.parse(in, root);
        if(!ret)
            return false;

        _result = root["result"].asInt();
        _code = root["code"].asInt();

        return true;
    }
    void SetResult(int r)
    {
        _result = r;
    }
    void SetCode(int c)
    {
        _code = c;
    }
    void Print()
    {
        std::cout << _result << "[" << _code << "]" << std::endl;
    }
    ~Response()
    {
    }

private:
    int _result; //    //响应协议
    int _code;   // 可信度
};
报头和报文
报头=报文+有效载荷。如下图所示。
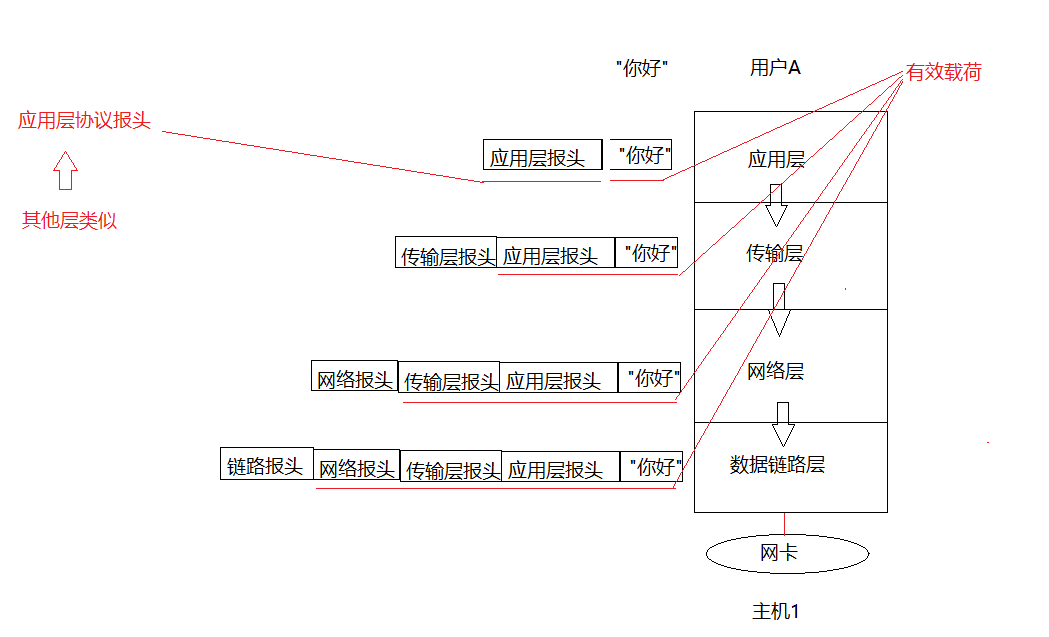
信息通过网络传输的过程
传输的过程
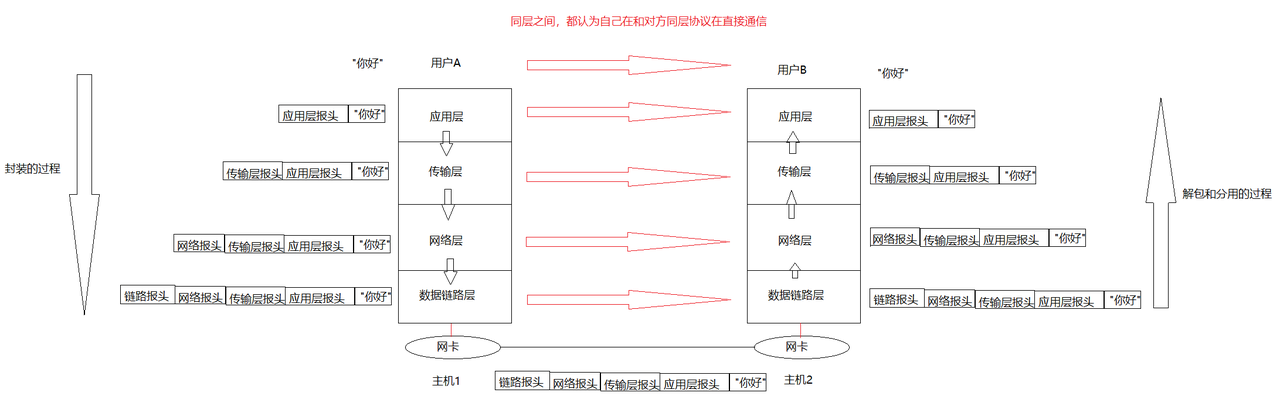
序列化和反序列化
-
为什么用序列化和反序列化?
在一台服务器上,使用C语言,来定义结构体。但是,在另一台服务器上使用Python来定义结构体。虽然两者的结构属性一样,但是语言不一样,就无法通信。
可以把各自传输的协议,给转换成字符串,把字符串给发送过去,在各自的服务器上进行解析,这样两者即使语言不同,也可以通信了。
如下图所示的过程。
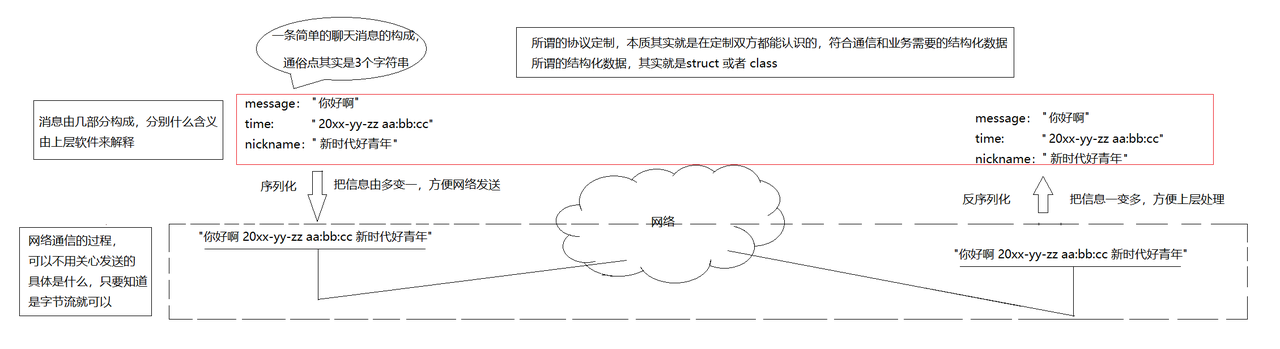
JSON格式
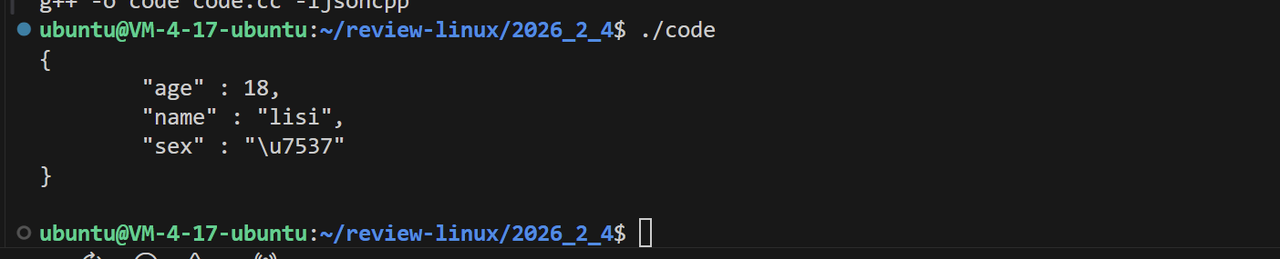
网络传输中,进行序列化,常常转换为JSON格式的字符串。为此,可以使用Jsoncpp库,使用该库提供的序列化方法,进行序列化。
序列化
类:Json::Value,使用该类把属性保存下来。
函数:toStyledString(),把保存属性的对象转为字符串。
#include <iostream>
#include <jsoncpp/json/json.h>
#include <string>
int main()
{
    Json::Value root;
    root["name"]="lisi";
    root["age"]=18;
    root["sex"]="男";
    std::string s=root.toStyledString();
    std::cout<<s<<std::endl;
    return 0;
}
反序列化
反序列化指的是,将序列化后的数据重新转换为原来的数据结构或对象。
类:Json::Reader
函数:parse(),使用它来读取序列化字符串。
#include <iostream>
#include <jsoncpp/json/json.h>
#include <string>
int main()
{
    /*序列化*/
    Json::Value root;
    root["name"]="lisi";
    root["age"]=18;
    root["sex"]="男";
    std::string s=root.toStyledString();

    /*反序列化*/
    Json::Reader read;
    Json::Value uroot;
    read.parse(s,uroot);    //通过read的parse函数,把字符串读到uroot中
    std::string name=uroot["name"].asString();
    int age=uroot["age"].asInt();
    std::string sex=uroot["sex"].asString();
    std::cout<<name<<std::endl;
    std::cout<<age<<std::endl;
    std::cout<<sex<<std::endl;

    return 0;
}

汇聚全球AI编程工具,助力开发者即刻编程。
更多推荐



 17
17 0
0- 0



 已为社区贡献7条内容

所有评论(0)