
zynq7020+BMP2GRAY+linux+网口传输文件
·
1、硬件搭建
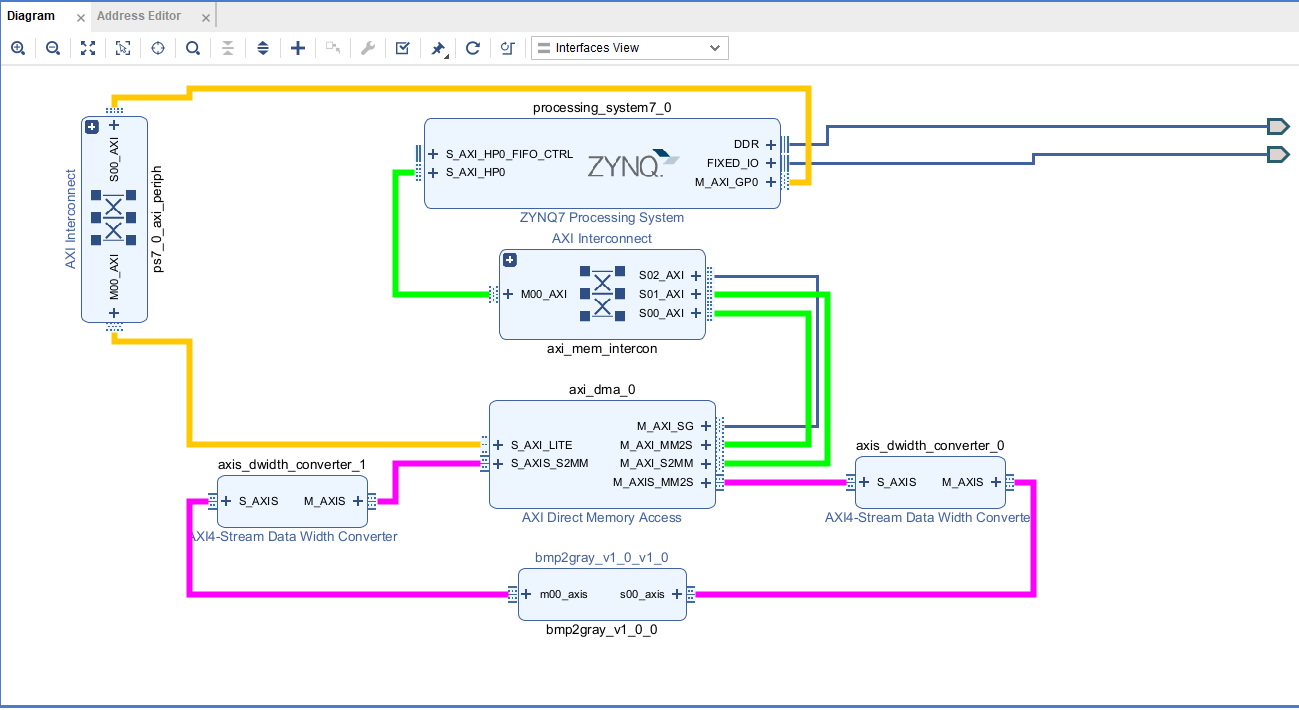
DMA经过转灰度IP的处理前后,经过的是两个数据位宽转化
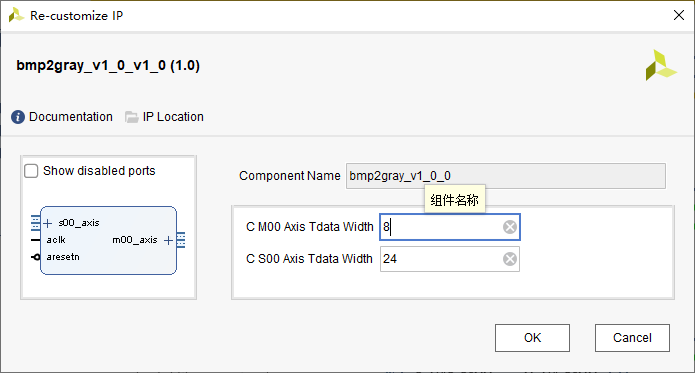
读取 24bit BMP,经 AXI DMA -> (DWC 128→24) -> 自定义IP(灰度) -> (DWC 8→128) -> AXI DMA,
 * 收到 8bit 灰度后写回 BMP(24bit,R=G=B)。
转灰度ip
2、petalinux配置
〇:petalinux-config -
 https://adg.csdn.net/694cf9e75b9f5f31781ab744.html?spm=1001.2101.3001.6650.2&utm_medium=distribute.pc_relevant.none-task-blog-2%7Edefault%7Ebaidujs_utm_term%7Eactivity-2-149469025-blog-149181159.235%5Ev43%5Epc_blog_bottom_relevance_base6&depth_1-utm_source=distribute.pc_relevant.none-task-blog-2%7Edefault%7Ebaidujs_utm_term%7Eactivity-2-149469025-blog-149181159.235%5Ev43%5Epc_blog_bottom_relevance_base6
①:petalinux-config -c kernel
(无需调整)
②:petalinux-config -c rootfs
启动open-ssh(相关需要勾选的内容)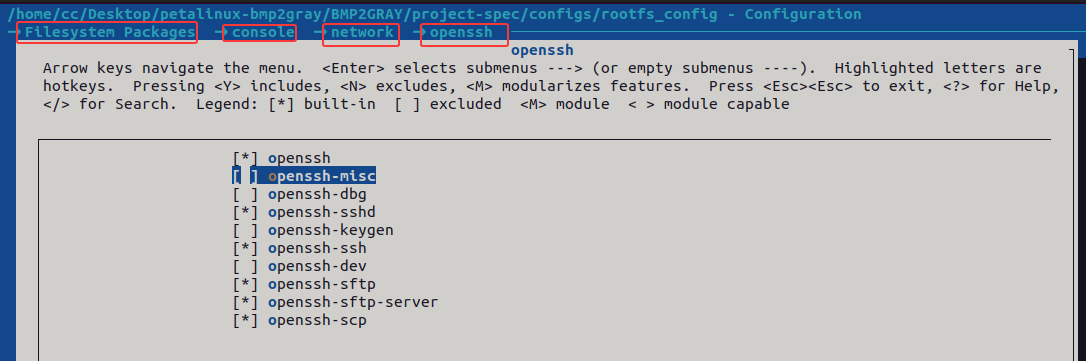
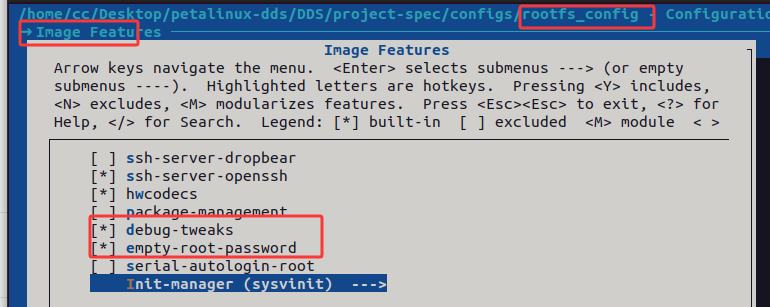
最好 启动一下登录免密码root
③:petalinux-build
直接运行就行
3、安装驱动:
①编译axidma驱动
参照开源给的例子
执行编译(make driver)先加载一下环境
source /opt/petalinux/2023.1/environment-setup-cortexa9t2hf-neon-xilinx-linux-gnueabi
👆边是这个交叉编译链路的地址
②安装axidma驱动
查询petalinux生成的设备树路径
/home/cc/Desktop/petalinux-bmp2gray/BMP2GRAY/components/plnx_workspace/device-tree/device-tree/
比对着修改一下设备树
(给mm2s,s2mm两个分配不同的device-id,还有就是添加axidma_chrdev一块)
axidma_chrdev: axidma_chrdev@0 {
    compatible = "xlnx,axidma-chrdev";
    dmas = <&axi_dma_0 0 &axi_dma_0 1>;
    dma-names = "tx_channel", "rx_channel";
};

axi_dma_0: axidma0@40400000 {
    #dma-cells = <1>;
    compatible = "xlnx,axi-dma", "xlnx,axi-dma-6.03.a", "xlnx,axi-dma-1.00.a";
    reg = <0x40400000 0x10000>;
    clocks = <&clkc 15>, <&clkc 15>, <&clkc 15>, <&clkc 15>;
    clock-names = "s_axi_lite_aclk", "m_axi_sg_aclk", "m_axi_mm2s_aclk", "m_axi_s2mm_aclk";
    xlnx,include-sg;
    xlnx,addrwidth = <32>;

    dma-mm2s-channel@40400000 {
        compatible = "xlnx,axi-dma-mm2s-channel";
        dma-channels = <1>;
        xlnx,datawidth = <64>;
        xlnx,device-id = <0>;
        interrupt-parent = <&intc>;
        interrupts = <0 29 4>;
    };

    dma-s2mm-channel@40400000 {
        compatible = "xlnx,axi-dma-s2mm-channel";
        dma-channels = <1>;
        xlnx,datawidth = <64>;
        xlnx,device-id = <1>;
        interrupt-parent = <&intc>;
        interrupts = <0 30 4>;
    };
};
安装成功insmod axidma.ko
③安装 测试例子examples文件夹下
1、例程自带benchmark测试
root@BMP2GRAY:~# insmod axidma.ko
axidma: loading out-of-tree module taints kernel.
axidma: axidma_dma.c: axidma_dma_init: 717: DMA: Found 1 transmit channels and 1 receive channels.
axidma: axidma_dma.c: axidma_dma_init: 719: VDMA: Found 0 transmit channels and 0 receive channels.
root@BMP2GRAY:~# ./axidma_benchmark
AXI DMA Benchmark Parameters:
        Transmit Buffer Size: 7.91 MiB
        Receive Buffer Size: 7.91 MiB
        Number of DMA Transfers: 1000 transfers

Using transmit channel 0 and receive channel 1.
Warning: 66.67% of the receive buffer matches the initialization pattern.
This may mean that the receive buffer was not properly updated.
Single transfer test successfully completed!
Beginning performance analysis of the DMA engine.

DMA Timing Statistics:
        Elapsed Time: 27.71 s
        Transmit Throughput: 285.42 MiB/s
        Receive Throughput: 285.42 MiB/s
        Total Throughput: 570.83 MiB/s
2、BMP转GRAY测试例子
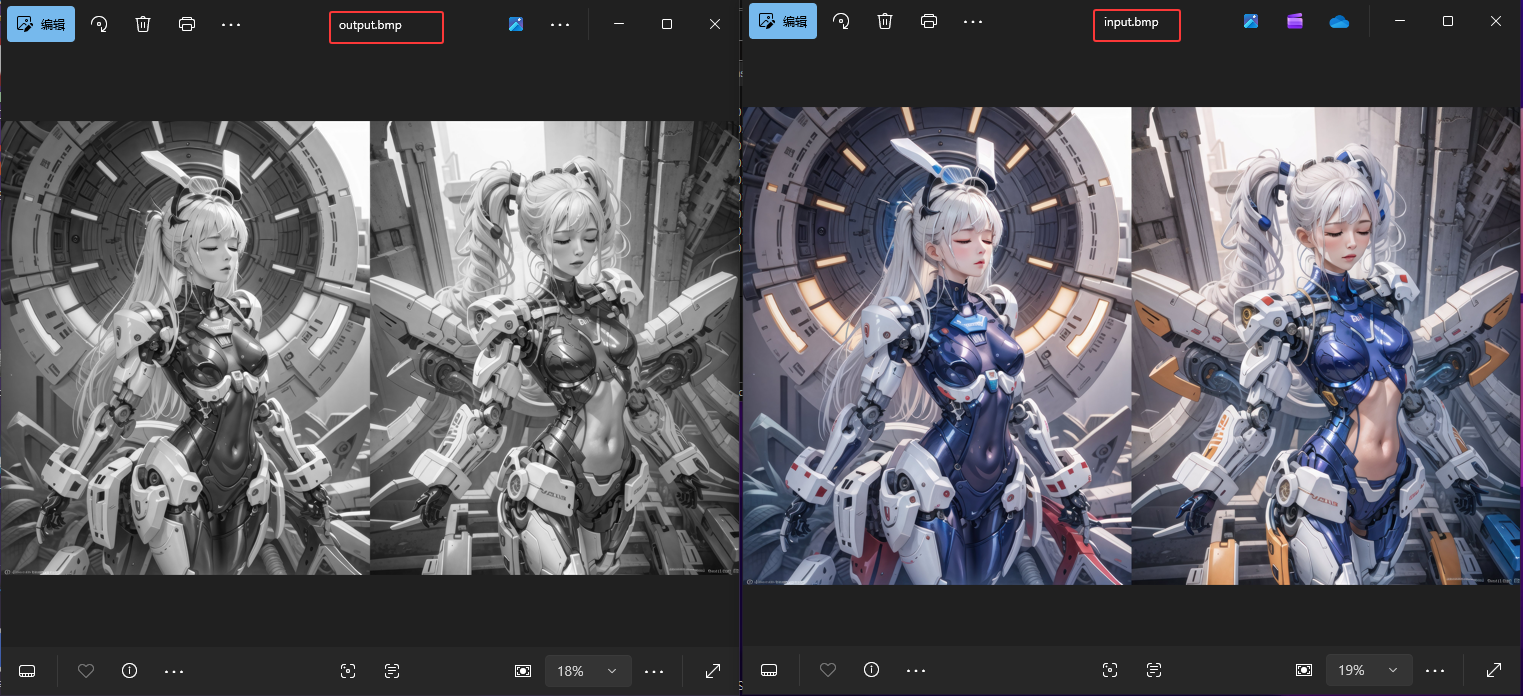
原bmp29MB,103.354ms完成处理
root@BMP2GRAY:~# ./axidma_R2G -t 0 -r 1 -i input.bmp -o output.bmp -v
[INFO] W=4096 H=2519  pixels=10317824
[INFO] TX bytes=30953472 (RGB888)  RX bytes=10317824 (GRAY8)
[RUN] tx_chan=0 rx_chan=1 use_vdma=yes
[DONE] DMA ok, elapsed = 103.354 ms, TX=285.62 MiB/s, RX=95.21 MiB/s
[OK] output saved: output.bmp
4、编译过程出现问题
①Uboot卡在Waiting for root device /dev/mmcblk0p2...
vivado工程当中没有勾选SD卡
②vscode openssh插件登录不上(使用windows powershell登录ssh root@192.168.3.145)然后让GPT接管
petalinux-config 初始化的时候

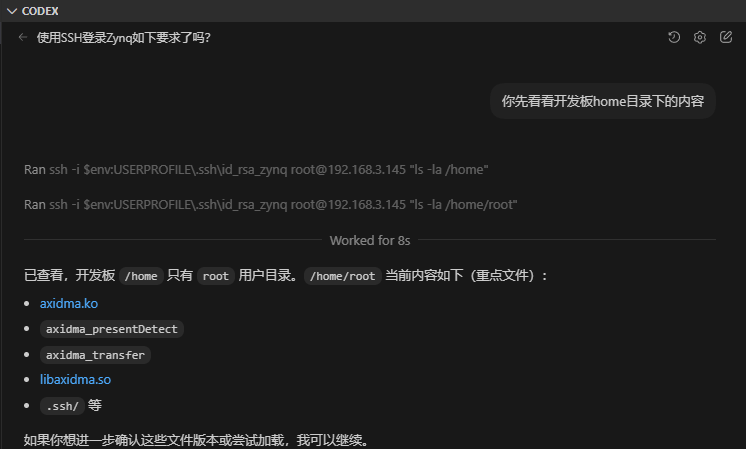
**断链之后 重连报错
PS D:\video_rgb2gray\r2g_8\xilinx_axidma_2> ssh root@192.168.3.145
@@@@@@@@@@@@@@@@@@@@@@@@@@@@@@@@@@@@@@@@@@@@@@@@@@@@@@@@@@@
@    WARNING: REMOTE HOST IDENTIFICATION HAS CHANGED!     @
@@@@@@@@@@@@@@@@@@@@@@@@@@@@@@@@@@@@@@@@@@@@@@@@@@@@@@@@@@@
IT IS POSSIBLE THAT SOMEONE IS DOING SOMETHING NASTY!
Someone could be eavesdropping on you right now (man-in-the-middle attack)!
It is also possible that a host key has just been changed.
The fingerprint for the RSA key sent by the remote host is
SHA256:LGUWCmyPlxIlWxMKOznFZPbaDLfUYKOMkOJqGOaygok.
Please contact your system administrator.
Add correct host key in C:\\Users\\Chenz/.ssh/known_hosts to get rid of this message.Offending RSA key in C:\\Users\\Chenz/.ssh/known_hosts:7
RSA host key for 192.168.3.145 has changed and you have requested strict checking.
Host key verification failed.
ssh-keygen -R 192.168.3.145避免powershell链接不上 刷新一下(跟着提示走)
PS D:\video_rgb2gray\r2g_8\xilinx_axidma_2> ssh-keygen -R 192.168.3.145
# Host 192.168.3.145 found: line 7
C:\Users\Chenz/.ssh/known_hosts updated.
Original contents retained as C:\Users\Chenz/.ssh/known_hosts.old
PS D:\video_rgb2gray\r2g_8\xilinx_axidma_2> ssh root@192.168.3.145
The authenticity of host '192.168.3.145 (192.168.3.145)' can't be established.
ECDSA key fingerprint is SHA256:iCAQ4mr+TZ/Q+sUlk8oD1WpVZEMHdadEHGE2xzLBo7o.
Are you sure you want to continue connecting (yes/no/[fingerprint])? yes
Warning: Permanently added '192.168.3.145' (ECDSA) to the list of known hosts.
root@192.168.3.145's password:
Last login: Fri Mar  9 12:35:06 2018
root@BMP2GRAY:~# ls
axidma.ko             axidma_presentDetect  libaxidma.so
axidma_R2G            axidma_transfer
axidma_benchmark      input.bmp
root@BMP2GRAY:~#
③petalinux-build过程报错
ERROR: linux-xlnx-6.1.5-xilinx-v2023.1+gitAUTOINC+716921b6d7-r0 do_assemble_fitimage: ExecutionError('/home/cc/Desktop/petalinux-bmp2gray/BMP2GRAY/build/tmp/work/zynq_generic_7z020-xilinx-linux-gnueabi/linux-xlnx/6.1.5-xilinx-v2023.1+gitAUTOINC+716921b6d7-r0/temp/run.do_assemble_fitimage.182606', 1, None, None)
ERROR: Logfile of failure stored in: /home/cc/Desktop/petalinux-bmp2gray/BMP2GRAY/build/tmp/work/zynq_generic_7z020-xilinx-linux-gnueabi/linux-xlnx/6.1.5-xilinx-v2023.1+gitAUTOINC+716921b6d7-r0/temp/log.do_assemble_fitimage.182606


ERROR: Task (/home/cc/Desktop/petalinux-bmp2gray/BMP2GRAY/components/yocto/layers/meta-xilinx/meta-xilinx-core/recipes-kernel/linux/linux-xlnx_2023.1.bb:do_assemble_fitimage) failed with exit code '1'
方案(可能是编译过程中 有文件损坏 清理一遍就行)
petalinux-build -c kernel -x cleansstate
petalinux-build -c device-tree -x cleansstate
petalinux-build
5、相关文件链接

汇聚全球AI编程工具,助力开发者即刻编程。
更多推荐



 30
30 0
0- 0


 已为社区贡献5条内容

所有评论(0)