
Nginx---初始化
·
实验一:Nginx的源码编译
1. 下载软件
[root@Nginx ~]# wget https://nginx.org/download/nginx-1.28.1.tar.gz2. 解压
[root@Nginx ~]# tar zxf nginx-1.28.1.tar.gz
[root@Nginx ~]# cd nginx-1.28.1/
3. 安装依赖并检测环境
[root@Nginx ~]# dnf install gcc openssl-devel.x86_64 pcre2-devel.x86_64 zlib-devel -y

[root@Nginx nginx-1.28.1]# ./configure --prefix=/usr/local/nginx --user=nginx --group=nginx \
--with-http_ssl_module --with-http_v2_module --with-http_realip_module \
--with-http_stub_status_module --with-http_gzip_static_module --with-pcre \
--with-stream --with-stream_ssl_module --with-stream_realip_module
4. 编译安装
[root@Nginx nginx-1.28.1]# make
[root@Nginx nginx-1.28.1]# make install
5. 启动Nginx
# 创建nginx用户
[root@Nginx ~]# useradd -s /sbin/nologin -M nginx

# 设置环境变量
[root@Nginx ~]# vim ~/.bash_profile
export PATH=$PATH:/usr/local/nginx/sbin
[root@Nginx ~]# source ~/.bash_profile

# 启动
[root@Nginx ~]# nginx
6. 编写systemd启动文件
[root@Nginx ~]# vim /lib/systemd/system/nginx.service[Unit]
Description=The NGINX HTTP and reverse proxy server
After=syslog.target network-online.target remote-fs.target nss-lookup.target
Wants=network-online.target
[Service]
Type=forking
ExecStartPre=/usr/local/nginx/sbin/nginx -t
ExecStart=/usr/local/nginx/sbin/nginx
ExecReload=/usr/local/nginx/sbin/nginx -s reload
ExecStop=/bin/kill -s QUIT $MAINPID
PrivateTmp=true
[Install]
WantedBy=multi-user.target[root@Nginx ~]# systemctl daemon-reload
[root@Nginx ~]# systemctl enable --now nginx实验二:Nginx的平滑升级及回滚
1. 下载高版本软件
[root@Nginx ~]# wget https://nginx.org/download/nginx-1.29.4.tar.gz2. 编译新版本(可选:隐藏版本信息)
[root@Nginx ~]# tar zxf nginx-1.29.4.tar.gz
[root@Nginx ~]# cd nginx-1.29.4/src/core/
[root@Nginx core]# vim nginx.h
修改版本信息:
#define NGINX_VERSION      "1.29.4"
#define NGINX_VER          "TIMINGLEE/" NGINX_VERSION
3. 编译
[root@Nginx nginx-1.29.4]# ./configure --prefix=/usr/local/nginx --user=nginx --group=nginx \
--with-http_ssl_module --with-http_v2_module --with-http_realip_module \
--with-http_stub_status_module --with-http_gzip_static_module --with-pcre \
--with-stream --with-stream_ssl_module --with-stream_realip_module

[root@Nginx nginx-1.29.4]# make
4. 平滑升级
# 备份旧版本
[root@Nginx ~]# cd /usr/local/nginx/sbin/
[root@Nginx sbin]# cp -p nginx nginx.old

# 替换二进制文件
[root@Nginx sbin]# \cp -f /root/nginx-1.29.4/objs/nginx /usr/local/nginx/sbin/nginx

# 发送USR2信号,启动新master进程
[root@Nginx sbin]# ps aux | grep nginx
[root@Nginx sbin]# kill -USR2 <旧master进程PID>

# 关闭旧版本worker进程
[root@Nginx sbin]# kill -WINCH <旧master进程PID>
5. 版本回滚
# 备份新版本
[root@Nginx sbin]# cp nginx nginx.new -p

# 恢复旧版本
[root@Nginx sbin]# \cp nginx.old nginx -pf

# 重新加载旧版本
[root@Nginx sbin]# kill -HUP <旧master进程PID>

# 关闭新版本进程
[root@Nginx sbin]# kill -WINCH <新master进程PID>
旧 Master 进程不会立即退出,但会通知其旗下的旧 Worker 进程在处理完当前请求后 gracefully quit(优雅退出)。最终只保留新版本的 Master 和 Worker 进程。
实验三:Nginx配置文件的管理及优化参数
1. 配置worker进程数
[root@Nginx ~]# vim /usr/local/nginx/conf/nginx.confworker_processes 2; # 指定进程数
worker_processes auto; # 自动匹配CPU核心数2. CPU亲和性绑定
worker_processes  auto;
worker_cpu_affinity 0001 0010 0100 1000;  # 四核CPU绑定
3. Events模块优化
events {
    worker_connections  10000;  # 单个worker最大连接数
    use epoll;                   # 使用epoll事件模型
    accept_mutex on;             # 打开负载均衡锁
    multi_accept on;             # 允许一次接收多个连接
}
4. 系统文件描述符限制
[root@Nginx ~]# vim /etc/security/limits.conf* - nofile 100000
* - noproc 100000
root - nofile 100000[root@Nginx ~]# ulimit -n 100000
[root@Nginx ~]# sudo -u nginx ulimit -n5. 并发测试
[root@Nginx ~]# dnf install httpd-tools -y
[root@Nginx ~]# ab -n 100000 -c10000 http://172.25.254.100/index.html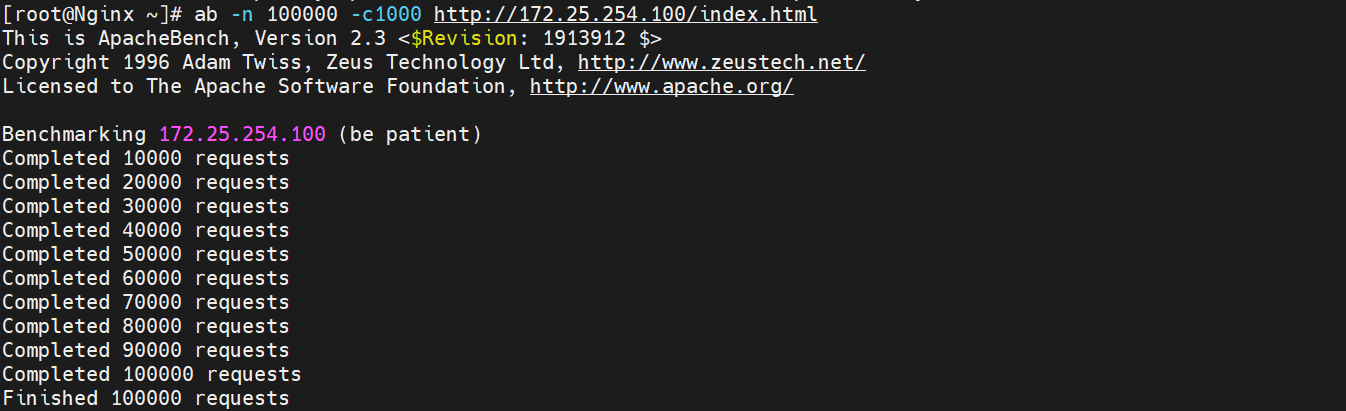
实验四:Nginx下构建PC站点
1. 配置虚拟主机目录
[root@Nginx ~]# mkdir -p /usr/local/nginx/conf/conf.d
[root@Nginx ~]# vim /usr/local/nginx/conf/nginx.conf
include "/usr/local/nginx/conf/conf.d/*.conf";2. 创建网站目录
[root@Nginx ~]# mkdir -p /webdata/nginx/timinglee.org/lee/html
[root@Nginx ~]# echo lee.timinglee.org > /webdata/nginx/timinglee.org/lee/html/index.html
3. 配置虚拟主机(root方式)
[root@Nginx ~]# vim /usr/local/nginx/conf/conf.d/vhosts.confserver {
listen 80;
server_name lee.timinglee.org;
location / {
root /webdata/nginx/timinglee.org/lee/html;
}
location /lee {
root /webdata/nginx/timinglee.org/lee/html;
# 访问路径:root值 + location值 = /webdata/.../html/lee/
}
}4. 配置alias(别名方式)
server {
    listen 80;
    server_name lee.timinglee.org;

    location /passwd {          # 访问文件
        alias /etc/passwd;
    }

    location /passwd/ {         # 访问目录
        alias /mnt/;
    }
}
5. 测试
[root@Nginx ~]# vim /etc/hosts
172.25.254.100  Nginx www.timinglee.org lee.timinglee.org

[root@Nginx ~]# curl www.timinglee.org
[root@Nginx ~]# curl lee.timinglee.org
[root@Nginx ~]# curl lee.timinglee.org/lee/
[root@Nginx ~]# curl lee.timinglee.org/passwd
实验五:KeepAlived长链接优化
1. 设置长连接超时时间
[root@Nginx ~]# vim /usr/local/nginx/conf/nginx.confkeepalive_timeout 5; # 保持连接5秒2. 设置长连接请求次数
keepalive_requests 3; # 单个连接最多处理3个请求3. 测试长连接
[root@Nginx ~]# dnf install telnet -y
[root@Nginx ~]# telnet www.timinglee.org 80
GET / HTTP/1.1
Host: www.timinglee.org
# 发送多次请求,观察Connection头的变化
# 第3次请求后,Connection会变为close
汇聚全球AI编程工具,助力开发者即刻编程。
更多推荐



 5
5 0
0- 0


 已为社区贡献5条内容

所有评论(0)