
(第九篇)spring cloud之Gateway网关
目录
一、概述
1、简介
SpringCloud Gateway 是 Spring Cloud 的一个全新项目,基于 Spring 5.0+Spring Boot 2.0 和 Project Reactor 等技术开发的网关,它旨在为微服务架构提供一种简单有效的统一的 API 路由管理方式。
SpringCloud Gateway 作为 Spring Cloud 生态系统中的网关,目标是替代 Zuul,在Spring Cloud 2.0以上版本中,没有对新版本的Zuul 2.0以上最新高性能版本进行集成,仍然还是使用的Zuul 1.x非Reactor模式的老版本。而为了提升网关的性能,SpringCloud Gateway是基于WebFlux框架实现的,而WebFlux框架底层则使用了高性能的Reactor模式通信框架Netty。
Spring Cloud Gateway的目标提供统一的路由方式且基于 Filter 链的方式提供了网关基本的功能,例如:安全,监控/指标,和限流。
官网地址 https://spring.io/projects/spring-cloud-gateway#overview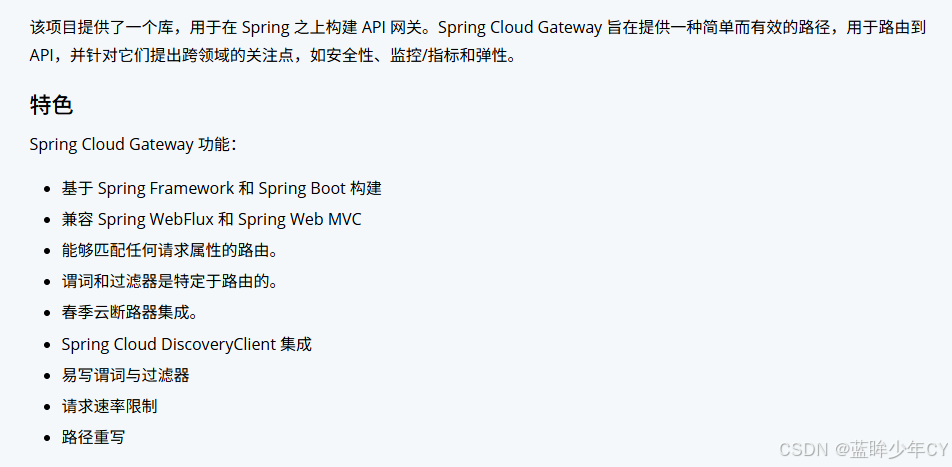
2、特性
- 基于Spring Framework 和 Spring Boot 进行构建;
- 兼容 Spring WebFlux 和 Spring Web MVC;
- 动态路由:能够匹配任何请求属性;
- 可以对路由指定 Predicate(断言)和 Filter(过滤器);
- 集成Hystrix的断路器功能;
- 集成 Spring Cloud 服务发现功能;
- 易于编写的 Predicate(断言)和 Filter(过滤器);
- 请求限流功能;
- 支持路径重写。
Spring WebFlux 是 Spring 5.0 引入的新的响应式框架,区别于 Spring MVC,它不需要依赖Servlet API,它是完全异步非阻塞的,并且基于 Reactor 来实现响应式流规范。
在项目中可以使用Gateway做反向代理、鉴权、流量控制、熔断、日志监控等
二、核心概念
1、三大核心
- Route(路由):路由是构建网关的基本模块,它由ID,目标URI,一系列的断言和过滤器组成,如果断言为true则匹配该路由
- Predicate(断言):匹配HTTP请求中的所有内容(例如请求头或请求参数),如果请求与断言相匹配则进行路由
- Filter(过滤):使用过滤器,可以在请求被路由前或者之后对请求进行修改。
2、工作流程
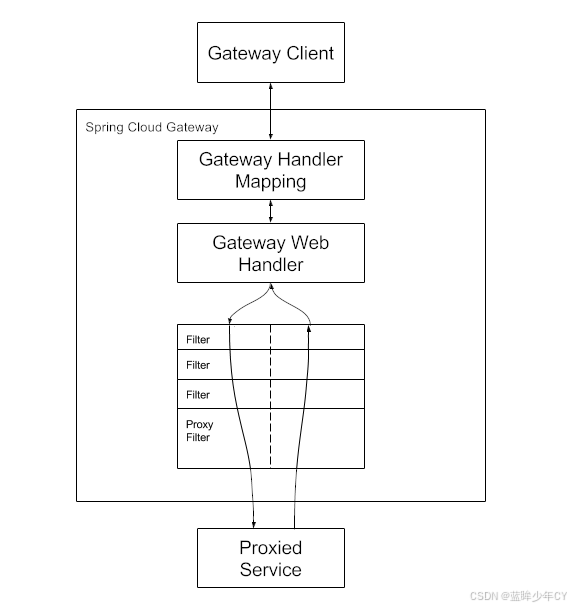
- 客户端向 Spring Cloud Gateway 发出请求。然后在 Gateway Handler Mapping 中找到与请求相匹配的路由,将其发送到 Gateway Web Handler。
- Handler 再通过指定的过滤器链来将请求发送到实际的服务执行业务逻辑,然后返回。
- 过滤器之间用虚线分开是因为过滤器可能会在发送代理请求之前(“pre”)或之后(“post”)执行业务逻辑。
- Filter在“pre”类型的过滤器可以做参数校验、权限校验、流量监控、日志输出、协议转换等,
- 在“post”类型的过滤器中可以做响应内容、响应头的修改,日志的输出,流量监控等有着非常重要的作用。
三、基本案例
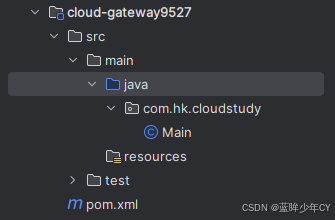
1、新建工程
2、修改pom文件
<?xml version="1.0" encoding="UTF-8"?>
<project xmlns="http://maven.apache.org/POM/4.0.0"
         xmlns:xsi="http://www.w3.org/2001/XMLSchema-instance"
         xsi:schemaLocation="http://maven.apache.org/POM/4.0.0 http://maven.apache.org/xsd/maven-4.0.0.xsd">
    <modelVersion>4.0.0</modelVersion>
    <parent>
        <groupId>com.hk.cloudstudy</groupId>
        <artifactId>SecondSpringCloud</artifactId>
        <version>1.0-SNAPSHOT</version>
    </parent>

    <groupId>com.hk</groupId>
    <artifactId>cloud-gateway9527</artifactId>

    <properties>
        <maven.compiler.source>8</maven.compiler.source>
        <maven.compiler.target>8</maven.compiler.target>
        <project.build.sourceEncoding>UTF-8</project.build.sourceEncoding>
    </properties>

    <dependencies>
        <!--gateway-->
        <dependency>
            <groupId>org.springframework.cloud</groupId>
            <artifactId>spring-cloud-starter-gateway</artifactId>
        </dependency>
        <!--eureka-client-->
        <dependency>
            <groupId>org.springframework.cloud</groupId>
            <artifactId>spring-cloud-starter-netflix-eureka-client</artifactId>
        </dependency>

        <!--一般基础配置类-->
        <dependency>
            <groupId>org.springframework.boot</groupId>
            <artifactId>spring-boot-devtools</artifactId>
            <scope>runtime</scope>
            <optional>true</optional>
        </dependency>
        <dependency>
            <groupId>org.projectlombok</groupId>
            <artifactId>lombok</artifactId>
            <optional>true</optional>
        </dependency>
        <dependency>
            <groupId>org.springframework.boot</groupId>
            <artifactId>spring-boot-starter-test</artifactId>
            <scope>test</scope>
        </dependency>
    </dependencies>

</project>
3、添加配置文件
server:
  port: 9527

spring:
  application:
    name: cloud-gateway
  cloud:
    gateway:
      routes:
        - id: payment_routh #payment_route    #路由的ID,没有固定规则但要求唯一,建议配合服务名
          uri: http://localhost:8001          #匹配后提供服务的路由地址
          predicates:
            - Path=/payment/circuit/**         # 断言,路径相匹配的进行路由

eureka:
  instance:
    hostname: cloud-gateway-service
  client: #服务提供者provider注册进eureka服务列表内
    service-url:
      register-with-eureka: true
      fetch-registry: true
      defaultZone: http://localhost:7001/eureka
4、创建启动类
@SpringBootApplication
@EnableEurekaClient
public class GateWayApp {
    public static void main(String[] args) {
        SpringApplication.run(GateWayApp.class, args);
    }
}
5、测试
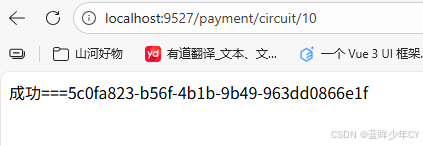
前置条件:启动注册中心Eureka,启动需要访问的服务provide8001,最后启动网关服务9527
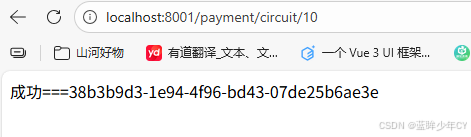
(1)直接访问不使用网关
localhost:8001/payment/circuit/10
(2)使用网关
localhost:9527/payment/circuit/10
6、网关路由配置方式
1)配置文件方式
spring:
  application:
    name: cloud-gateway
  cloud:
    gateway:
      routes:
        - id: payment_routh #payment_route    #路由的ID,没有固定规则但要求唯一,建议配合服务名
          uri: http://localhost:8001          #匹配后提供服务的路由地址
          predicates:
            - Path=/payment/circuit/**         # 断言,路径相匹配的进行路由
2)配置类方式
可以配置多个路由规则,也可以注入多个Bean
@Configuration
public class GateWayConfig {

    @Bean
    public RouteLocator customRouteLocator(RouteLocatorBuilder builder) {
        RouteLocatorBuilder.Builder routes = builder.routes();
        routes.route("payment", r -> r.path("/payment/circuit/**").uri("http://localhost:8001")).build();
        // .....可以配置多个
        return routes.build();
    }
}
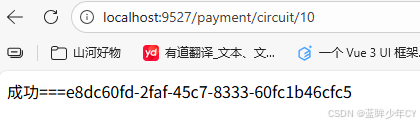
测试:注释掉配置文件,再次访问,也是ok的
四、服务名实现动态路由
如果uri的协议为lb,表示启用Gateway的负载均衡功能
修改配置文件,再次访问localhost:9527/payment/circuit/10也是成功的
server:
  port: 9527

spring:
  application:
    name: cloud-gateway
  cloud:
    gateway:
      discovery:
        locator:
          enabled: true #开启从注册中心动态创建路由的功能,利用微服务名进行路由
      routes:
        - id: payment_routh #payment_route    #路由的ID,没有固定规则但要求唯一,建议配合服务名
#          uri: http://localhost:8001          #匹配后提供服务的路由地址
          uri: lb://CLOUD-PROVIDER-HYSTRIX-PAYMENT        #匹配后提供服务的路由地址
          predicates:
            - Path=/payment/circuit/**         # 断言,路径相匹配的进行路由

eureka:
  instance:
    hostname: cloud-gateway-service
  client: #服务提供者provider注册进eureka服务列表内
    service-url:
      register-with-eureka: true
      fetch-registry: true
      defaultZone: http://localhost:7001/eureka
五、Predicate使用
1、介绍
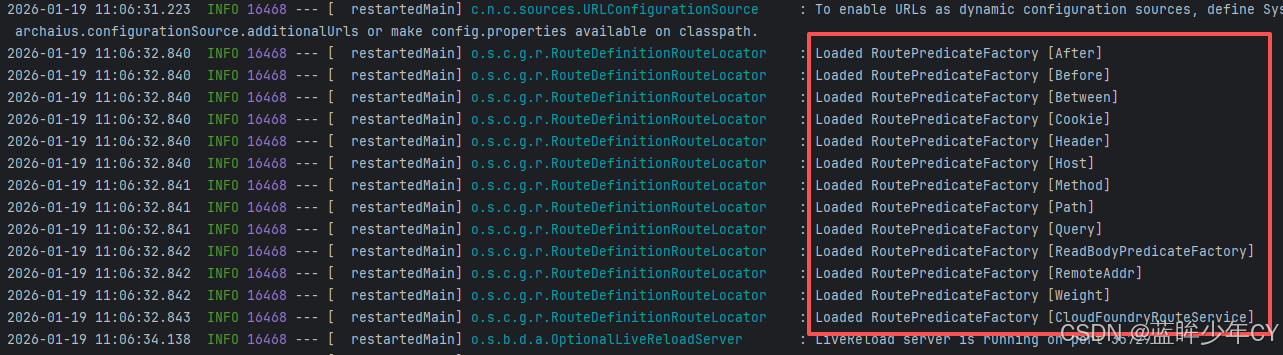
Gateway将路由匹配作为Spring WebFlux HandlerMapping基础架构的一部分。Gateway包括许多内置的Route Predicate工厂。所有这些Predicate都与HTTP请求的不同属性匹配。多个Route Predicate工厂可以进行组合
Gateway 创建 Route 对象时, 使用 RoutePredicateFactory 创建 Predicate 对象,Predicate 对象可以赋值给 Route。 Spring Cloud Gateway 包含许多内置的Route Predicate Factories。
所有这些谓词都匹配HTTP请求的不同属性。多种谓词工厂可以组合,并通过逻辑and。
2、常用Predicate配置
(1) After
简单说明:在该时间之后可以访问服务
spring:
  application:
    name: cloud-gateway
  cloud:
    gateway:
      discovery:
        locator:
          enabled: true #开启从注册中心动态创建路由的功能,利用微服务名进行路由
      routes:
        - id: payment_routh #payment_route    #路由的ID,没有固定规则但要求唯一,建议配合服务名
#          uri: http://localhost:8001          #匹配后提供服务的路由地址
          uri: lb://CLOUD-PROVIDER-HYSTRIX-PAYMENT        #匹配后提供服务的路由地址
          predicates:
            - Path=/payment/circuit/**         # 断言,路径相匹配的进行路由
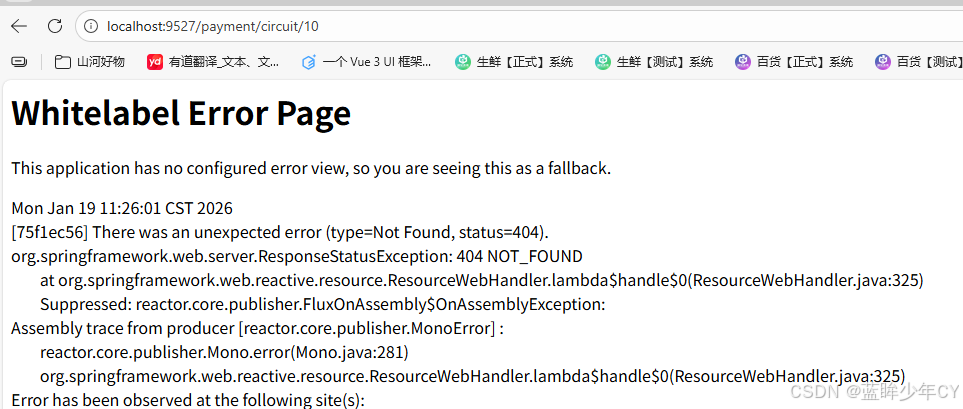
            - After=2026-01-19T11:27:03.685+08:00[Asia/Shanghai]
在2026-01-19T11:27:03.685+08:00[Asia/Shanghai]之前访问会出现错误
(2)Before
简单说明:在该时间之前可以访问服务
例如:在2026-01-19 11点之后 且 2026-01-19 19点之前可以访问
spring:
  application:
    name: cloud-gateway
  cloud:
    gateway:
      discovery:
        locator:
          enabled: true #开启从注册中心动态创建路由的功能,利用微服务名进行路由
      routes:
        - id: payment_routh #payment_route    #路由的ID,没有固定规则但要求唯一,建议配合服务名
#          uri: http://localhost:8001          #匹配后提供服务的路由地址
          uri: lb://CLOUD-PROVIDER-HYSTRIX-PAYMENT        #匹配后提供服务的路由地址
          predicates:
            - Path=/payment/circuit/**         # 断言,路径相匹配的进行路由
            - After=2026-01-19T11:00:00.685+08:00[Asia/Shanghai]
- Before=2026-01-19T19:00:00.685+08:00[Asia/Shanghai](3)Between
简单说明:在该时间段之间可以访问服务
例如:在2026-01-19 11点之后 且 2026-01-19 19点之前可以访问
spring:
  application:
    name: cloud-gateway
  cloud:
    gateway:
      discovery:
        locator:
          enabled: true #开启从注册中心动态创建路由的功能,利用微服务名进行路由
      routes:
        - id: payment_routh #payment_route    #路由的ID,没有固定规则但要求唯一,建议配合服务名
#          uri: http://localhost:8001          #匹配后提供服务的路由地址
          uri: lb://CLOUD-PROVIDER-HYSTRIX-PAYMENT        #匹配后提供服务的路由地址
          predicates:
            - Path=/payment/circuit/**         # 断言,路径相匹配的进行路由
- Between=2026-01-19T11:00:00.685+08:00[Asia/Shanghai],2026-01-19T19:00:00.685+08:00[Asia/Shanghai](4)Cookie
简单说明:指定Cookie里面携带某个值时可以访问服务
例如:Cookie里面必须要带用户名
spring:
  application:
    name: cloud-gateway
  cloud:
    gateway:
      discovery:
        locator:
          enabled: true #开启从注册中心动态创建路由的功能,利用微服务名进行路由
      routes:
        - id: payment_routh #payment_route    #路由的ID,没有固定规则但要求唯一,建议配合服务名
#          uri: http://localhost:8001          #匹配后提供服务的路由地址
          uri: lb://CLOUD-PROVIDER-HYSTRIX-PAYMENT        #匹配后提供服务的路由地址
          predicates:
            - Path=/payment/circuit/**         # 断言,路径相匹配的进行路由
            - Cookie=username, lisi
1)Cookie携带多个值(或关系)
spring:
  cloud:
    gateway:
      routes:
        - id: cookie-multi-value-route
          uri: http://localhost:8081
          predicates:
            - Cookie=userType, admin
            - Cookie=userType, test
            - Cookie=userType, guest
或则
spring:
  cloud:
    gateway:
      routes:
        - id: cookie-multi-value-route
          uri: http://localhost:8081
          predicates:
            # 匹配Cookie键为userType,值为admin、test、guest中的任意一个
            - Cookie=userType, ^(admin|test|guest)$
2)Cookie携带多个值(与关系)
spring:
  cloud:
    gateway:
      routes:
        - id: multi-cookie-route
          uri: http://localhost:8081
          predicates:
            # 必须同时满足:Cookie包含token=abc123 且 userId=1001
            - Cookie=token, abc123
- Cookie=userId, 1001(5)Header
简单说明:请求头携带某个值时可以访问服务
例如:
spring:
  application:
    name: cloud-gateway
  cloud:
    gateway:
      discovery:
        locator:
          enabled: true #开启从注册中心动态创建路由的功能,利用微服务名进行路由
      routes:
        - id: payment_routh #payment_route    #路由的ID,没有固定规则但要求唯一,建议配合服务名
#          uri: http://localhost:8001          #匹配后提供服务的路由地址
          uri: lb://CLOUD-PROVIDER-HYSTRIX-PAYMENT        #匹配后提供服务的路由地址
          predicates:
            - Path=/payment/circuit/**         # 断言,路径相匹配的进行路由
- Header=X-Request-Id, \d+ # 请求头要有X-Request-Id属性并且值为整数的正则表达式(6)Host
说明:限制某些地址才能访问,多个用逗号分隔,支持Ant风格
spring:
  application:
    name: cloud-gateway
  cloud:
    gateway:
      discovery:
        locator:
          enabled: true #开启从注册中心动态创建路由的功能,利用微服务名进行路由
      routes:
        - id: payment_routh #payment_route    #路由的ID,没有固定规则但要求唯一,建议配合服务名
#          uri: http://localhost:8001          #匹配后提供服务的路由地址
          uri: lb://CLOUD-PROVIDER-HYSTRIX-PAYMENT        #匹配后提供服务的路由地址
          predicates:
            - Path=/payment/circuit/**         # 断言,路径相匹配的进行路由
            - Host=**.hk.com,**.test.com
(7)Method
说明:限制某些请求方式才能访问
例如:只允许get请求访问
spring:
  application:
    name: cloud-gateway
  cloud:
    gateway:
      discovery:
        locator:
          enabled: true #开启从注册中心动态创建路由的功能,利用微服务名进行路由
      routes:
        - id: payment_routh #payment_route    #路由的ID,没有固定规则但要求唯一,建议配合服务名
#          uri: http://localhost:8001          #匹配后提供服务的路由地址
          uri: lb://CLOUD-PROVIDER-HYSTRIX-PAYMENT        #匹配后提供服务的路由地址
          predicates:
            - Path=/payment/circuit/**         # 断言,路径相匹配的进行路由
            - Method=GET
(7)Path
说明:路径匹配规则,也是使用最多的一种匹配方式
spring:
  application:
    name: cloud-gateway
  cloud:
    gateway:
      discovery:
        locator:
          enabled: true #开启从注册中心动态创建路由的功能,利用微服务名进行路由
      routes:
        - id: payment_routh #payment_route    #路由的ID,没有固定规则但要求唯一,建议配合服务名
#          uri: http://localhost:8001          #匹配后提供服务的路由地址
          uri: lb://CLOUD-PROVIDER-HYSTRIX-PAYMENT        #匹配后提供服务的路由地址
          predicates:
            - Path=/payment/circuit/**         # 断言,路径相匹配的进行路由
六、过滤器使用
1、常用的过滤器
GatewayFilter Factories
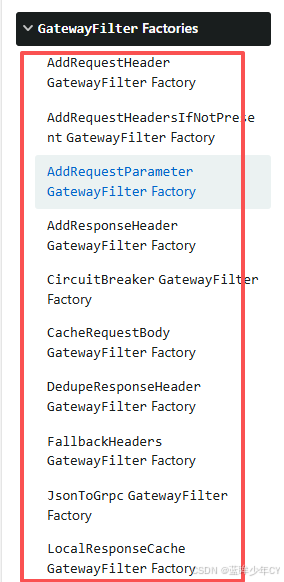
AddRequestHeader:在请求头添加属性
例如:在请求头添加 X-Request-red:blue
spring:
  application:
    name: cloud-gateway
  cloud:
    gateway:
      discovery:
        locator:
          enabled: true #开启从注册中心动态创建路由的功能,利用微服务名进行路由
      routes:
        - id: payment_routh #payment_route    #路由的ID,没有固定规则但要求唯一,建议配合服务名
#          uri: http://localhost:8001          #匹配后提供服务的路由地址
          uri: lb://CLOUD-PROVIDER-HYSTRIX-PAYMENT        #匹配后提供服务的路由地址
          predicates:
            - Path=/payment/circuit/**         # 断言,路径相匹配的进行路由
          filters:
            - AddRequestHeader=X-Request-red, blue
其他的过滤器可以参考官方文档。
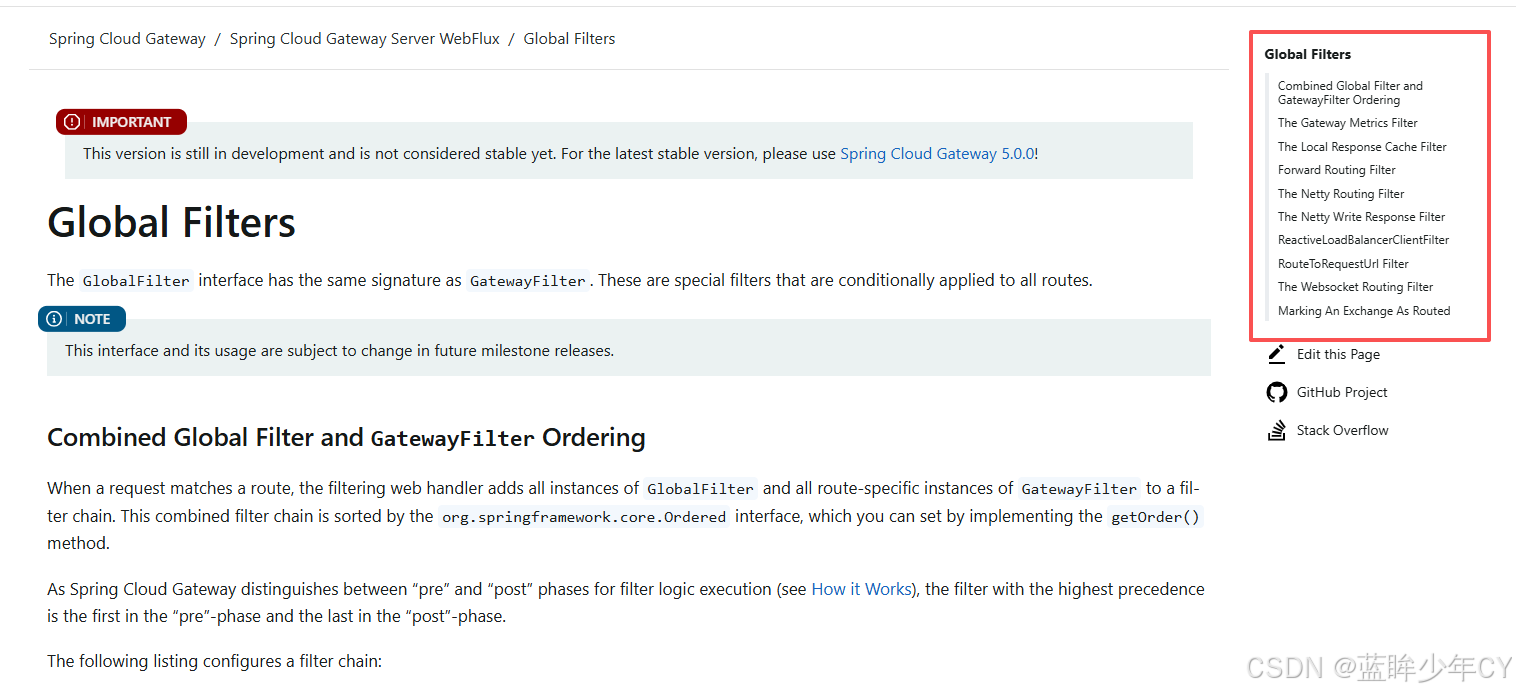
2、全局过滤器
3、自定义过滤器
自定义过滤器主要实现GlobalFilter, Ordered接口
@Component
public class MyLogGateWayFilter implements GlobalFilter, Ordered {
    @Override
    public Mono<Void> filter(ServerWebExchange exchange, GatewayFilterChain chain) {
        System.out.println("进入自定义过滤器...");
        String name = exchange.getRequest().getQueryParams().getFirst("name");
        if (StringUtils.isEmpty(name)){
            System.out.println("名称不能为空...");
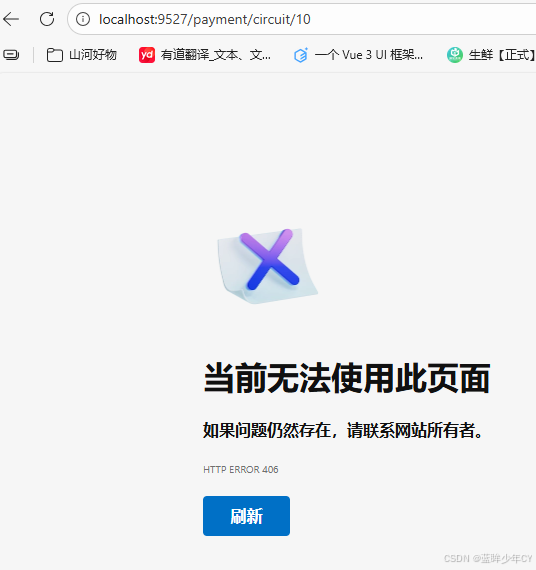
            exchange.getResponse().setStatusCode(HttpStatus.NOT_ACCEPTABLE);
            return exchange.getResponse().setComplete();
        }
        return chain.filter(exchange);
    }

    @Override
    public int getOrder() {
        return 0;
    }
}
测试:


汇聚全球AI编程工具,助力开发者即刻编程。
更多推荐

 19
19 0
0- 0


 已为社区贡献11条内容

所有评论(0)