
docker+jenkins+gitlab实现自定义分支代码自动打包部署
前言
记录jenkins实现自定义分支自动化打包部署java项目
项目前置准备
下载javaDemo代码后上传到gitlab通过gitlab管理代码
操作
jenkins 插件maven Integration 未安装就没有构建一个maven项目这个选项
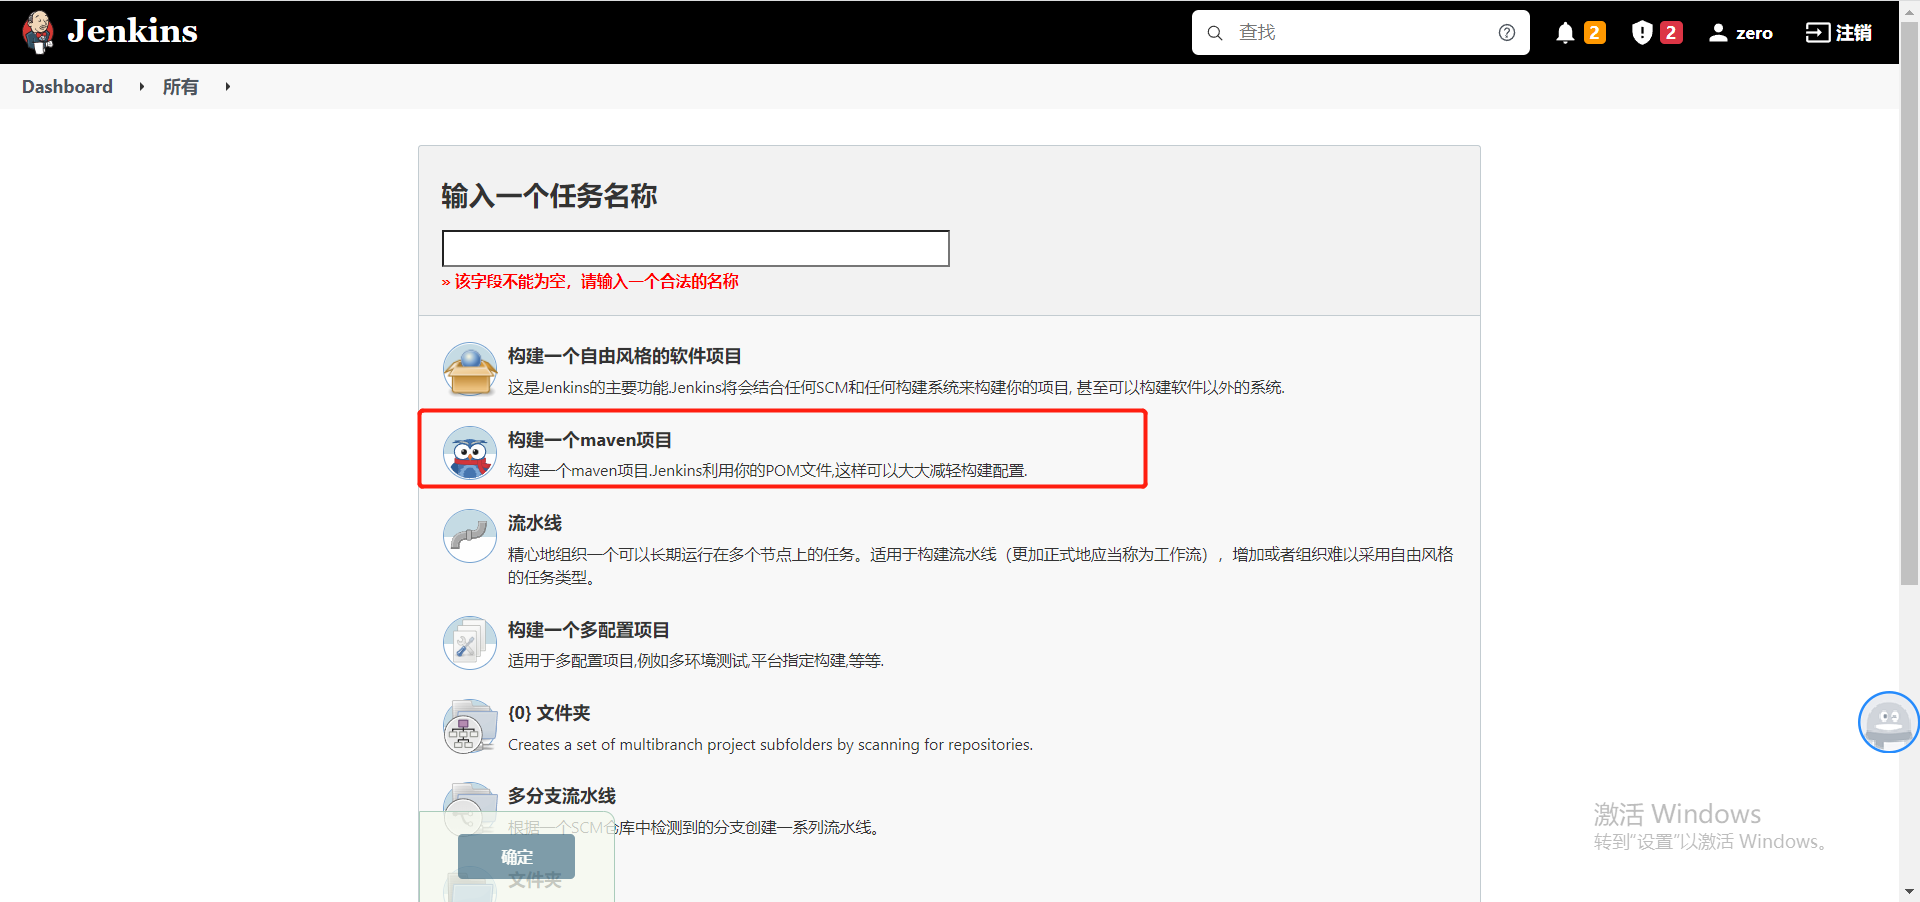
安装插件
maven Integration
Build With Parameters
Post Build task
Publish Over SSH
搜索对应插件名称点击安装 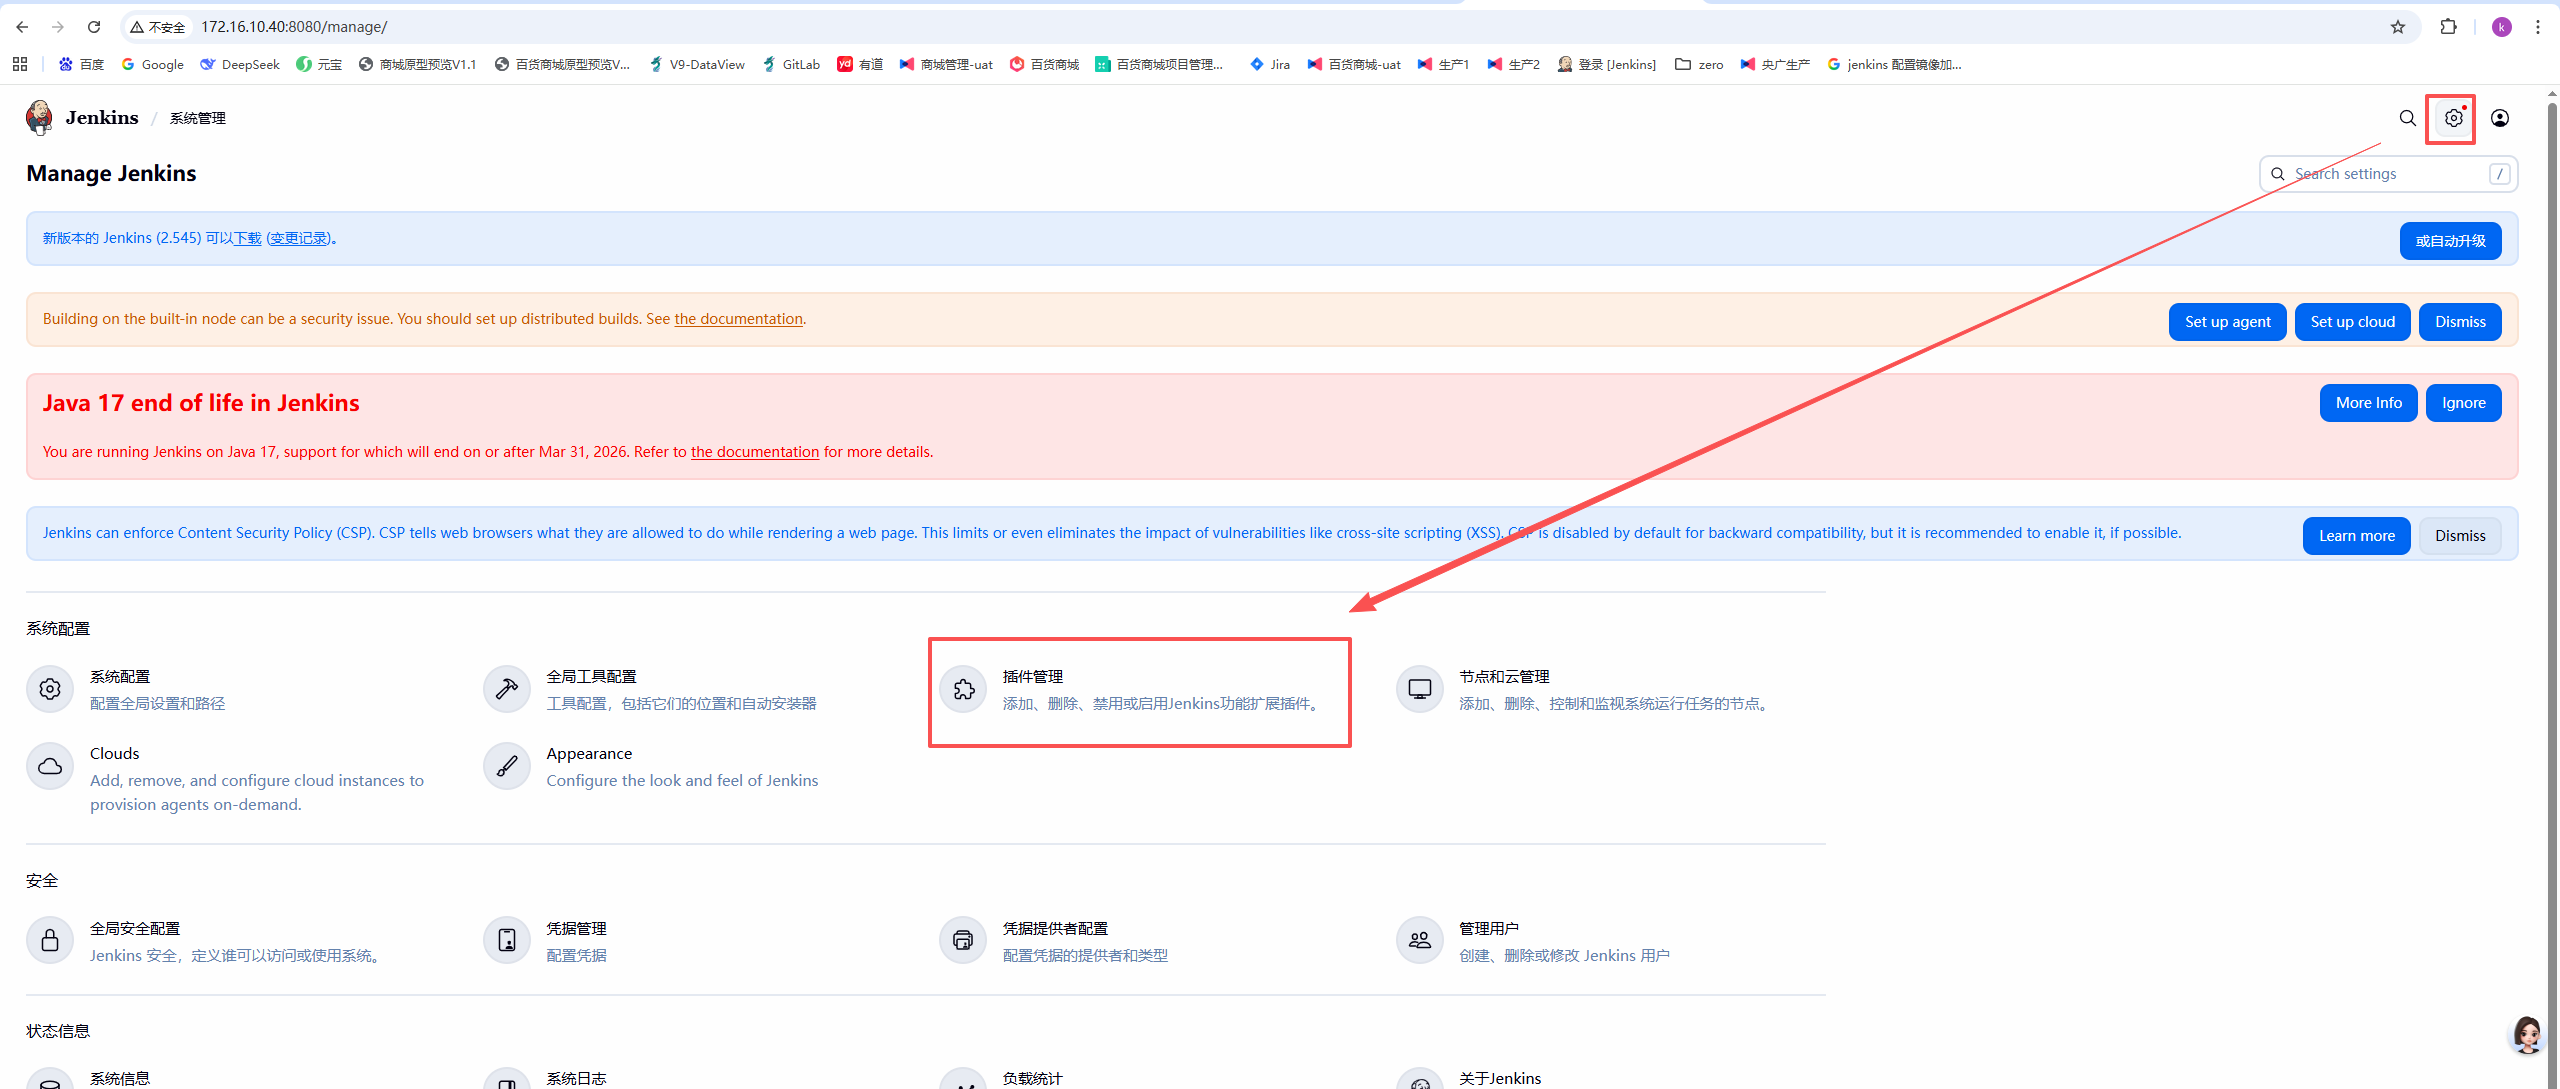
http://172.16.10.40:8080/manage/pluginManager/available
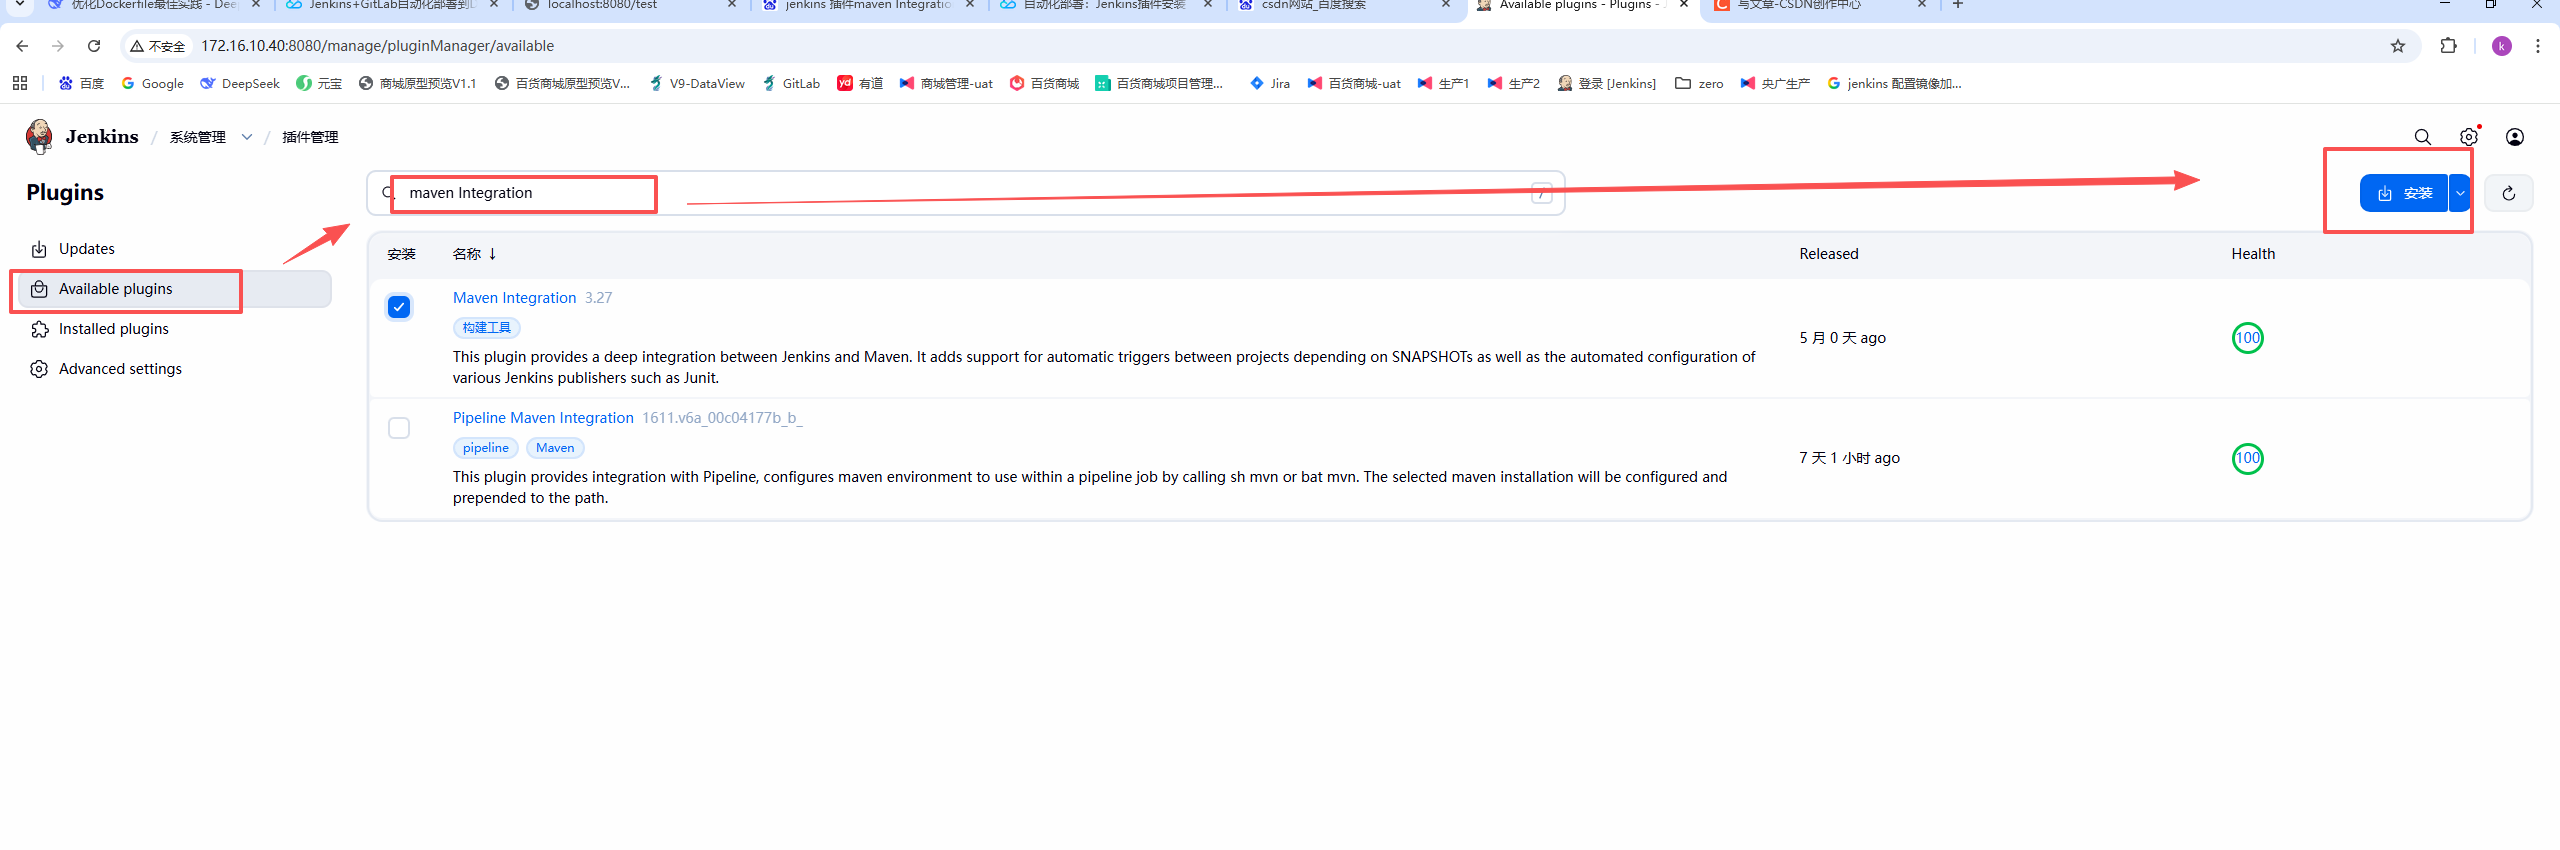
jenkins配置jdk 、git、maven
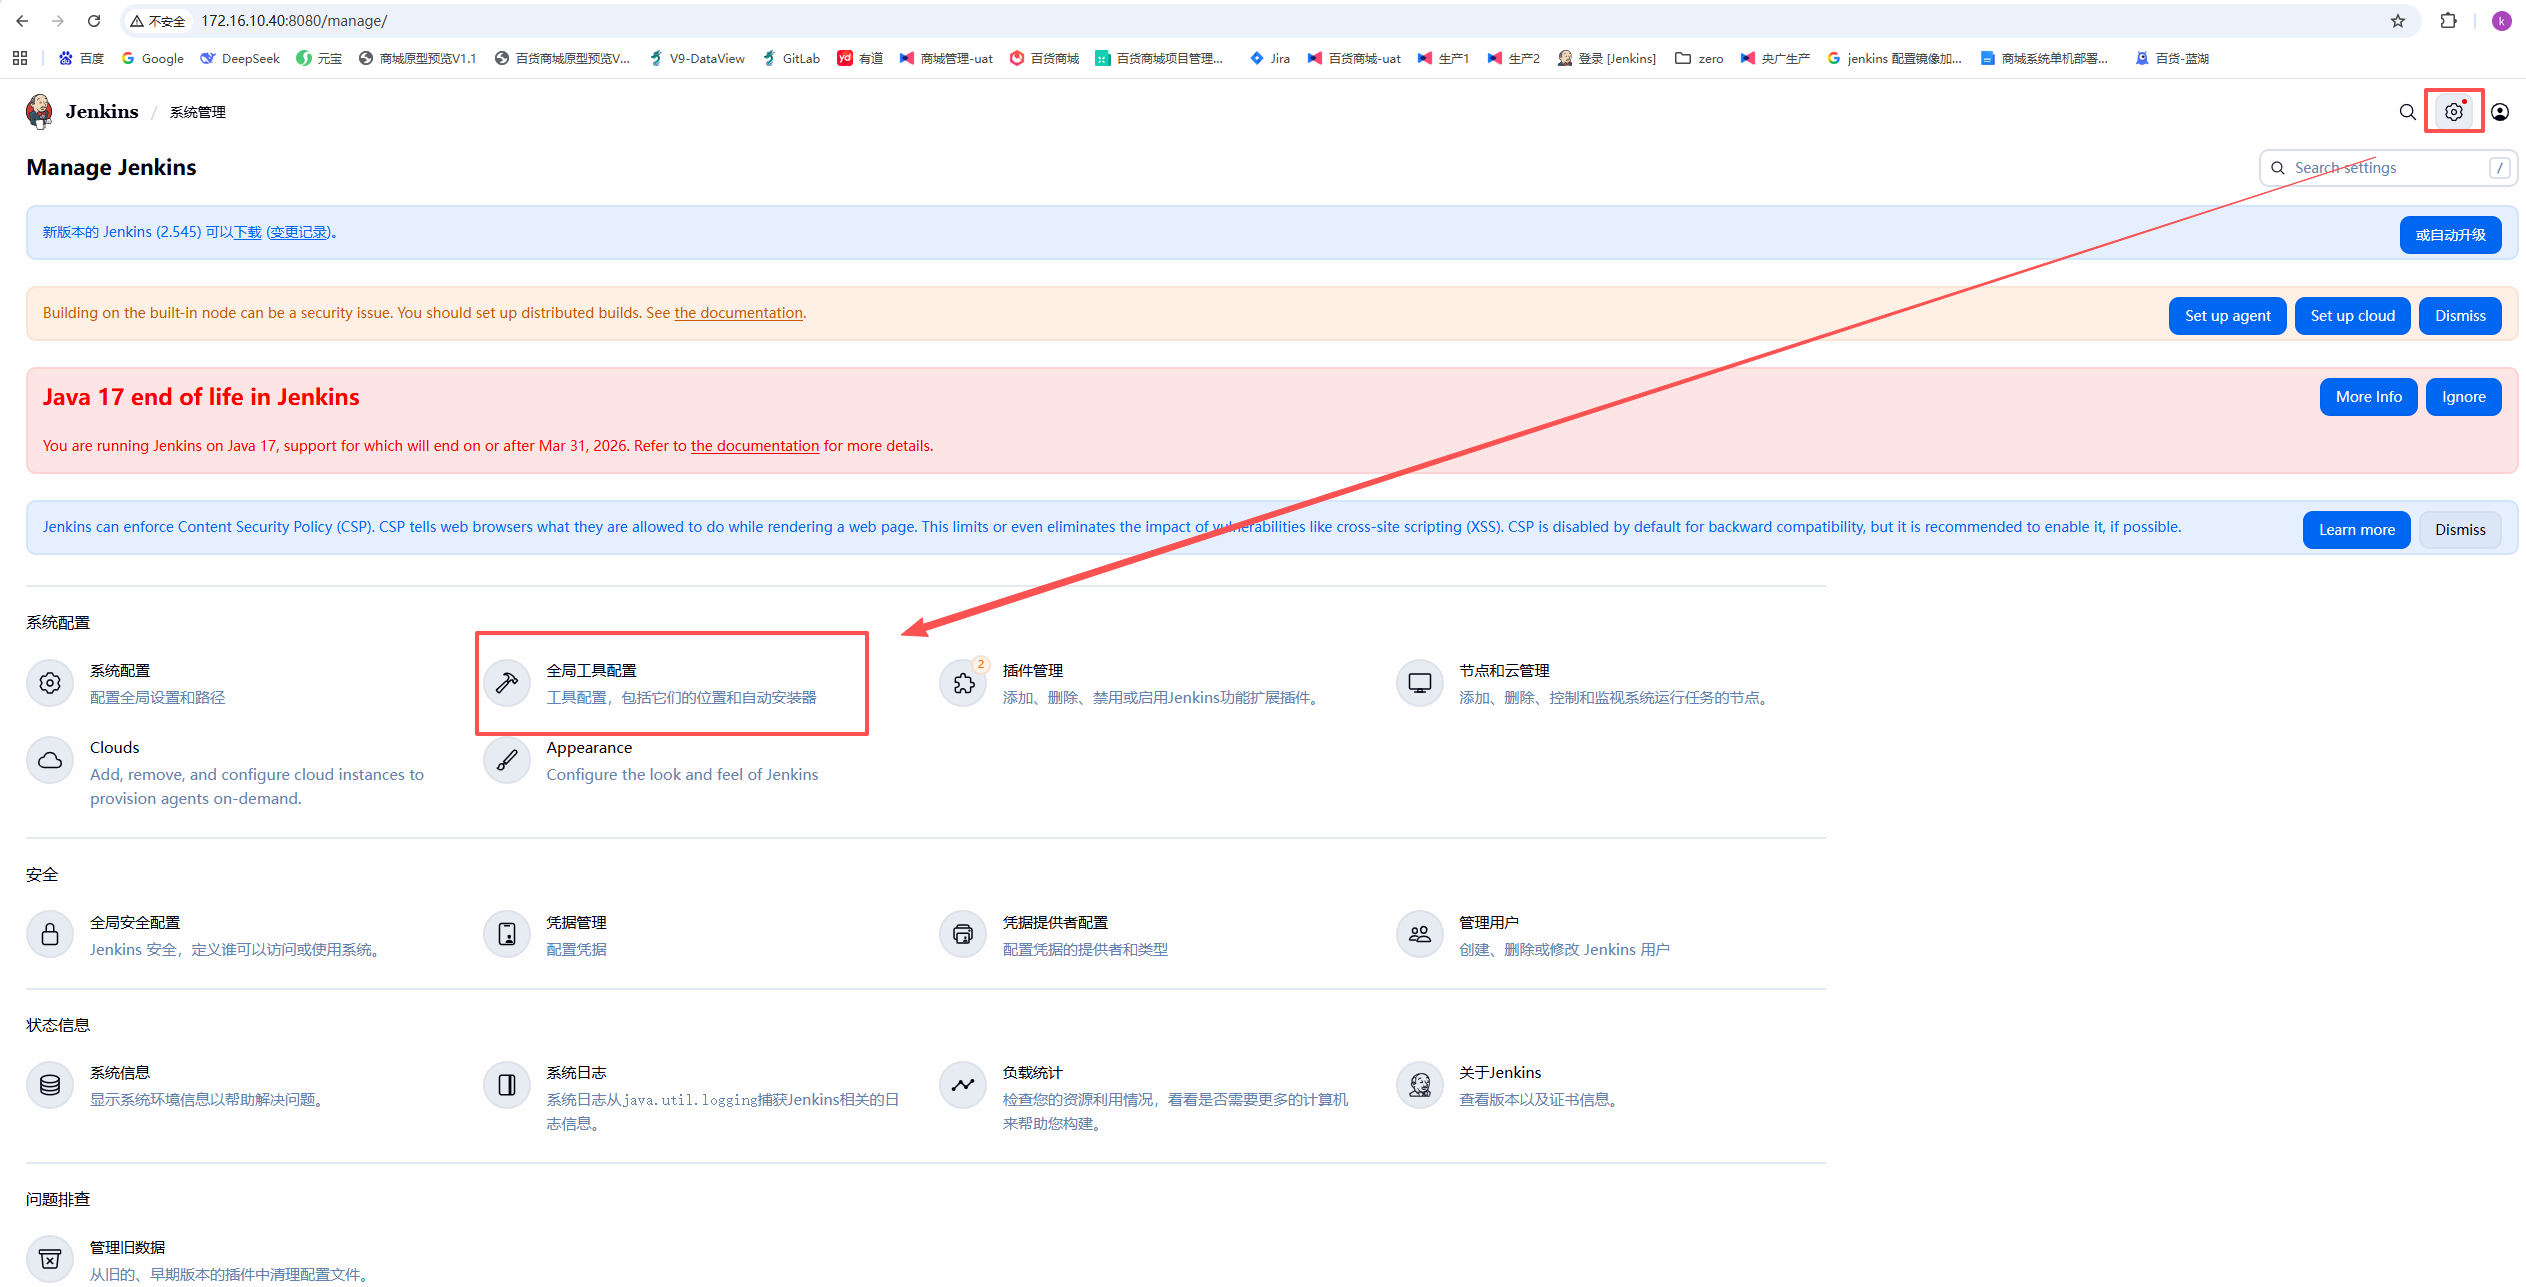
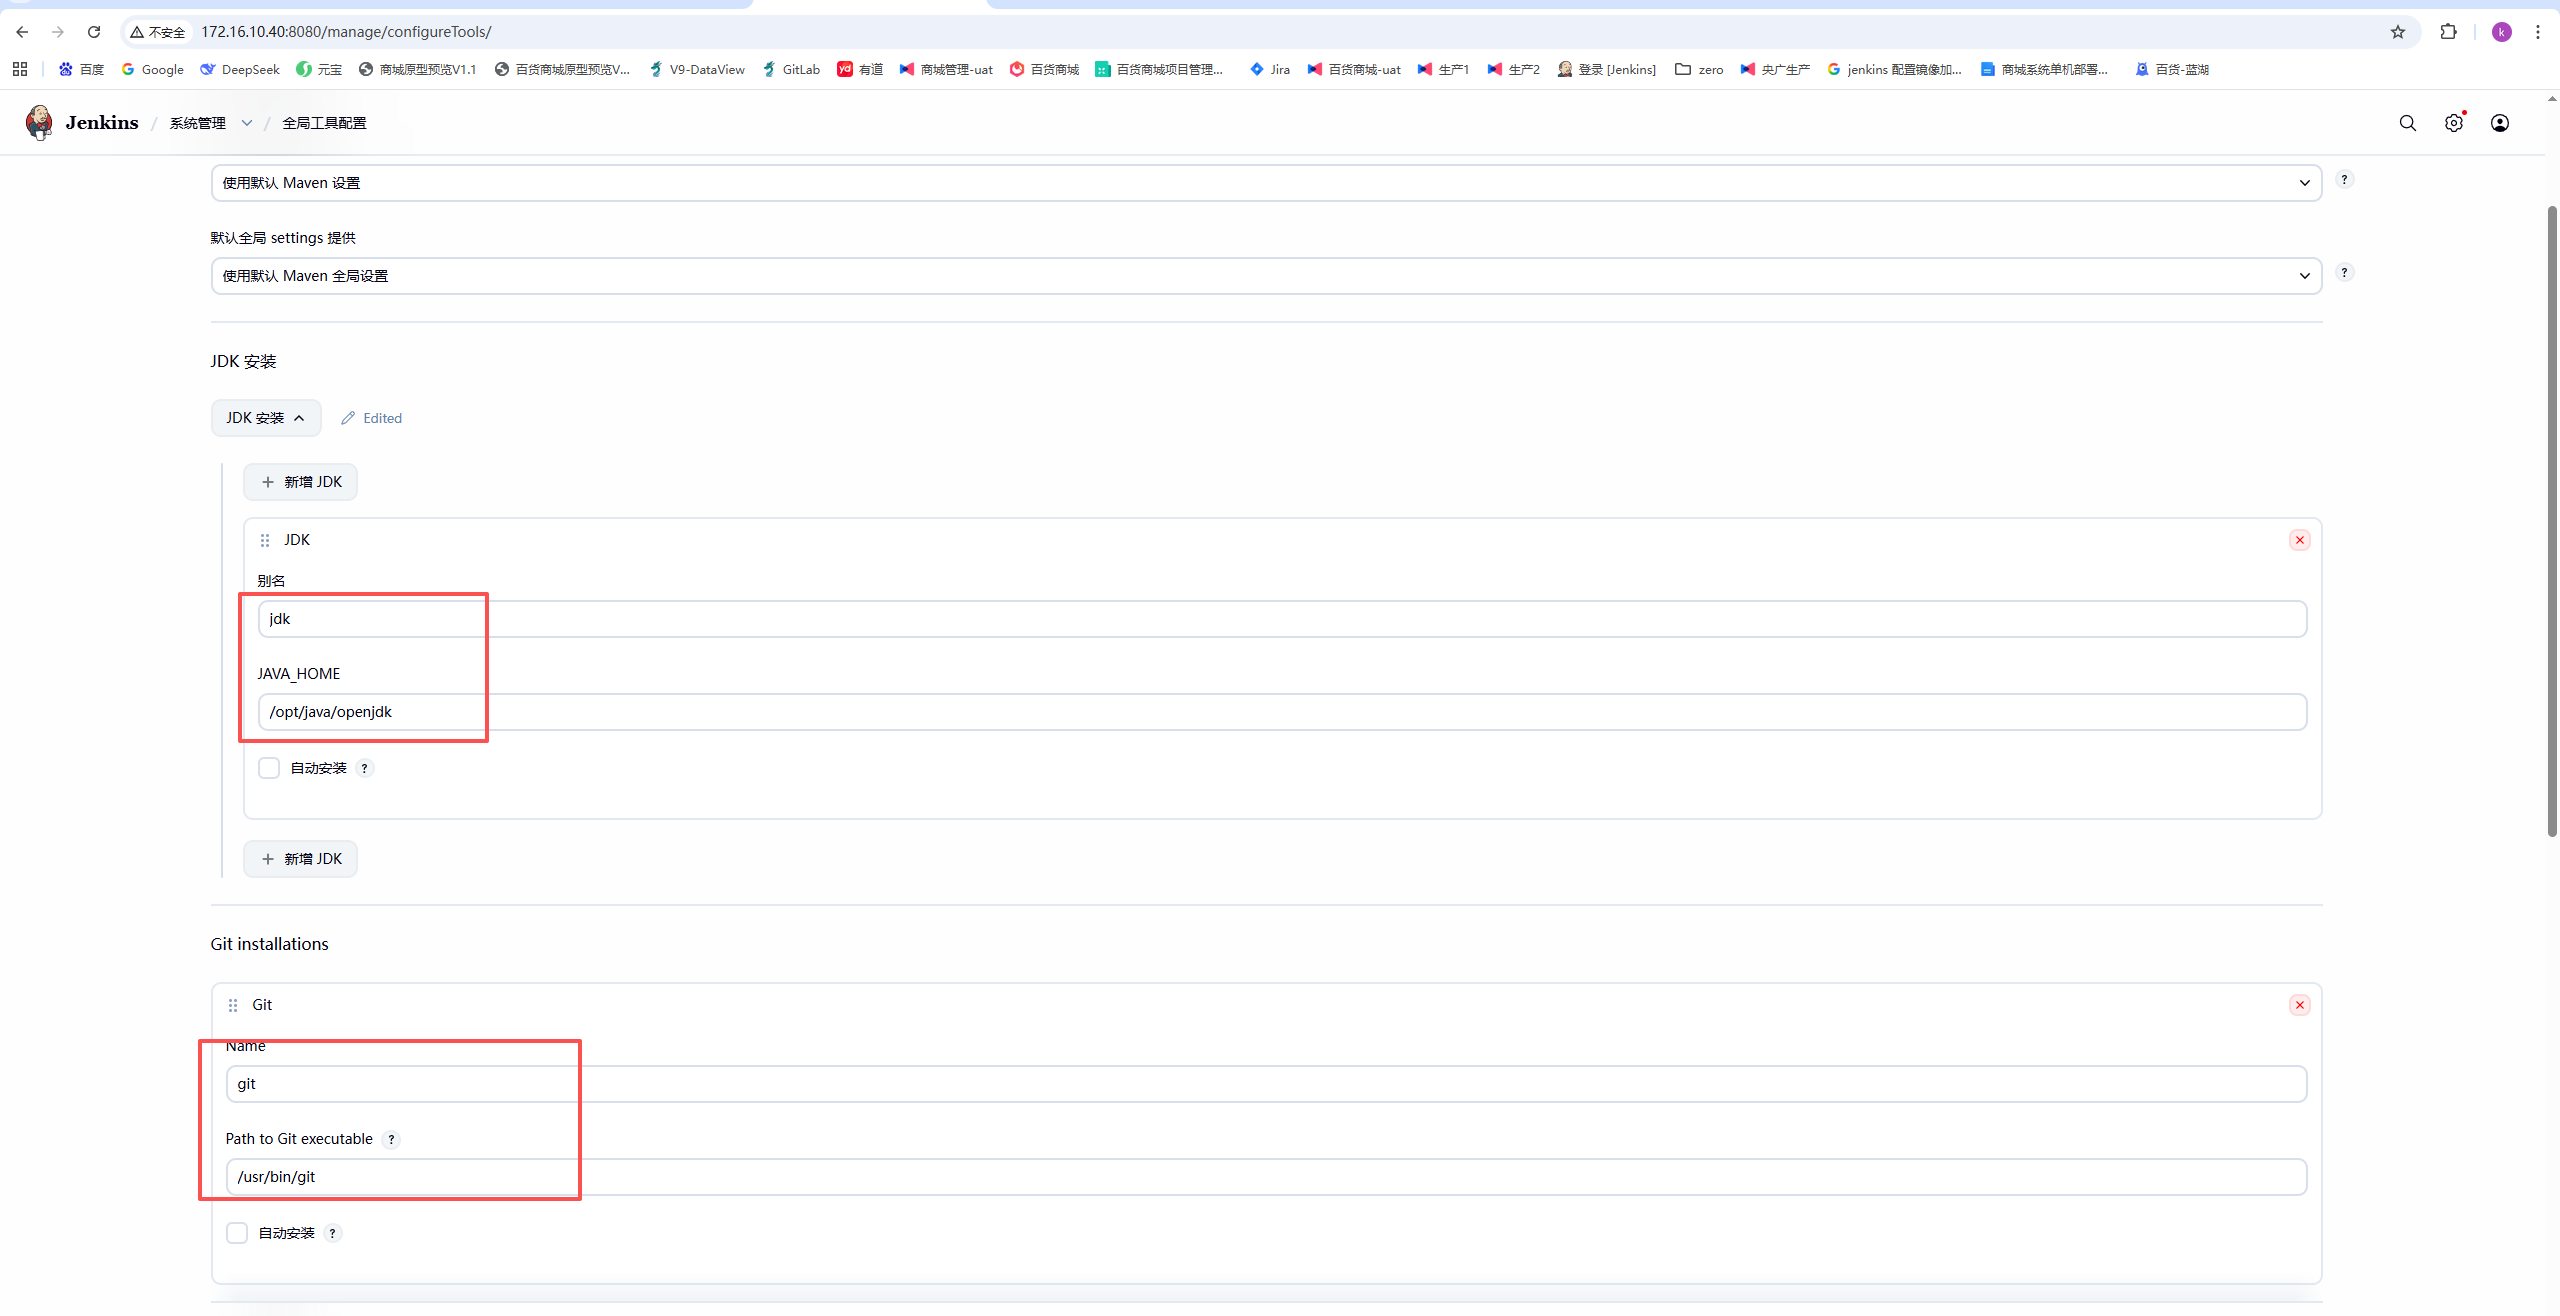
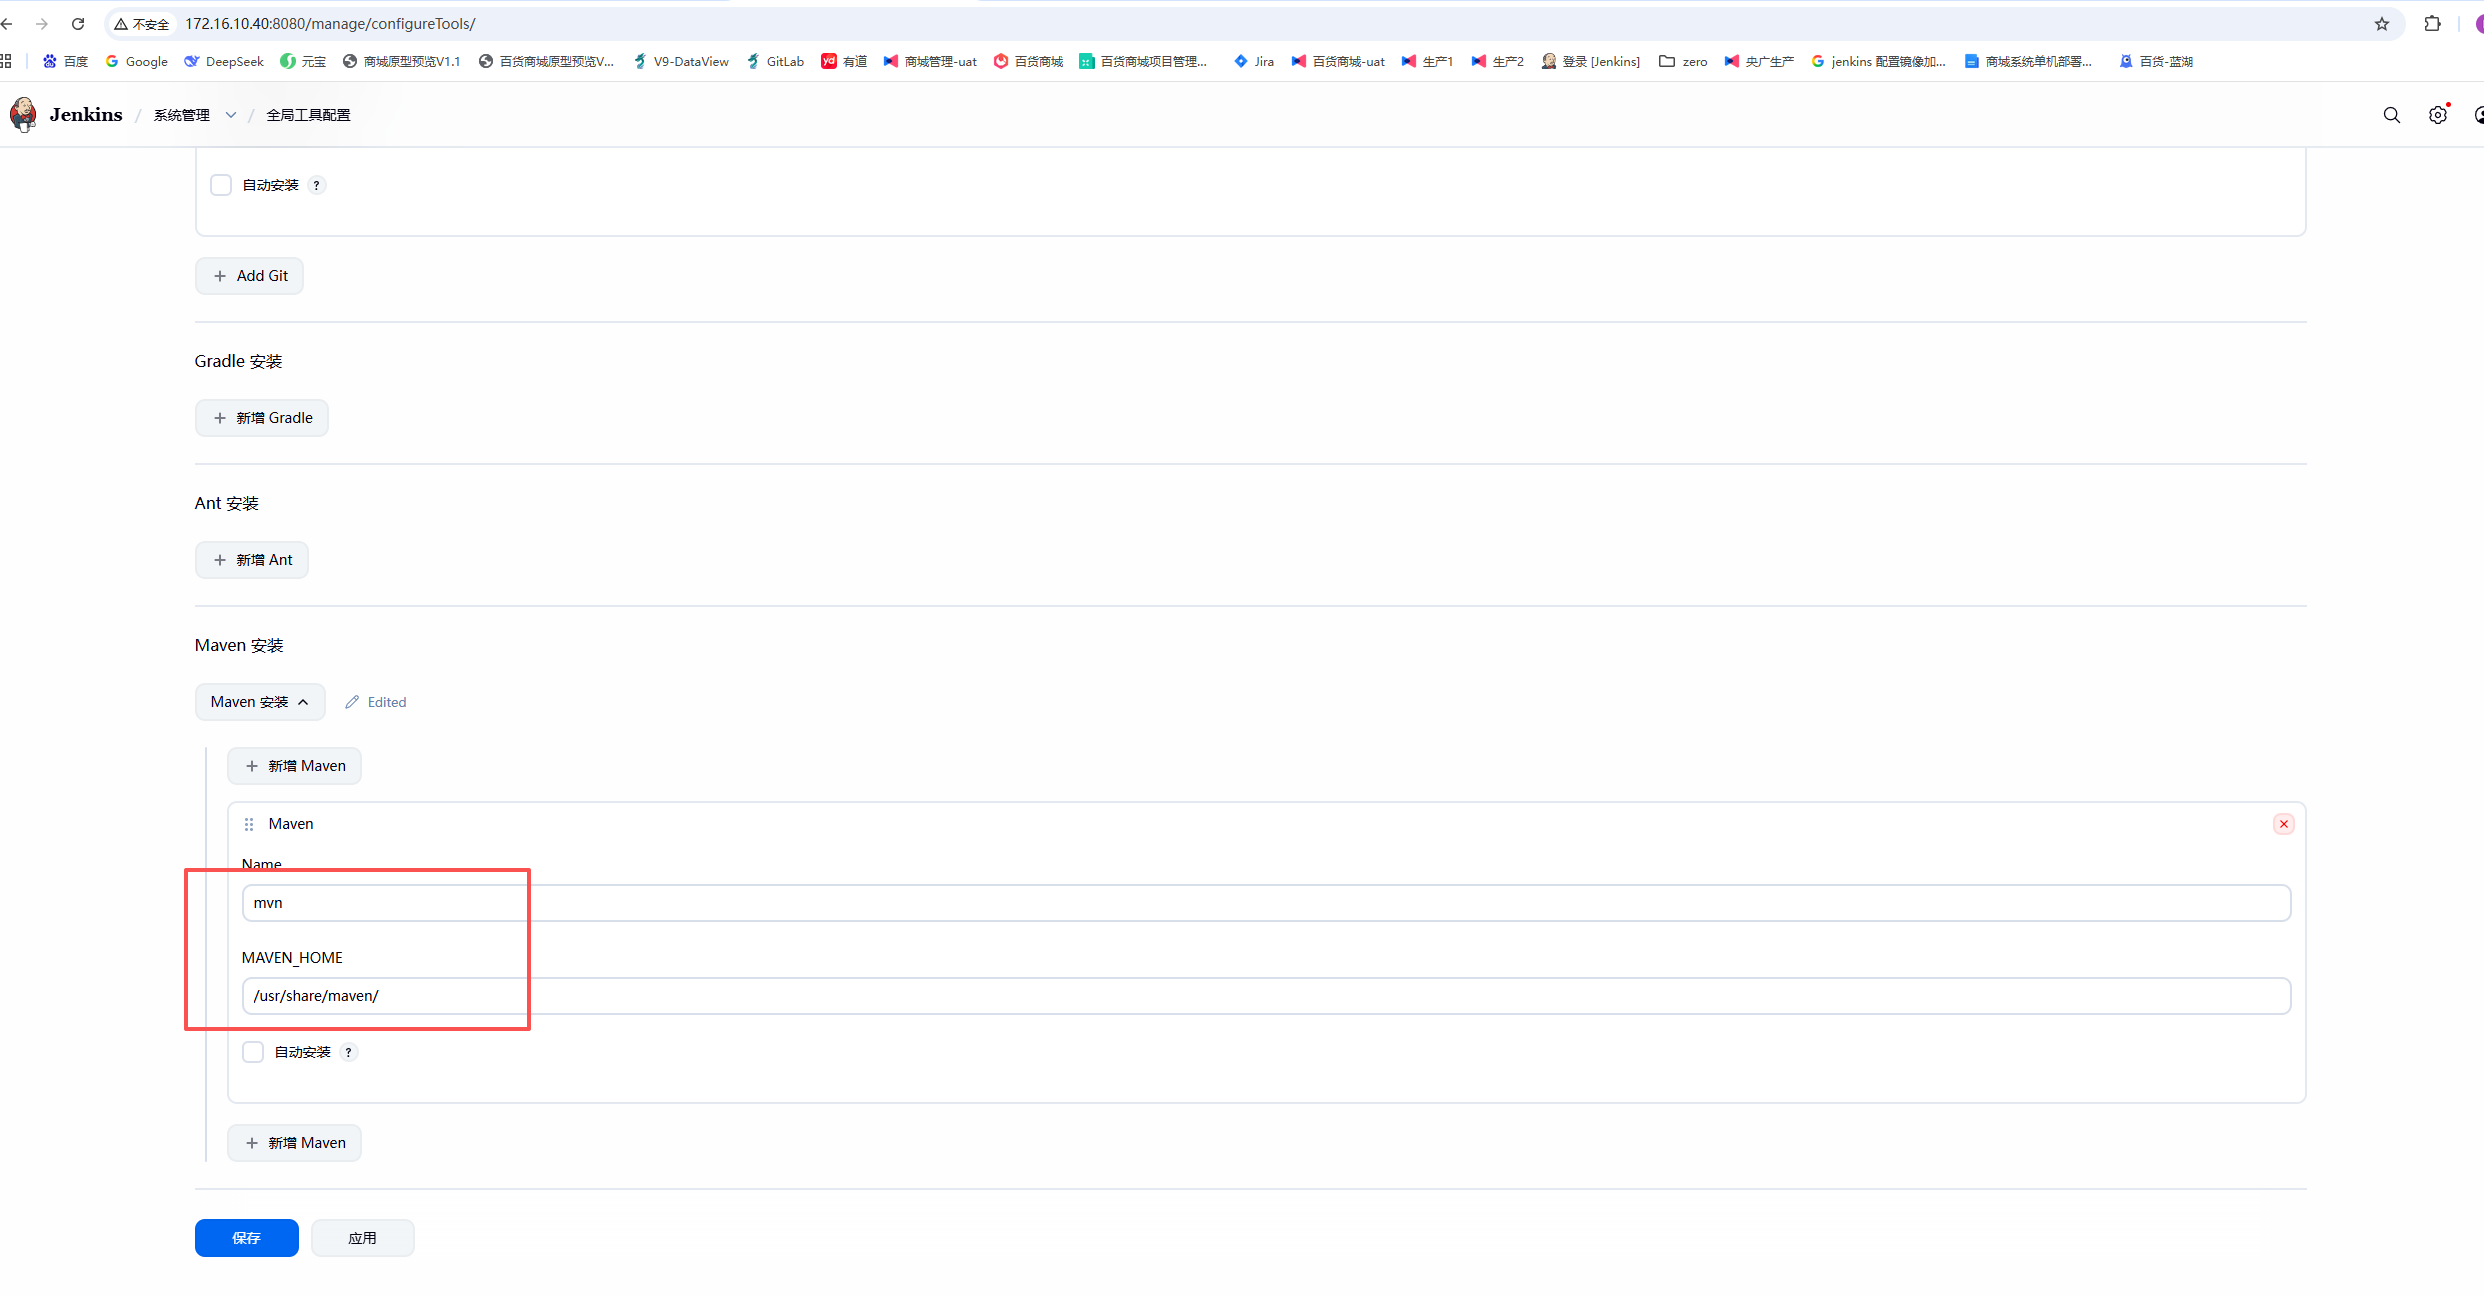
查看jdk、git、maven对应路径方式
进入jenkins容器
docker exec -it jenkins bash

maven没安装执行安装命令
apt update
apt install maven
maven安装后路径在:
/usr/share/maven
==========================跳过==========================================
==========================跳过==========================================
==========================跳过==========================================
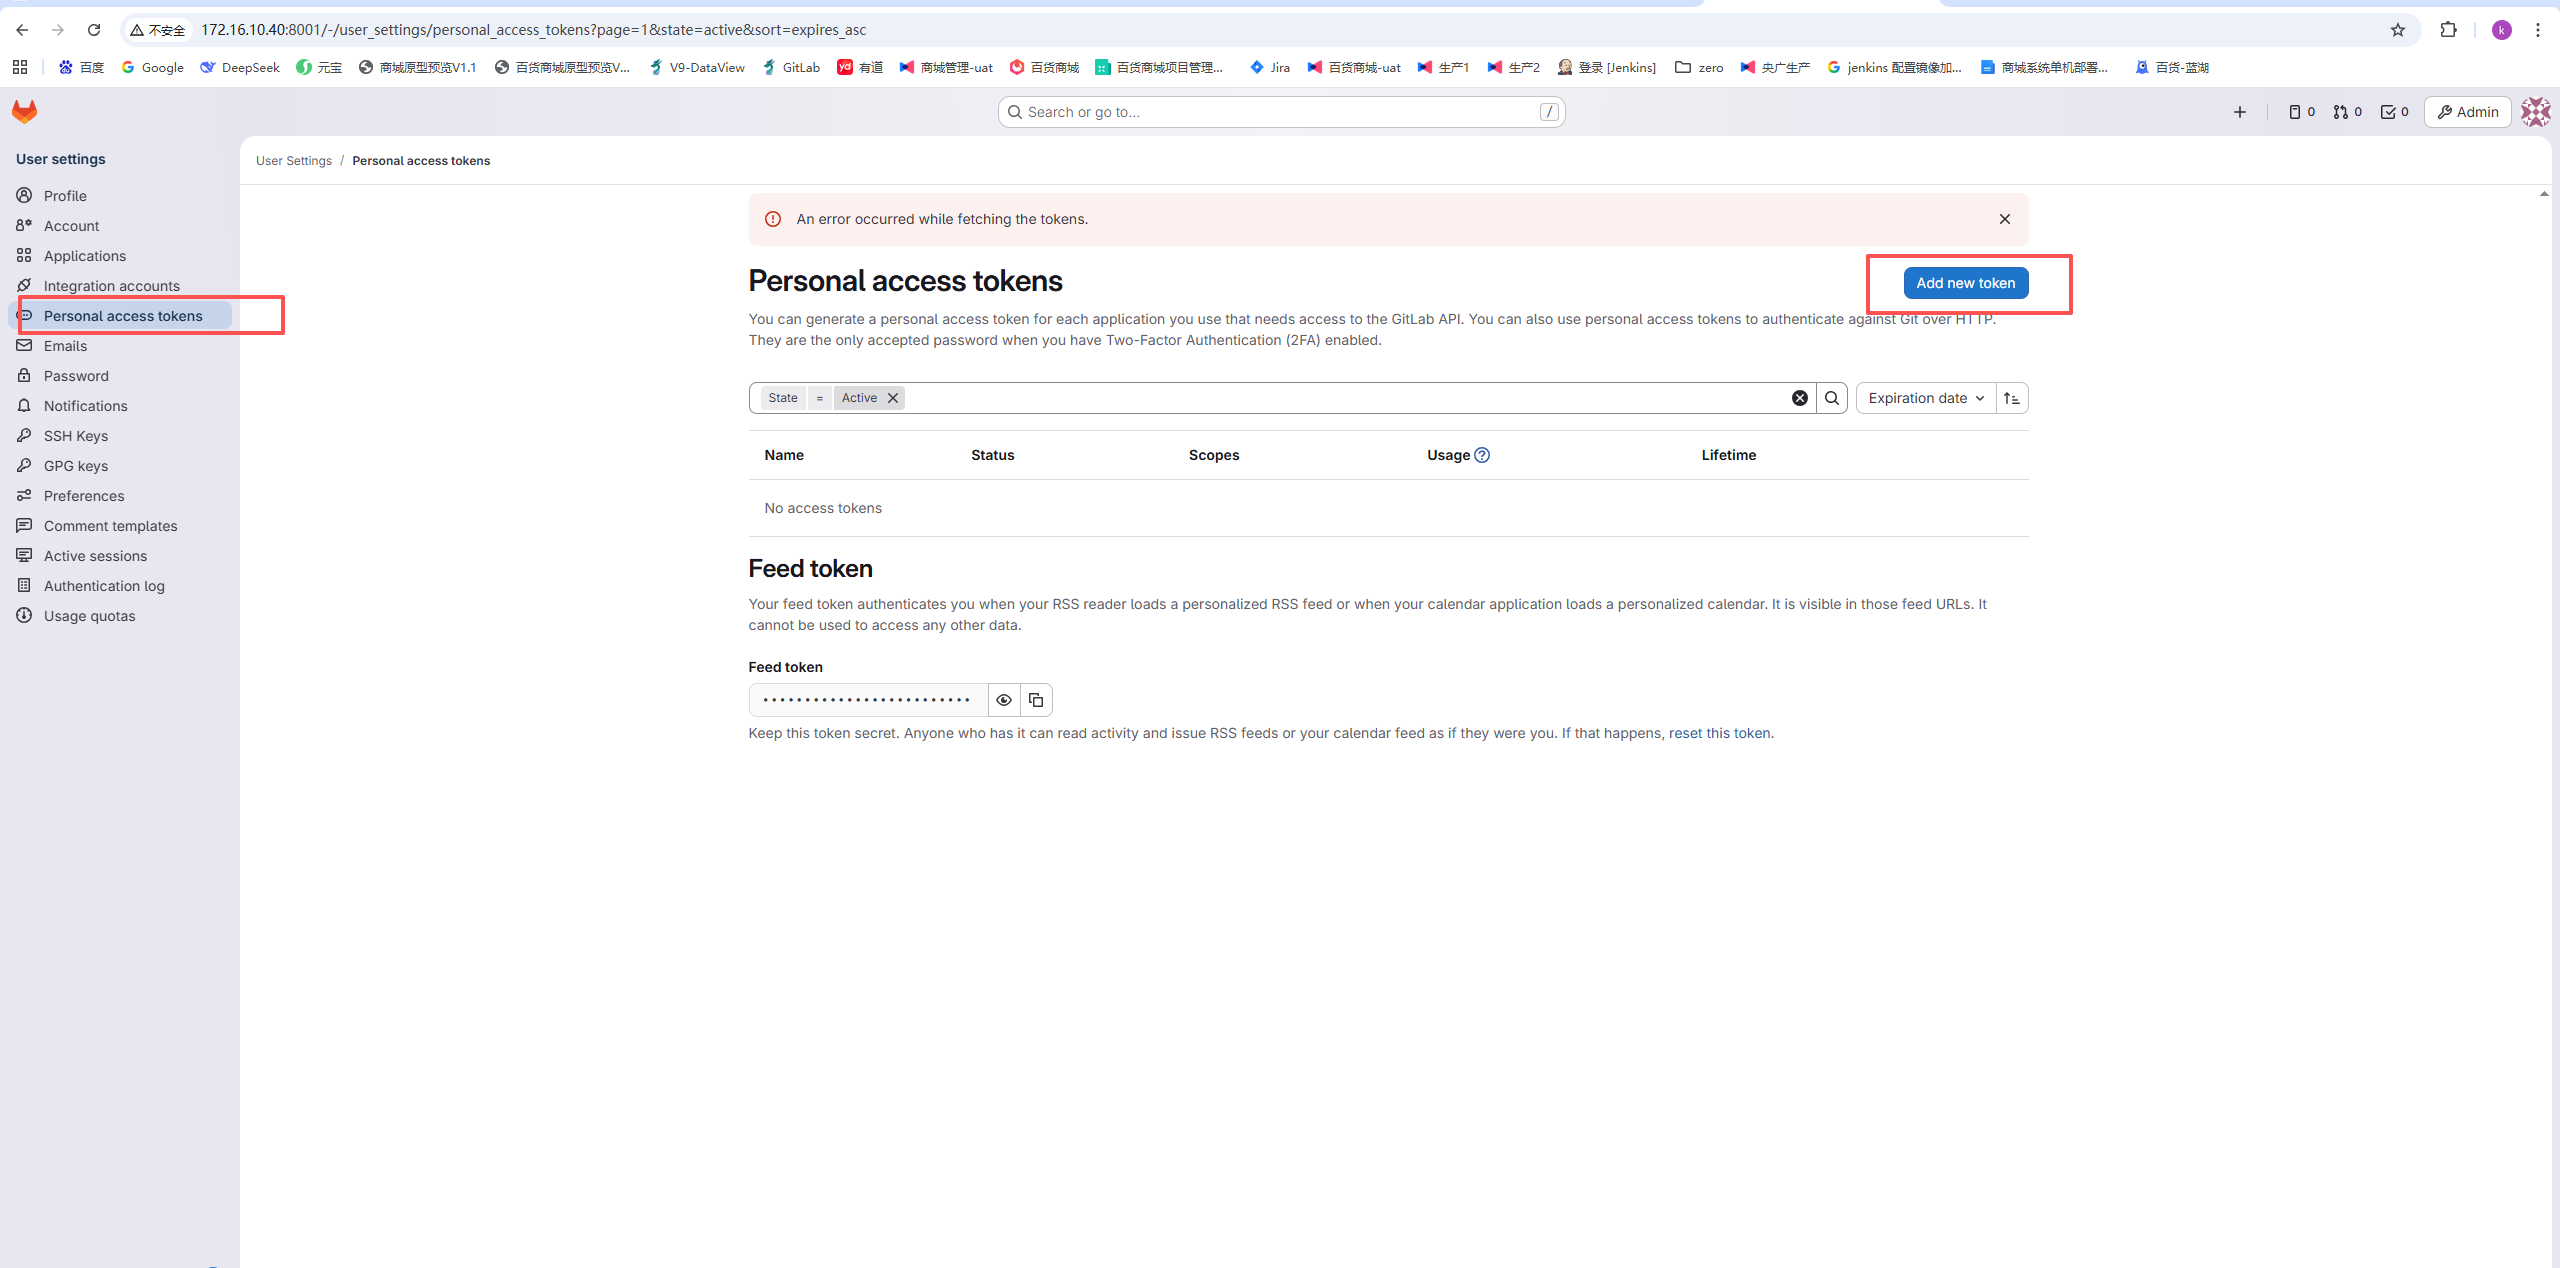
一般的项目需要在 Jenkins 系统中建立2个身份谁凭据,一个是连接 Git 服务器的 SSH 认证,另一个是连接 GitLab 的令牌
1.首先建立一个 SSH 认证
进入jenkins容器:执行命令后操作enter下一步
ssh-keygen -t rsa -b 4096 -C "1169715237@qq.com"
查看公钥
cat /root/.ssh/id_rsa.pub
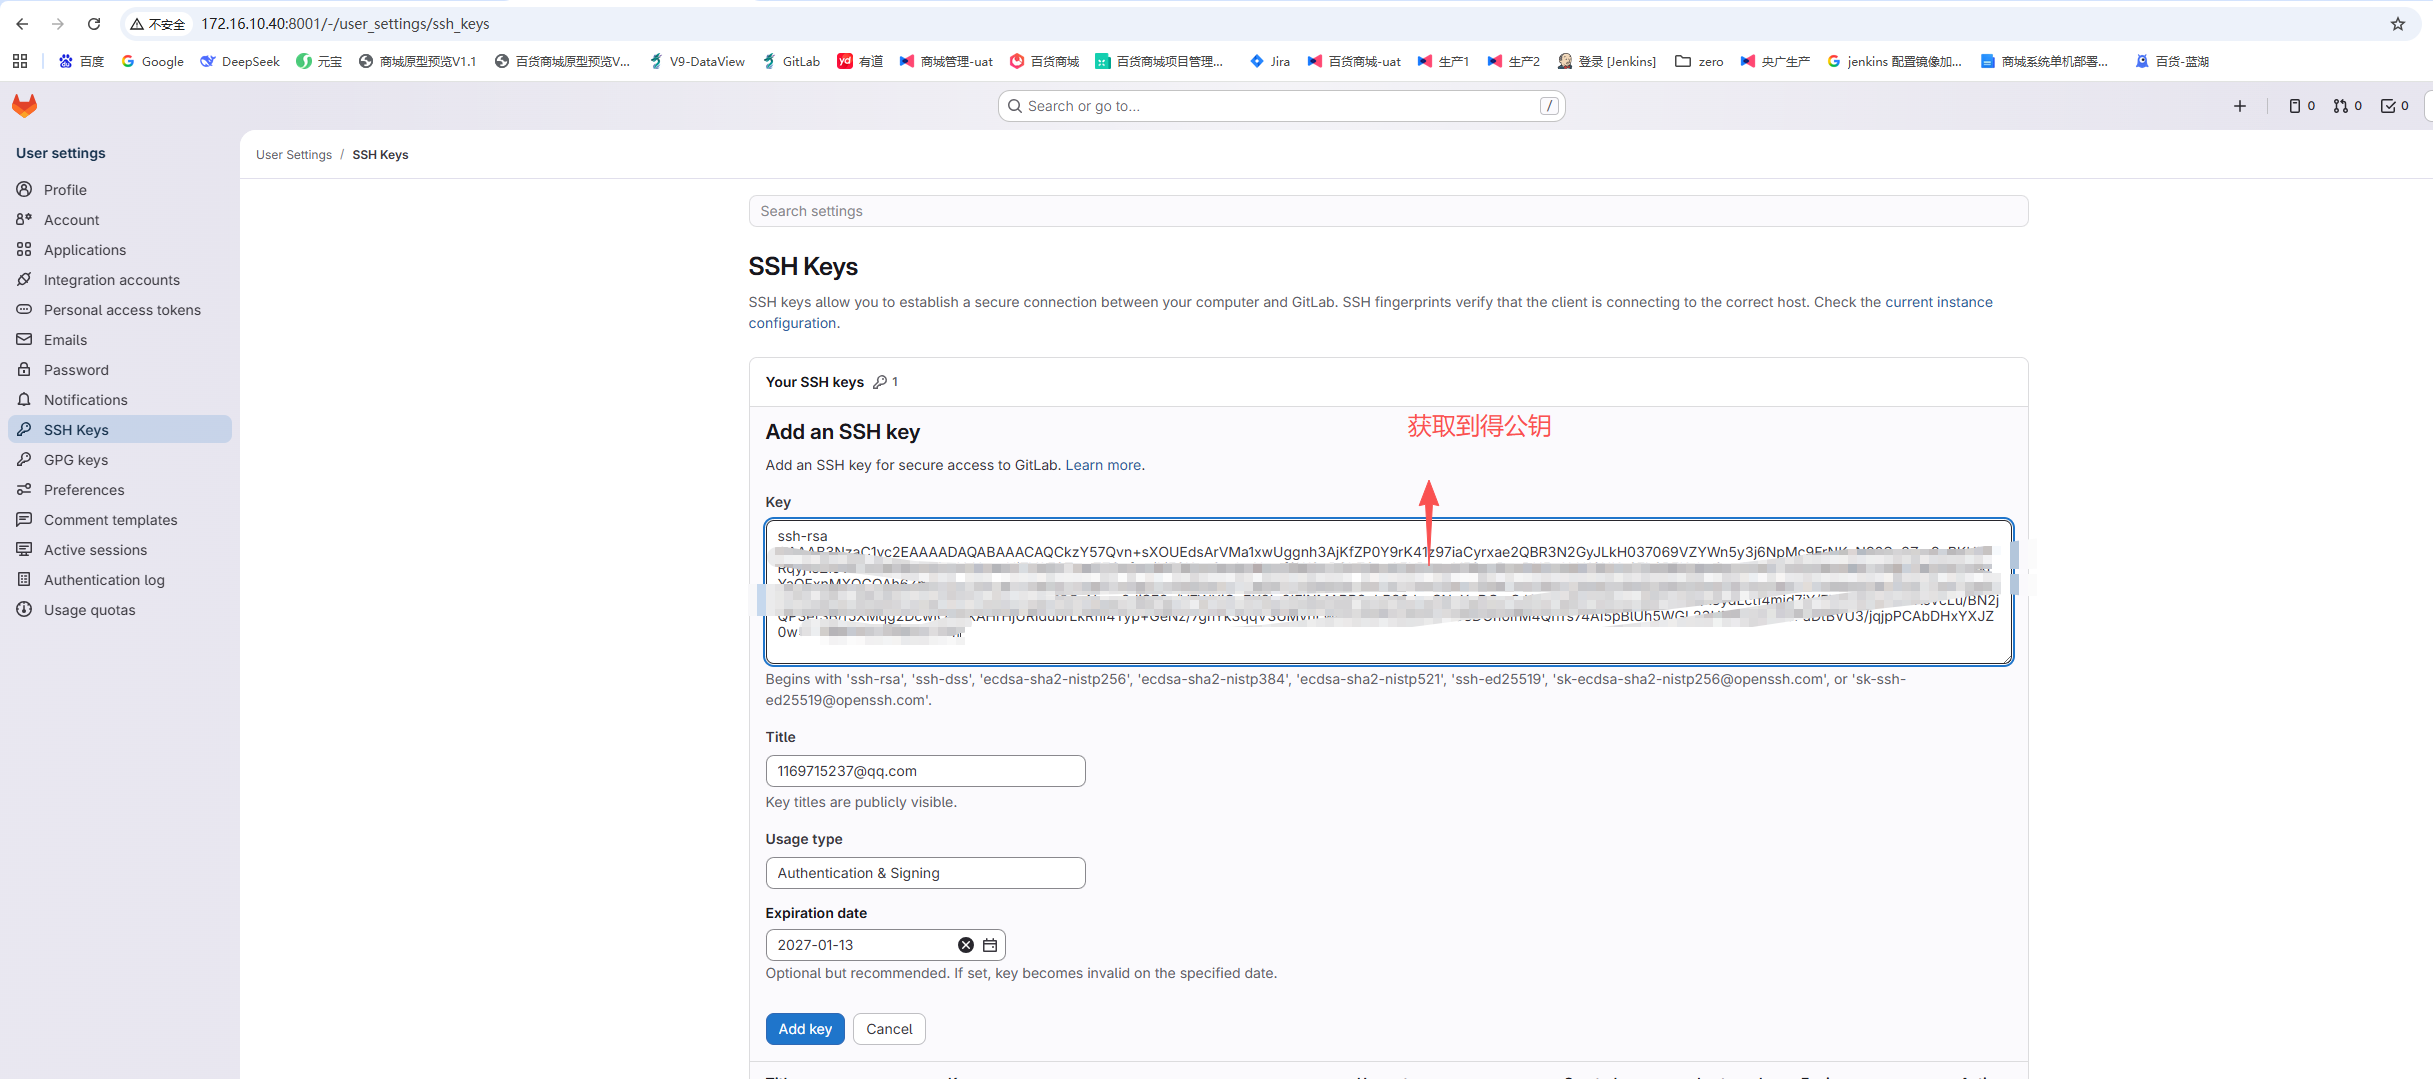
创建连接 GitLab 的令牌
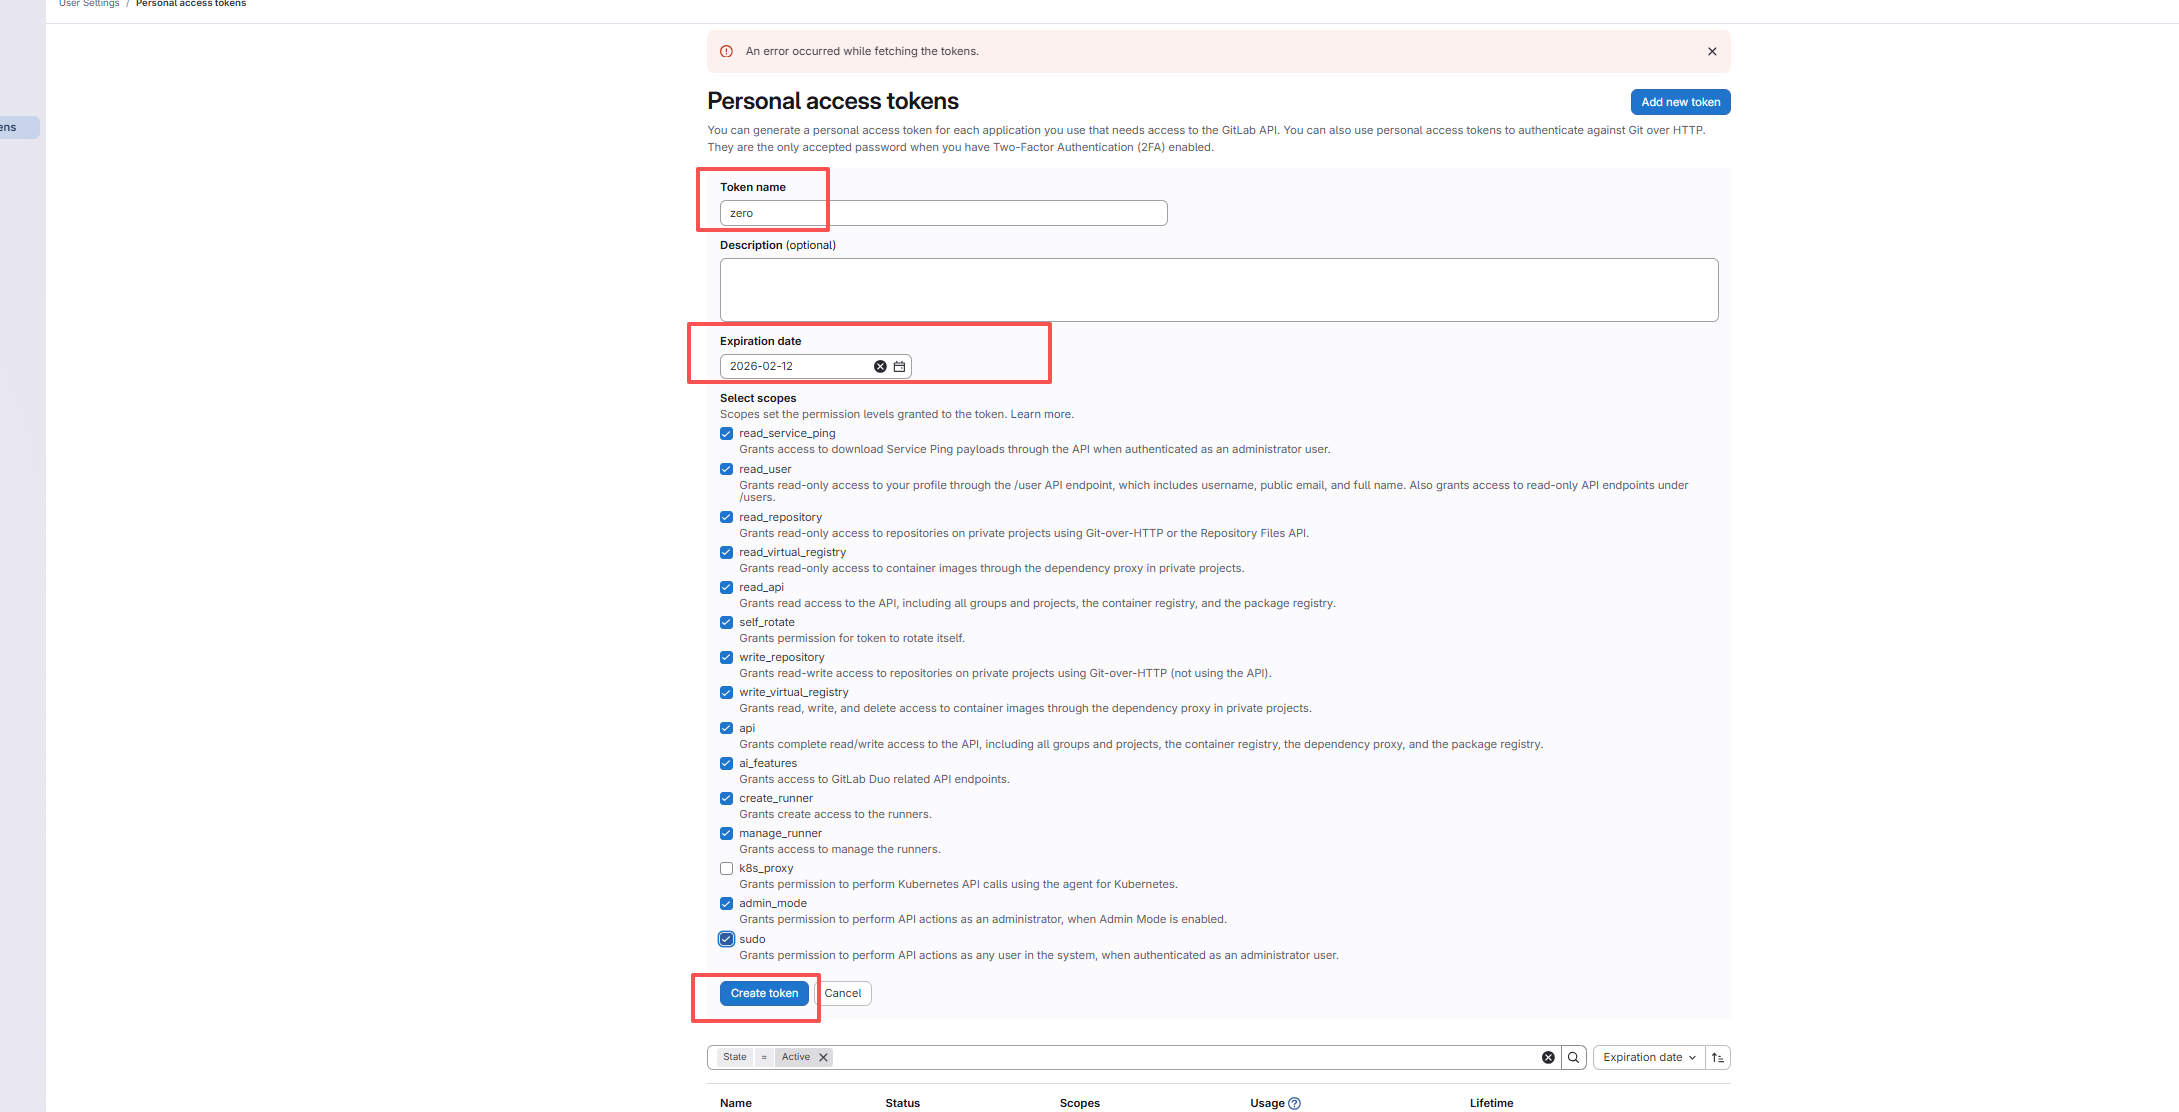
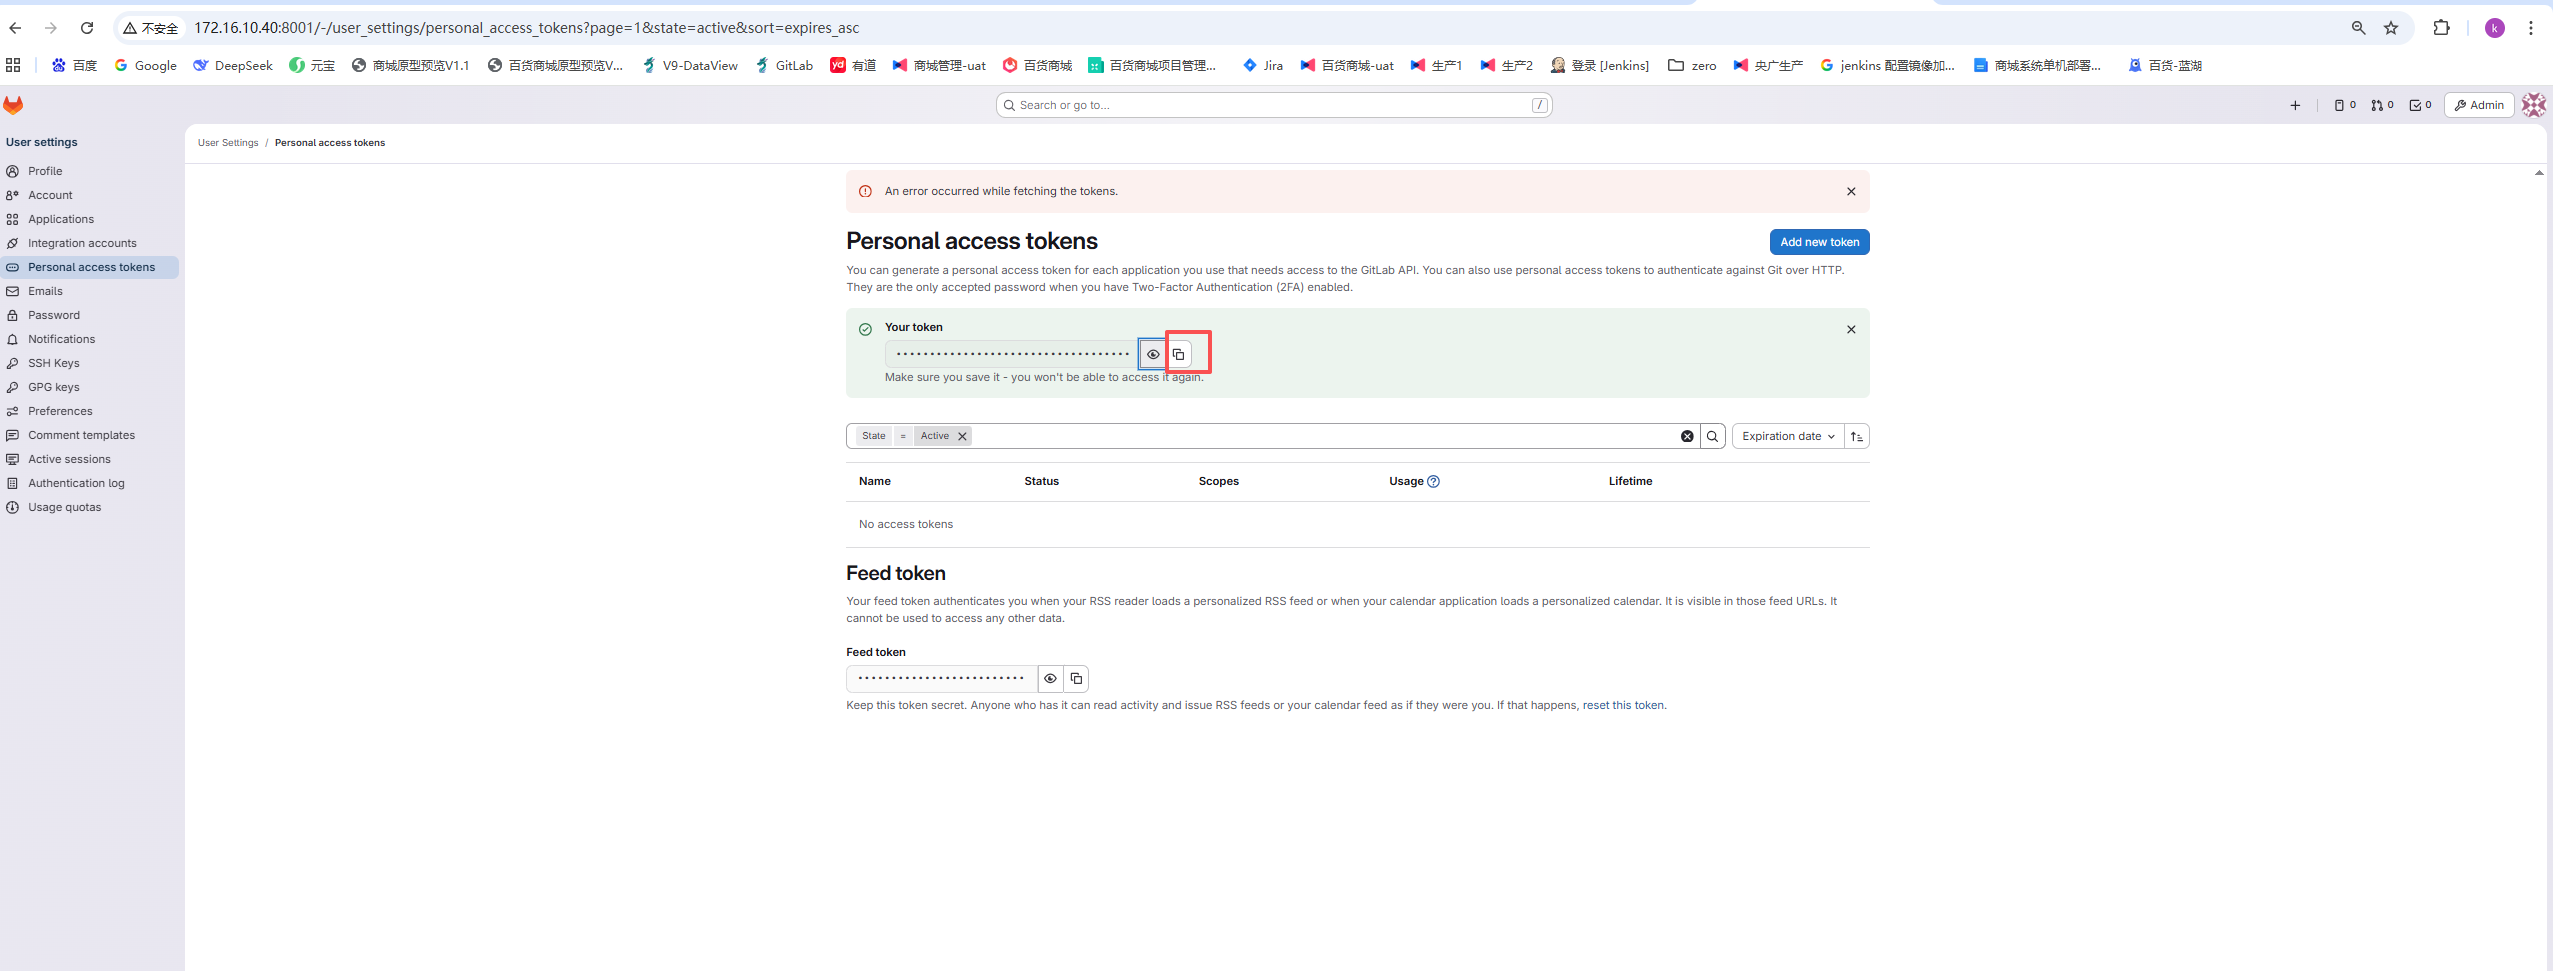
==========================跳过==========================================
==========================跳过==========================================
==========================跳过==========================================
配置ssh服务器
maven打包成功后将包上传部署得服务器
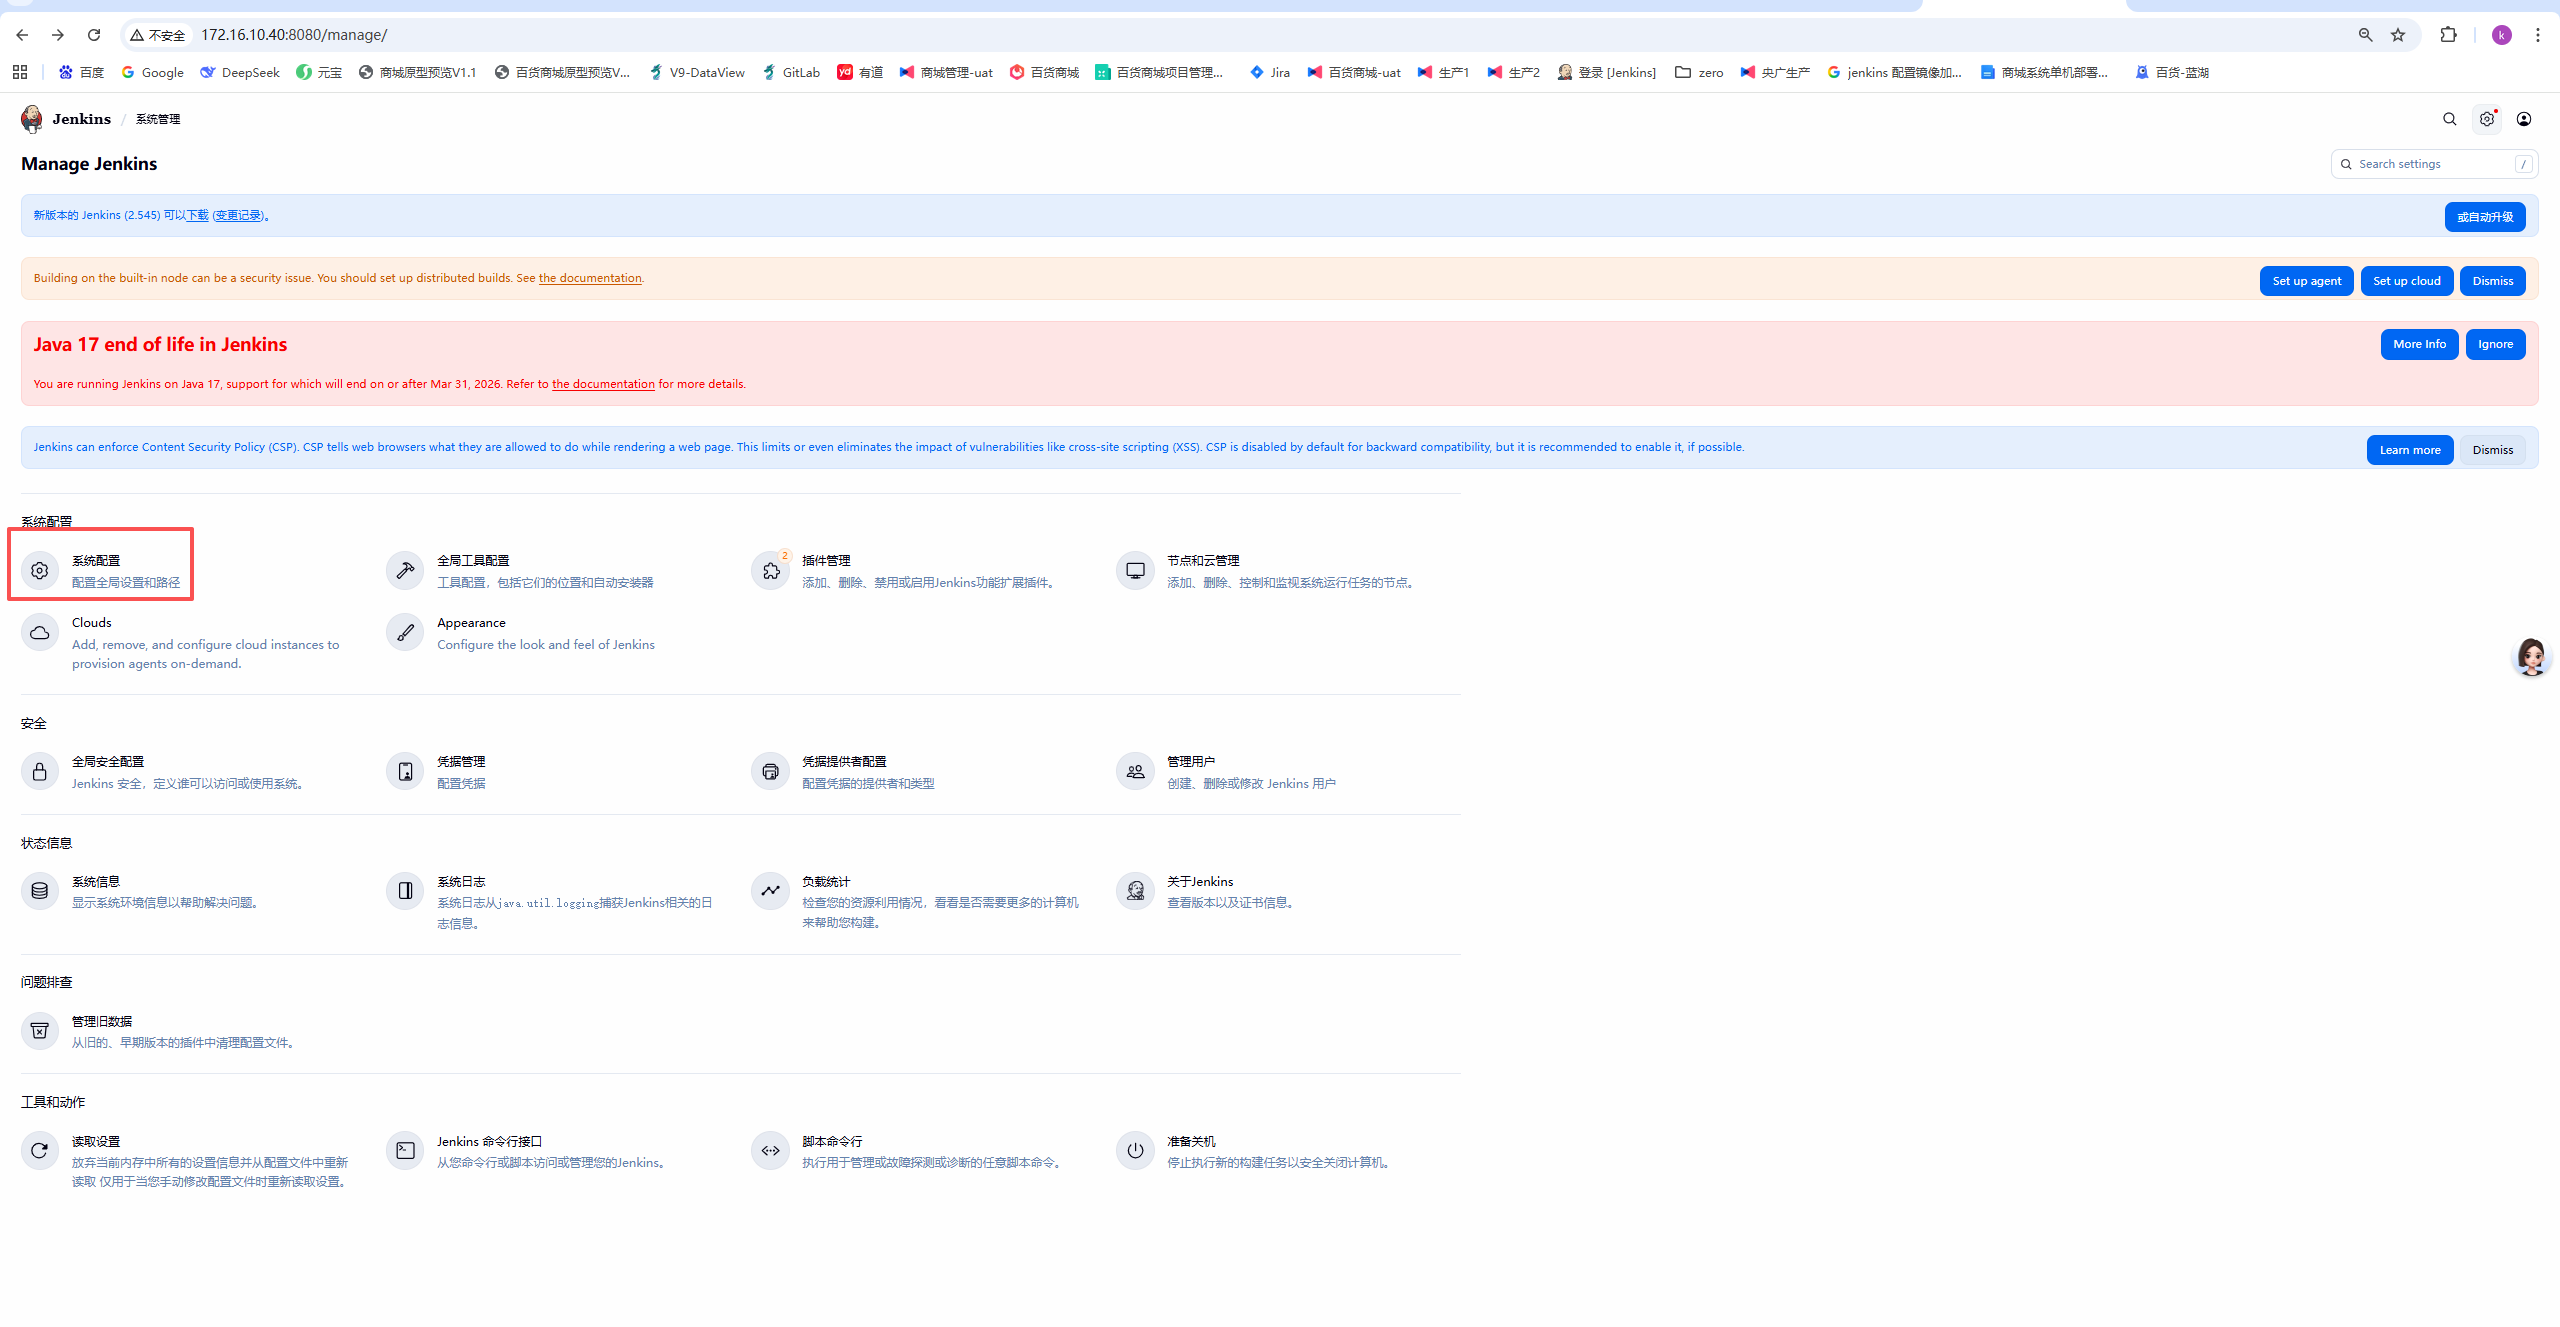
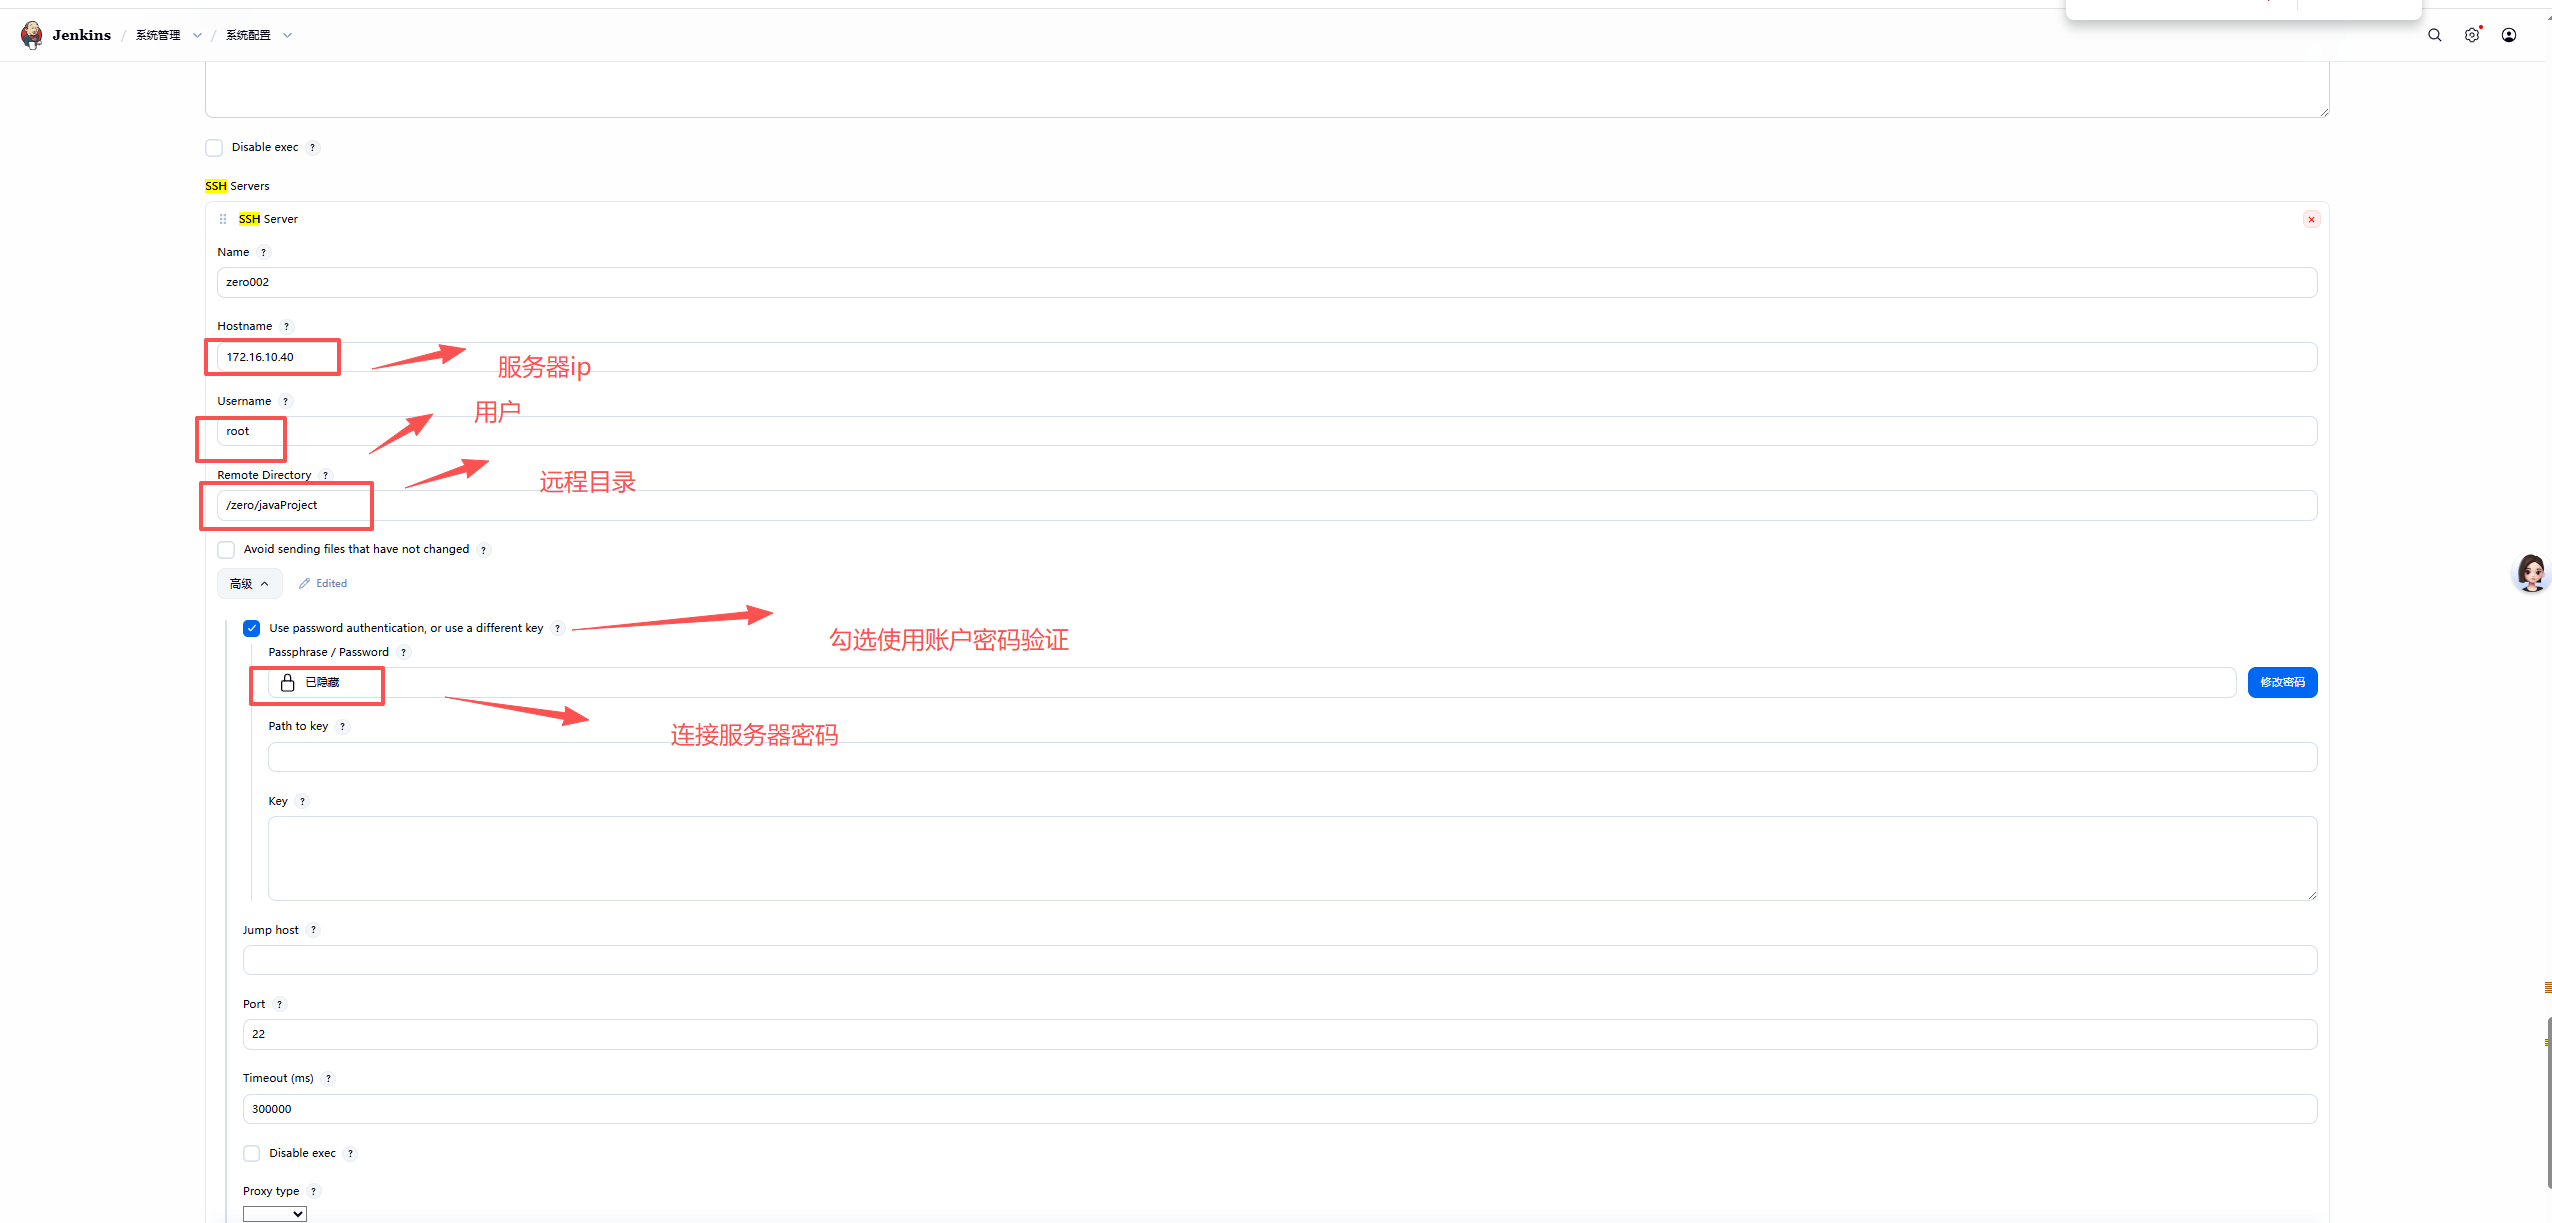
创建jenkins自动部署任务
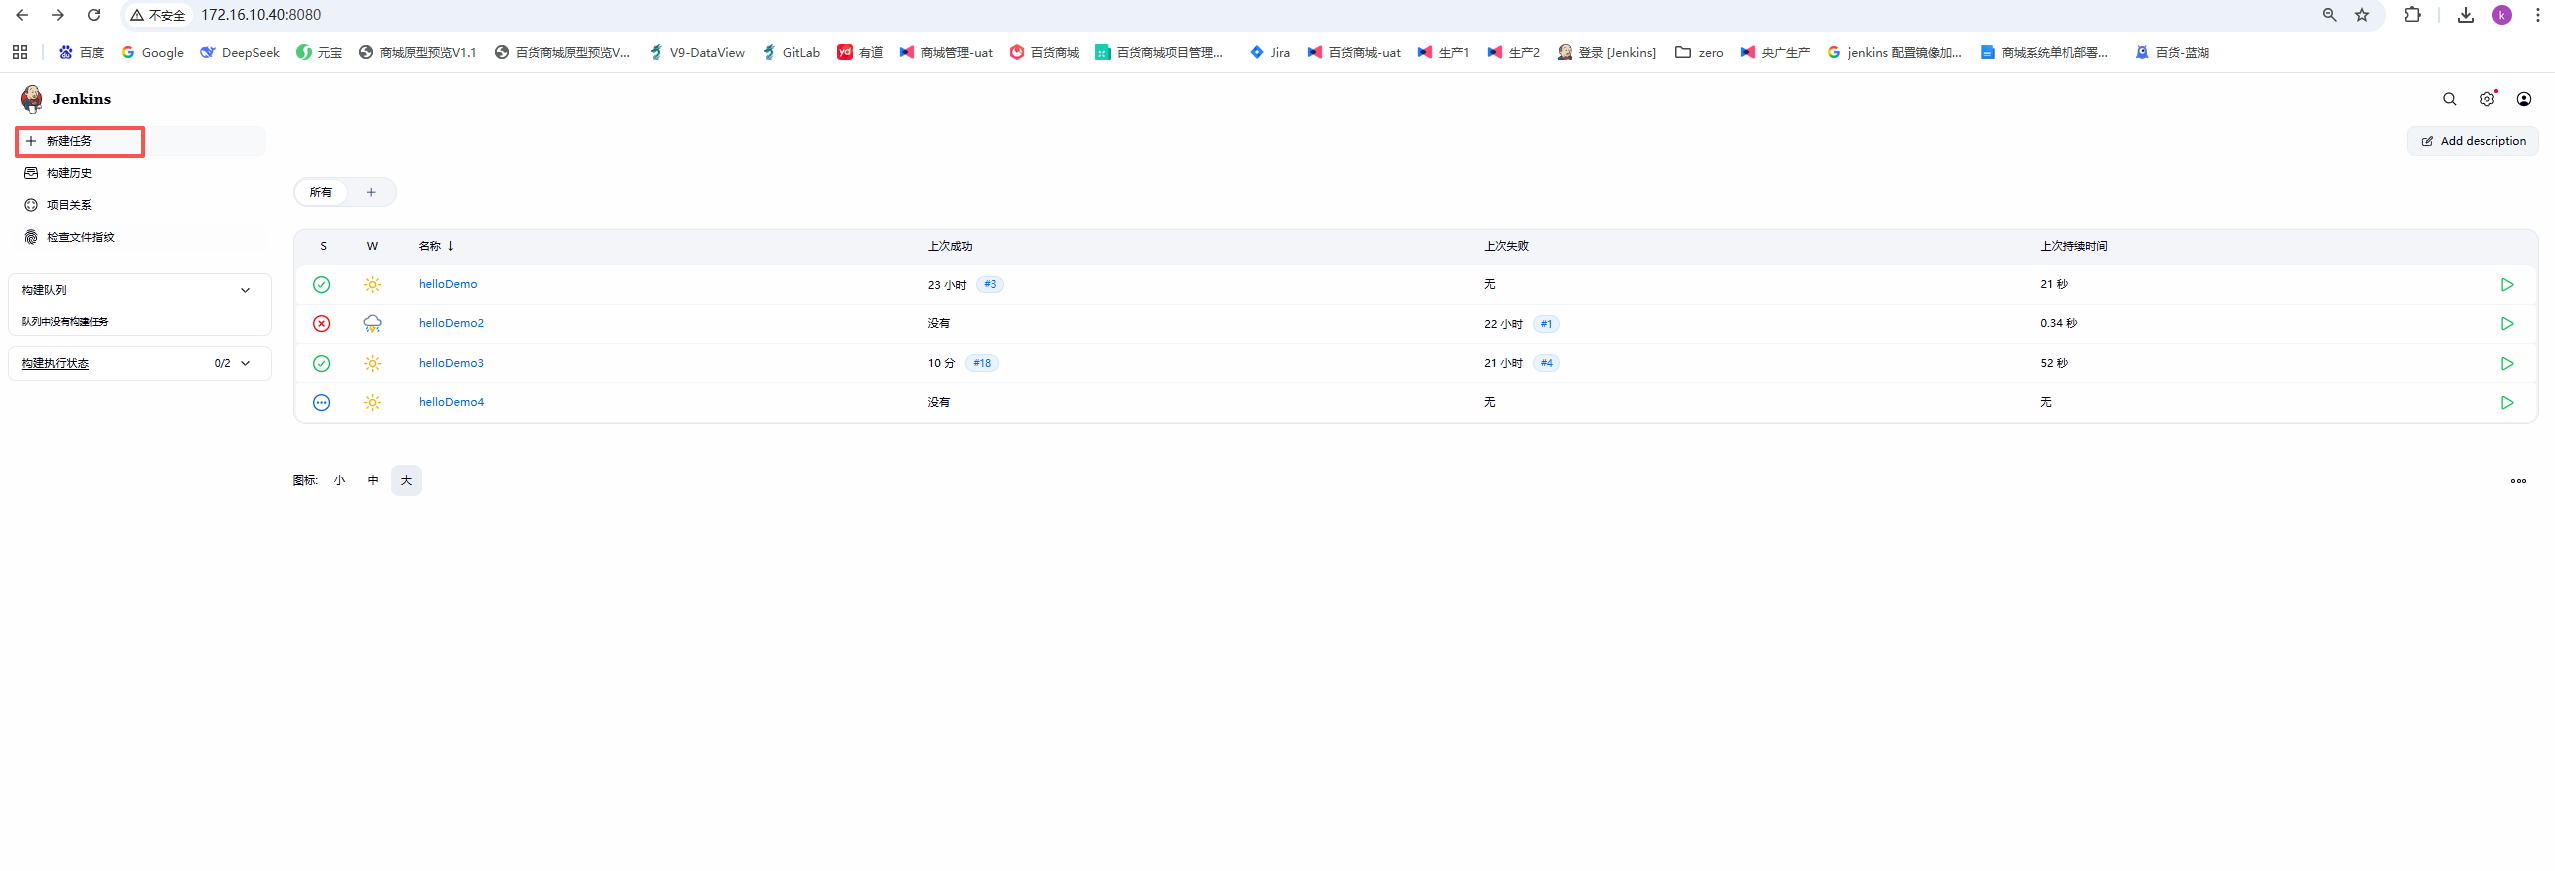
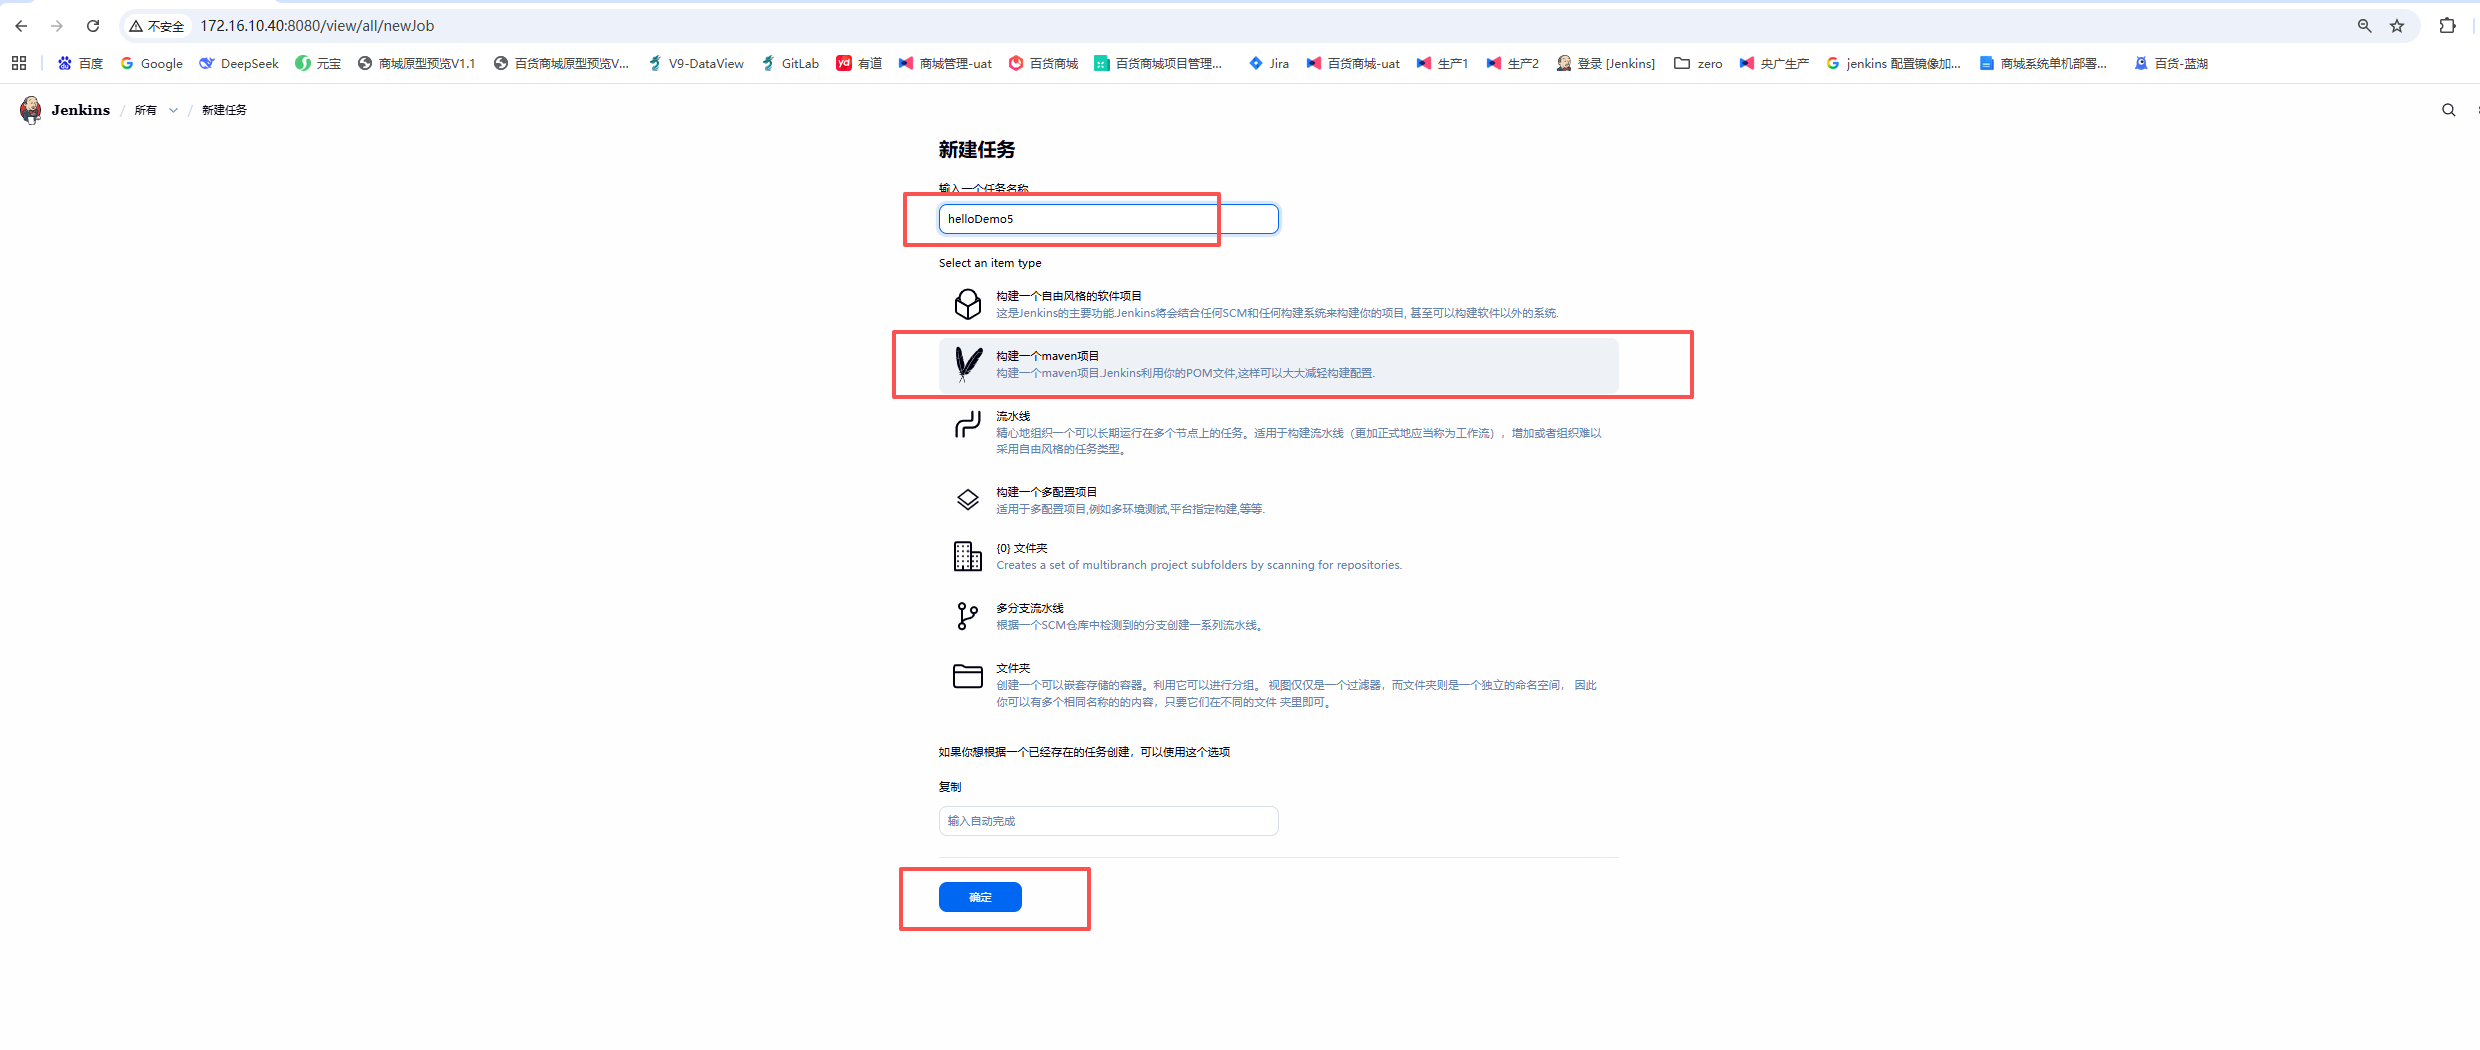
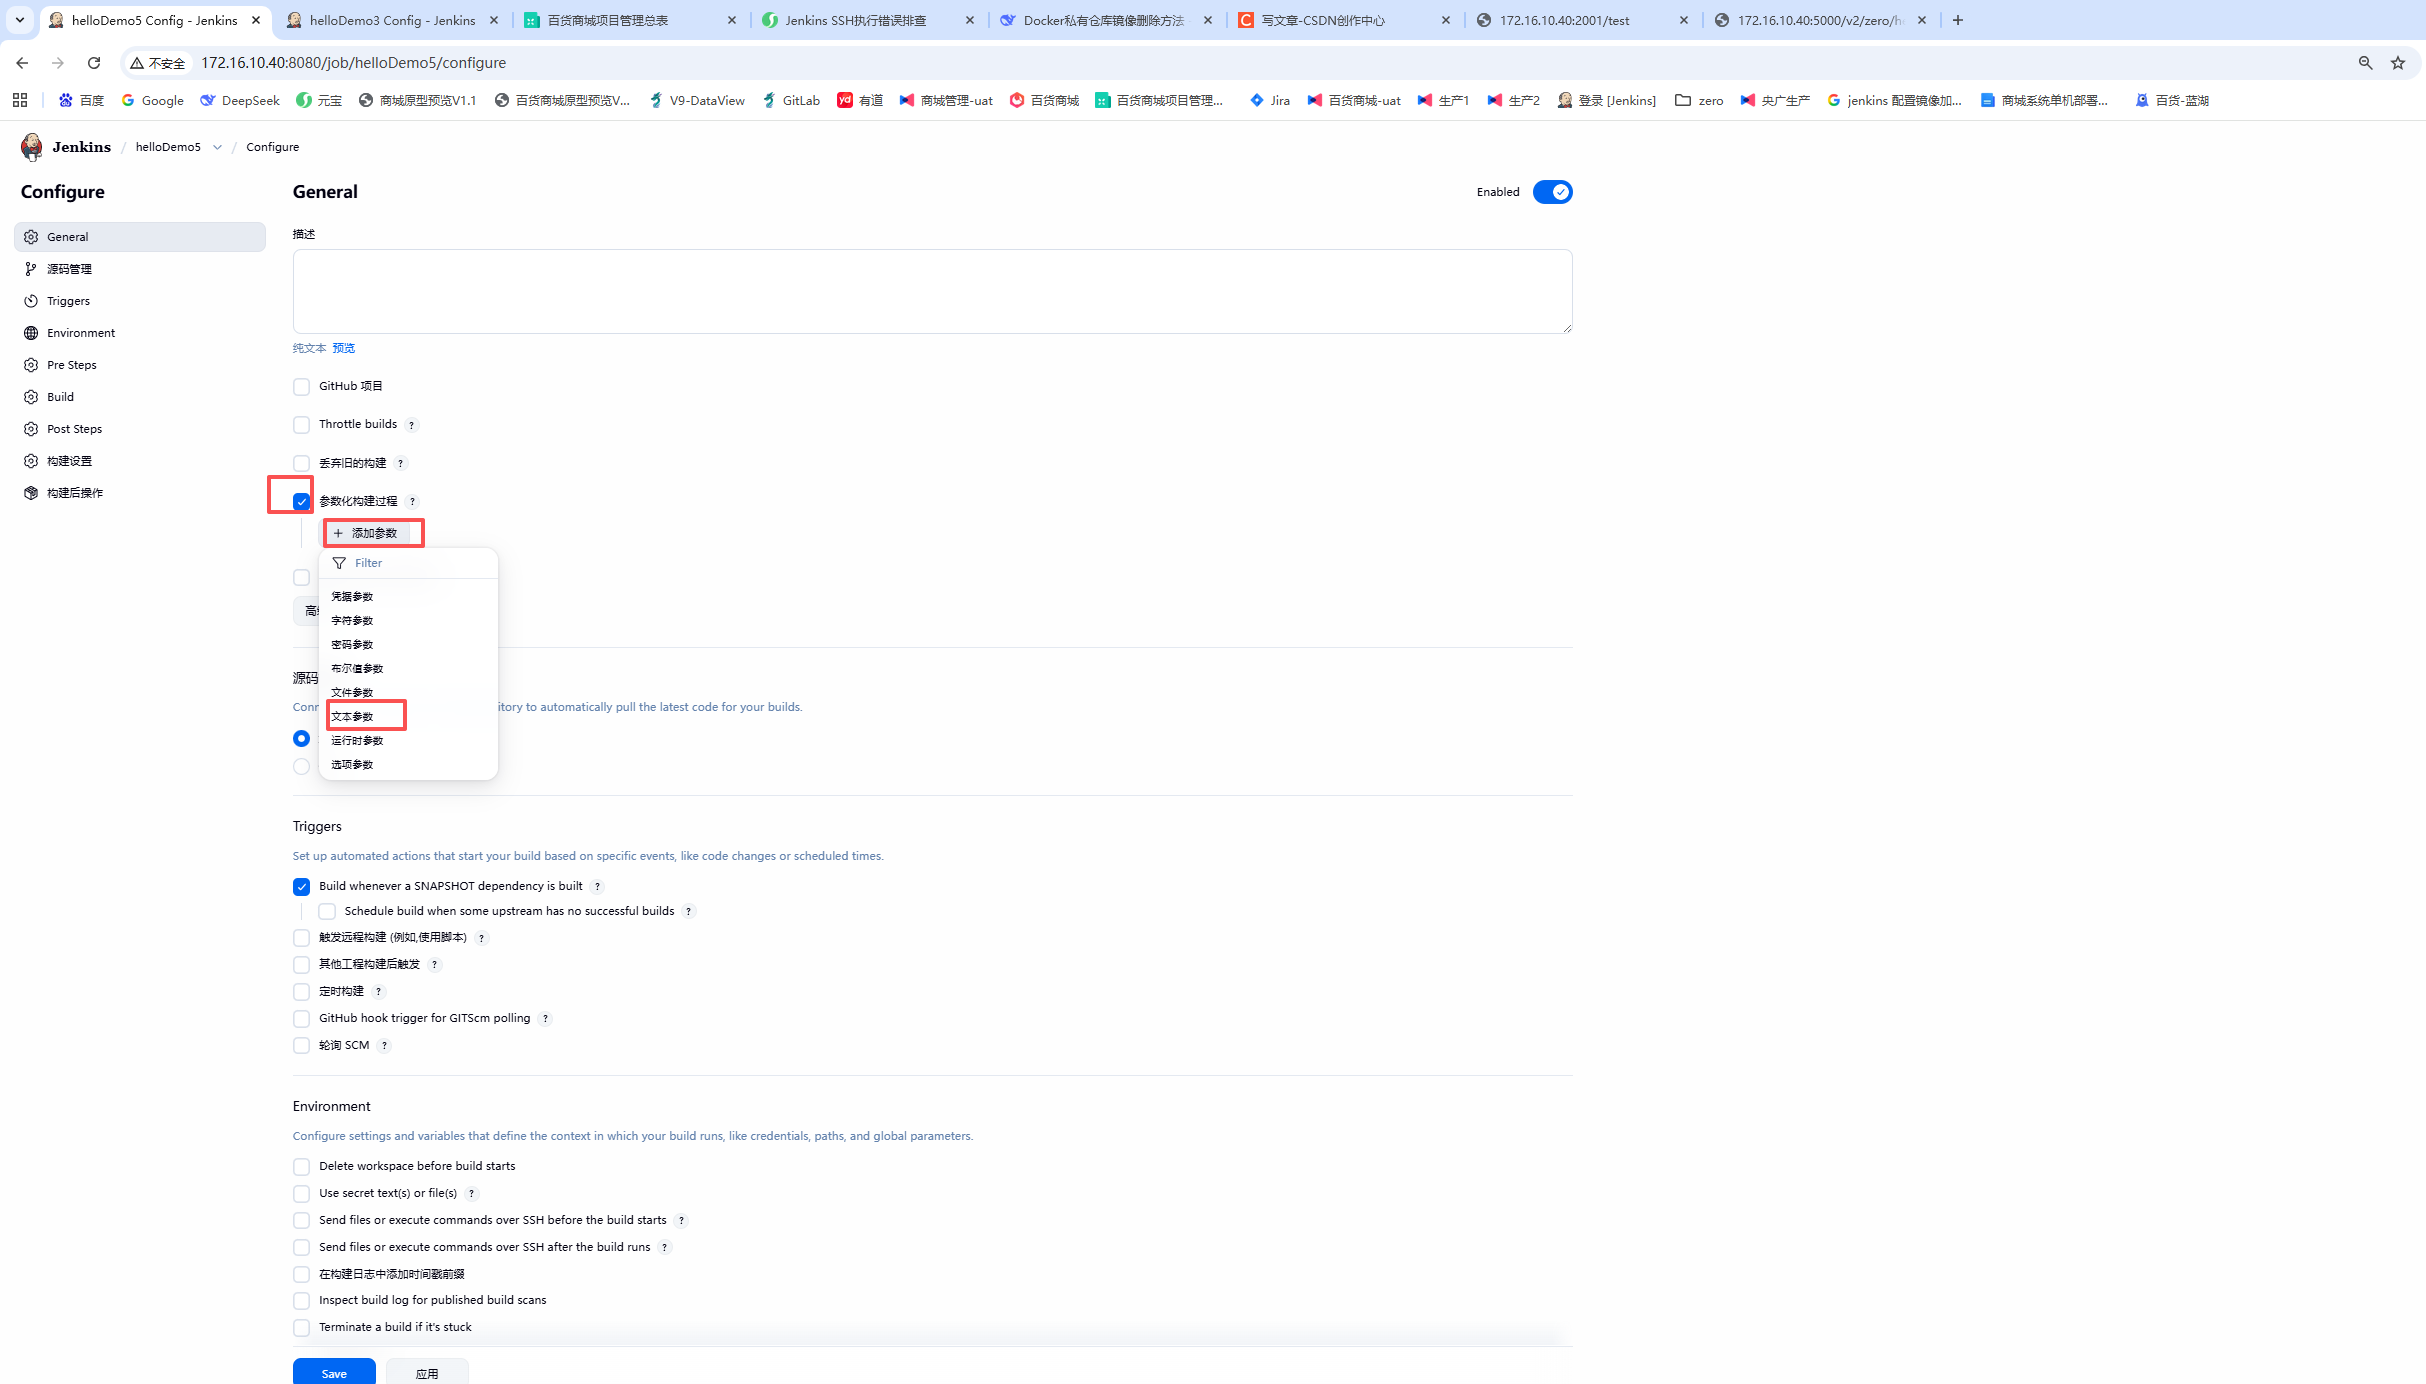
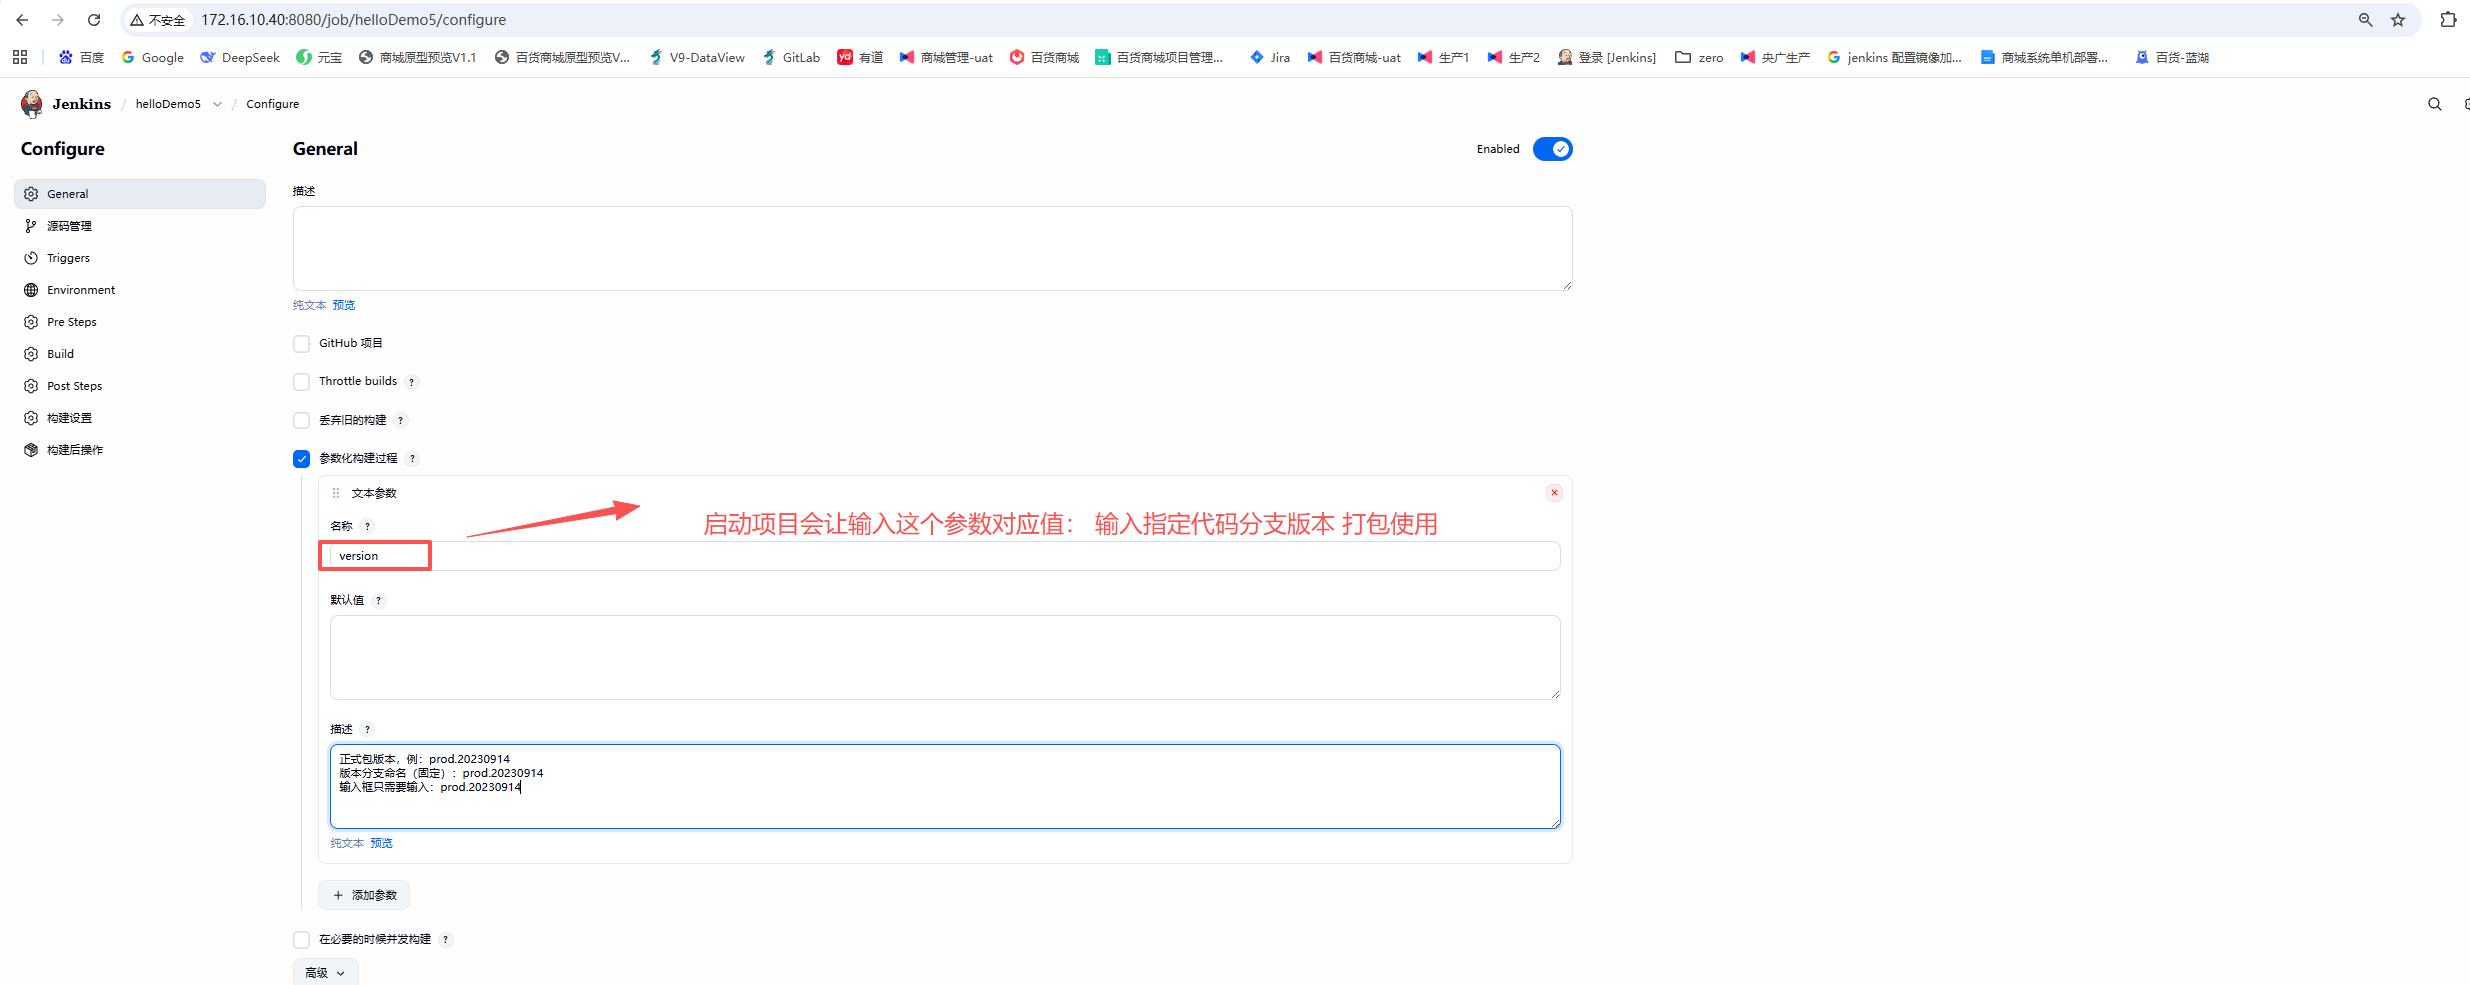
添加gitlab用户凭证
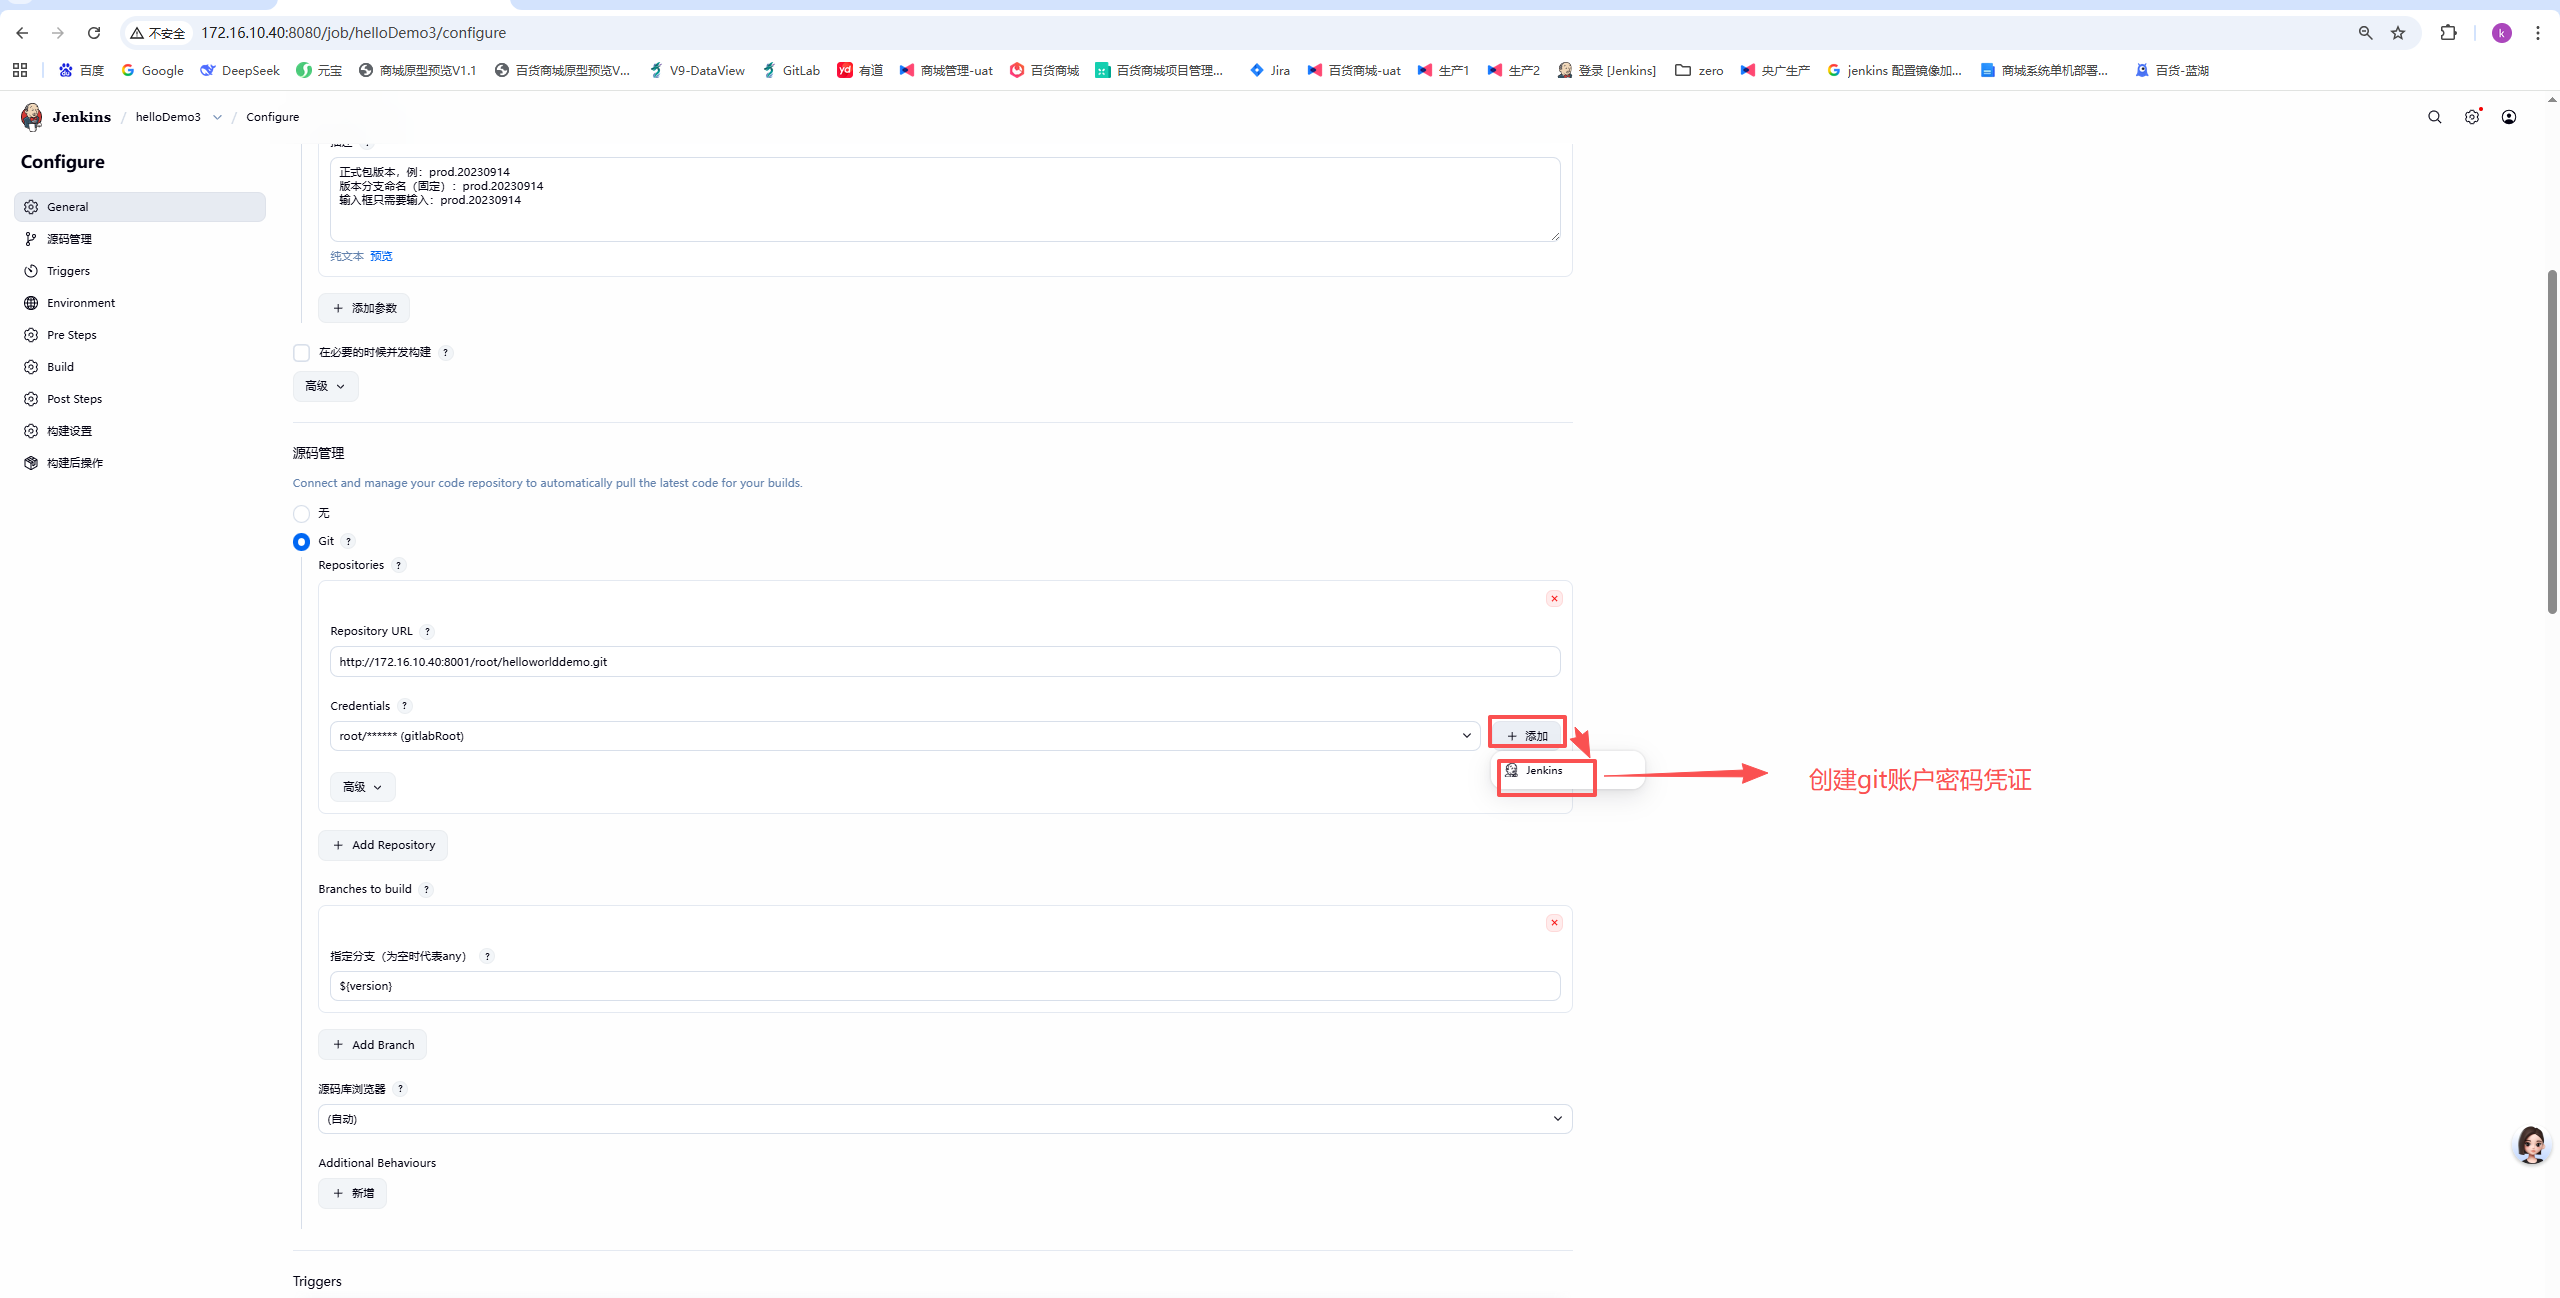
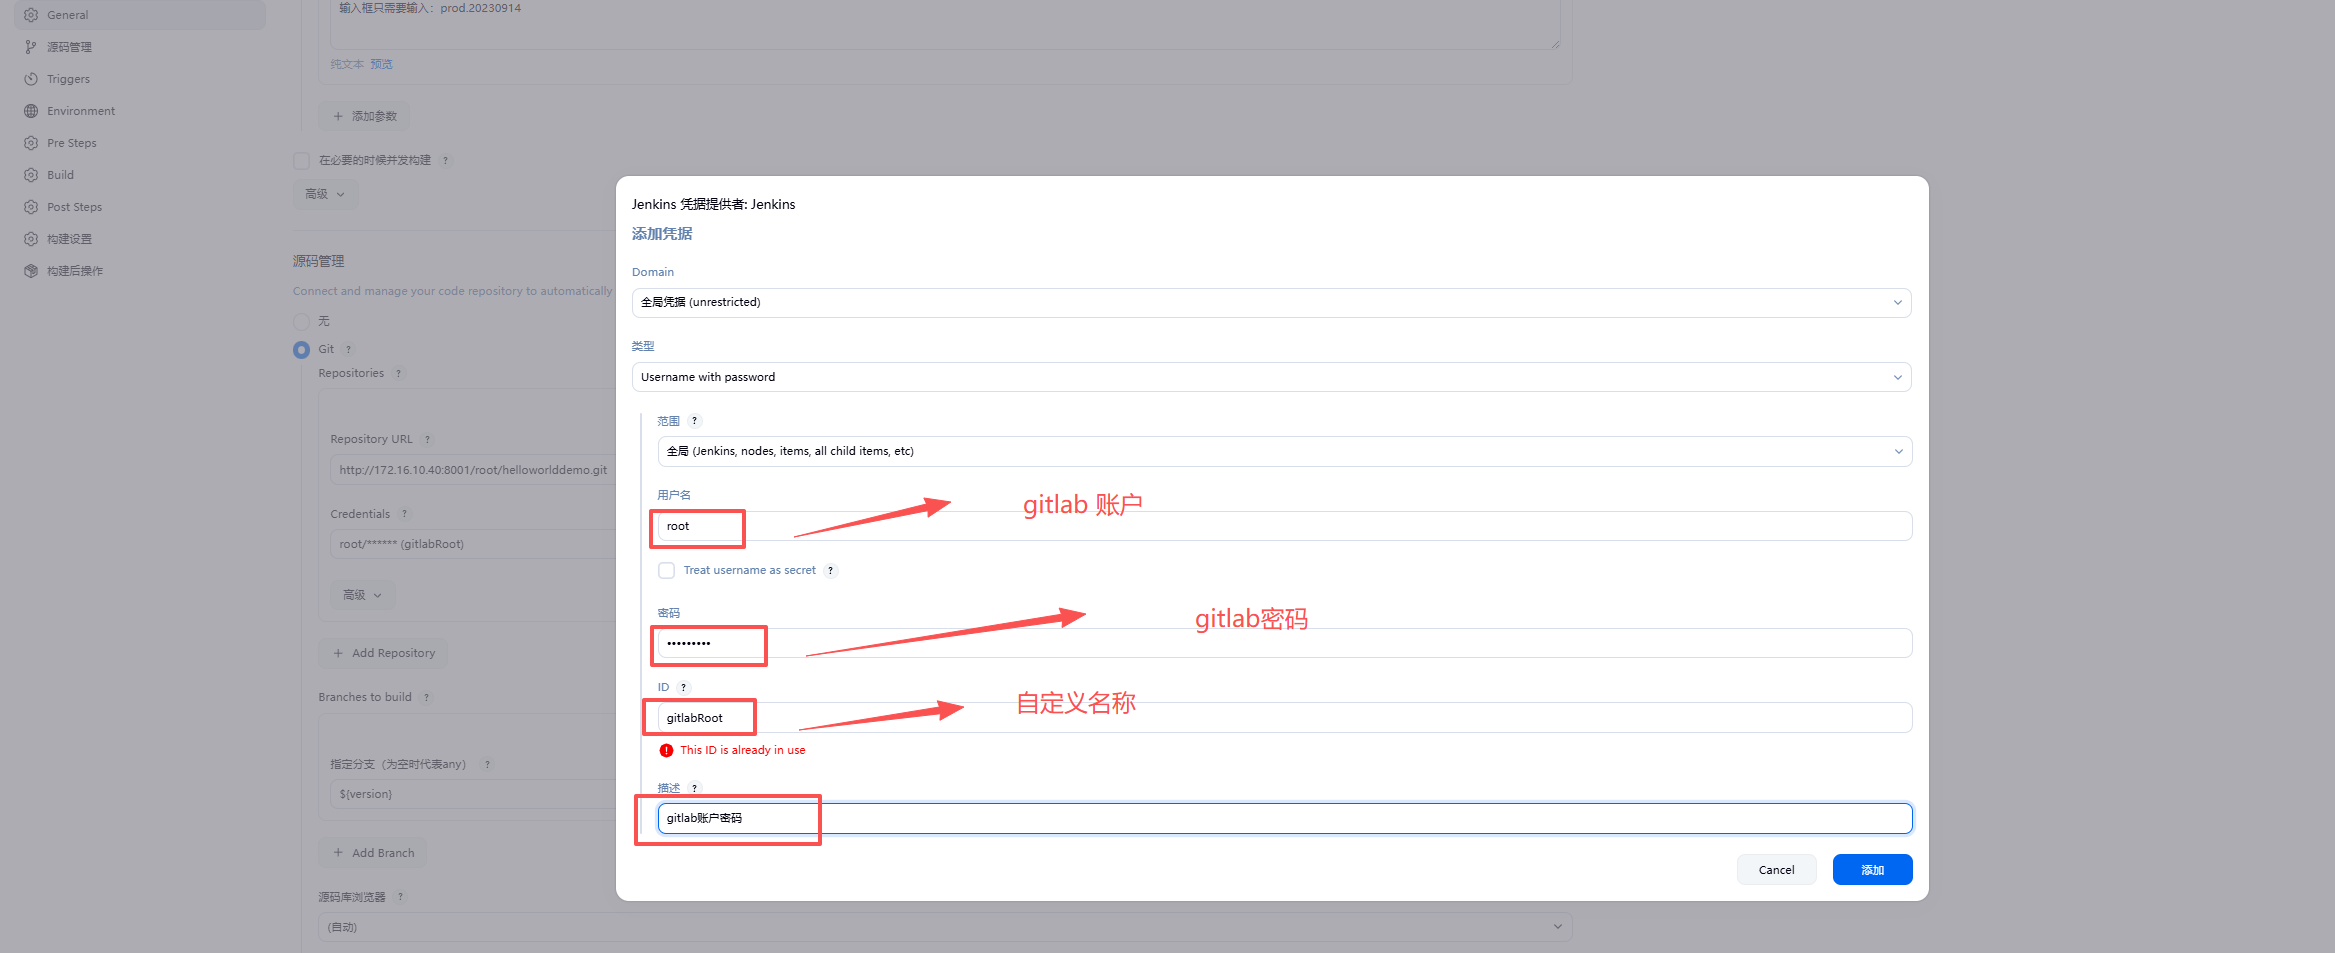
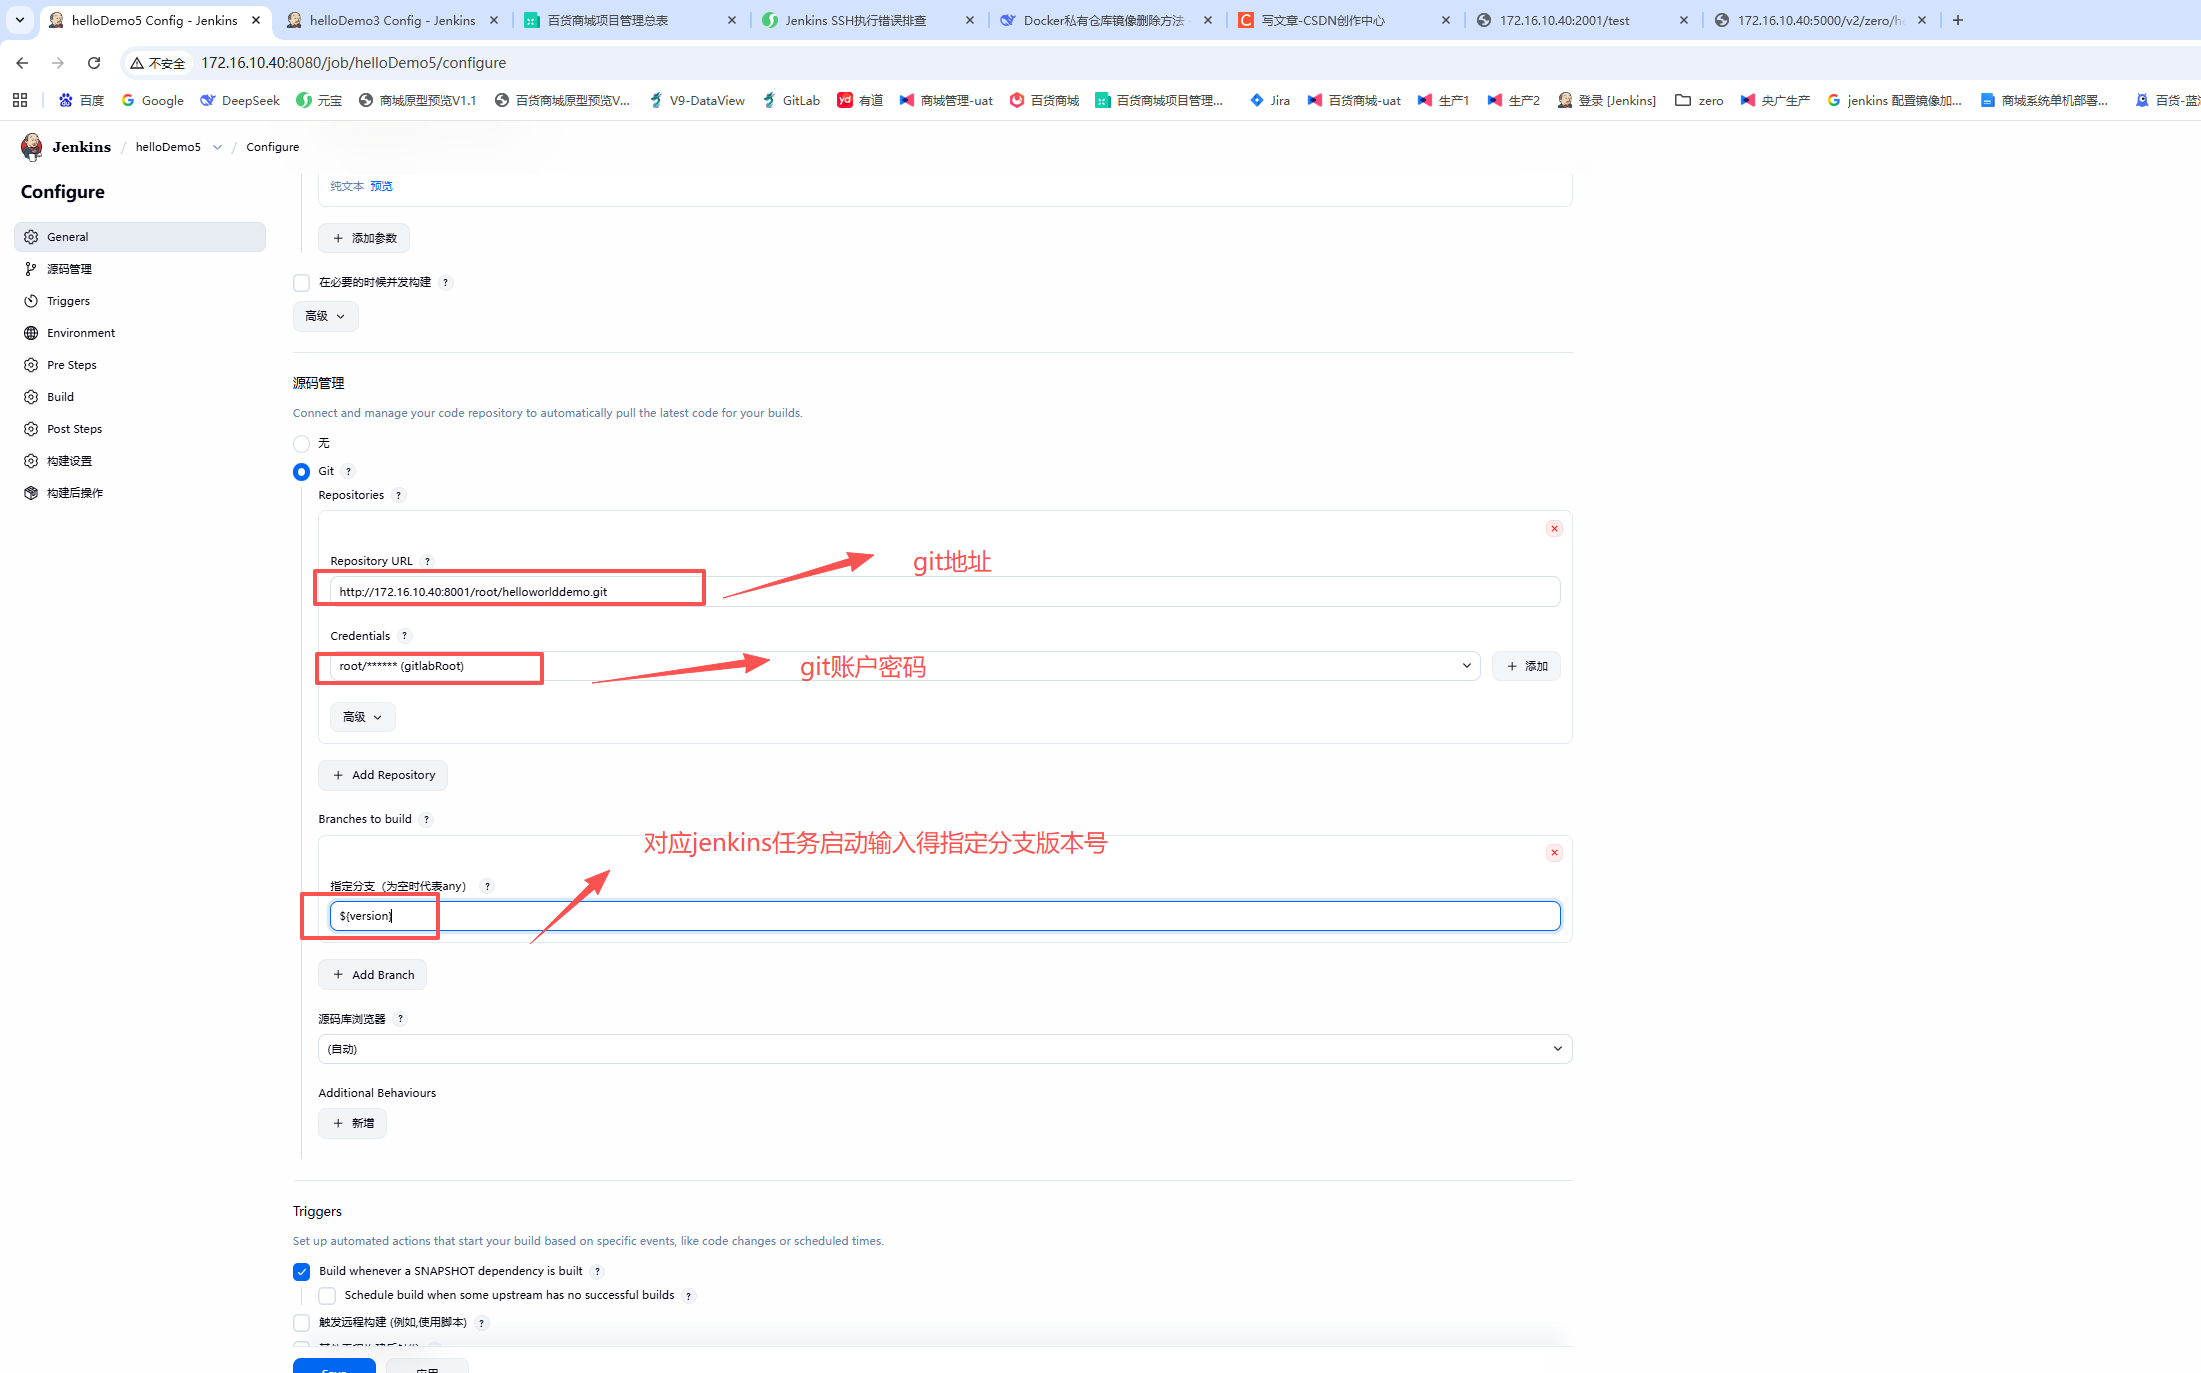
Pre Steps(构建前操作)
这里没用到可以直接跳过
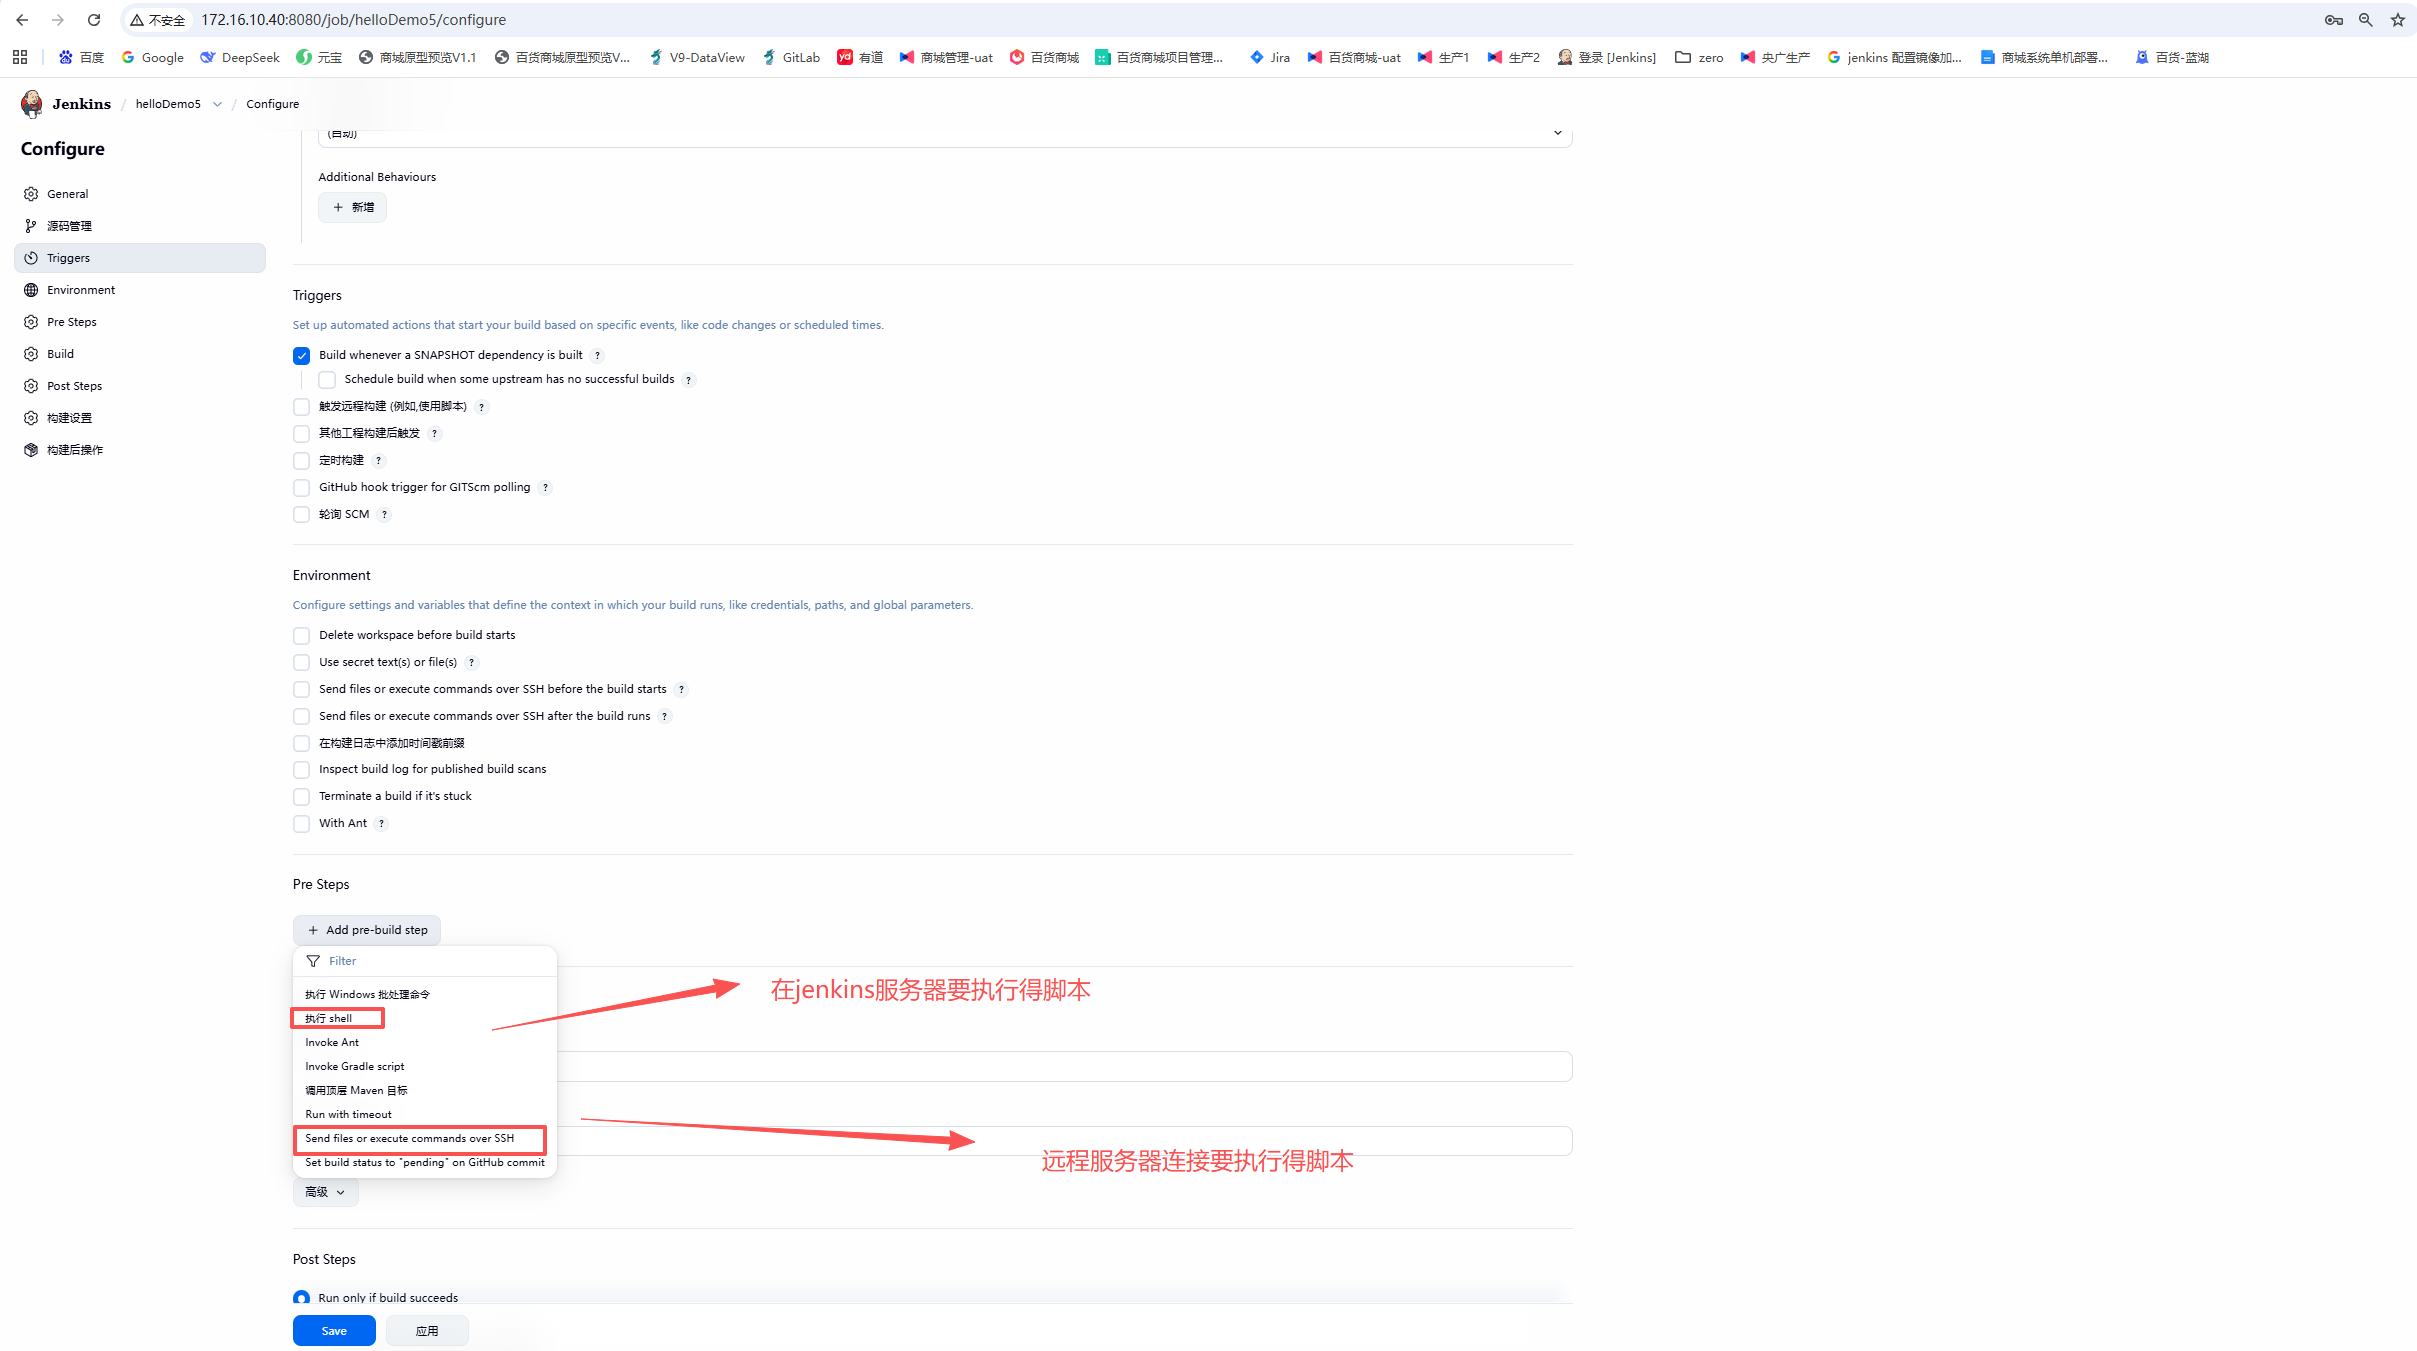
Post Steps(构建后操作)
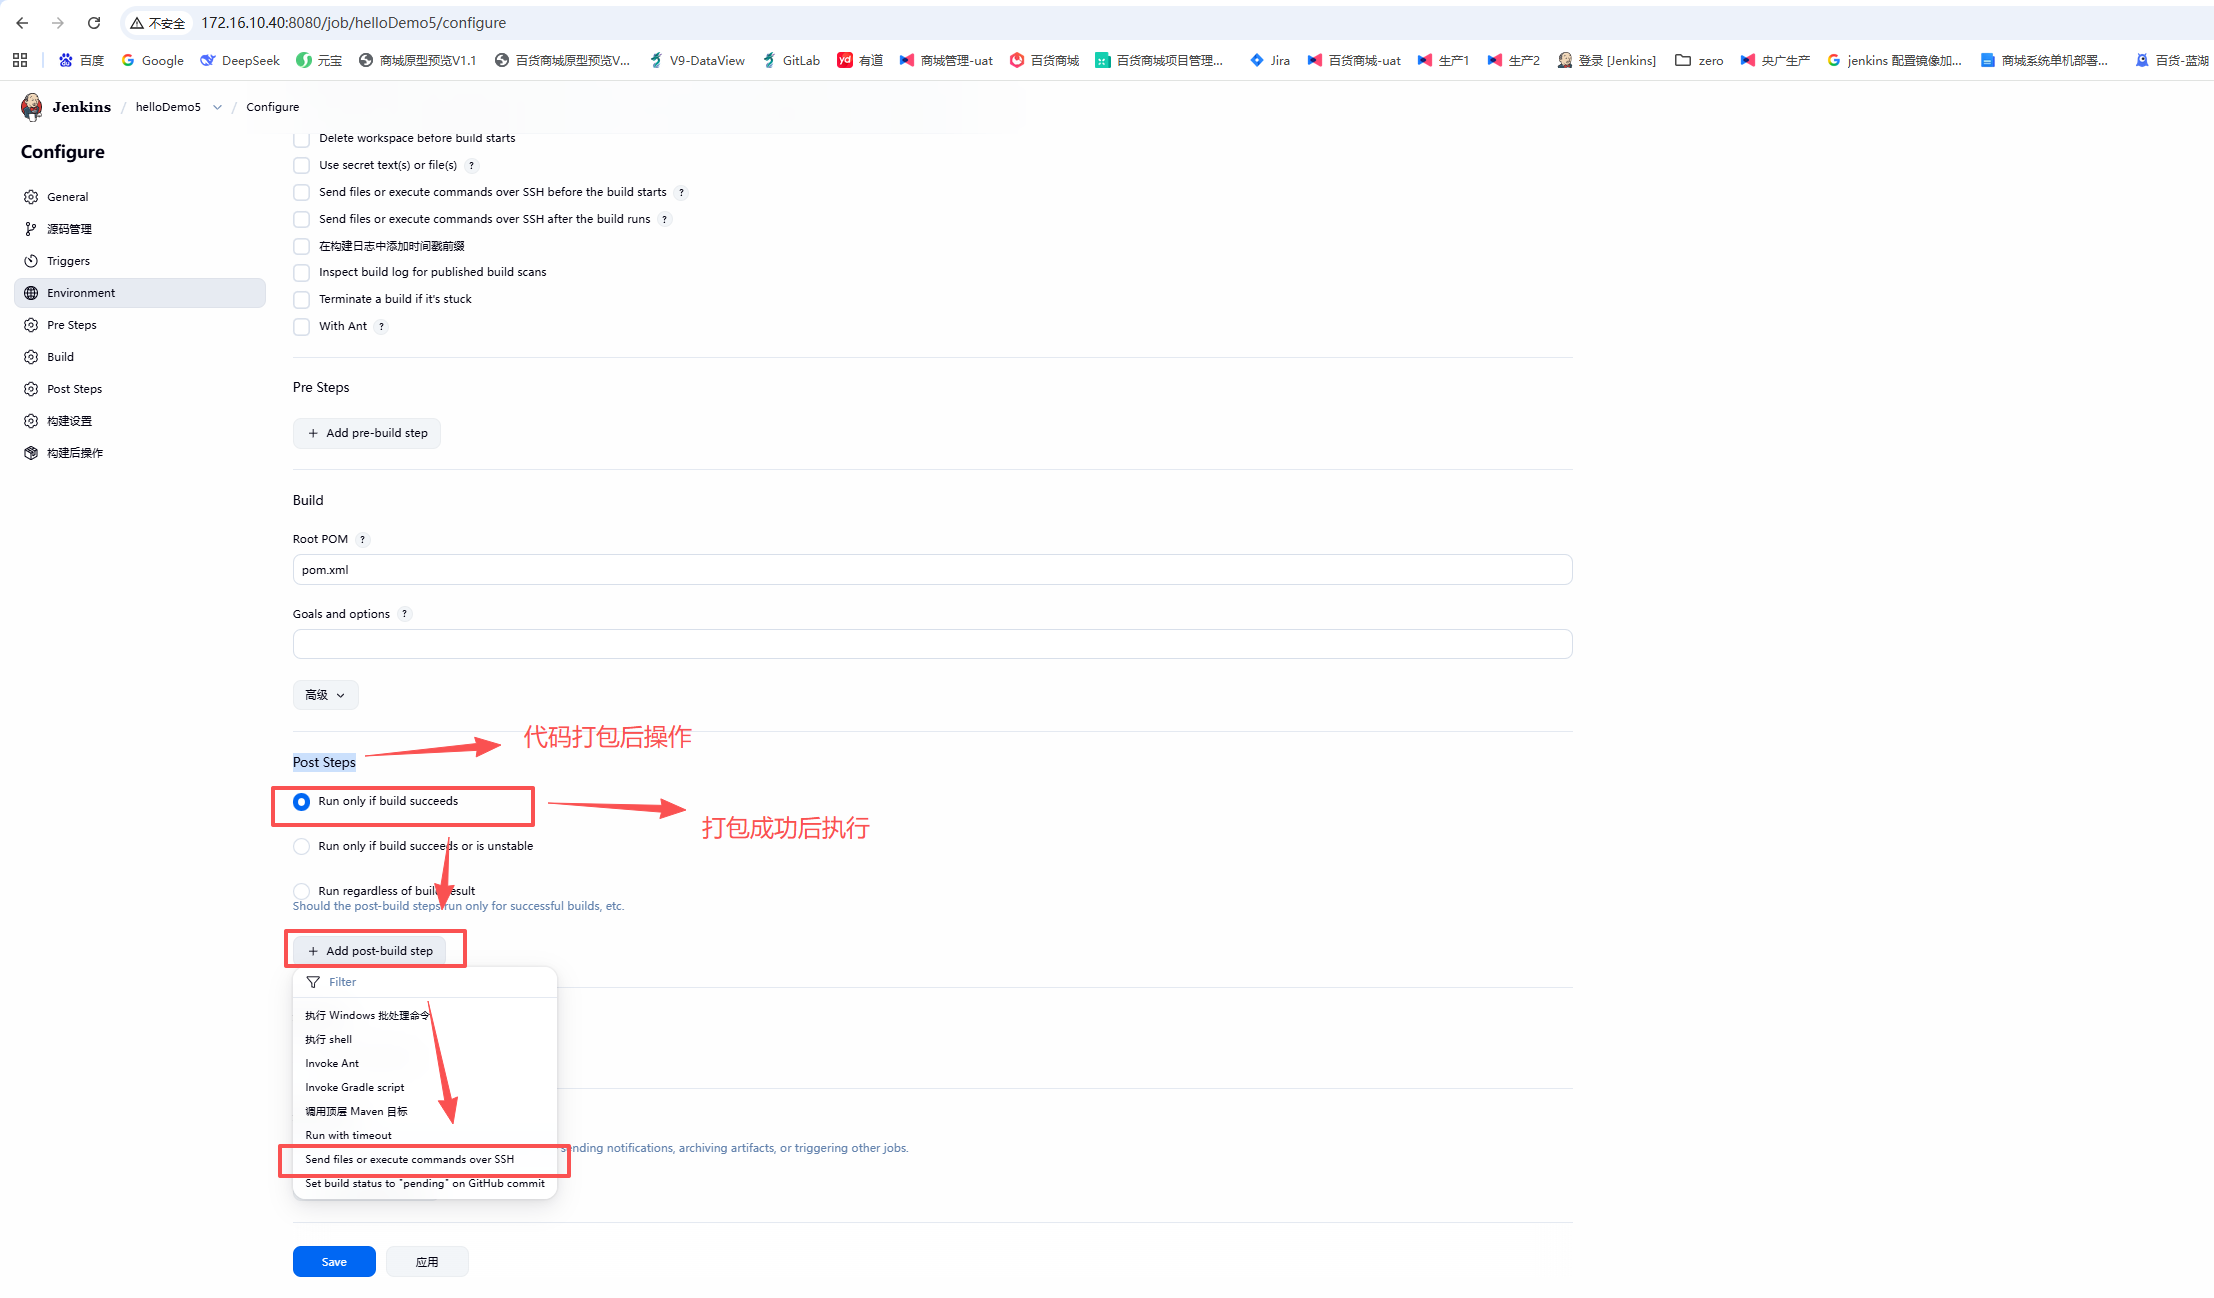
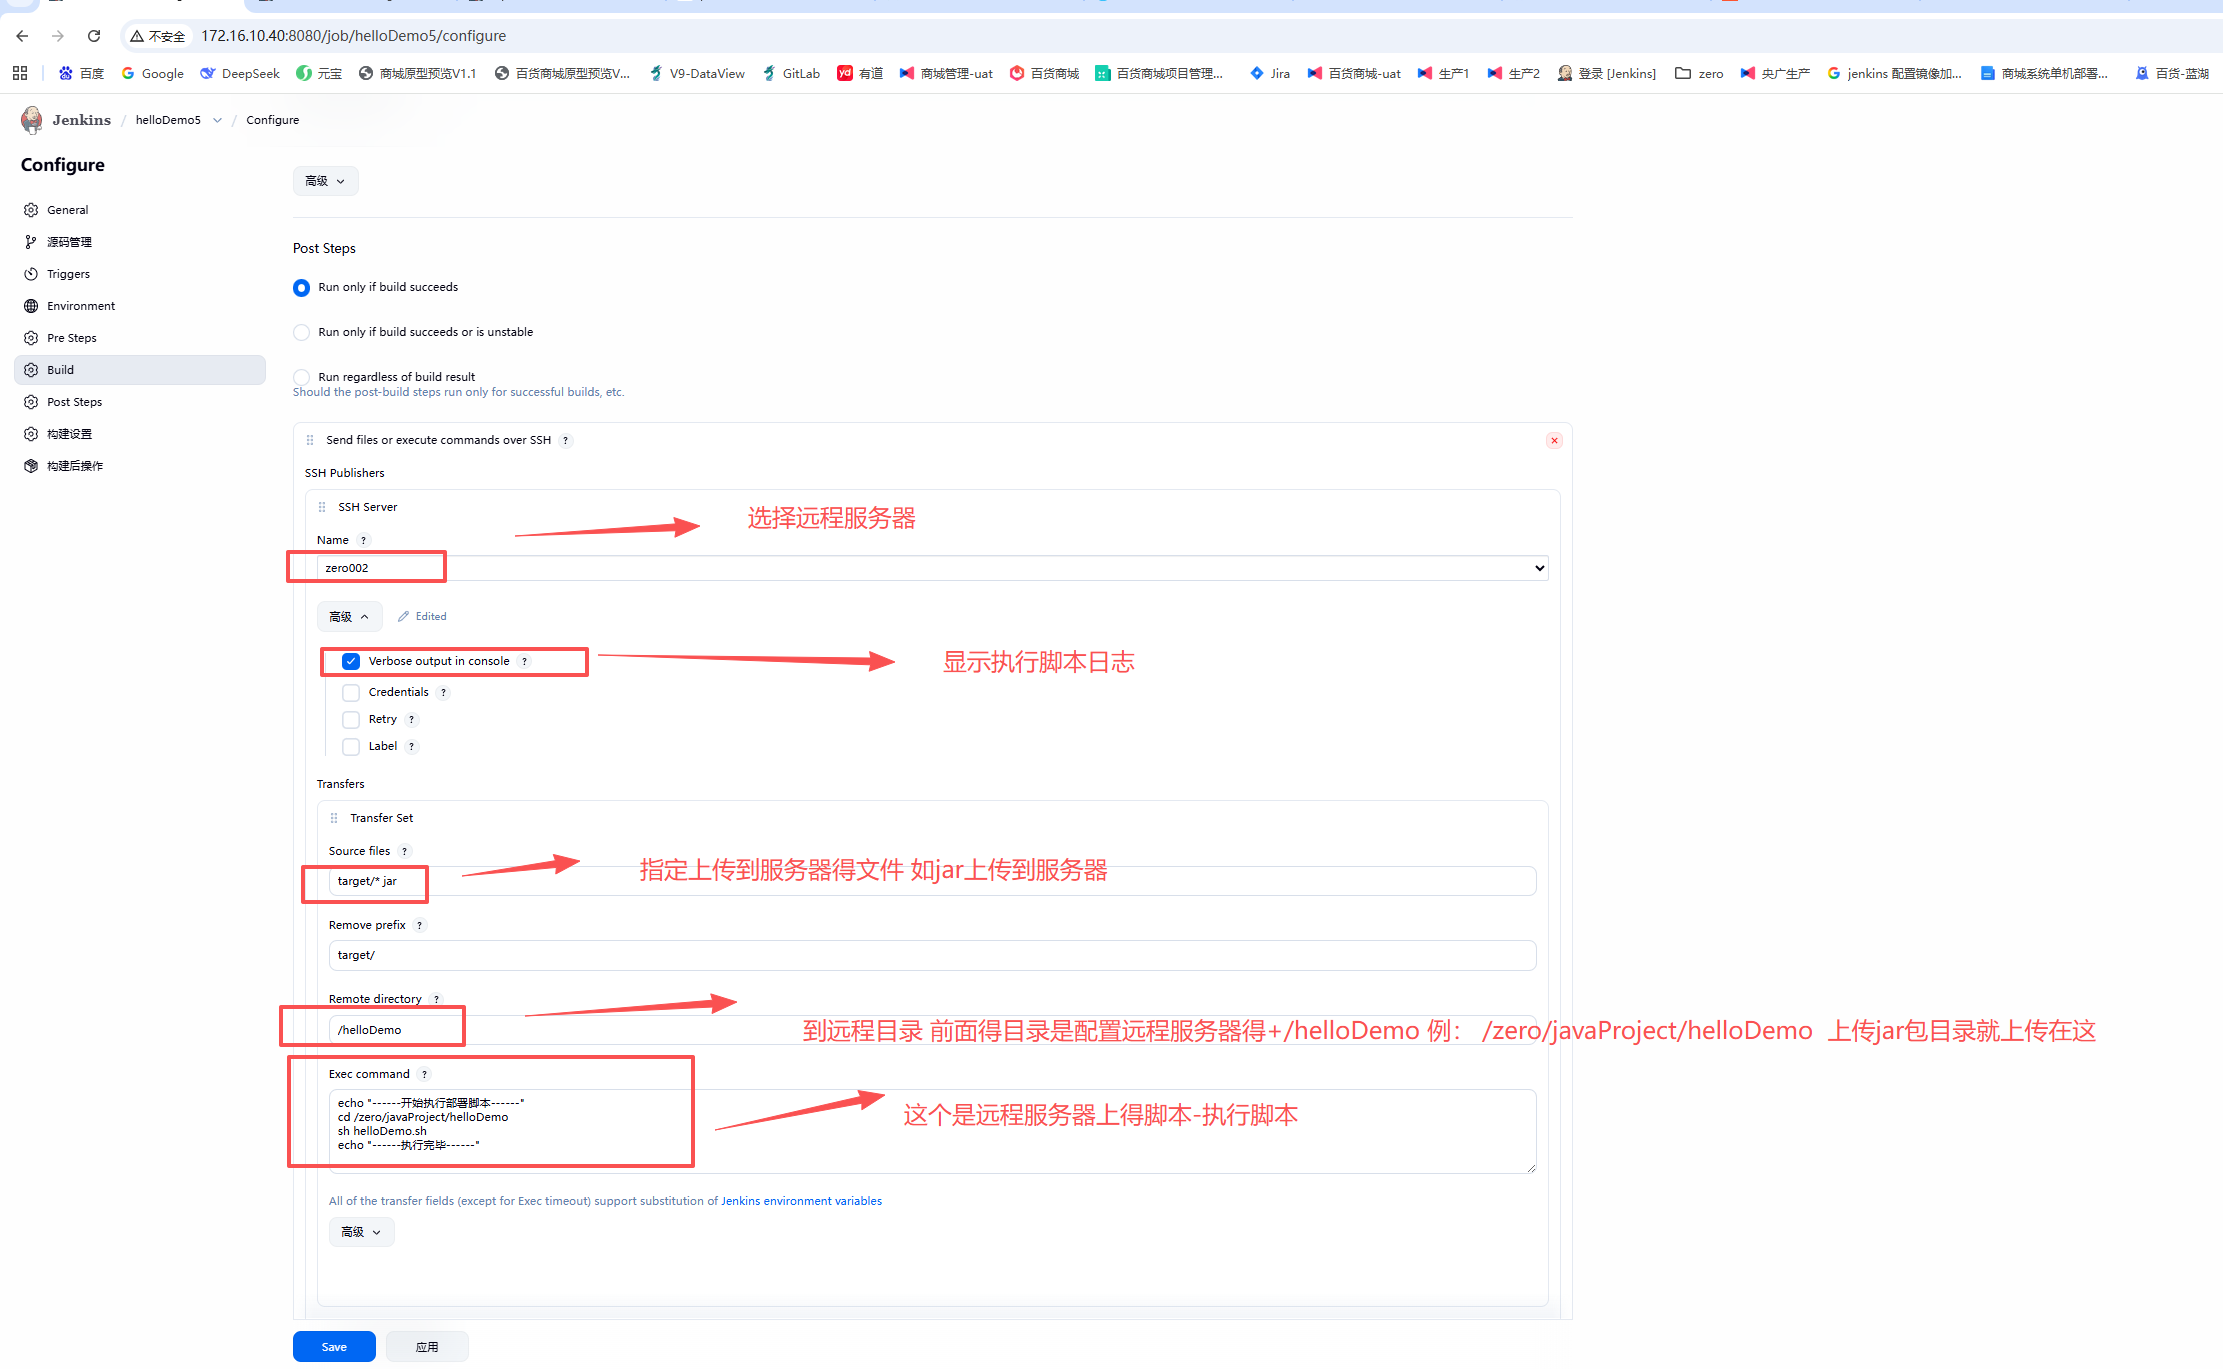
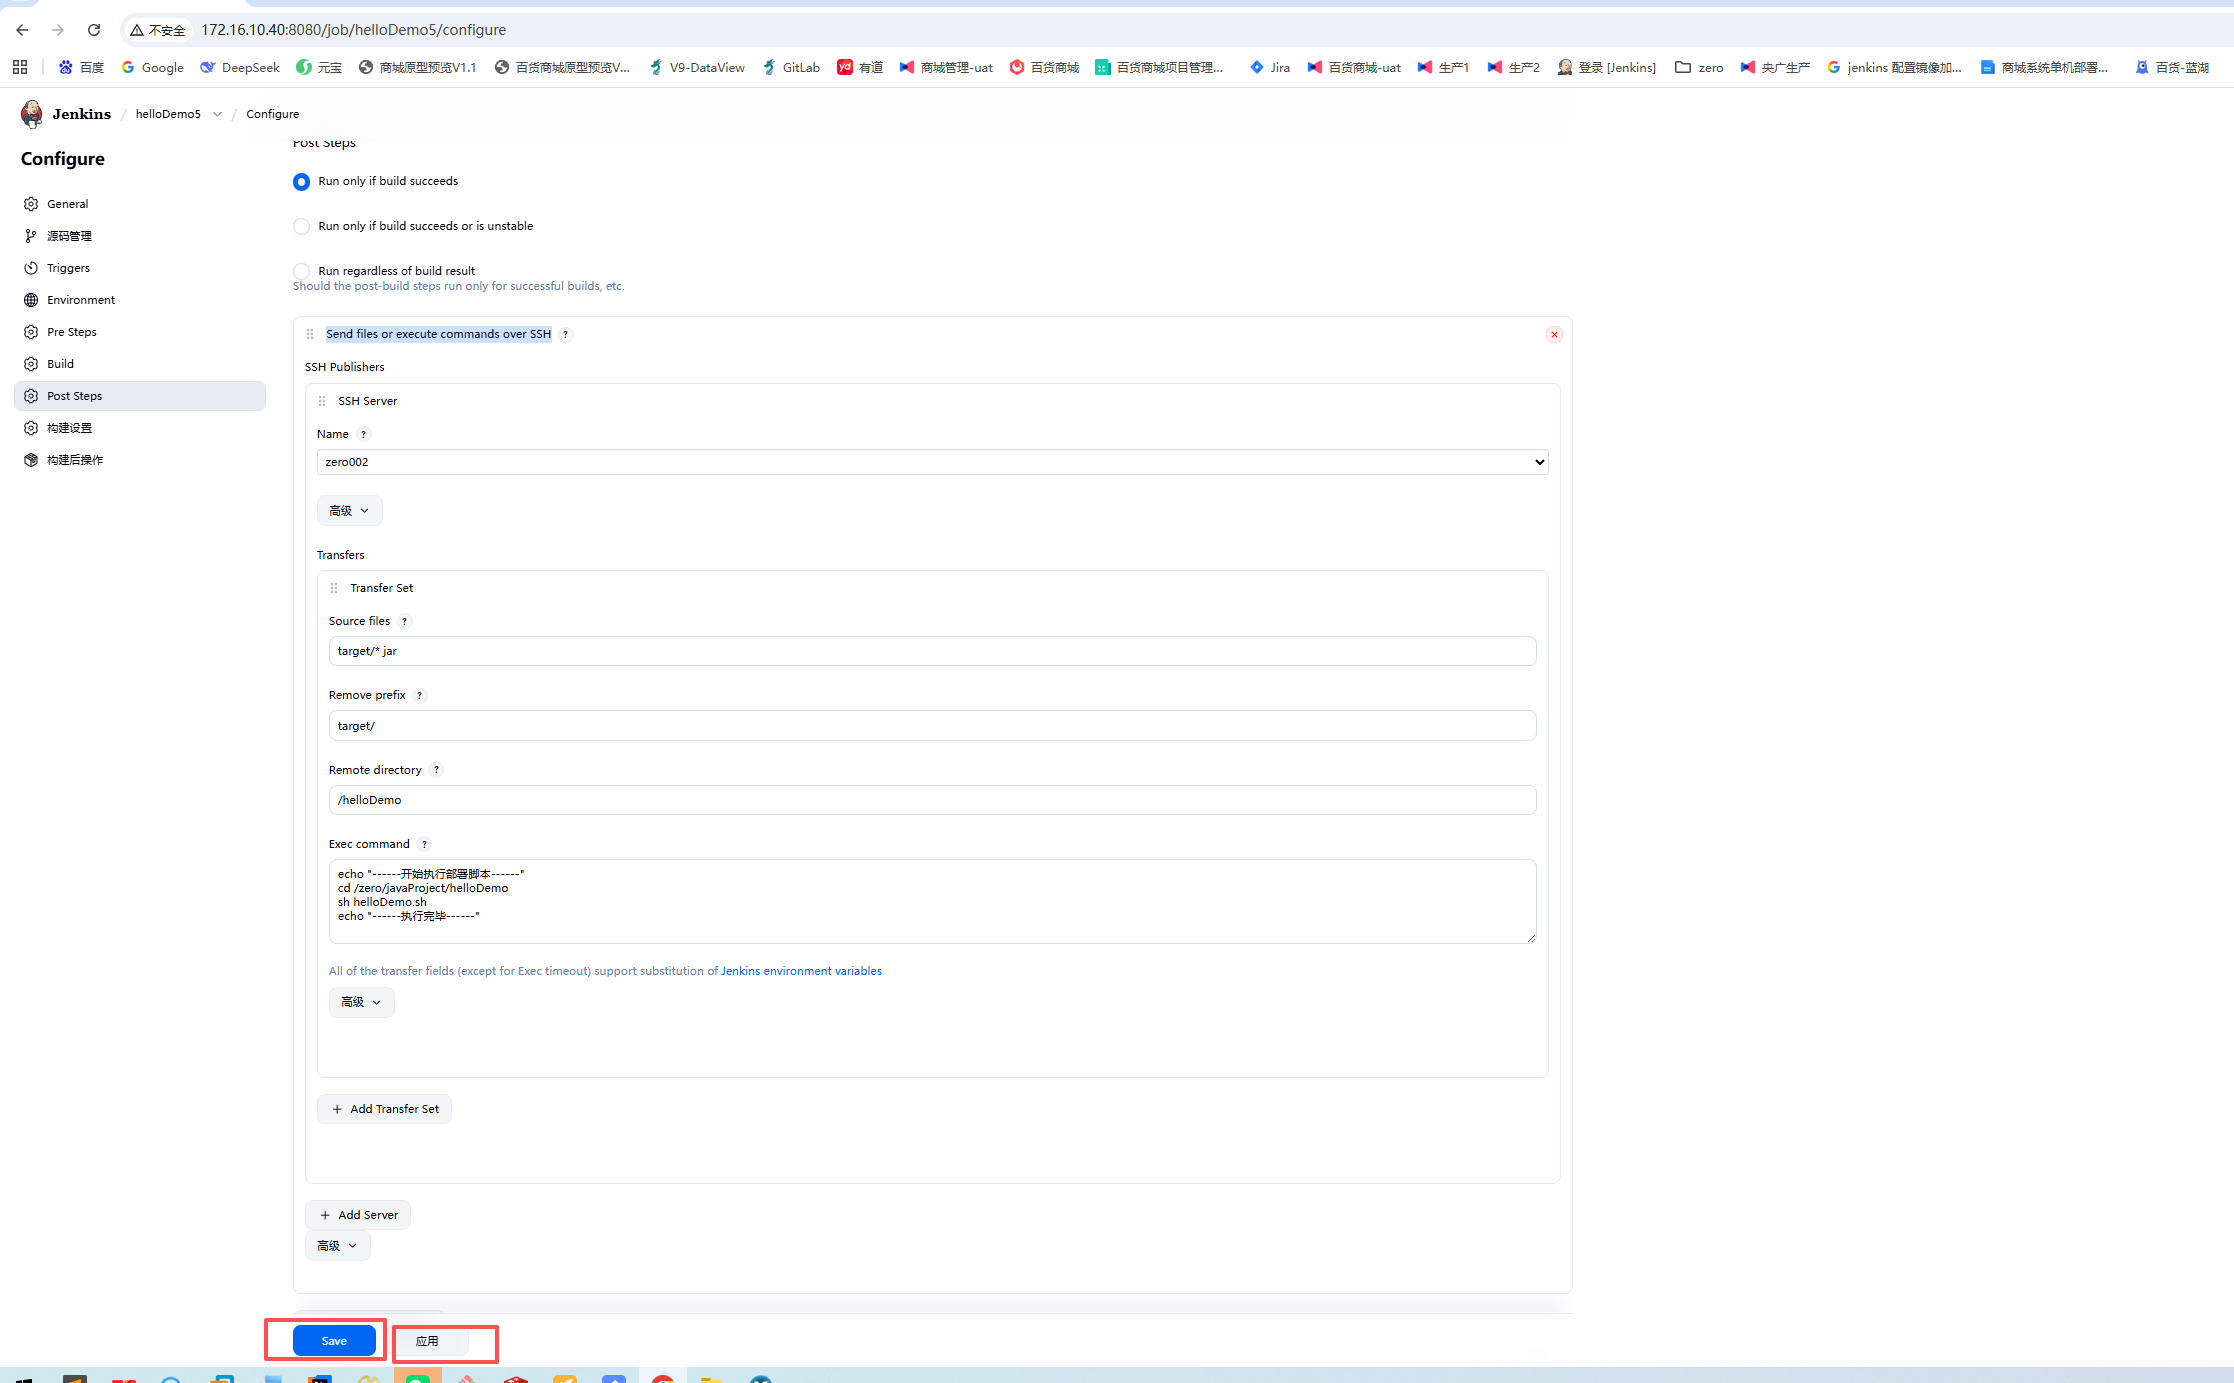
echo "------开始执行部署脚本------"
cd /zero/javaProject/helloDemo
sh helloDemo.sh
echo "------执行完毕------"
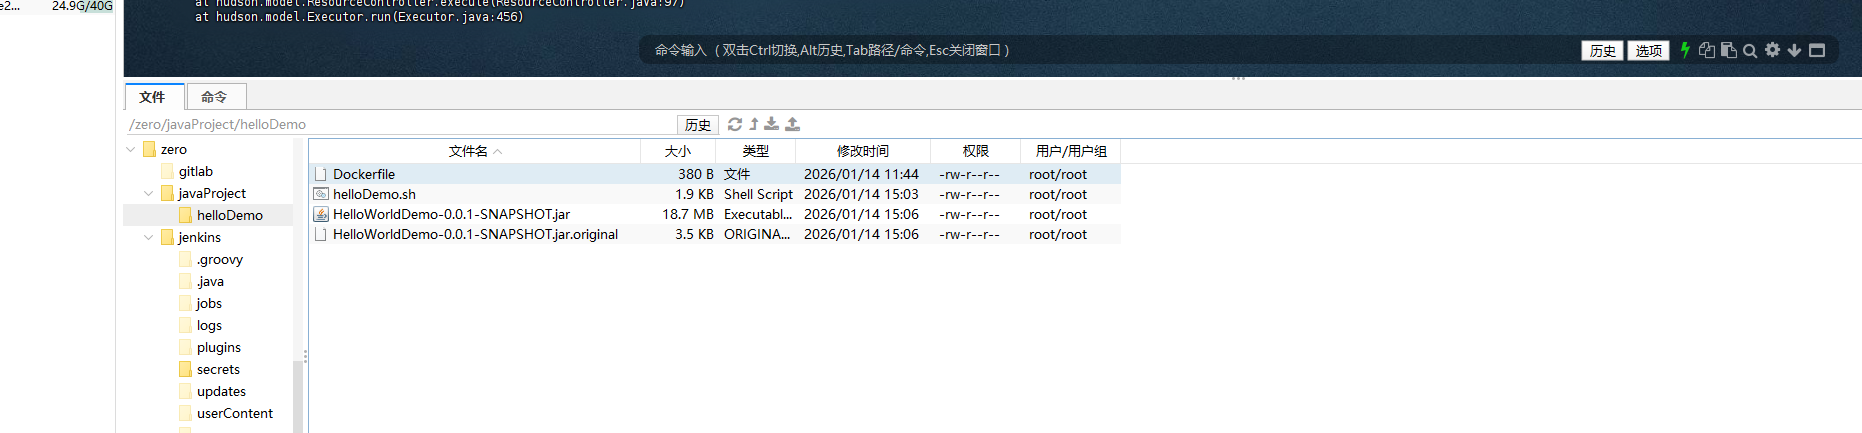
Dockerfile
# 基于java镜像创建新镜像
FROM jenkins/jenkins:latest-jdk17
# 作者
MAINTAINER luoyq
# 将jar包添加到容器中并更名为kxrw.jar
COPY HelloWorldDemo-0.0.1-SNAPSHOT.jar /zero/jars/HelloWorldDemo-0.0.1-SNAPSHOT.jar
# 暴露8080端口
EXPOSE 8080
# 运行jar包
ENTRYPOINT ["nohup","java","-jar","/zero/jars/HelloWorldDemo-0.0.1-SNAPSHOT.jar","--server.port=8080","&"]
helloDemo.sh
#!/bin/bash

echo "------清理旧容器和镜像------"
# 暂停并删除旧容器
echo "暂停旧的容器"
docker ps -a --format "{{.Names}}" | grep "^hellodemo" | xargs -r docker stop
echo "删除旧的容器"
docker ps -a --format "{{.Names}}" | grep "^hellodemo" | xargs -r docker rm

# 删除本地镜像(忽略不存在的错误)
echo "删除本地-旧的镜像"
docker rmi zero/hellodemo:test 2>/dev/null || true
echo "删除本地-私有仓库旧的镜像"
docker rmi 172.16.10.40:5000/zero/hellodemo:test 2>/dev/null || true

echo "------清理私有仓库------"
# 删除私有仓库中的镜像目录
echo "删除私有仓库-旧的镜像"
docker exec registry rm -rf /var/lib/registry/docker/registry/v2/repositories/zero/hellodemo 2>/dev/null || true

# 执行垃圾回收
echo "私有仓库-执行垃圾回收"
docker exec registry bin/registry garbage-collect /etc/docker/registry/config.yml

# 关键步骤:重启Registry服务以清除缓存
echo "重启私有仓库服务"
docker restart registry

# 等待服务完全启动
sleep 5

echo "------构建和推送新镜像------"
# 构建新镜像
echo "制作镜像"
docker build -f Dockerfile -t zero/hellodemo:test .

# 打标签
echo "现有镜像打上私有仓库标签"
docker tag zero/hellodemo:test 172.16.10.40:5000/zero/hellodemo:test

# 推送前检查网络连通性
echo "检查私有仓库连接"
curl -s http://172.16.10.40:5000/v2/_catalog >/dev/null && echo "仓库连接正常" || echo "仓库连接异常"

# 推送镜像
echo "推送到私有仓库"
docker push 172.16.10.40:5000/zero/hellodemo:test

echo "------部署新镜像------"
# 检查并拉取镜像(确保使用最新版本)
TARGET_IMAGE="172.16.10.40:5000/zero/hellodemo:test"
echo "下载镜像"
docker pull "$TARGET_IMAGE"

# 启动新容器
echo "启动镜像"
docker run -d \
  --name hellodemo \
  --restart always \
  -p 2001:8080 \
  -e TZ=Asia/Shanghai \
  "$TARGET_IMAGE"

echo "------部署完成------"
启动自动化打包部署
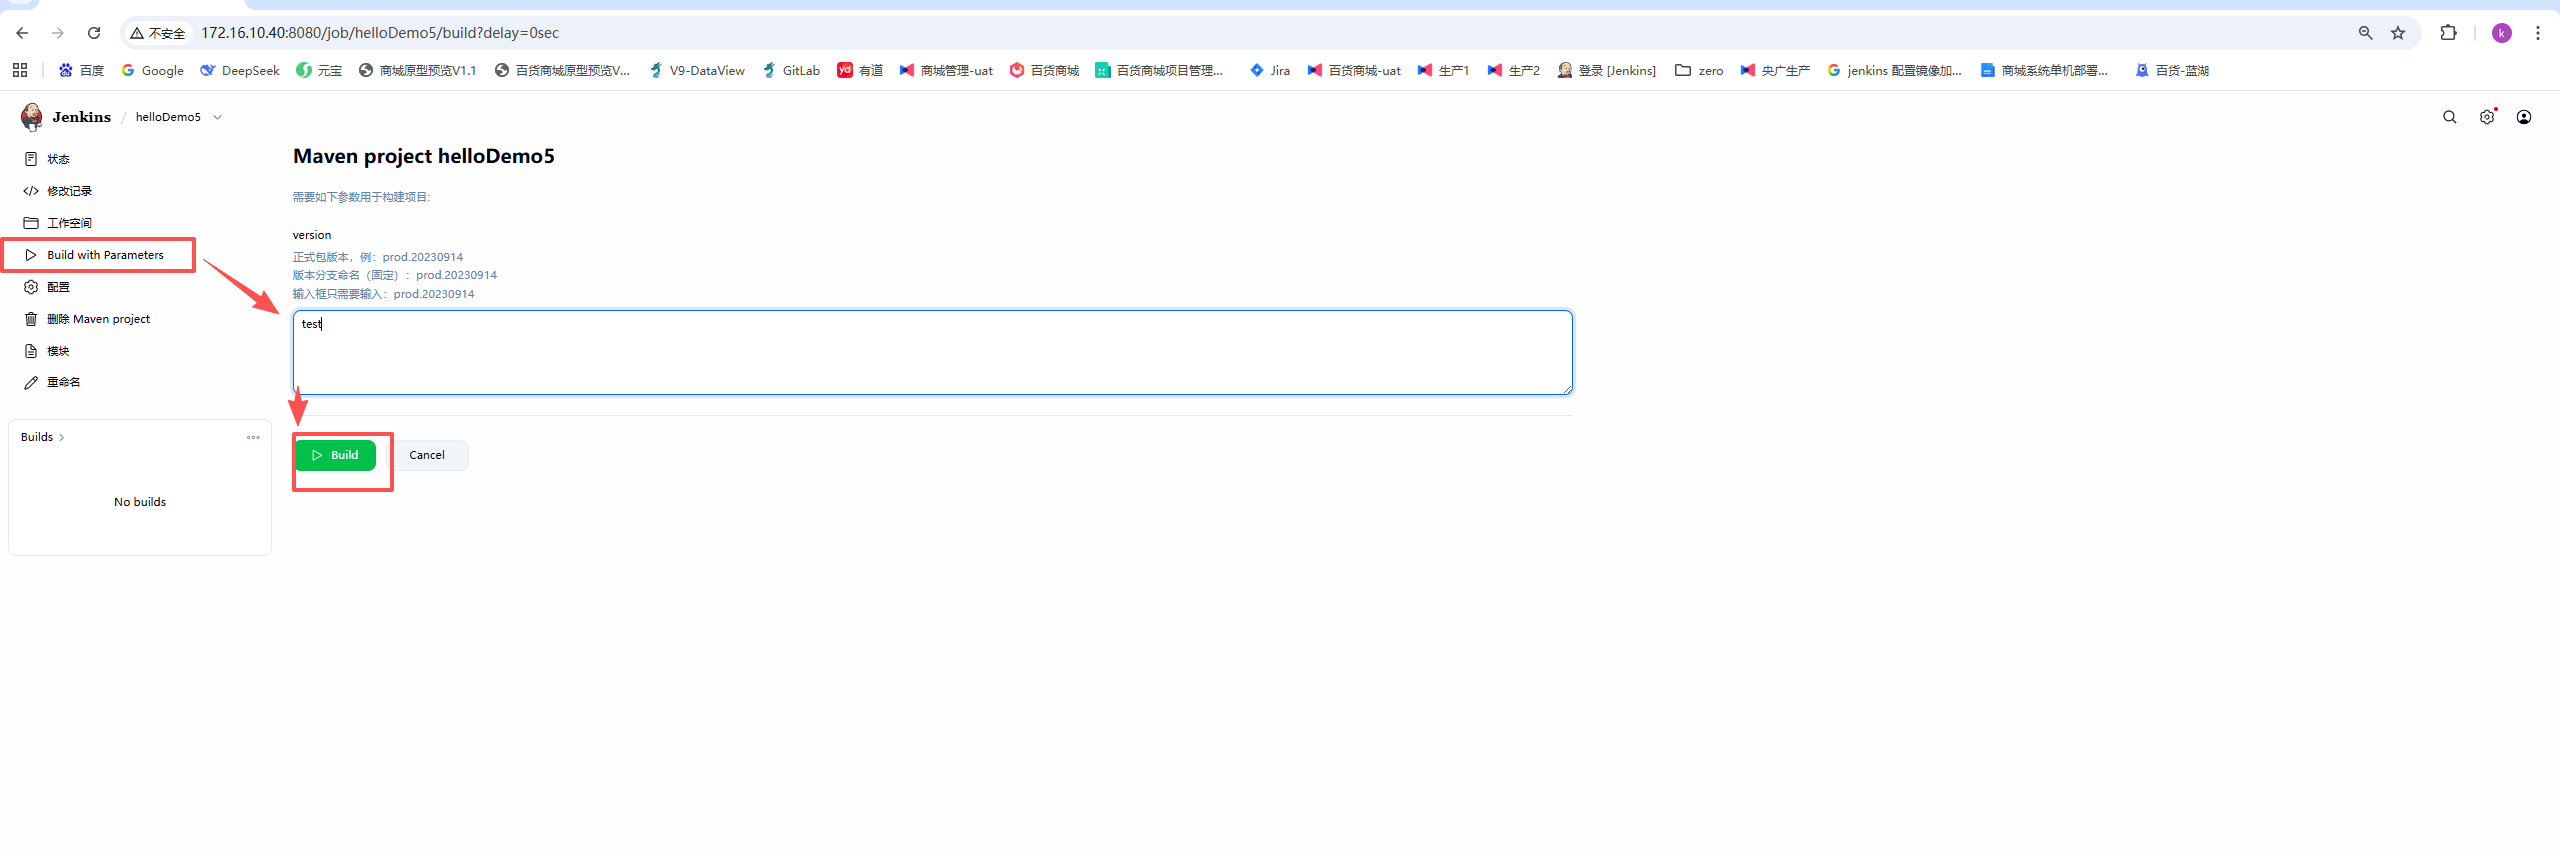
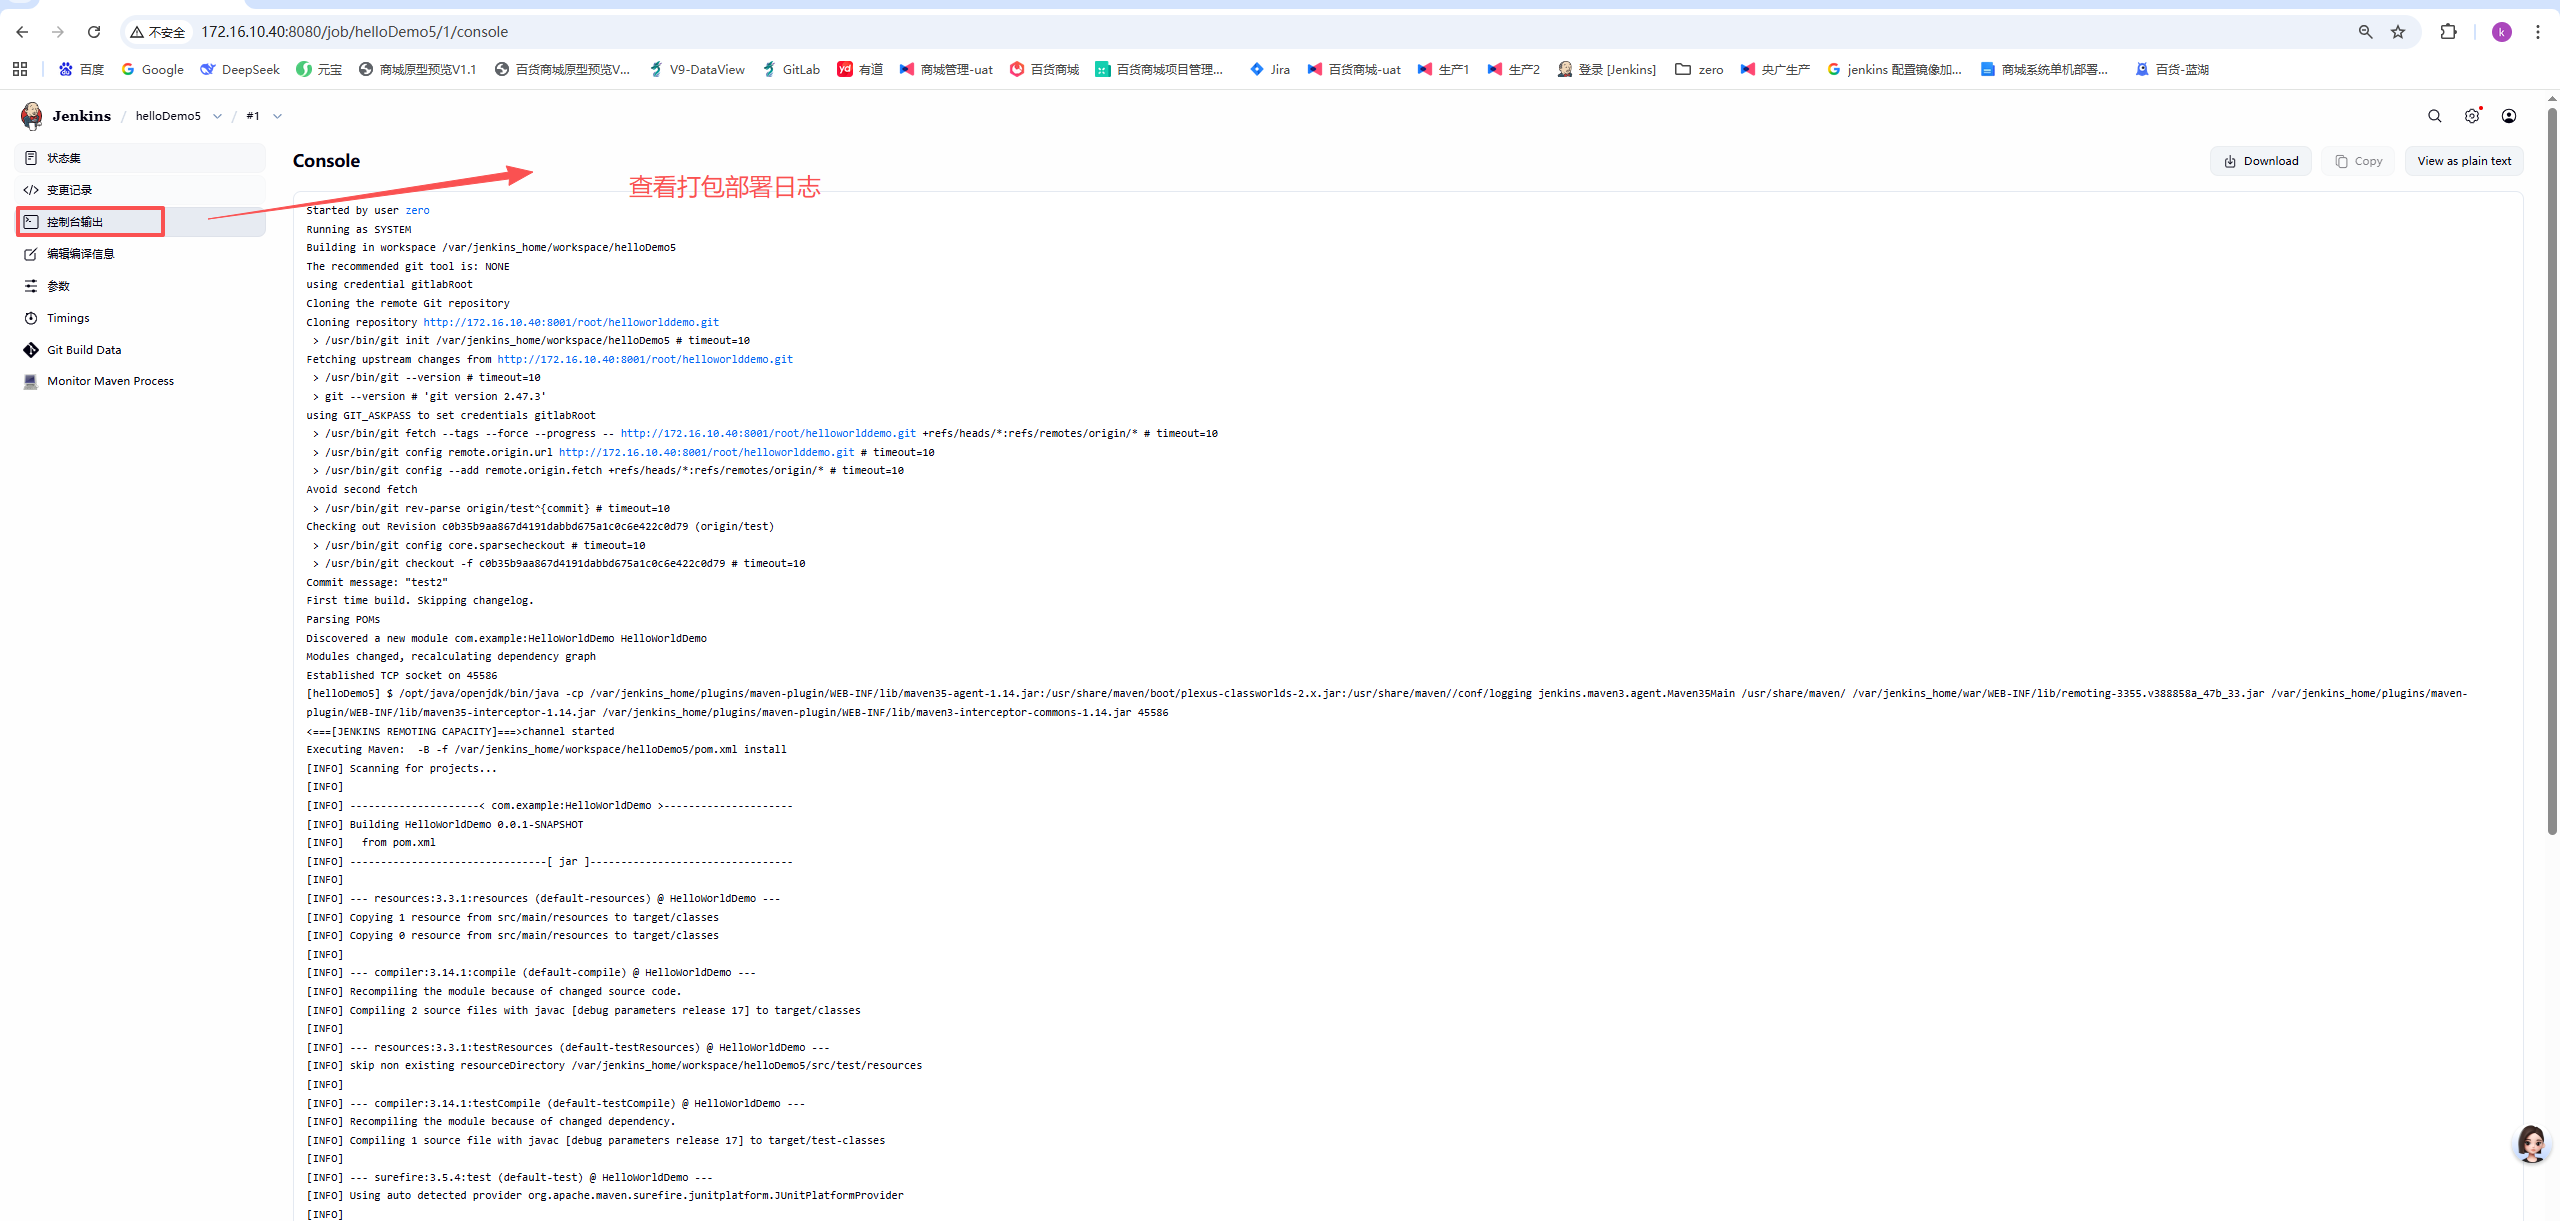
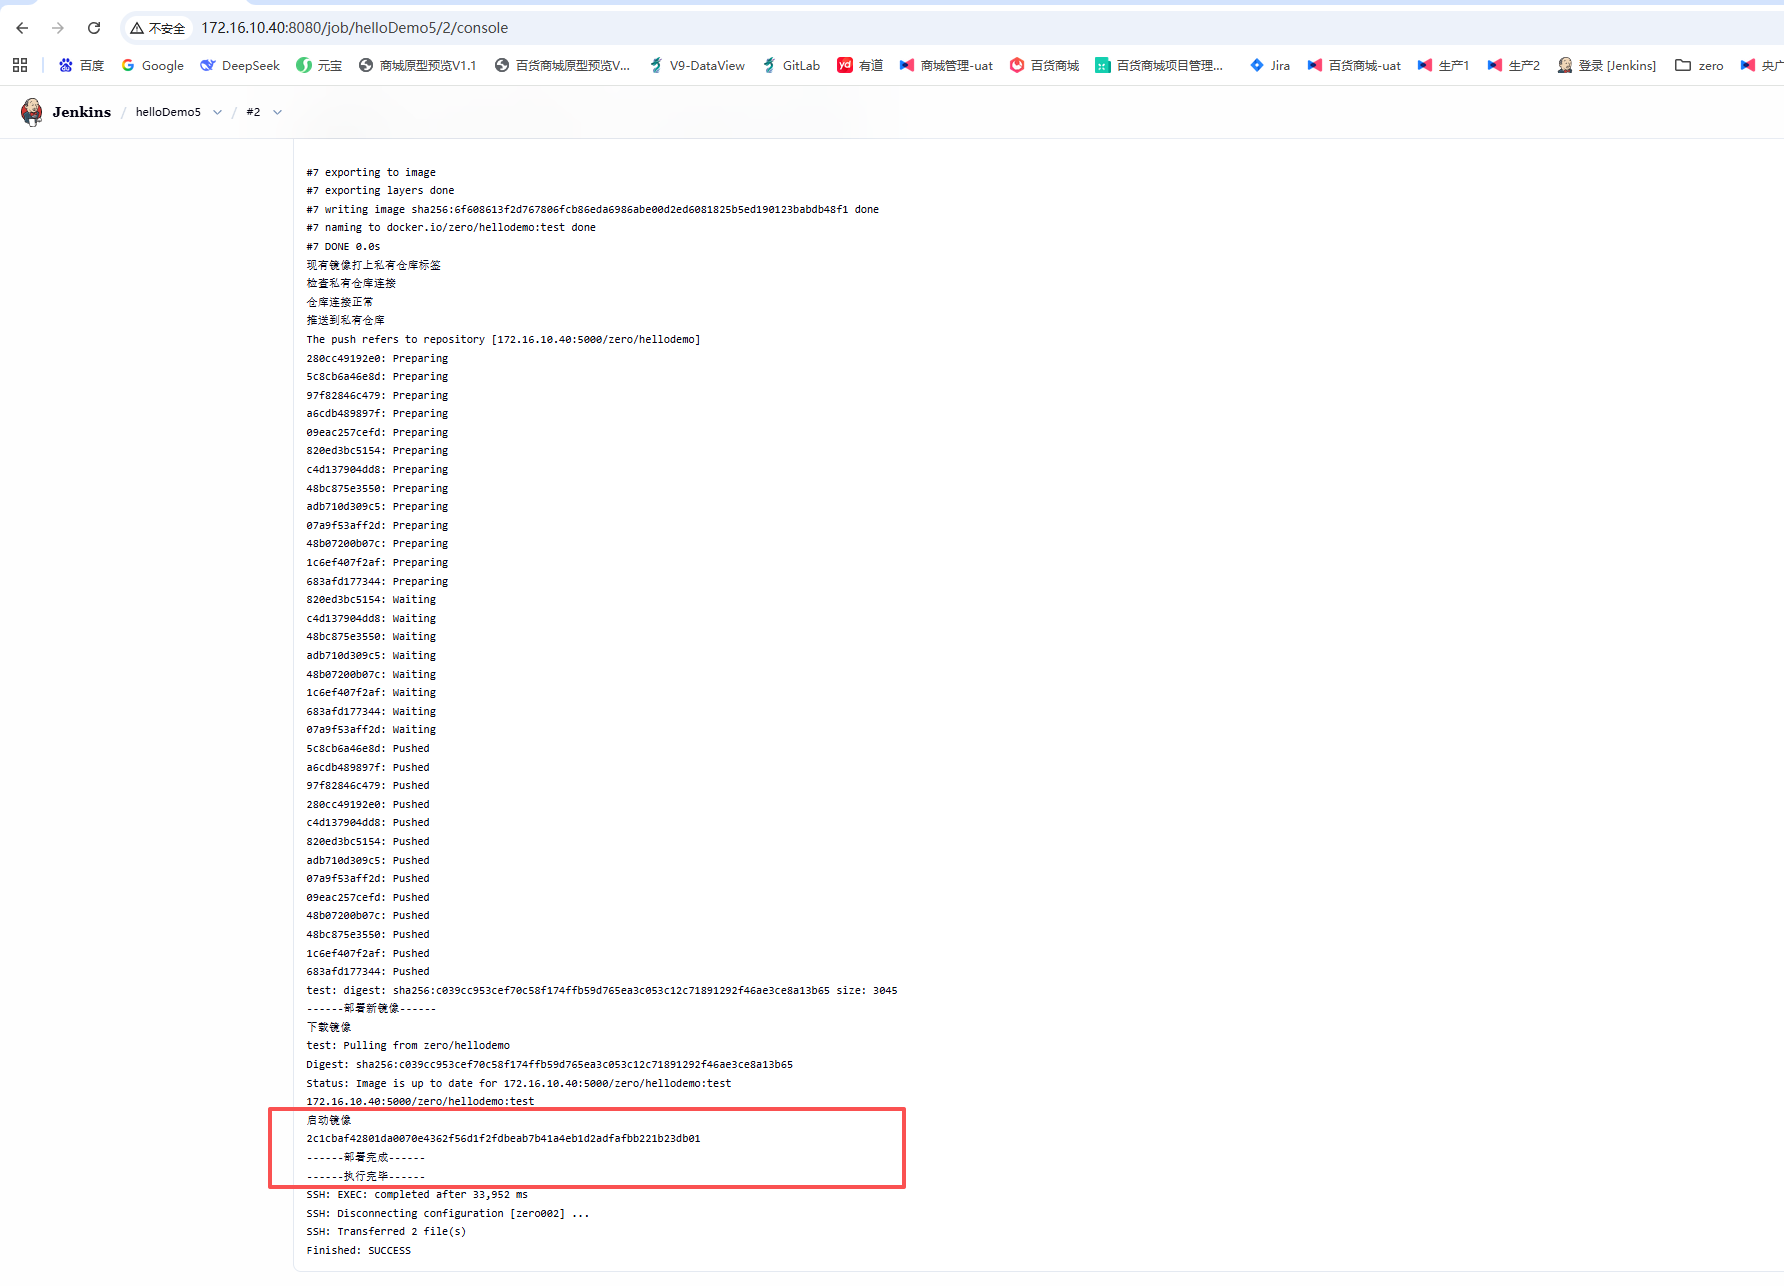
脚本执行如下一条条执行效果留底:
echo "暂停旧的容器"
docker ps -a --format "{{.Names}}" | grep "^hellodemo" | xargs -r docker stop
echo "删除旧的容器"
docker ps -a --format "{{.Names}}" | grep "^hellodemo" | xargs -r docker rm
echo "删除本地-旧的镜像"
docker rmi zero/hellodemo:test
echo "删除本地-私有仓库旧的镜像"
docker rmi 172.16.10.40:5000/zero/hellodemo:test
echo "删除私有仓库-私有仓库旧的镜像"
docker exec registry rm -rf /var/lib/registry/docker/registry/v2/repositories/zero/hellodemo
echo "私有仓库-执行垃圾回收"
docker exec registry bin/registry garbage-collect /etc/docker/registry/config.yml
echo "重启 registry..."
docker restart registry
sleep 5
echo "------制作镜像------"
docker build -f Dockerfile -t zero/hellodemo:test .
sleep 3
echo ""------现有镜像打上私有仓库标签------"
docker tag zero/hellodemo:test 172.16.10.40:5000/zero/hellodemo:test
sleep 3
echo ""------推送到私有仓库------"
docker push 172.16.10.40:5000/zero/hellodemo:test
sleep 3
echo "------下载镜像------"
TARGET_IMAGE="172.16.10.40:5000/zero/hellodemo:test"
# 核心判断:检查镜像是否存在
if docker image inspect "$TARGET_IMAGE" &> /dev/null; then
echo "镜像 $TARGET_IMAGE 已存在,跳过下载。"
else
echo "镜像 $TARGET_IMAGE 不存在,开始下载..."
docker pull "$TARGET_IMAGE"
fi
sleep 3
echo ""------启动镜像"------"
docker run -d \
--name hellodemo \
--restart always \
-p 2001:8080 \
-e TZ=Asia/Shanghai \
172.16.10.40:5000/zero/hellodemo:test

汇聚全球AI编程工具,助力开发者即刻编程。
更多推荐
 19
19 0
0- 0


 已为社区贡献5条内容

所有评论(0)