
部署 Sphinx 文档到 GitHub Pages 详细指南
部署 Sphinx 文档到 GitHub Pages 指南
本文将详细介绍如何将 Sphinx 生成的文档部署到 GitHub Pages,包括手动部署和使用 GitHub Actions 的自动部署方案。我们将以 dlt645 项目的 Python 版本文档为例进行说明。
1. 准备工作
1.1 项目结构
在开始之前,让我们先了解一下典型的 Sphinx 文档项目结构(以 dlt645/python/docs 为例):
docs/
├── source/
│   ├── conf.py          # Sphinx 配置文件
│   ├── index.rst        # 文档首页
│   ├── modules.rst      # 模块索引
│   └── ...              # 其他文档源文件
├── build/               # 构建输出目录
│   └── html/            # HTML 文档输出
├── Makefile             # 构建脚本
└── make.bat             # Windows 构建脚本
1.2 确保 Sphinx 配置正确
在 conf.py 中,确保以下配置项正确设置:
# conf.py

# 项目信息
project = 'dlt645'
copyright = '2026, 陈东宇'
author = '陈东宇'
release = 'v1.4.0'

# 确保 sphinx.ext.githubpages 扩展已启用
extensions = [
    # 其他扩展...
    'sphinx.ext.githubpages',
]

# HTML 主题配置
html_theme = 'sphinx_rtd_theme'
html_theme_options = {
    'collapse_navigation': False,
    'navigation_depth': -1,
}
1.3 生成 HTML 文档
首先,确保能够成功生成 HTML 文档:
# 在 docs 目录下执行
cd python/docs
make html
生成的 HTML 文档将位于 build/html/ 目录下。
2. 手动部署到 GitHub Pages
手动部署适合简单项目或初次部署测试。
2.1 推送 HTML 文件到 gh-pages 分支
-
构建文档:在项目根目录下,执行 Sphinx 构建命令,生成 HTML 文件,文件在build/html/目录下
make html
# 或者直接使用 sphinx-build
# sphinx-build -b html docs/source docs/build/html
-
准备部署目录:进入构建输出目录(如
docs/_build/html或build/html),初始化一个 Git 仓库并设置远程地址cd docs/build/html git init git remote add origin https://github.com/<你的用户名>/<你的仓库名>.git
-
创建并推送至 gh-pages 分支:将生成的所有文件提交并强制推送到远程仓库的
gh-pages分支# 添加所有文件 git add . # 提交 git commit -m "Deploy Sphinx documentation to GitHub Pages" # 推送到远程仓库 git push -f origin main:gh-pages
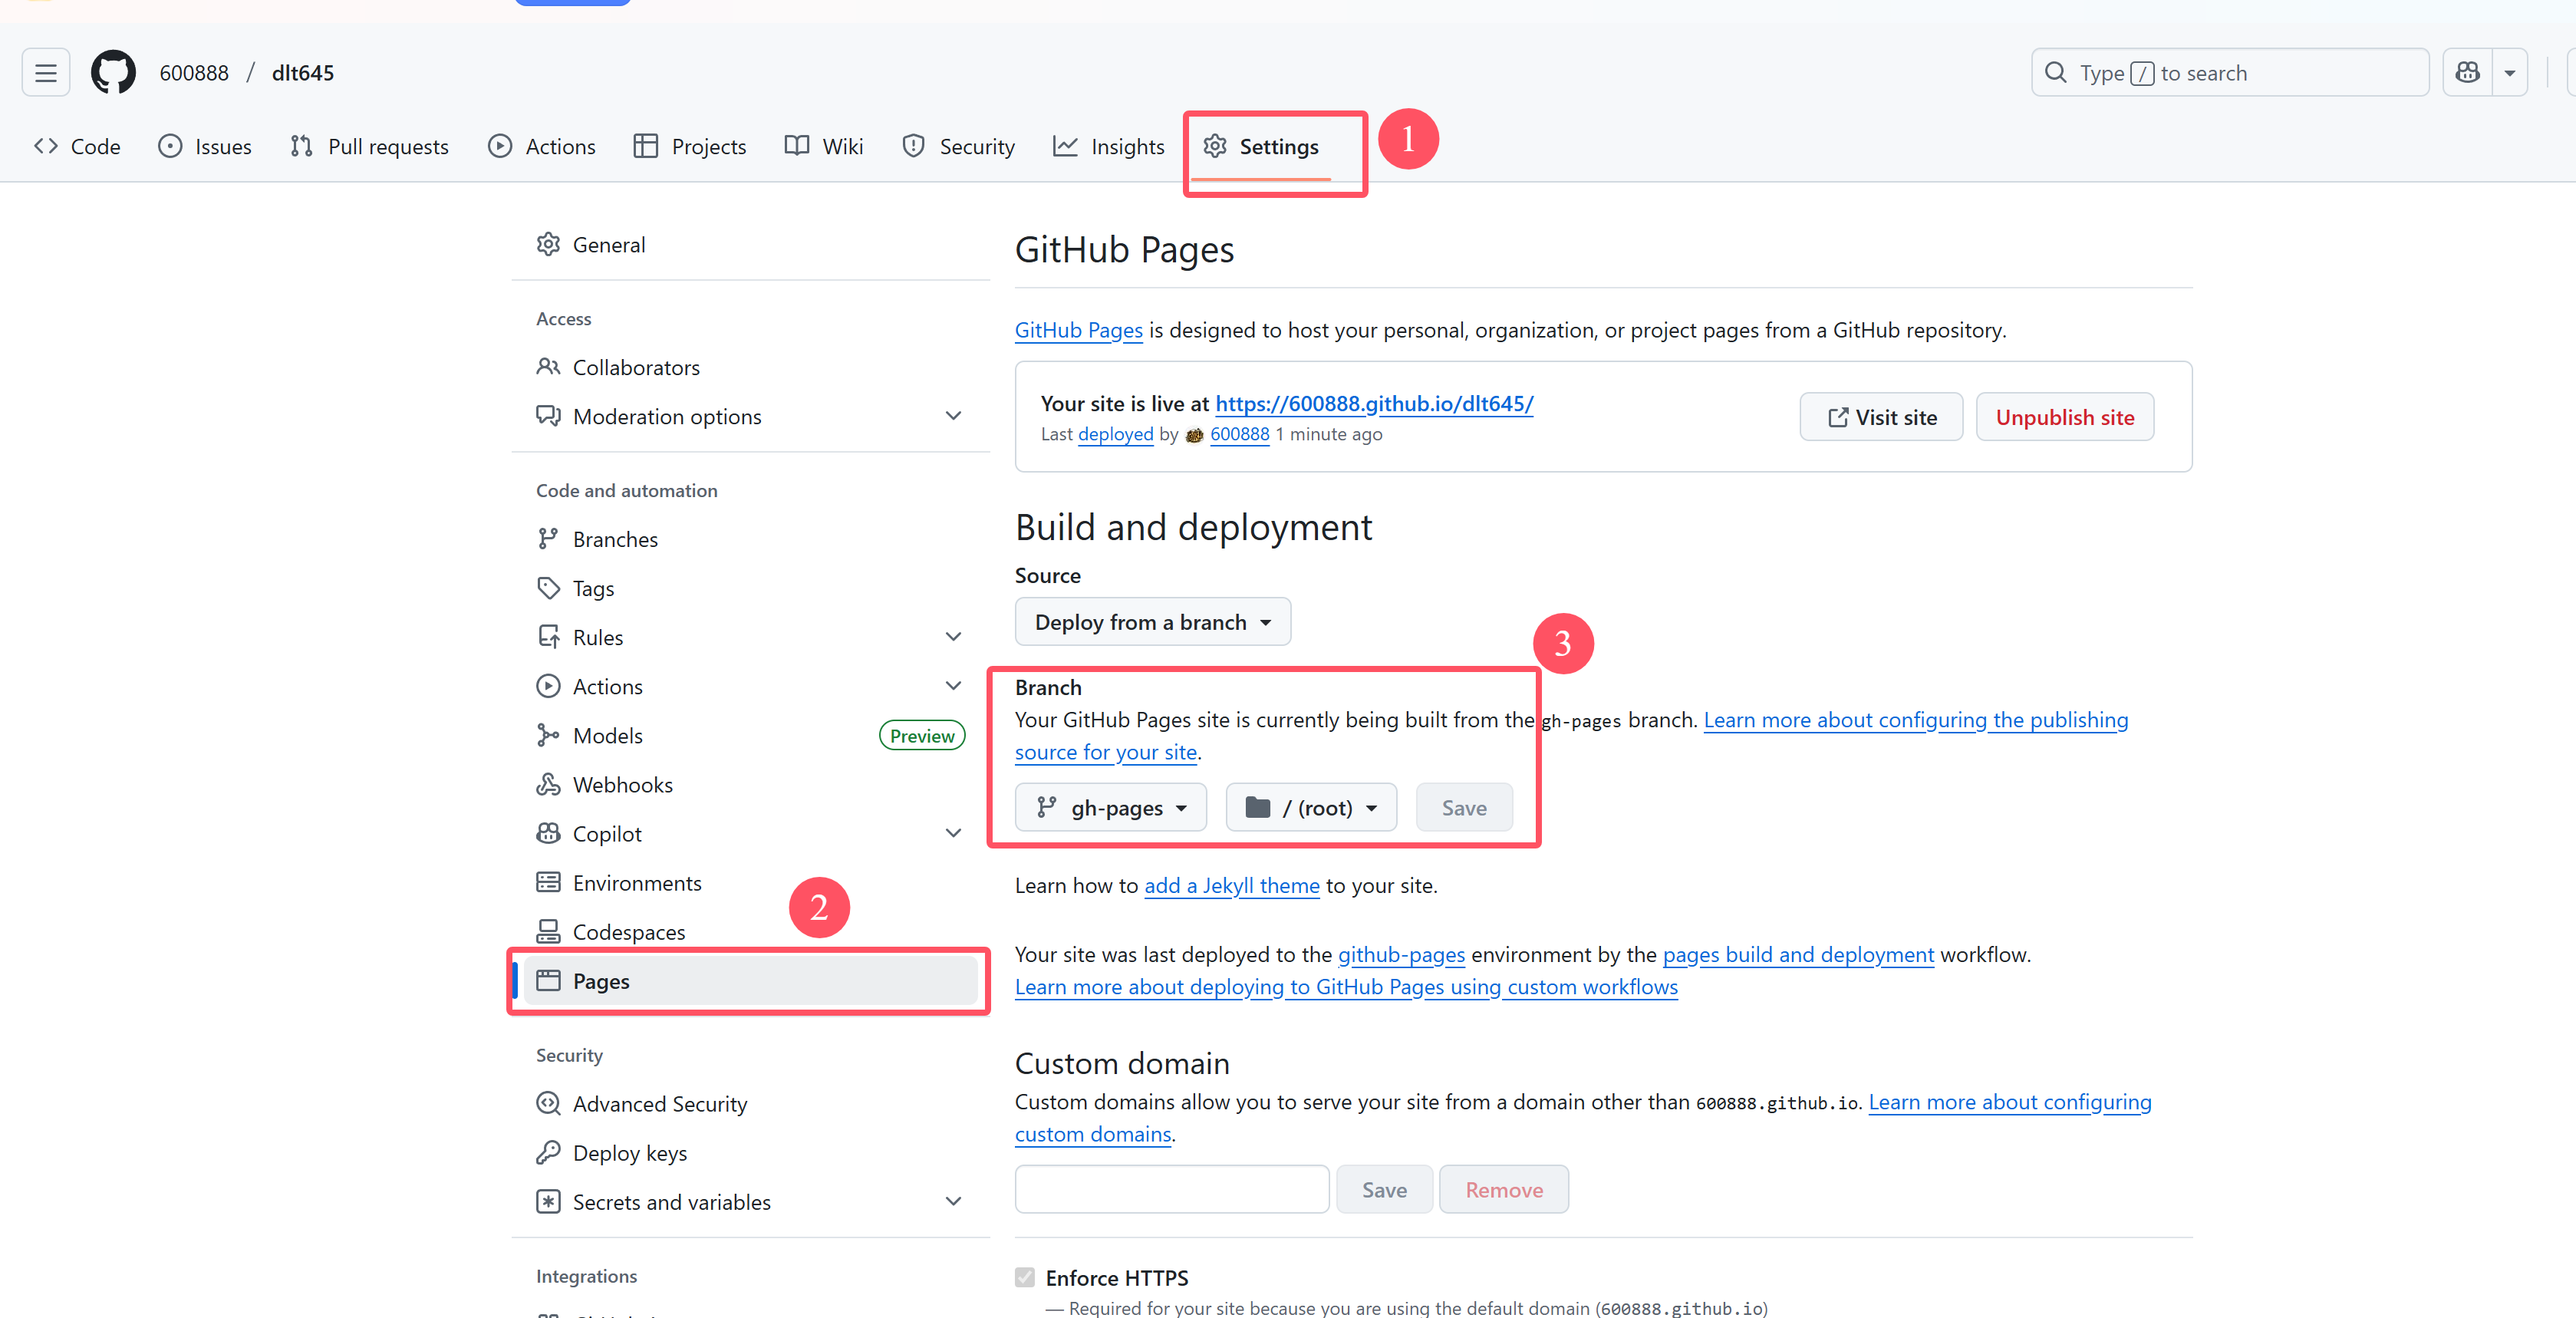
2.3 配置 GitHub Pages
部署完成后,需要在 GitHub 仓库中配置 Pages:
- 登录 GitHub,进入项目仓库
- 点击
Settings→Pages - 在
Source部分,选择gh-pages分支和/(root)目录 - 点击
Save
3. 自动部署(GitHub Actions)
使用 GitHub Actions 可以实现文档的自动构建和部署,当代码变更时自动更新文档。
3.1 创建 GitHub Actions 工作流
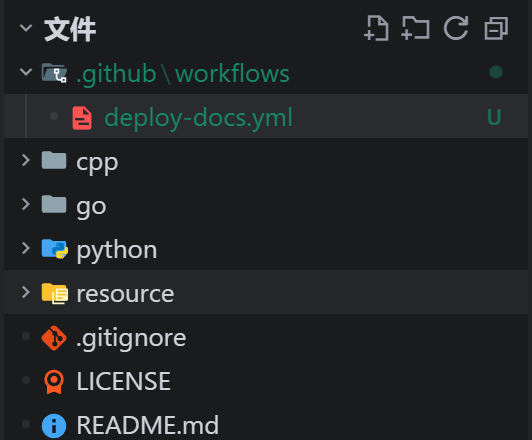
在项目根目录下创建 .github/workflows/ 目录,并添加部署工作流文件:
mkdir -p .github/workflows
touch .github/workflows/deploy-docs.yml
3.2 编写工作流配置
编辑 deploy-docs.yml 文件,添加以下内容:
name: Deploy Sphinx Documentation

on:
  # 当主分支或开发分支有推送时触发
  push:
    branches: [ main, master, develop ]
  # 允许手动触发
  workflow_dispatch:

jobs:
  build-and-deploy:
    runs-on: ubuntu-latest
    permissions:
      contents: write  # 需要写入内容权限
      pages: write     # 需要操作 Pages 权限
      id-token: write  # 需要生成 ID Token
    steps:
      # 步骤 1: 检出代码
      - name: Checkout repository
        uses: actions/checkout@v4
        with:
          fetch-depth: 0  # 确保获取完整的提交历史

      # 步骤 2: 设置 Python 环境
      - name: Set up Python
        uses: actions/setup-python@v4
        with:
          python-version: '3.10'
          cache: 'pip'

      # 步骤 3: 安装依赖
      - name: Install dependencies
        run: |
          pip install --upgrade pip
          pip install -r python/requirements.txt
          pip install sphinx sphinx-rtd-theme sphinx-autodoc-typehints sphinx-copybutton

      # 步骤 4: 生成 HTML 文档
      - name: Build HTML documentation
        run: |
          cd python/docs
          make html

      # 步骤 5: 部署到 GitHub Pages
      - name: Deploy to GitHub Pages
        uses: peaceiris/actions-gh-pages@v4
        with:
          # 文档源目录
          publish_dir: ./python/docs/build/html
          # 提交信息
          commit_message: "Deploy Sphinx docs for ${{ github.sha }}"
          # 个人访问令牌(如果需要)
          github_token: ${{ secrets.GITHUB_TOKEN }}
          # 推送的分支
          publish_branch: gh-pages
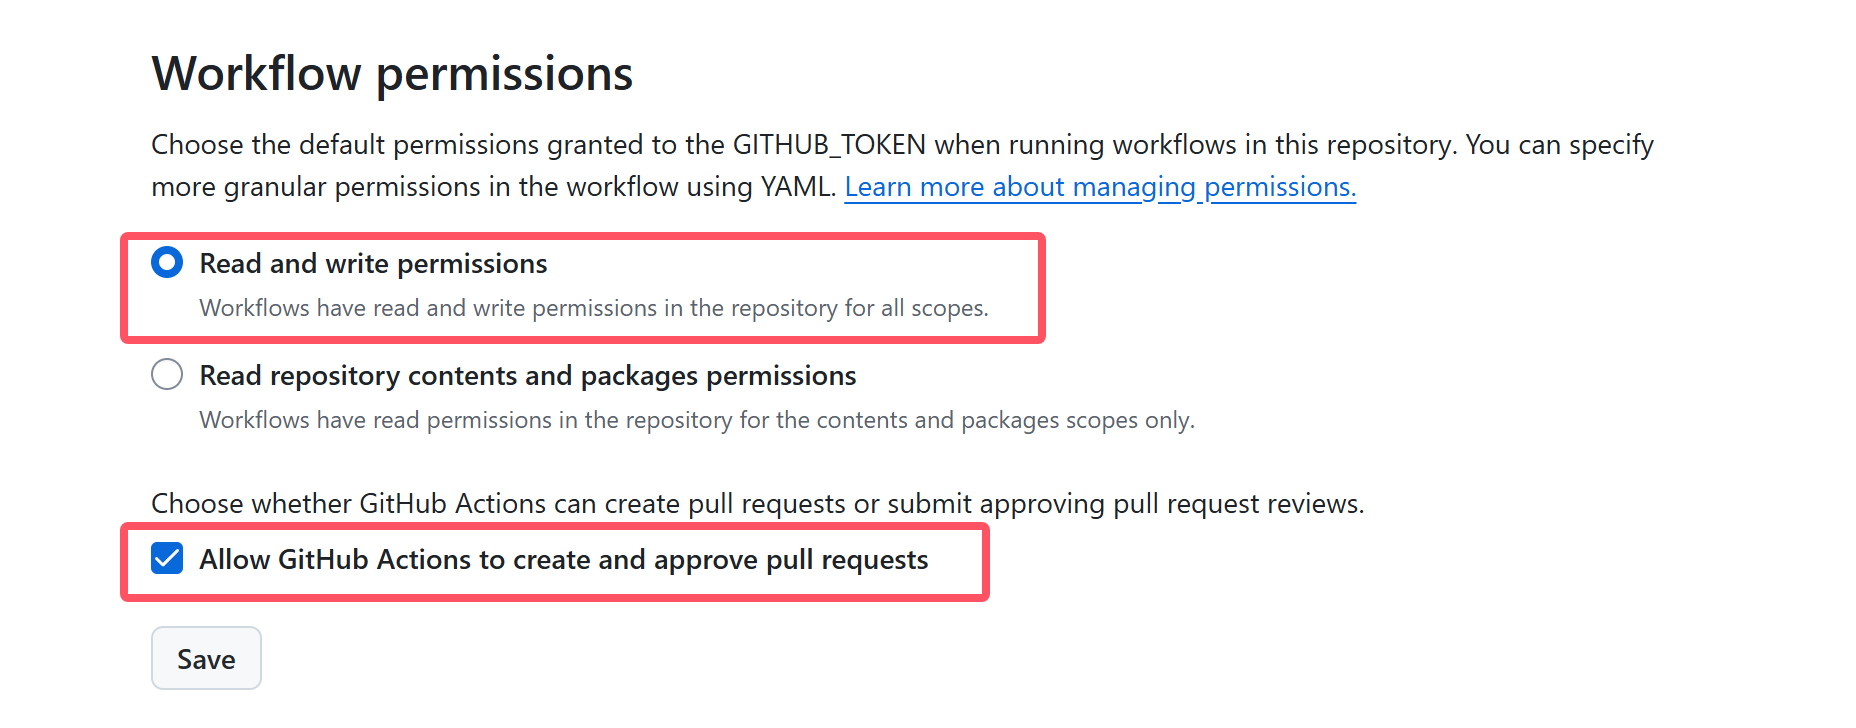
3.3 配置权限
确保 GitHub 仓库的 Actions 有足够的权限:
- 进入仓库
Settings→Actions→General - 在
Workflow permissions部分,选择Read and write permissions - 勾选
Allow GitHub Actions to create and approve pull requests - 点击
Save
3.4 测试自动部署
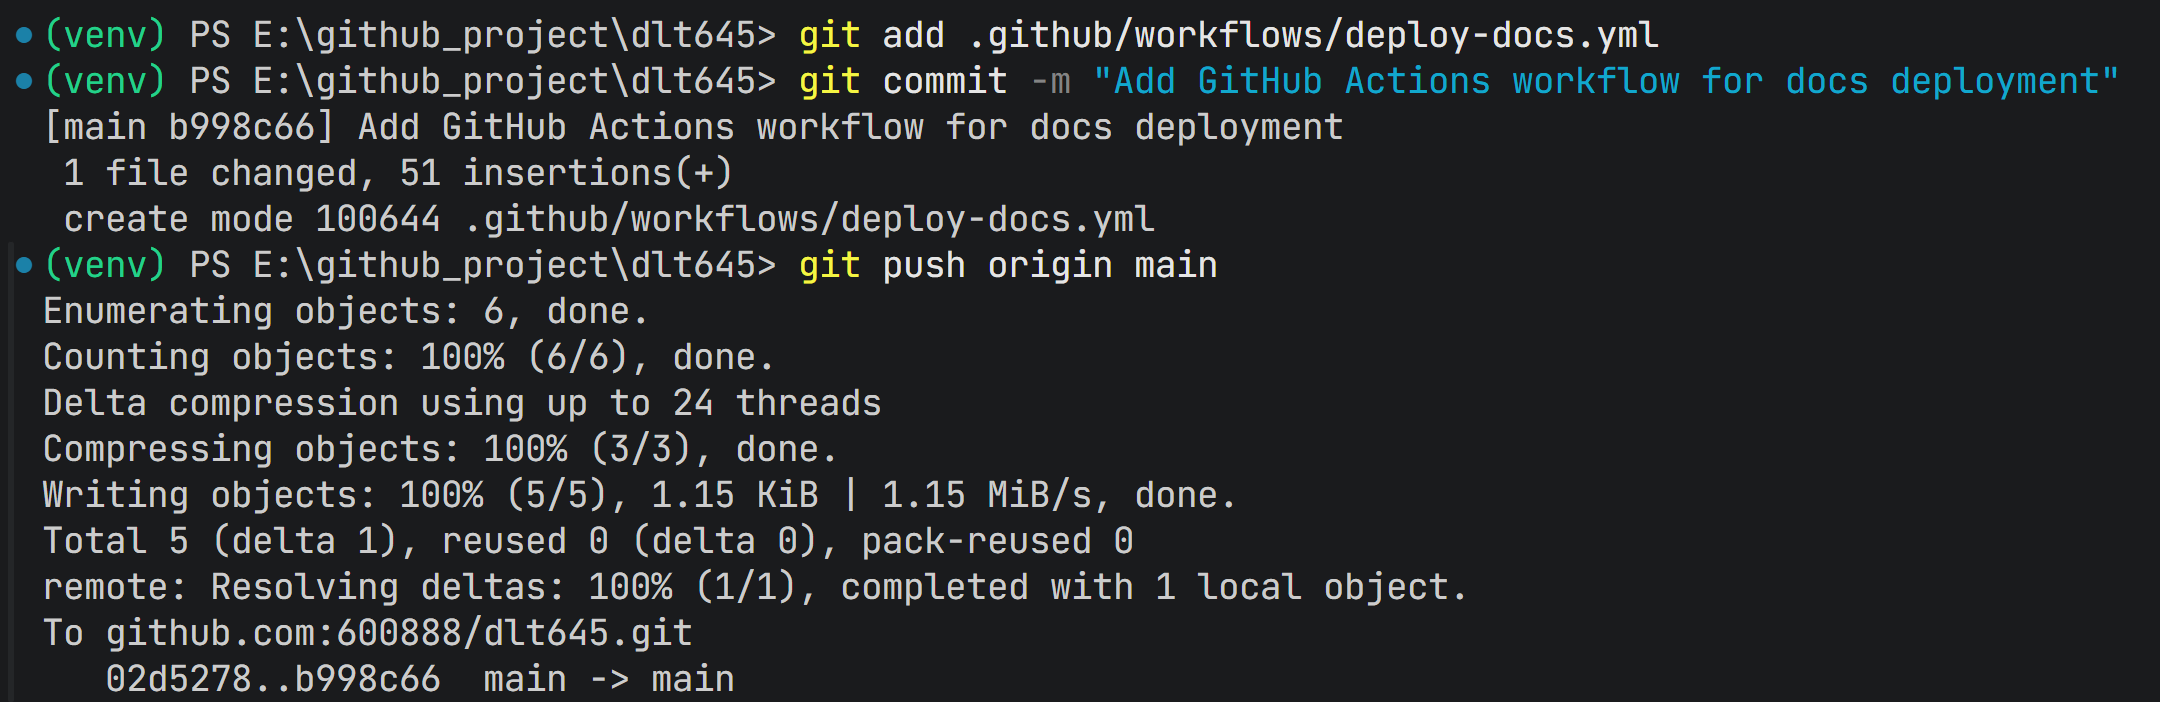
提交工作流文件到主分支:
git add .github/workflows/deploy-docs.yml
git commit -m "Add GitHub Actions workflow for docs deployment"
git push origin main
然后在 GitHub 仓库的 Actions 标签页中查看部署进度。
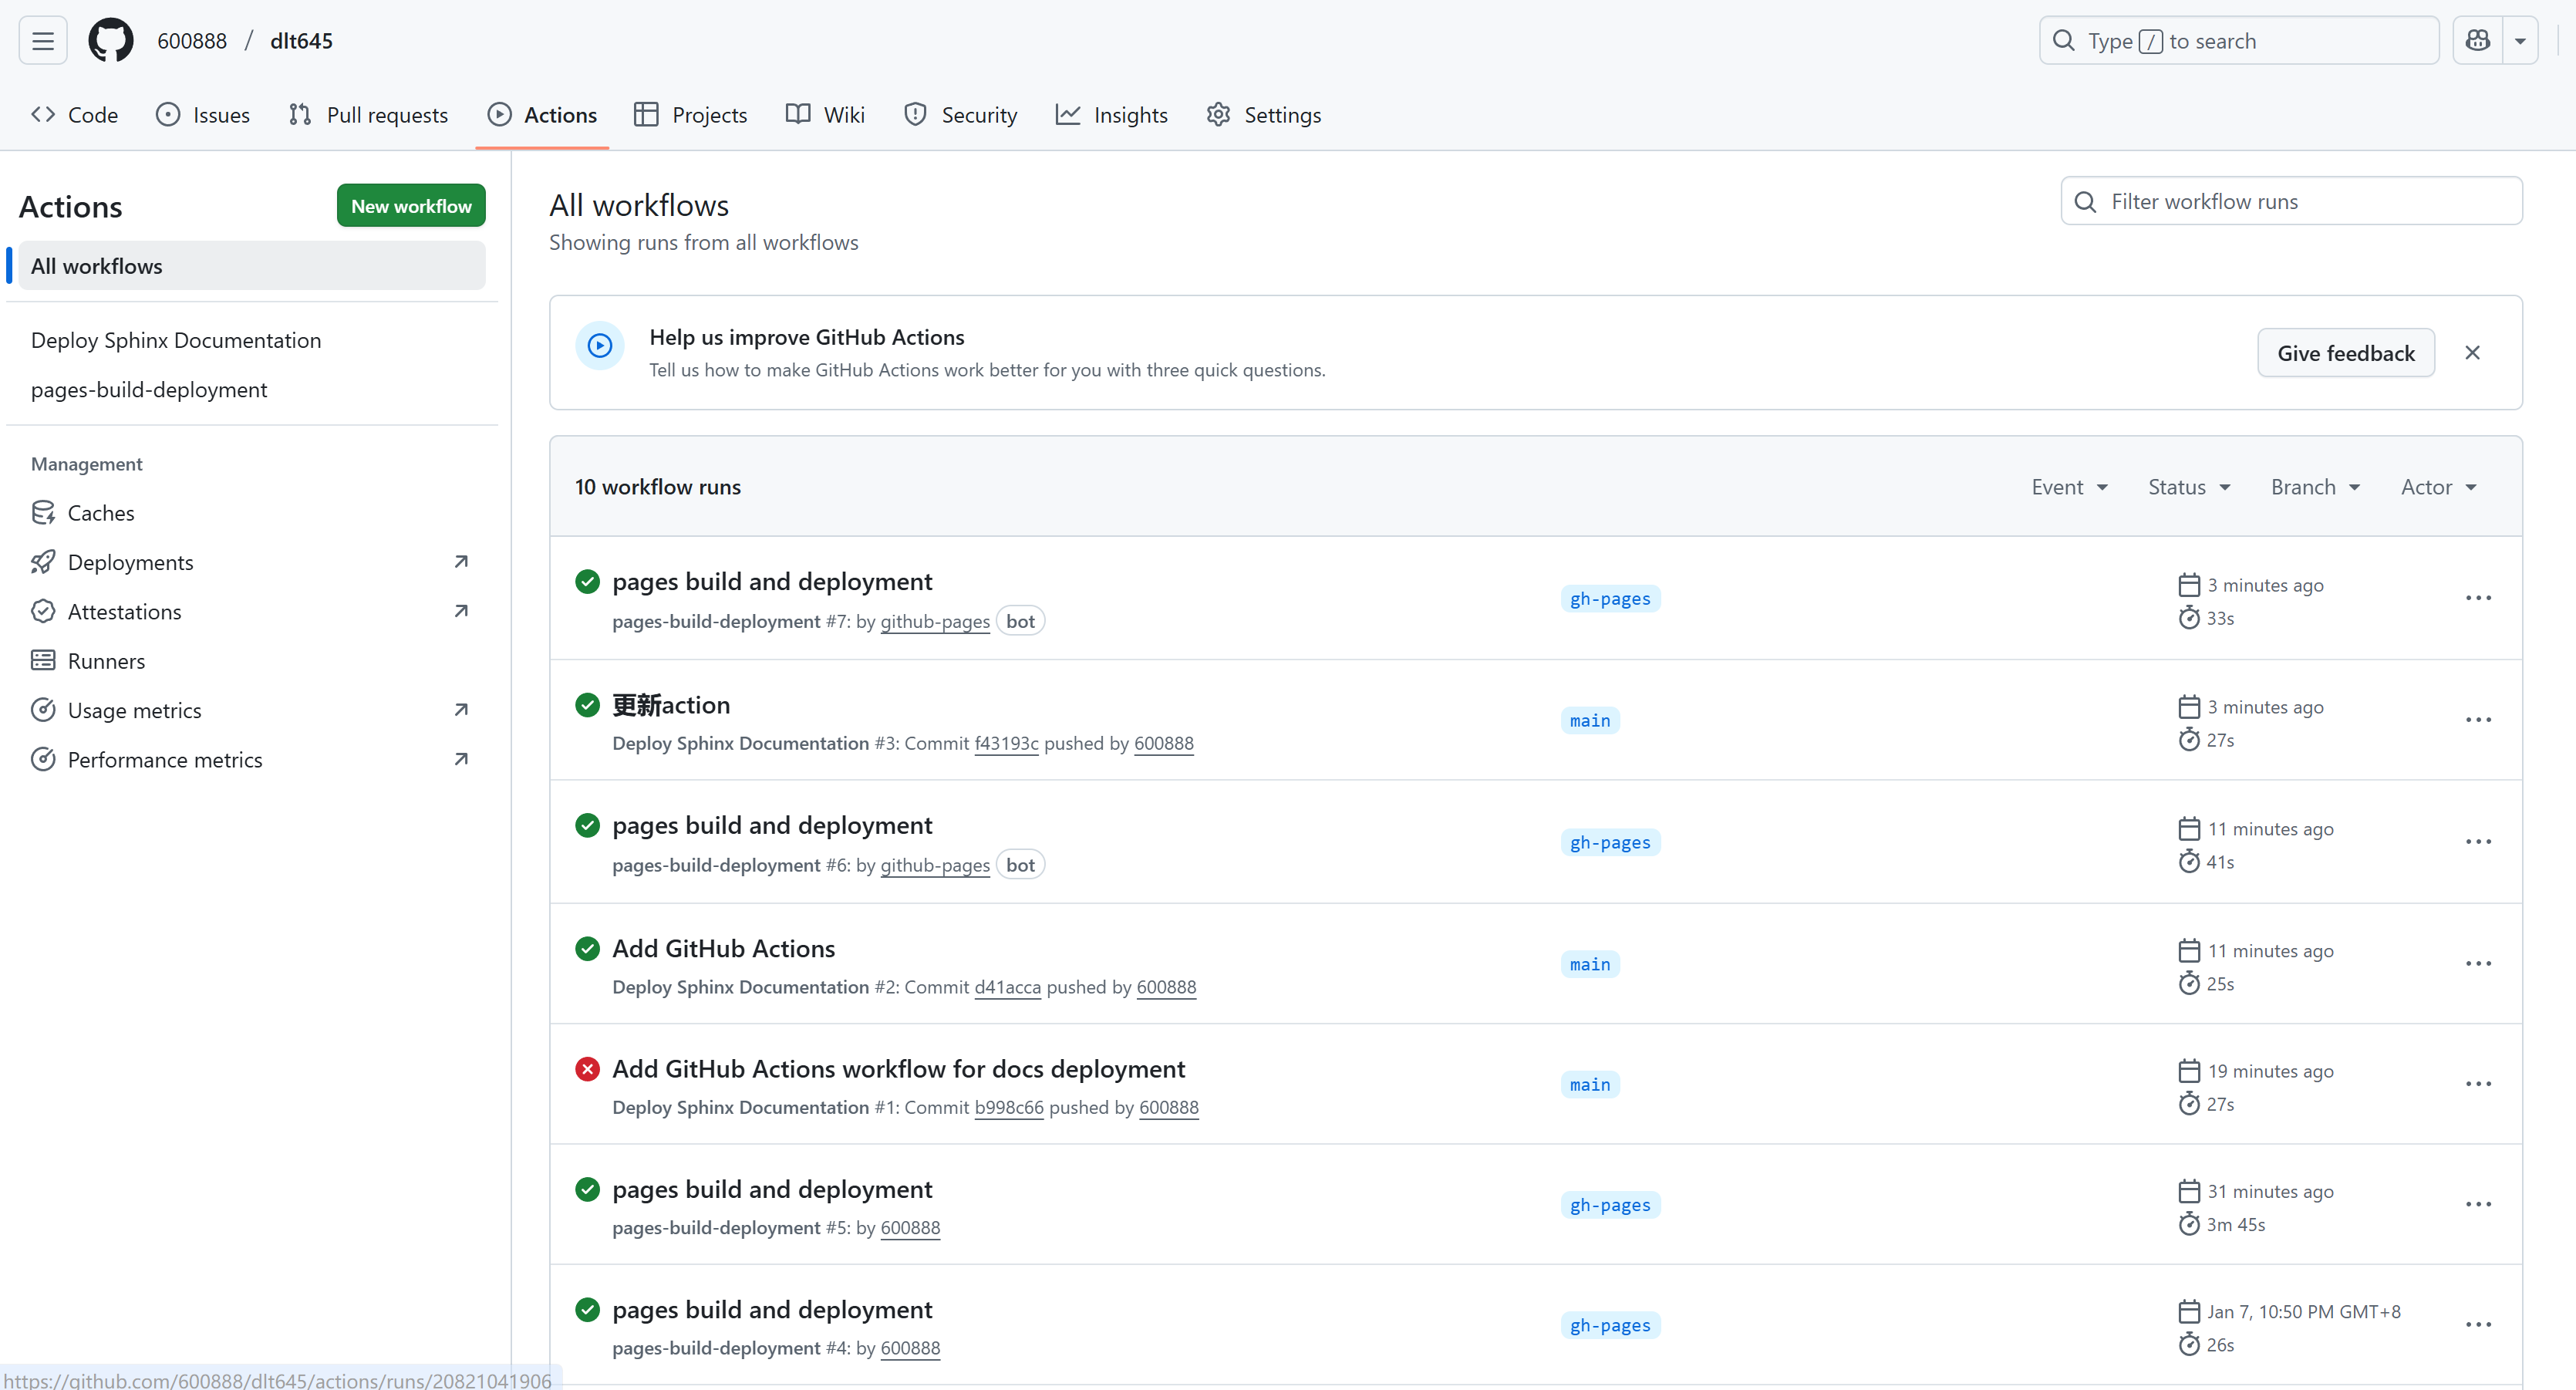
可以看到我最新提交的一次action已经成功
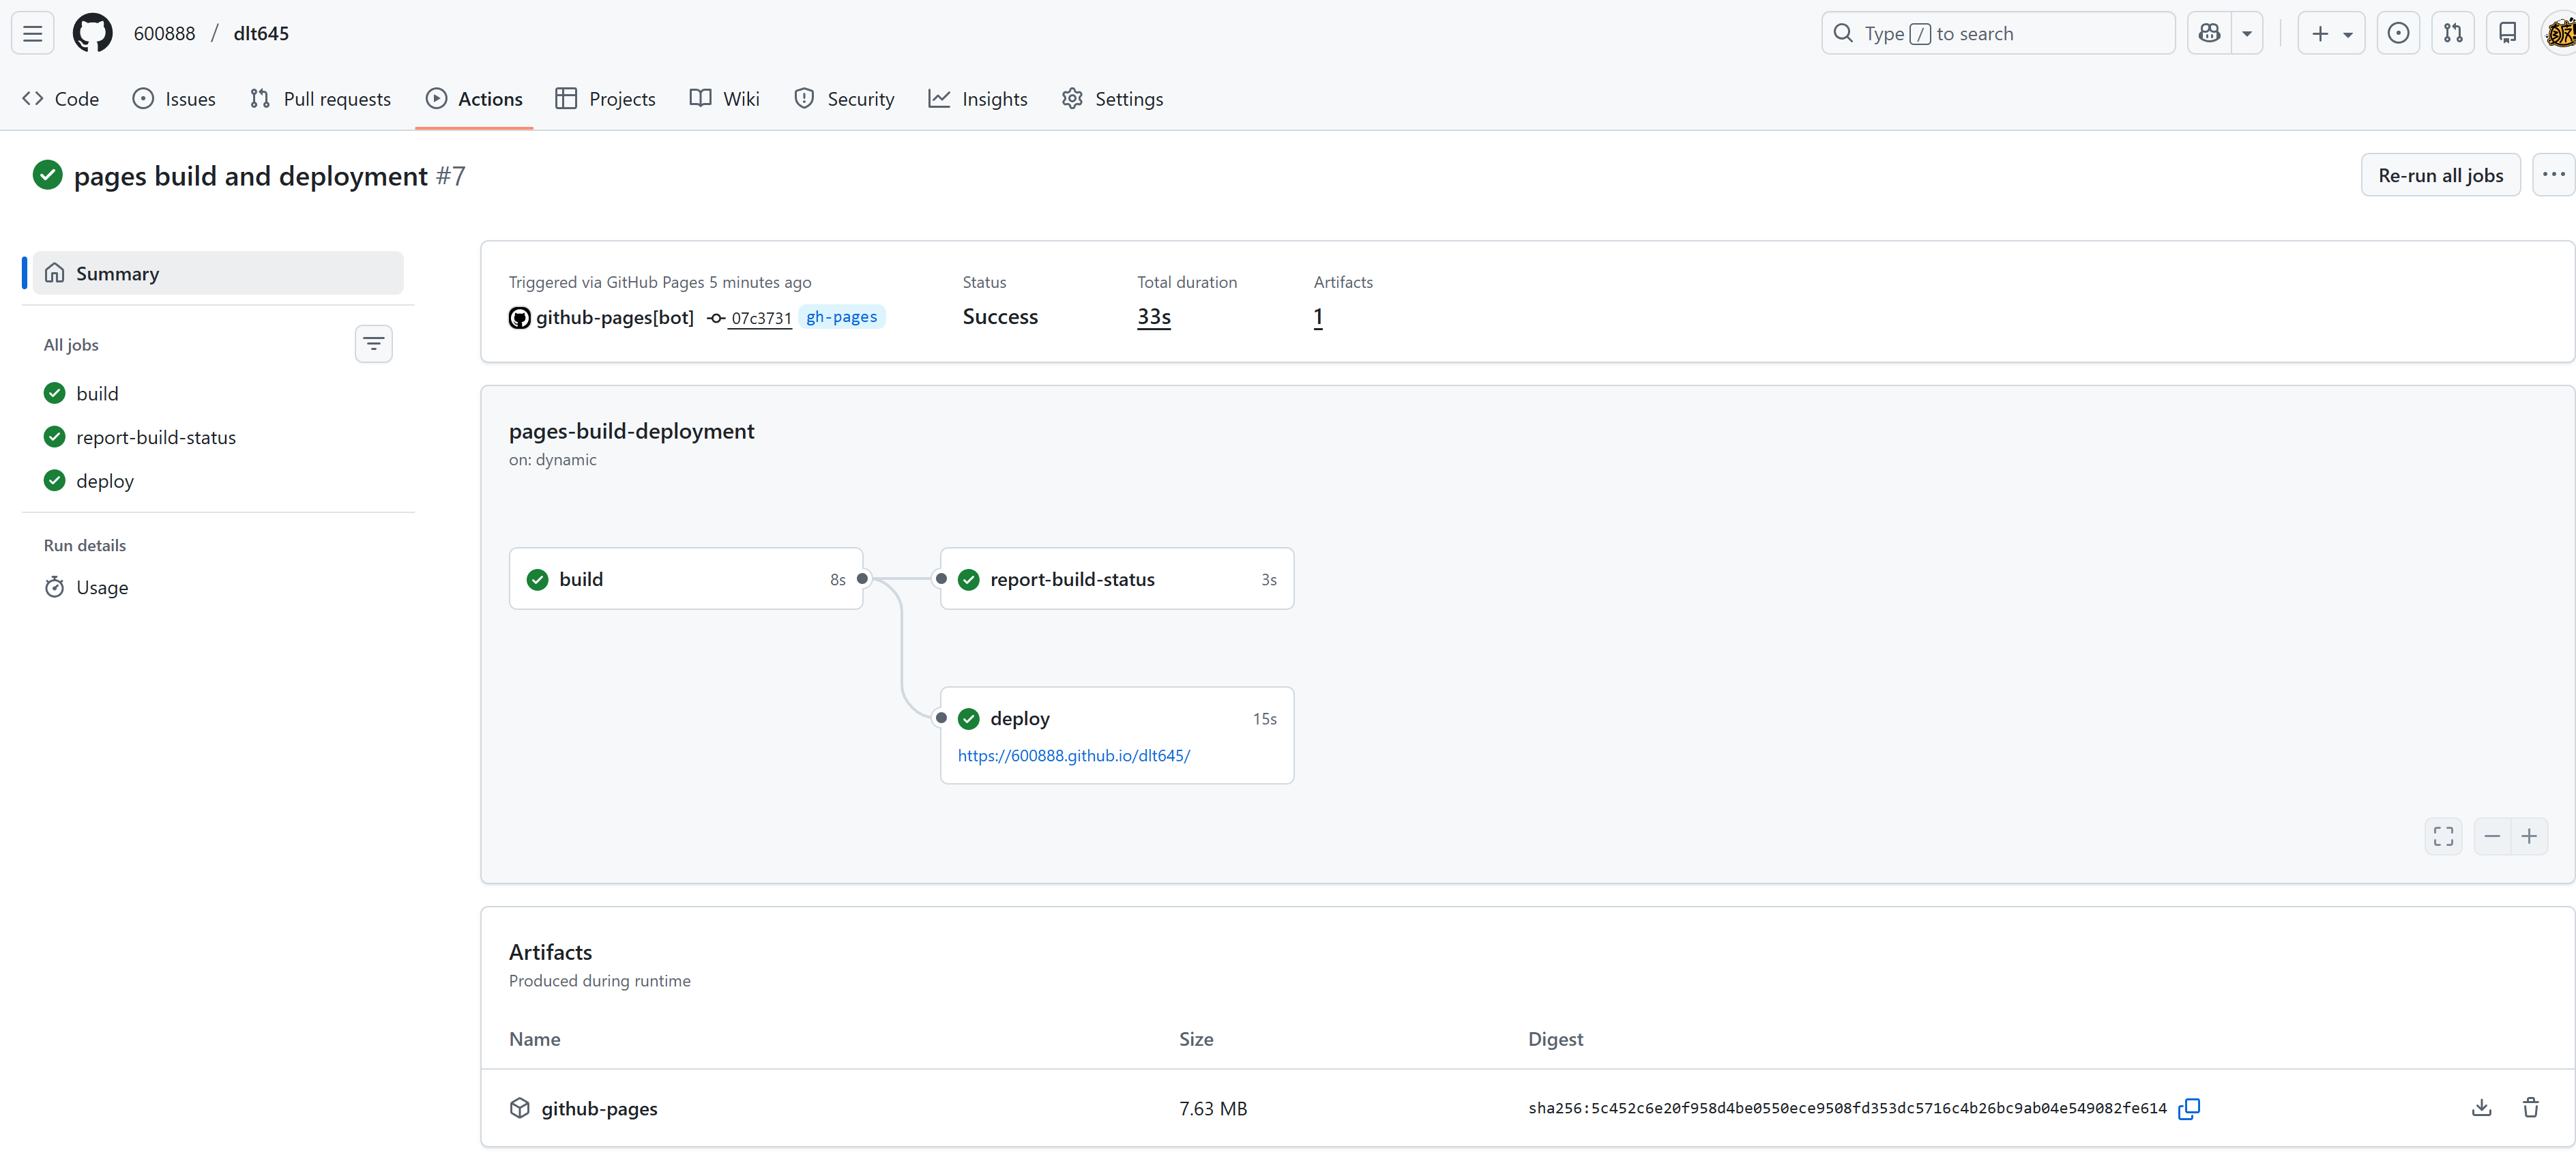
4. 高级配置
4.1 自定义域名
如果需要使用自定义域名,可以在 gh-pages 分支根目录添加 CNAME 文件:
echo "docs.dlt645.example.com" > CNAME
然后在 DNS 服务商处添加 CNAME 记录,指向 username.github.io。
4.2 文档版本管理
对于多版本文档,可以使用 sphinx-multiversion 扩展:
pip install sphinx-multiversion
在 conf.py 中添加:
extensions = [
    # 其他扩展...
    'sphinx_multiversion',
]

# 配置 sphinx-multiversion
smv_tag_whitelist = r'^v\d+\.\d+\.\d+$'  # 只包含版本标签
smv_branch_whitelist = r'^main$|^master$'  # 只包含主分支
smv_remote_whitelist = r'^origin$'         # 只包含 origin 远程仓库
smv_outputdir_format = '{ref.name}'        # 输出目录格式
然后使用 sphinx-multiversion 命令生成多版本文档:
sphinx-multiversion source build/html
4.3 文档搜索优化
为了让 GitHub Pages 正确处理 Sphinx 的搜索功能,需要确保 .nojekyll 文件存在,以禁用 Jekyll 的处理。
5. 常见问题与解决方案
5.1 文档样式丢失
问题:部署后文档样式丢失,显示为原始 HTML。
解决方案:
- 确保添加了
.nojekyll文件 - 检查
html_baseurl配置是否正确 - 确保静态资源路径配置正确
5.2 部署权限错误
问题:GitHub Actions 部署时出现权限错误。
解决方案:
- 确保工作流文件中设置了正确的权限
- 检查仓库的 Actions 权限设置
- 如果使用个人访问令牌,确保令牌有足够的权限
5.3 自动部署不触发
问题:推送代码后自动部署不触发。
解决方案:
- 检查工作流文件中的
on触发条件 - 确保推送的分支与配置的分支匹配
- 查看 Actions 日志了解具体原因
5.4 文档更新不及时
问题:部署后文档内容未更新。
解决方案:
- 确保构建命令正确生成了新文档
- 检查 GitHub Pages 的缓存设置
- 尝试强制刷新浏览器或使用无痕模式访问
6. 总结
本文介绍了两种将 Sphinx 文档部署到 GitHub Pages 的方法:
- 手动部署:适合简单项目或初次测试,包括直接推送和使用 git worktree 两种方式。
- 自动部署:使用 GitHub Actions 实现文档的自动构建和部署,提高开发效率。
通过正确配置和部署,可以确保 Sphinx 文档始终保持最新,并通过 GitHub Pages 方便地分享给用户。
参考链接

汇聚全球AI编程工具,助力开发者即刻编程。
更多推荐

 30
30 0
0- 0


 已为社区贡献2条内容

所有评论(0)