
springboot实现微信公众号扫码登录
微信公众号扫码登录
本文实现方式基于weixin-java-mp
weixin-java-mp是一个用于微信公众号开发的 Java 开发工具包,效率非常高!!!
实现之后的大体流程是:
1、前端采用websocket连接到后端
2、后端收到请求返回一个访问微信公众号的url
3、前端根据url使用QR code生成二维码
4、用户扫码,使用websocket向后端发送扫码事件
5、后端接收到扫码事件,向MQ发送用户扫码成功,MQ异步通知前端扫码成功等待授权
6、后端向微信服务器发送授权文字,微信服务器收到之后让微信公众号发授权文字到用户账户上
7、用户点击授权会回调后端事先声明好的固定地址
8、后端回调的固定地址被触发,实现业务逻辑,向MQ发送登录成功事件,MQ异步通知前端登陆成功,并且附带登录信息。
9、前端收到,流程完毕。
首先引入接下来要用到的依赖
<dependency>
    <groupId>com.github.binarywang</groupId>
    <artifactId>weixin-java-mp</artifactId>
    <version>4.4.0</version>
</dependency>

<dependency>
    <groupId>org.apache.rocketmq</groupId>
    <artifactId>rocketmq-spring-boot-starter</artifactId>
    <version>2.3.1</version>
</dependency>

<dependency>
    <groupId>cn.hutool</groupId>
    <artifactId>hutool-extra</artifactId>
    <version>5.8.28</version>
</dependency>

<dependency>
    <groupId>org.projectlombok</groupId>
    <artifactId>lombok</artifactId>
    <optional>true</optional>
</dependency>

<dependency>
    <groupId>io.netty</groupId>
    <artifactId>netty-all</artifactId>
</dependency>

<dependency>
    <groupId>com.github.ben-manes.caffeine</groupId>
    <artifactId>caffeine</artifactId>
</dependency>

<dependency>
    <groupId>org.apache.rocketmq</groupId>
    <artifactId>rocketmq-spring-boot-starter</artifactId>
    <version>2.3.1</version>
</dependency>
配置文件写好👇
wx:
  mp:
    useRedis: false
    callback: https://www.xxxguetxxx.cn # 授权回调地址
    redisConfig:
      host: 127.0.0.1
      port: 6379
    configs:
      - appId: ${guet.wx.appId} # 第一个公众号的appid
        secret: ${guet.wx.secret} # 公众号的appsecret
        token: ${guet.wx.token} # 接口配置里的Token值
        aesKey:  # 接口配置里的EncodingAESKey值

rocketmq:
  name-server: ${guet.rocketmq.ip}:${guet.rocketmq.port} #更改你的IP、端口
  # 默认的消息组
  producer:
    group: yourGroup
    send-message-timeout: 6000
appid和secret可以用测试号,回调地址需要授权
测试号地址微信公众平台 (qq.com)
记得配置好签名,签名配置方法写在文章后面了。
配置wxMp相关信息
// WxMpConfiguration.java
@AllArgsConstructor
@Configuration
@EnableConfigurationProperties(WxMpProperties.class)
public class WxMpConfiguration {
    private final ScanHandler scanHandler;

    @Bean
    public WxMpService wxMpService() {
        final List<WxMpProperties.MpConfig> configs = this.properties.getConfigs();
        if (configs == null) {
            throw new RuntimeException();
        }

        WxMpService service = new WxMpServiceImpl();
        service.setMultiConfigStorages(configs
                .stream().map(a -> {
                    WxMpDefaultConfigImpl configStorage;
                    configStorage = new WxMpDefaultConfigImpl();
                    configStorage.setAppId(a.getAppId());
                    configStorage.setSecret(a.getSecret());
                    configStorage.setToken(a.getToken());
                    configStorage.setAesKey(a.getAesKey());
                    return configStorage;
                }).collect(Collectors.toMap(WxMpDefaultConfigImpl::getAppId, a -> a, (o, n) -> o)));
        return service;
    }

    @Bean
    public WxMpMessageRouter messageRouter(WxMpService wxMpService) {
        final WxMpMessageRouter newRouter = new WxMpMessageRouter(wxMpService);
        // 扫码事件
        newRouter.rule().async(false).msgType(EVENT).event(EventType.SCAN).handler(this.scanHandler).end();
        return newRouter;
    }

}
ScanHandler扫码处理器之后再写,先创建好websocket
然后用netty搭建一个websocket
// NettyWebSocketServer.java

@Configuration
@Slf4j
public class NettyWebSocketServer {

    private final static int WEB_SOCKET_PORT = 9090;
    public static final NettyWebSocketServerHandler NETTY_WEB_SOCKET_SERVER_HANDLER = new NettyWebSocketServerHandler();

    private final EventLoopGroup bossGroup = new NioEventLoopGroup(1);
    private final EventLoopGroup workerGroup = new NioEventLoopGroup(NettyRuntime.availableProcessors());

    @PostConstruct
    public void start() throws Exception {
        run();
    }

    @PreDestroy
    public void destroy() {
        Future<?> future = bossGroup.shutdownGracefully();
        Future<?> future1 = workerGroup.shutdownGracefully();
        future.syncUninterruptibly();
        future1.syncUninterruptibly();
        log.info("关闭 ws server 成功");
    }

    public void run() throws Exception {
        ServerBootstrap serverBootstrap = new ServerBootstrap();

        serverBootstrap.group(bossGroup, workerGroup)
                .channel(NioServerSocketChannel.class)
                .option(ChannelOption.SO_BACKLOG, 128)
                .option(ChannelOption.SO_KEEPALIVE, true)
                .handler(new LoggingHandler(LogLevel.INFO)) // 为 bossGroup 添加 日志处理器
                .childHandler(new ChannelInitializer<SocketChannel>() {
                    @Override
                    protected void initChannel(SocketChannel socketChannel) throws Exception {
                        ChannelPipeline pipeline = socketChannel.pipeline();
                        //30秒客户端没有向服务器发送心跳则关闭连接
                        pipeline.addLast(new IdleStateHandler(30, 0, 0));
                        // 因为使用http协议,所以需要使用http的编码器,解码器
                        pipeline.addLast(new HttpServerCodec());
                        // 以块方式写,添加 chunkedWriter 处理器
                        pipeline.addLast(new ChunkedWriteHandler());
                        /**
                         *  http在传输过程中是分段的,HttpObjectAggregator可以把多个段聚合起来
                         */
                        pipeline.addLast(new HttpObjectAggregator(8192));
                        pipeline.addLast(new WebSocketServerProtocolHandler("/"));
                        // 自定义handler ,处理业务逻辑
                        pipeline.addLast(NETTY_WEB_SOCKET_SERVER_HANDLER);
                    }
                });
        // 启动服务器,监听端口,阻塞直到启动成功
        serverBootstrap.bind(WEB_SOCKET_PORT).sync();
        log.info("netty在{}启动成功", WEB_SOCKET_PORT);
    }

}
上面代码定义了一个自定义处理器NettyWebSocketServerHandler.java,稍后编写,并且在端口9090上成功启动netty,匹配路径是"/"
// NettyWebSocketServerHandler.java
@Slf4j
@ChannelHandler.Sharable
public class NettyWebSocketServerHandler extends SimpleChannelInboundHandler<TextWebSocketFrame> {

    private WebSocketService webSocketService;

    @Override
    public void handlerAdded(ChannelHandlerContext ctx) throws Exception {
        this.webSocketService = SpringUtil.getBean(WebSocketService.class);
        this.webSocketService.connect(ctx.channel());
    }

    @Override
    public void handlerRemoved(ChannelHandlerContext ctx) throws Exception {
        log.info("触发handlerRemoved");
    }

    @Override
    protected void channelRead0(ChannelHandlerContext ctx, TextWebSocketFrame msg) throws Exception {
        WxReqBase wxReqBase = JSONObject.parseObject(msg.text(), WxReqBase.class);
        WxReqEnum wxReqEnum = WxReqEnum.of(wxReqBase.getType());
        switch (wxReqEnum) {
            case LOGIN -> {
                webSocketService.handleLoginReq(ctx.channel());
            }
            case HEARTBEAT -> {

            }
            case AUTHORIZE -> {
                System.out.println(1);
            }
        }

    }

    @Override
    public void channelInactive(ChannelHandlerContext ctx) throws Exception {
        log.info("触发channelInactive");
        this.webSocketService.disconnect(ctx.channel());
    }

    @Override
    public void userEventTriggered(ChannelHandlerContext ctx, Object evt) throws Exception {
        if (evt instanceof IdleStateEvent) {
            System.out.println("IdleStateEvent");
        } else if (evt instanceof WebSocketServerProtocolHandler.HandshakeComplete) {
            System.out.println("HandshakeComplete");
        }
        super.userEventTriggered(ctx, evt);
    }

    @Override
    public void exceptionCaught(ChannelHandlerContext ctx, Throwable cause) {
        cause.printStackTrace();
        ctx.close();
    }
}
@ChannelHandler.Sharable 表示此处理器可以被多个Channel共享
SimpleChannelInboundHandler是netty中用户处理入栈数据的处理器,它提供了一种方便的方式来处理特定类型的消息,当有数据进入通道时,Netty 会自动调用这个处理器的相应方法来处理数据。
WxReqBase是和前端约定好的,websocket数据相互传输时的数据格式。
// WxReqBase.java
@Data
public class WxReqBase {
    private Integer type;
    private String data;
}
WxReqEnum是一个枚举类,用来规定每个type类型的作用
@AllArgsConstructor
@Getter
public enum WxReqEnum {
    LOGIN(1, "二维码登录"),
    HEARTBEAT(2, "心跳包"),
    AUTHORIZE(3, "登录认证"),
    ;

    private final Integer type;
    private final String desc;

    private static final Map<Integer, WxReqEnum> cache;

    static {
        cache = Arrays.stream(WxReqEnum.values()).collect(Collectors.toMap(WxReqEnum::getType, Function.identity()));
        // 生成一个map,可以用type去获取此枚举类
    }

    public static WxReqEnum of(Integer type) {
        return cache.get(type);
    }

}
我们还定义了一个服务类WebSocketService此类编写业务逻辑
// WebSocketService.java
@Service
@Slf4j
@RequiredArgsConstructor
public class WebSocketService {

    private static final Duration EXPIRE_TIME = Duration.ofHours(1); // 二维码过期时间
    private static final Long MAX_MUM_SIZE = 10000L;// 内存中最多放多少个等待中的二维码
    private final UserProfileService userProfileService;// mybatis	用户服务类(自由编写,下面贴了我的)

    @Autowired
    private WxMpService wxMpService; // mp-weixin-java实现的服务类

    private final static Map<Channel, UserProfile> ONLINE_WX_MAP = new ConcurrentHashMap<>(); // websocket处于在线的集合
    private final static Cache<Integer, Channel> WAIT_LOGIN_MAP =
            Caffeine.newBuilder()
                    .expireAfterWrite(EXPIRE_TIME)
                    .maximumSize(MAX_MUM_SIZE)
                    .build(); // Caffeine 是一个基于 Java 的高性能缓存库,它在一段时间后会将过期的数据清除,保证map中不会有太多数据,造成内存爆炸
    @Autowired
    private RocketMQTemplate rocketMQTemplate;

    public void connect(Channel channel) {
        ONLINE_WX_MAP.put(channel, new UserProfile());
        log.info("{}连接成功,当前在线人数{}", channel.id(), ONLINE_WX_MAP.size());
    }

    public void disconnect(Channel channel) {
        ONLINE_WX_MAP.remove(channel);
        log.info("{}断开成功,当前在线人数{}", channel.id(), ONLINE_WX_MAP.size());
    }

    public Integer generateCode() {
        Integer loginCode;
        do {
            loginCode = RedisUtils.integerInc("guet:inc", (int) EXPIRE_TIME.getSeconds(), TimeUnit.SECONDS);
        } while (WAIT_LOGIN_MAP.asMap().containsKey(loginCode));
        return loginCode;
    }

    @SneakyThrows
    public void handleLoginReq(Channel channel) {
        Integer loginCode = generateCode();
        // 存一份再本地,之后授权的时候方便取到对应的channel
        WAIT_LOGIN_MAP.put(loginCode, channel);
        WxMpQrCodeTicket wxMpQrCodeTicket = wxMpService.getQrcodeService().qrCodeCreateTmpTicket(loginCode, (int) EXPIRE_TIME.getSeconds());
        sendMsg(channel, WxRespBase.<String>builder().type(WxRespEnum.LOGIN_URL.getType()).data(wxMpQrCodeTicket.getUrl()).build());
    }

    private void sendMsg(Channel channel, WxRespBase<?> wxRespBase) {
        channel.writeAndFlush(new TextWebSocketFrame(JSONObject.toJSONString(wxRespBase)));
    }

    public void scanSuccess(Integer loginCode) {
        Channel channel = WAIT_LOGIN_MAP.getIfPresent(loginCode);
        if (channel != null) {
            sendMsg(channel, WxRespBase.builder().type(WxRespEnum.SCAN_SUCCESS.getType()).build());
        }
    }

    public void loginSuccess(WxOAuth2UserInfo userInfo) {
        UserProfile one = userProfileService.lambdaQuery().eq(UserProfile::getOpenid, userInfo.getOpenid()).one();
        if (one == null) {
            // 没有注册自动注册
            UserProfile userProfile = buildUserProfile(userInfo);
            userProfileService.save(userProfile);
            one = userProfile;
        }
        baseLoginSuccess(one, userInfo.getOpenid());
    }

    public void loginSuccess(UserProfile one) {
        baseLoginSuccess(one, one.getOpenid());
    }

    private void baseLoginSuccess(UserProfile one, String openid) {
        Integer loginCode = RedisUtils.get(String.format(RedisConstant.OPEN_ID, openid), Integer.class);
        Channel channel = WAIT_LOGIN_MAP.getIfPresent(loginCode);
        if (loginCode == null) {
            handleLoginReq(channel); // 刷新二维码
            return;
        }
        if (channel != null) {
            sendMsg(channel, WxRespBase.builder().type(WxRespEnum.LOGIN_SUCCESS.getType()).data(one).build());
        }
        WAIT_LOGIN_MAP.invalidate(loginCode);
        RedisUtils.del(String.format(RedisConstant.OPEN_ID, openid));
    }

    private UserProfile buildUserProfile(WxOAuth2UserInfo userInfo) {
        UserProfile userProfile = new UserProfile();
        userProfile.setUserId(IdUtils.genId());
        userProfile.setUserMobile("");
        userProfile.setPassword("");
        userProfile.setRightsId(202316961359090014L);
        userProfile.setRights(1);
        userProfile.setRealName(userInfo.getNickname());
        userProfile.setUserName(userInfo.getNickname());
        userProfile.setStatus(1);
        userProfile.setOpenid(userInfo.getOpenid());
        userProfile.setAvatar(userInfo.getHeadImgUrl());
        return userProfile;
    }
}
generateCode方法利用redis生成一个唯一的自增的编码,后端给前端发送二维码时,会绑定一个这个code,根据这个唯一code来判断是哪一个channel扫的码,这样知道了是哪个channel才可以向前端发送对应的通知。
sendMsg提出来的一个私有方法,用于向前端发送数据
WxRespBase是和前端约定的规范,也就是传输的格式
// WxRespBase.java
@Data
@Builder
public class WxRespBase<T> {
    private Integer type;
    private T data;
}
handleLoginReq前端发送二维码登录事件会调用此方法,方法会生成code,将code与channel绑定,并且调用wxMpService.getQrcodeService().qrCodeCreateTmpTicket(loginCode, (int) EXPIRE_TIME.getSeconds());生成二维码url,返回给前端
scanSuccess会根据code取出对应用户的channel,告知前端扫码成功
loginSuccess用户点击授权后回调触发,如果用户不是第一次登录也会触发,在scanSucess方法里面做了判断。
baseLoginSuccess方法从redis中取出code,校验了code是否过期,过期会刷新二维码,没有过期则通知前端登录成功,并将用户实体类传输给前端。
扫码成功如何触发的呢?
之前我们配置好了wxmp的扫码路由器,扫描微信二维码会触发ScanHandler
// ScanHandler.java
@Component
public class ScanHandler implements WxMpMessageHandler {

    private static final String URL = "https://open.weixin.qq.com/connect/oauth2/authorize?appid=%s&redirect_uri=%s&response_type=code&scope=snsapi_userinfo&state=STATE#wechat_redirect";
    //上面是微信固定格式的回调地址

    @Value("${wx.mp.callback}")
    private String callback;

    @Autowired
    private RocketMQTemplate rocketMQTemplate;
    @Autowired
    private UserProfileService userProfileService;

    @Override
    public WxMpXmlOutMessage handle(WxMpXmlMessage wxMpXmlMessage, Map<String, Object> map,
                                    WxMpService wxMpService, WxSessionManager wxSessionManager) throws WxErrorException {
        // 扫码事件处理
        // 搜索用户ID,如果已经授权过,直接登录
        String openid = wxMpXmlMessage.getFromUser();
        UserProfile one = userProfileService.lambdaQuery().eq(UserProfile::getOpenid, openid).one();// 更换自己的用户实体类
        //下方获取的是我们生成二维码时对应的code
        // 正是loginCode
        // 之前写的这段 wxMpService.getQrcodeService().qrCodeCreateTmpTicket(loginCode, (int) EXPIRE_TIME.getSeconds());
        int loginCode = Integer.parseInt(getEventKey(wxMpXmlMessage));

        RedisUtils.set(String.format("openid:%s", openid), loginCode, 60, TimeUnit.MINUTES);
        if (one != null) {
            rocketMQTemplate.convertAndSend(MQConstant.LOGIN_MESSAGE_TOPIC, new LoginMessageDTO(String.valueOf(one.getUserId()), loginCode));
            return new TextBuilder().build(String.format("欢迎登录,%s", one.getRealName()), wxMpXmlMessage, wxMpService);
        }
        // 使用rocketmq发送消息,监听器监听主题,通过netty发送到前端。(等待授权,或者直接授权成功)
        String skipUrl = String.format(URL, wxMpService.getWxMpConfigStorage().getAppId(), URLEncoder.encode(callback + "/wx/portal/public/callBack", Charset.defaultCharset()));
        rocketMQTemplate.convertAndSend(MQConstant.SCAN_MESSAGE_TOPIC, new ScanMessageDTO(loginCode));
        return new TextBuilder().build(DateUtil.now() + "授权登录,点击<a href=\"" + skipUrl + "\">登录</a>", wxMpXmlMessage, wxMpService);
    }

    private String getEventKey(WxMpXmlMessage wxMpXmlMessage) {
        //扫码关注的渠道事件有前缀,需要去除
        return wxMpXmlMessage.getEventKey().replace("qrscene_", "");
    }
}
MQConstant定义了MQ Topic名字
// MQConstant.java
public interface MQConstant {

    String LOGIN_MESSAGE_TOPIC = "user_login_send_msg";
    String LOGIN_MESSAGE_GROUP = "user_login_send_msg_group";

    String SCAN_MESSAGE_TOPIC = "user_scan_send_msg";
    String SCAN_MESSAGE_GROUP = "user_scan_send_msg_group";
}
现在已经写了很多代码了,我们理一理思路,写了那么多到底做了哪些事情?
首先后端可以给前端发送绑定唯一code的二维码了,并且绑定了扫码处理器,用户扫码会调用到扫码处理器的内容,处理器内会判断用户是否之前扫描过,若扫描过根据openid查询用户数据,直接异步发送登陆成功的事件,正常登录。如果是第一次登陆,会让公众号给用户发送一段授权登录的文字,用户需要点击,点击后跳转的地址,正是我们之前配置的回调地址。
理清逻辑之后,继续往下👇
之前一直提到异步,其实就是发送到MQ,让MQ处理。
一共有两个监听器:
① 处理扫码成功的MQ监听器
监听器代码很简单,异步消费消息,并将消息交给WebSocketService处理。
//ScannerSuccessListener.java
@RocketMQMessageListener(topic = MQConstant.SCAN_MESSAGE_TOPIC, consumerGroup = MQConstant.SCAN_MESSAGE_GROUP)
@Component
@RequiredArgsConstructor
public class ScannerSuccessListener implements RocketMQListener<ScanMessageDTO> {

    private final WebSocketService webSocketService;

    @Override
    public void onMessage(ScanMessageDTO message) {
        webSocketService.scanSuccess(message.getCode());
    }
}
② 处理登录成功的MQ监听器
也是将消息交给WebSocketService处理。
// LoginSuccessListener.java
@RocketMQMessageListener(topic = MQConstant.LOGIN_MESSAGE_TOPIC, consumerGroup = MQConstant.LOGIN_MESSAGE_GROUP)
@Service
@RequiredArgsConstructor
public class LoginSuccessListener implements RocketMQListener<LoginMessageDTO> {

    private final WebSocketService webSocketService;
    private final UserProfileService userProfileService;

    @Override
    public void onMessage(LoginMessageDTO message) {
        UserProfile one = userProfileService.lambdaQuery().eq(UserProfile::getUserId, message.getUid()).one();
        if (one != null) {
            webSocketService.loginSuccess(one);
        }
    }
}
监听器也写完了,和WebSocketService已经连通,最后还差一个回调,需要写一个controller
上面提到的校验签名的接口也在这里
// WxPortalController.java
@Slf4j
@AllArgsConstructor
@RestController
@RequestMapping("/wx/portal/public")
public class WxPortalController {

    private final WxMpService wxService;
    private final WxMpMessageRouter messageRouter;
    private final WebSocketService webSocketService;

    // 微信公众号接口配置校验签名的接口
    @GetMapping(produces = "text/plain;charset=utf-8")
    public String authGet(@RequestParam(name = "signature", required = false) String signature,
                          @RequestParam(name = "timestamp", required = false) String timestamp,
                          @RequestParam(name = "nonce", required = false) String nonce,
                          @RequestParam(name = "echostr", required = false) String echostr) {

        log.info("\n接收到来自微信服务器的认证消息:[{}, {}, {}, {}]", signature,
                timestamp, nonce, echostr);
        if (StringUtils.isAnyBlank(signature, timestamp, nonce, echostr)) {
            throw new IllegalArgumentException("请求参数非法,请核实!");
        }

        if (wxService.checkSignature(timestamp, nonce, signature)) {
            return echostr;
        }

        return "非法请求";
    }

    @PostMapping(produces = "application/xml; charset=UTF-8")
    public String post(@RequestBody String requestBody,
                       @RequestParam("signature") String signature,
                       @RequestParam("timestamp") String timestamp,
                       @RequestParam("nonce") String nonce,
                       @RequestParam("openid") String openid,
                       @RequestParam(name = "encrypt_type", required = false) String encType,
                       @RequestParam(name = "msg_signature", required = false) String msgSignature) {
        log.info("\n接收微信请求:[openid=[{}], [signature=[{}], encType=[{}], msgSignature=[{}],"
                        + " timestamp=[{}], nonce=[{}], requestBody=[\n{}\n] ",
                openid, signature, encType, msgSignature, timestamp, nonce, requestBody);

        if (!wxService.checkSignature(timestamp, nonce, signature)) {
            throw new IllegalArgumentException("非法请求,可能属于伪造的请求!");
        }

        String out = null;
        if (encType == null) {
            // 明文传输的消息
            WxMpXmlMessage inMessage = WxMpXmlMessage.fromXml(requestBody);
            WxMpXmlOutMessage outMessage = this.route(inMessage);
            if (outMessage == null) {
                return "";
            }

            out = outMessage.toXml();
        } else if ("aes".equalsIgnoreCase(encType)) {
            // aes加密的消息
            WxMpXmlMessage inMessage = WxMpXmlMessage.fromEncryptedXml(requestBody, wxService.getWxMpConfigStorage(),
                    timestamp, nonce, msgSignature);
            log.debug("\n消息解密后内容为:\n{} ", inMessage.toString());
            WxMpXmlOutMessage outMessage = this.route(inMessage);
            if (outMessage == null) {
                return "";
            }

            out = outMessage.toEncryptedXml(wxService.getWxMpConfigStorage());
        }

        log.debug("\n组装回复信息:{}", out);
        return out;
    }

    // 回调地址
    @GetMapping("/callBack")
    public RedirectView callBack(@RequestParam String code) {
        try {
            WxOAuth2AccessToken accessToken = wxService.getOAuth2Service().getAccessToken(code);//获取accessToken
            WxOAuth2UserInfo userInfo = wxService.getOAuth2Service().getUserInfo(accessToken, "zh-CN");//获取用户信息
            webSocketService.loginSuccess(userInfo);//调用登陆成功
        } catch (WxErrorException e) {
            throw new RuntimeException(e);
        }
        RedirectView redirectView = new RedirectView();
        redirectView.setUrl("https://www.xxxx.cn");
        return redirectView;
    }

    private WxMpXmlOutMessage route(WxMpXmlMessage message) {
        try {
            return this.messageRouter.route(message);
        } catch (Exception e) {
            log.error("路由消息时出现异常!", e);
        }
        return null;
    }

}
现在后端逻辑基本上已经通了
接下来看看前端。
定义一个init函数,连接上websocket,按照事先约定的参数,请求登录二维码
const qrCodeUrl = ref<string>('')
const isScan = ref(false)
let ws: WebSocket
let timer: NodeJS.Timeout
let refreshTimer: NodeJS.Timeout
init()
function init() {
  ws = new WebSocket("ws://127.0.0.1:9090/")

  ws.onopen = () => {
    console.log('WebSocket 已连接')
    ws.send(JSON.stringify({ type: 1 })) //表示请求登录二维码
  }

  ws.onmessage = async (event) => {
    const back = JSON.parse(event.data)
    if (back.type === 1) {
      // 1 —— 返回二维码,等待登录
      qrCodeUrl.value = back.data
    } else if (back.type === 2) {
      // 2 —— 用户扫描成功等待授权
      isScan.value = true
    } else if (back.type === 3) {
      // 3 —— 授权登录成功
      // 后端返回用户信息,之后写你的业务逻辑
    }
  }

  ws.onerror = (event) => {
    console.log('WebSocket 发生了错误:', event)
  }

  ws.onclose = () => {
    qrCodeUrl.value = ''
  }

  // 间隔5s发送心跳包
  timer = setInterval(() => {
    ws.send(JSON.stringify({ type: 2 }))
  }, 5000)

  // 间隔一分钟刷新二维码
  refreshTimer = setInterval(() => {
    ws.send(JSON.stringify({ type: 1 }))
  }, 1000 * 60)

}
有了qrCodeUrl之后就好办了,呈现二维码的方式多种多样。
你可以用antd for vue组件库的qrcode,也可以用qrcode的npm包qrcode - npm (npmjs.com)
二维码生成完成!!!
最后添一点样式:
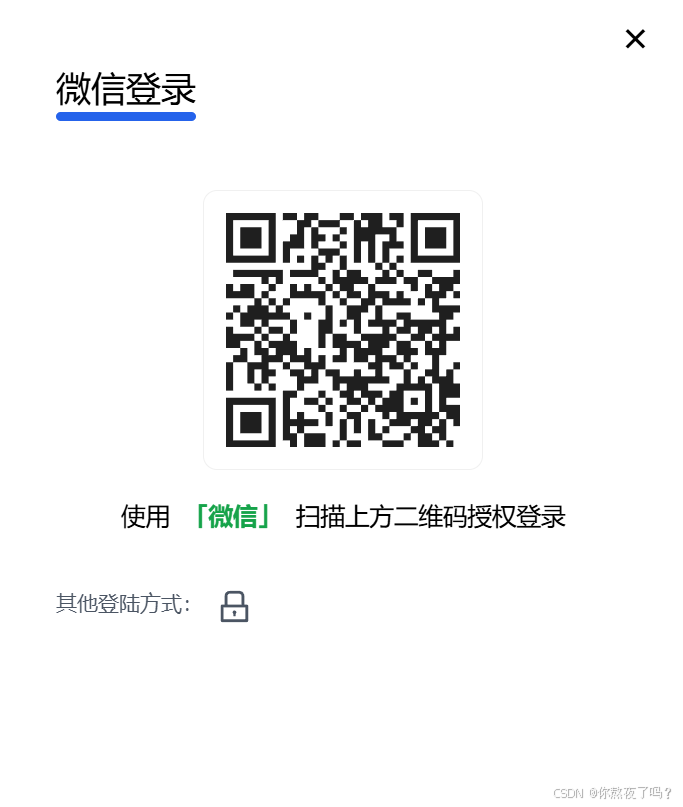
扫码会触发扫码成功,紧接着跑我们上面写的后端流程。
大功告成!
最后贴一个UserProfile.java
@TableName("user_profile")
@Data
@AllArgsConstructor
@NoArgsConstructor
public class UserProfile implements Serializable {

    private Long userId;
    /**
    * P[用户名称];
    */
    private String userName;
    /**
    * P[身份识别号];
    */
    private String idNumber;
    /**
    * P[姓名];
    */
    private String realName;
    /**
    * P[用户手机号];
    */
    private String userMobile;
    /**
    * P[头像];
    */
    private String avatar;
    /**
    * P[密码];
    */
    private String password;
    /**
    * P[密码盐];
    */
    private String salt;
    /**
    * P[账户状态];V[1=正常,2=冻结];
    */
    private Integer status;
    /**
    * P[账户];
    */
    private String account;
    /**
    * P[权益id];
    */
    private Long rightsId;
    /**
    * P[会员等级];
    */
    private Integer rights;
    /**
    * P[创建时间];
    */
    private Date createTime;
    private String openid;
}
建表sql
SET NAMES utf8mb4;
SET FOREIGN_KEY_CHECKS = 0;

-- ----------------------------
-- Table structure for user_profile
-- ----------------------------
DROP TABLE IF EXISTS `user_profile`;
CREATE TABLE `user_profile`  (
  `user_id` bigint(20) NOT NULL COMMENT 'P[用户ID];',
  `user_name` varchar(255) CHARACTER SET utf8mb4 COLLATE utf8mb4_general_ci NULL DEFAULT NULL COMMENT 'P[用户名称];',
  `id_number` varchar(255) CHARACTER SET utf8mb4 COLLATE utf8mb4_general_ci NULL DEFAULT NULL COMMENT 'P[身份识别号];',
  `real_name` varchar(255) CHARACTER SET utf8mb4 COLLATE utf8mb4_general_ci NULL DEFAULT NULL COMMENT 'P[姓名];',
  `user_mobile` varchar(255) CHARACTER SET utf8mb4 COLLATE utf8mb4_general_ci NULL DEFAULT NULL COMMENT 'P[用户手机号];',
  `avatar` text CHARACTER SET utf8mb4 COLLATE utf8mb4_general_ci NULL COMMENT 'P[头像];',
  `password` varchar(255) CHARACTER SET utf8 COLLATE utf8_general_ci NULL DEFAULT NULL COMMENT 'P[密码];',
  `salt` varchar(255) CHARACTER SET utf8 COLLATE utf8_general_ci NULL DEFAULT NULL COMMENT 'P[密码盐];',
  `status` int(11) NULL DEFAULT NULL COMMENT 'P[账户状态];V[1=正常,2=冻结];',
  `account` varchar(255) CHARACTER SET utf8mb4 COLLATE utf8mb4_general_ci NULL DEFAULT NULL COMMENT 'P[账户];',
  `rights_id` bigint(20) NULL DEFAULT NULL COMMENT 'P[权益id];',
  `rights` int(11) NULL DEFAULT NULL COMMENT 'P[会员等级];',
  `create_time` datetime NULL DEFAULT NULL COMMENT 'P[创建时间];',
  `openid` varchar(255) CHARACTER SET utf8mb4 COLLATE utf8mb4_general_ci NULL DEFAULT NULL COMMENT '微信openid',
  PRIMARY KEY (`user_id`) USING BTREE,
  INDEX `FKkpao7dlveepy80sm3b1nx1tl7`(`rights_id`) USING BTREE,
  CONSTRAINT `FKkpao7dlveepy80sm3b1nx1tl7` FOREIGN KEY (`rights_id`) REFERENCES `user_rights` (`id`) ON DELETE RESTRICT ON UPDATE RESTRICT
) ENGINE = InnoDB CHARACTER SET = utf8mb4 COLLATE = utf8mb4_general_ci COMMENT = '用户资料表' ROW_FORMAT = DYNAMIC;

SET FOREIGN_KEY_CHECKS = 1;
希望对你有所帮助

汇聚全球AI编程工具,助力开发者即刻编程。
更多推荐

 6
6 0
0- 0


 已为社区贡献3条内容

所有评论(0)