
milvus快速入门(包含图搜图文搜图)
·
目录
Milvus 提供强大的数据建模功能,使您能够将非结构化或多模式数据组织成结构化的 Collections。它支持多种数据类型,适用于不同的属性模型,包括常见的数字和字符类型、各种向量类型、数组、集合和 JSON
1 安装
https://milvus.io/docs/zh/install_standalone-docker-compose.md
curl -SL https://github.com/docker/compose/releases/download/v2.30.3/docker-compose-linux-x86_64 -o /usr/local/bin/docker-compose
#将可执行权限赋予安装目标路径中的独立二进制文件
sudo chmod +x /usr/local/bin/docker-compose
sudo ln -s /usr/local/bin/docker-compose /usr/bin/docker-compose
wget https://github.com/milvus-io/milvus/releases/download/v2.6.9/milvus-standalone-docker-compose.yml -O docker-compose.yml

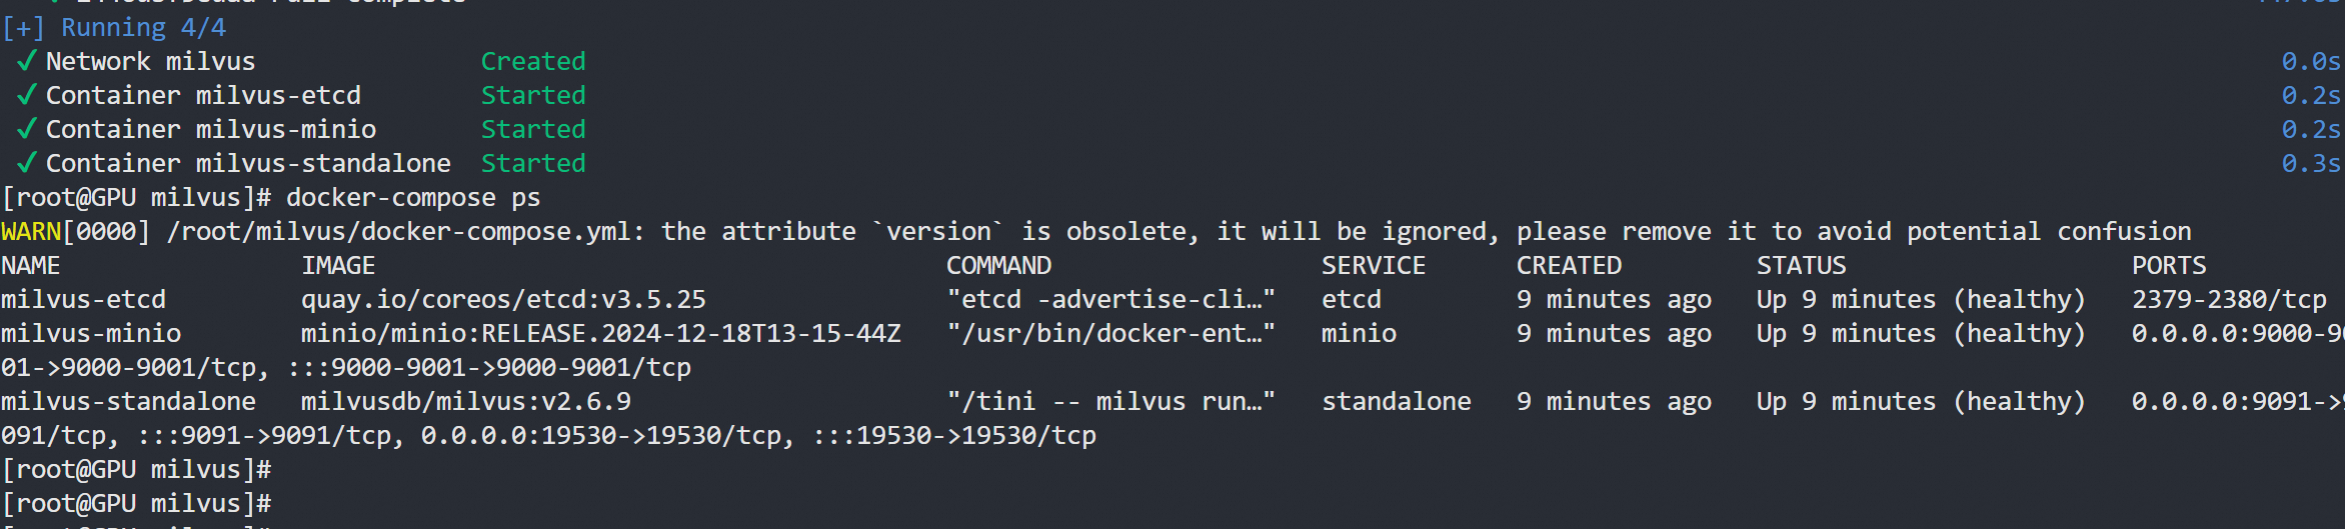
sudo docker compose up -d

Creating milvus-etcd  ... done
Creating milvus-minio ... done
Creating milvus-standalone ... done
如何添加密码功能
#添加密码https://milvus.io/docs/zh/authenticate.md?tab=docker
...
common:
...
  security:
    authorizationEnabled: true
...
#默认密码root:Milvus

#pip install -U pymilvus
from pymilvus import MilvusClient

client = MilvusClient(
    uri='http://localhost:19530', # replace with your own Milvus server address
    token="root:Milvus"
)
2 使用案例
2.1 文档搜索比如rag
这里以云上模型为例,自建embed的话可以参考我之前的文章
import dashscope
from dashscope import TextEmbedding
from pymilvus import MilvusClient

dashscope.api_key=''
client = MilvusClient("http://127.0.0.1:19530")

def create_collection(collection_name):
    if client.has_collection(collection_name="demo_collection"):
        client.drop_collection(collection_name="demo_collection")
    client.create_collection(
        collection_name=collection_name,
        dimension=1024,  # The vectors we will use in this demo has 768 dimensions
        metric_type="IP",  # Inner product distance
        consistency_level="Bounded",  # Supported values are (`"Strong"`, `"Session"`, `"Bounded"`, `"Eventually"`). See https://milvus.io/docs/consistency.md#Consistency-Level for more details.
    )

    print(client.list_collections())
    print(client.describe_collection(collection_name=client.list_collections()[0]))

def emb_text(text):
    return (
         TextEmbedding.call(
            model="text-embedding-v4",
            input=text,
            dimension=1024
     )
    ).output['embeddings']

def insert_data(collection_name, data):
    res = client.insert(collection_name=collection_name, data=data)
    return  res

def search_data(collection_name):
    query_vectors = emb_text(["深度学习"])[0]['embedding']

    res = client.search(
        collection_name=collection_name,  # target collection
        data=[query_vectors],  # query vectors
        limit=2,  # number of returned entities
        output_fields=["text", "subject"],  # specifies fields to be returned
    )
    print(res)

if __name__ == '__main__':
    # 创建集合
    create_collection("demo_collection")
    documents = [
        "人工智能是计算机科学的一个分支",
        "机器学习是实现人工智能的重要方法",
        "深度学习是机器学习的一个子领域"
    ]
    # test_embedding = emb_text("This is a test")
    test_embedding = emb_text(documents)
    embedding_dim = len(test_embedding)
    # print(embedding_dim) 索引长度也就是定义的维度1024
    # print(test_embedding) 索引内容
    data = [
        {"id": i, "vector": test_embedding[i]['embedding'], "text": documents[i], "subject": "demo"}
        for i in range(len(documents))
    ]
    print("Data has", len(data), "entities, each with fields: ", data[0].keys())
    print("Vector dim:", len(data[0]["vector"]))
    # 插入数据
    res = insert_data("demo_collection", data)
    print(res)
    # 查询数据
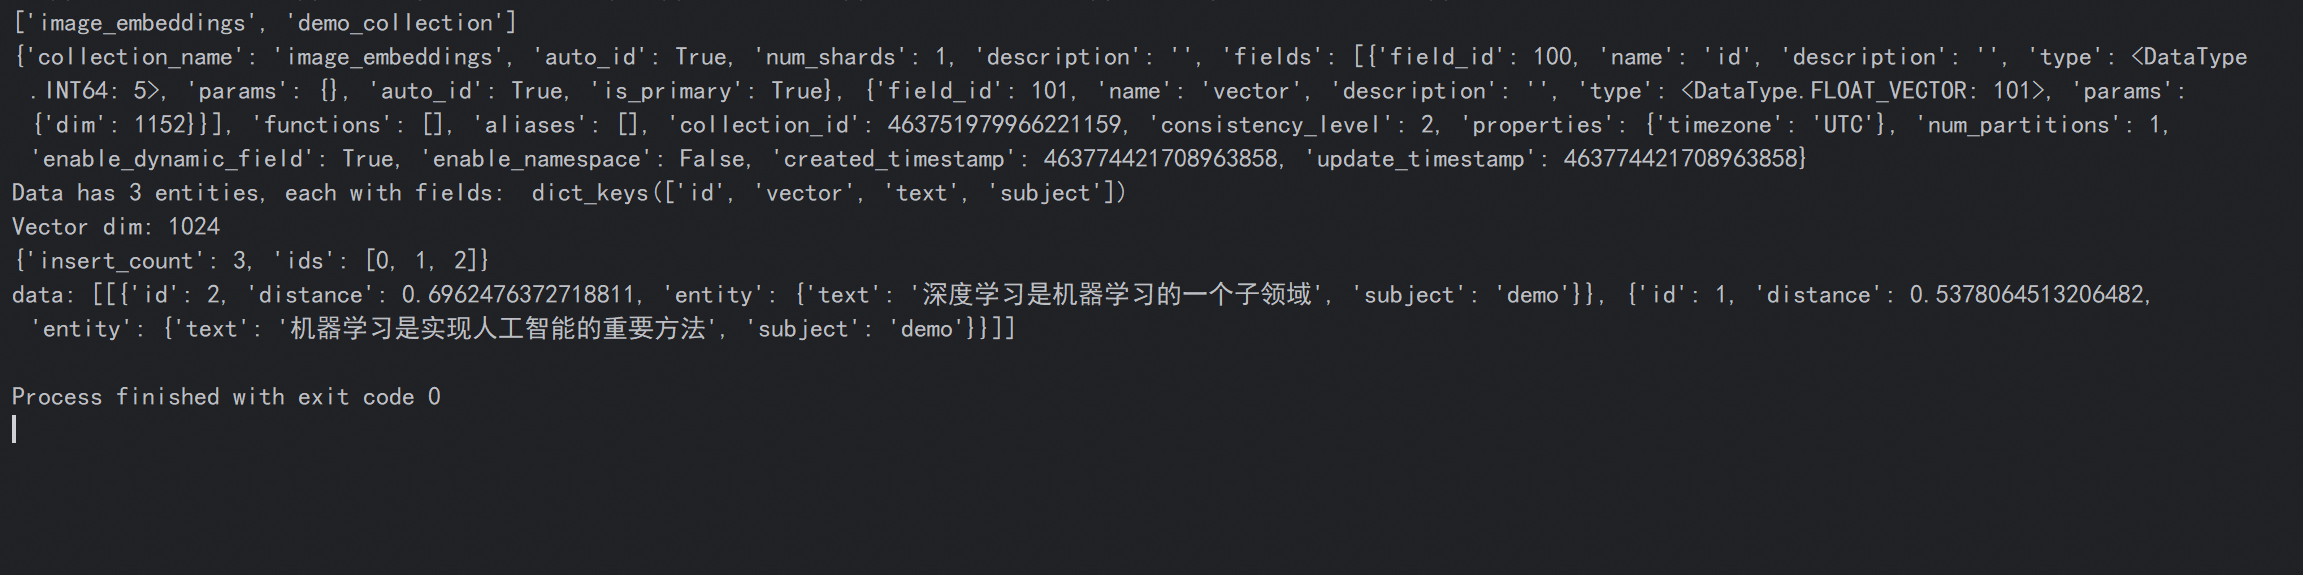
    search_data("demo_collection")
可以通过相似值检索出相关内容
2.2 图片检索以图搜图功能
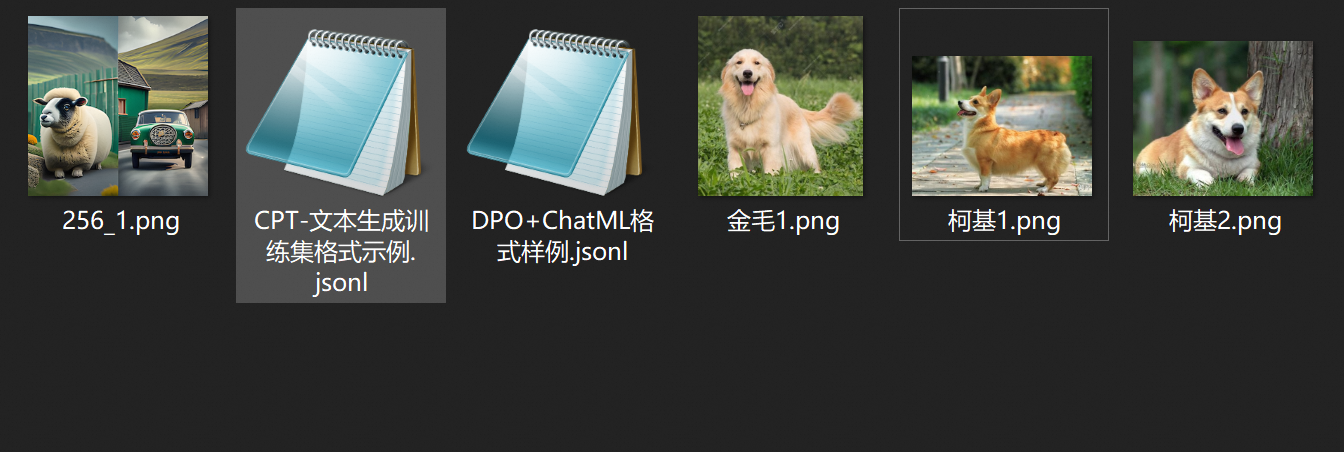
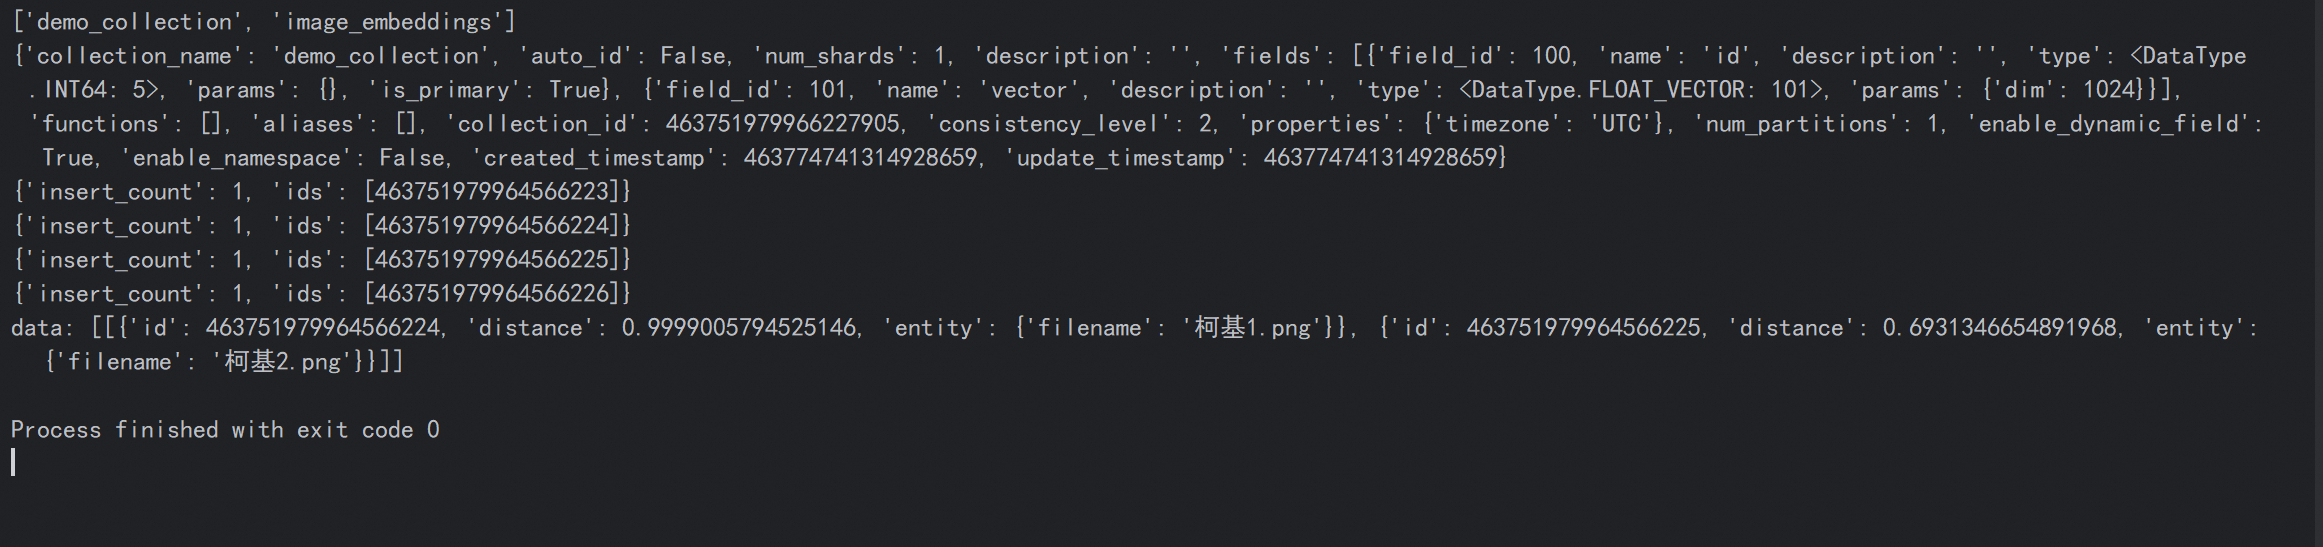
这里有两张柯基的图片一张金毛的图片
import base64
import os

import dashscope
from milvus.demo import client

dashscope.api_key=''
image = "https://dashscope.oss-cn-beijing.aliyuncs.com/images/256_1.png"

def create_collection(collection_name):
    if client.has_collection(collection_name=collection_name):
        client.drop_collection(collection_name=collection_name)
    client.create_collection(
        collection_name=collection_name,
        auto_id=True,
        vector_field_name="vector",
        dimension=1152,  # The vectors we will use in this demo has 768 dimensions
        metric_type="IP",  # Inner product distance
        consistency_level="Bounded",  # Supported values are (`"Strong"`, `"Session"`, `"Bounded"`, `"Eventually"`). See https://milvus.io/docs/consistency.md#Consistency-Level for more details.
    )

    print(client.list_collections())
    print(client.describe_collection(collection_name=client.list_collections()[0]))

# def insert_data(collection_name, data):
#     res = client.insert(collection_name=collection_name, data=data)
#     return  res


def image_to_base64(image_path):
    with open(image_path, "rb") as image_file:
        # 读取文件并转换为Base64
        base64_image = base64.b64encode(image_file.read()).decode('utf-8')
    # 设置图像格式
    image_format = "png"  # 根据实际情况修改,比如jpg、bmp 等
    image_data = f"data:image/{image_format};base64,{base64_image}"
    # 输入数据
    input = [{'image': image_data}]
    return input


#input = [{'image': image}]
def emb_text(input):
    # 调用模型接口
    resp = dashscope.MultiModalEmbedding.call(
        model="tongyi-embedding-vision-plus",
        input=input
    ).output['embeddings'][0]['embedding']
    # print(resp)
    # print(len(resp))
    return resp

def search_data(input,collection_name):
    query_vectors = emb_text(input)

    res = client.search(
        collection_name=collection_name,  # target collection
        data=[query_vectors],  # query vectors
        limit=2,  # number of returned entities
        output_fields=["filename"],  # specifies fields to be returned
    )
    print(res)


if __name__ == '__main__':
    create_collection("image_embeddings")
    for file in os.listdir("../data"):
        if file.endswith(".png"):
            input = image_to_base64("../data/" + file)
            image_embedding = emb_text(input)
            res = client.insert(
                "image_embeddings",
                {"vector": image_embedding, "filename": file},
            )
            print(res)

    search_data(image_to_base64("../data/柯基1.png"),"image_embeddings")
    #emb_text(input)
这里通过filename做演示,发现搜索柯基图片的时候返回的也是柯基,实际业务可以将图片地址返回前端使用以图搜相似图片
2.3 以文搜图
还是上面的例子,只需要更换下模型,需要同时支持文字和图片向量化操作,保证文字和图片向量化的维度一致,两个向量维度不一样的话无法通过文字去查询
import os

import dashscope
from milvus.demo import client
from milvus.images import image_to_base64

os.environ['DASHSCOPE_API_KEY']=''
def create_collection(collection_name):
    if client.has_collection(collection_name=collection_name):
        client.drop_collection(collection_name=collection_name)
    client.create_collection(
        collection_name=collection_name,
        auto_id=True,
        vector_field_name="vector",
        dimension=2560,  # The vectors we will use in this demo has 768 dimensions
        metric_type="IP",  # Inner product distance
        consistency_level="Bounded",  # Supported values are (`"Strong"`, `"Session"`, `"Bounded"`, `"Eventually"`). See https://milvus.io/docs/consistency.md#Consistency-Level for more details.
    )

    print(client.list_collections())
    print(client.describe_collection(collection_name=client.list_collections()[0]))

def emb_image(input):
    # 使用 qwen3-vl-embedding 生成融合向量
    resp = dashscope.MultiModalEmbedding.call(
        # 若没有配置环境变量,请用百炼API Key将下行替换为:api_key="sk-xxx",
        api_key=os.getenv("DASHSCOPE_API_KEY"),
        model="qwen3-vl-embedding",
        input=input,
        dimension=2560
        # 可选参数:指定向量维度(支持 2560、2048、1536、1024、768、512、256,默认 2560)
        #parameters={"dimension": 1024}
    )
   #print(len(resp.output['embeddings'][0]['embedding']))
    return resp.output['embeddings'][0]['embedding']

def search_data(query_vectors,collection_name):
    query_vectors = query_vectors

    res = client.search(
        collection_name=collection_name,  # target collection
        data=[query_vectors],  # query vectors
        limit=2,  # number of returned entities
        output_fields=["filename"],  # specifies fields to be returned
    )
    print(res)

if __name__ == '__main__':
    create_collection("image_embeddings")
    for file in os.listdir("../data"):
        if file.endswith(".png"):
            input = image_to_base64("../data/" + file)
            image_embedding = emb_image(input)
            res = client.insert(
                "image_embeddings",
                {"vector": image_embedding, "filename": file},
            )
            print(f"插入文件 {file} 成功,返回结果为:{res}")

    query_vectors_text = emb_image(["柯基犬"])
    search_data(query_vectors_text, "image_embeddings")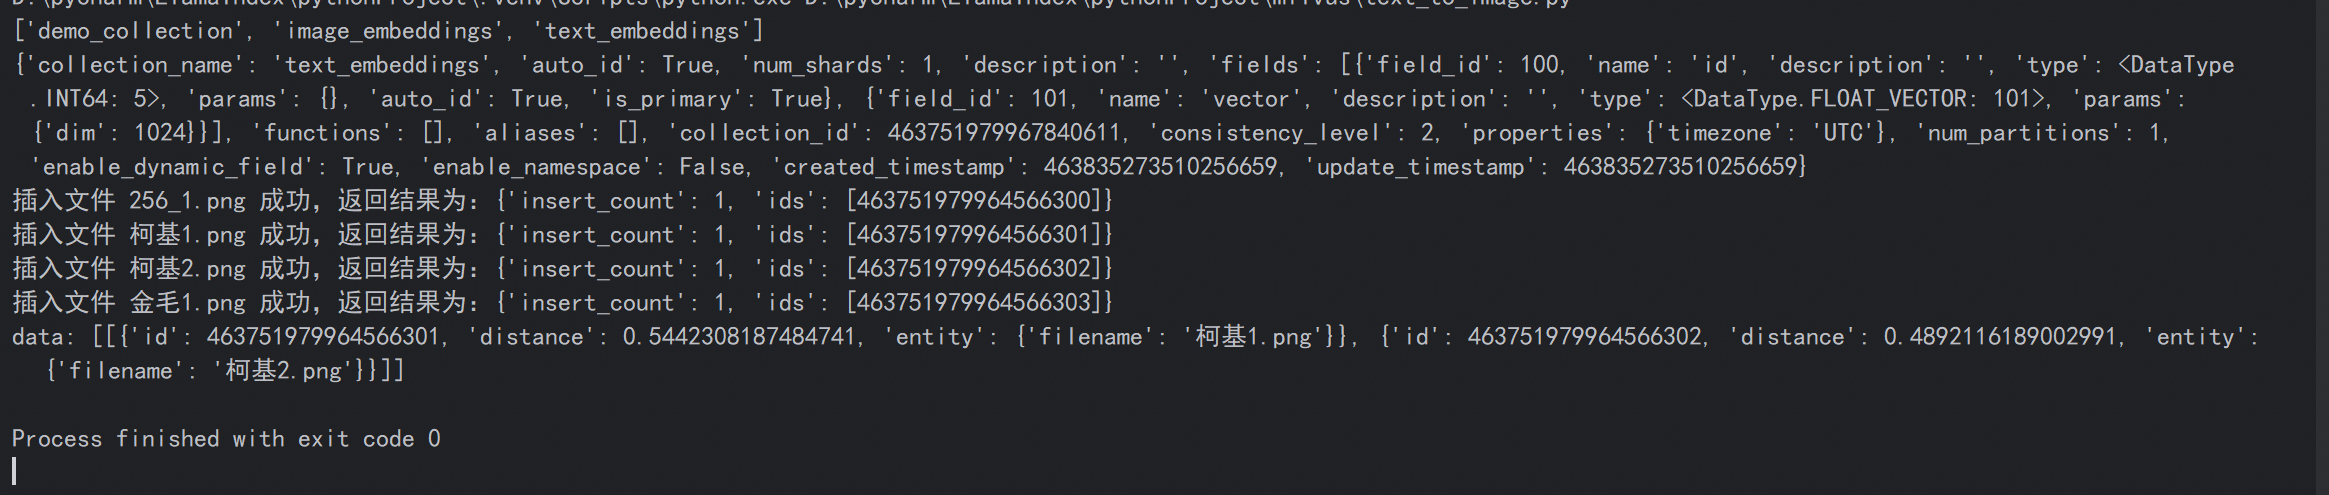
3 集成
更新
https://docs.llamaindex.org.cn/en/stable/examples/vector_stores/MilvusIndexDemo/
通过llamaindex插入到milvus,注意dim需要和模型的嵌入维度一样
import asyncio
import os
import dashscope
from llama_index.core import SimpleDirectoryReader, StorageContext, VectorStoreIndex, Settings
from llama_index.core.postprocessor import SimilarityPostprocessor
from llama_index.embeddings.dashscope import DashScopeEmbedding
from llama_index.llms.openai_like import OpenAILike
from llama_index.vector_stores.milvus import MilvusVectorStore

os.environ['DASHSCOPE_API_KEY']=''

dashscope.api_key=api_key=os.getenv("DASHSCOPE_API_KEY")
# LlamaIndex默认使用的Embedding模型被替换为百炼的Embedding模型
Settings.embed_model = DashScopeEmbedding(
    model_name="text-embedding-v2"

)
Settings.llm = OpenAILike(
    model="qwen-plus",
    api_base="https://dashscope.aliyuncs.com/compatible-mode/v1",
    api_key=os.getenv("DASHSCOPE_API_KEY"),
    is_chat_model=True
)

documents = SimpleDirectoryReader(
    '../data',
    required_exts=[".jsonl"],
).load_data()
print(f'已加载 {len(documents)} 个文件')

#pip install llama-index-vector-stores-milvus

async  def init_store_async(overwrite: bool):
    return   MilvusVectorStore(
    uri="http://localhost:19530", dim=1536, overwrite=overwrite,collection_name='llama_milvus',
)


def get_vector_store(overwrite: bool = False):
    """
    【核心技巧】智能获取 Milvus 实例
    自动判断当前是否有 EventLoop,解决 Windows 同步/异步环境兼容性问题
    """
    try:
        # 场景1: 如果已经在 Loop 中 (如 Jupyter 或 其他异步函数内部)
        loop = asyncio.get_event_loop()
        return loop.run_until_complete(init_store_async(overwrite))
    except RuntimeError:
        # 场景2: 如果是普通脚本运行,没有 Loop,则新建一个
        return asyncio.run(init_store_async(overwrite))

vector_store = get_vector_store(overwrite=True)
storage_context = StorageContext.from_defaults(vector_store=vector_store)
index = VectorStoreIndex.from_documents(
    documents, storage_context=storage_context,
)

query_engine = index.as_query_engine(streaming=True, similarity_top_k=2)
#https://docs.llamaindex.org.cn/en/stable/module_guides/querying/node_postprocessors/

nodes = query_engine.retrieve("小明是谁")
#print(f'检索到的结果:{nodes}')
print(f'加载了 {len(nodes)} 个节点')
processor = SimilarityPostprocessor(similarity_cutoff=0.05)

filtered_nodes = processor.postprocess_nodes(nodes)
#print(f'过滤后的结果:{filtered_nodes}')
print(f'分数大于0.05的 过滤后的结果:{len(filtered_nodes)} 个节点')


res = query_engine.query("小明是谁")
print(res.print_response_stream())
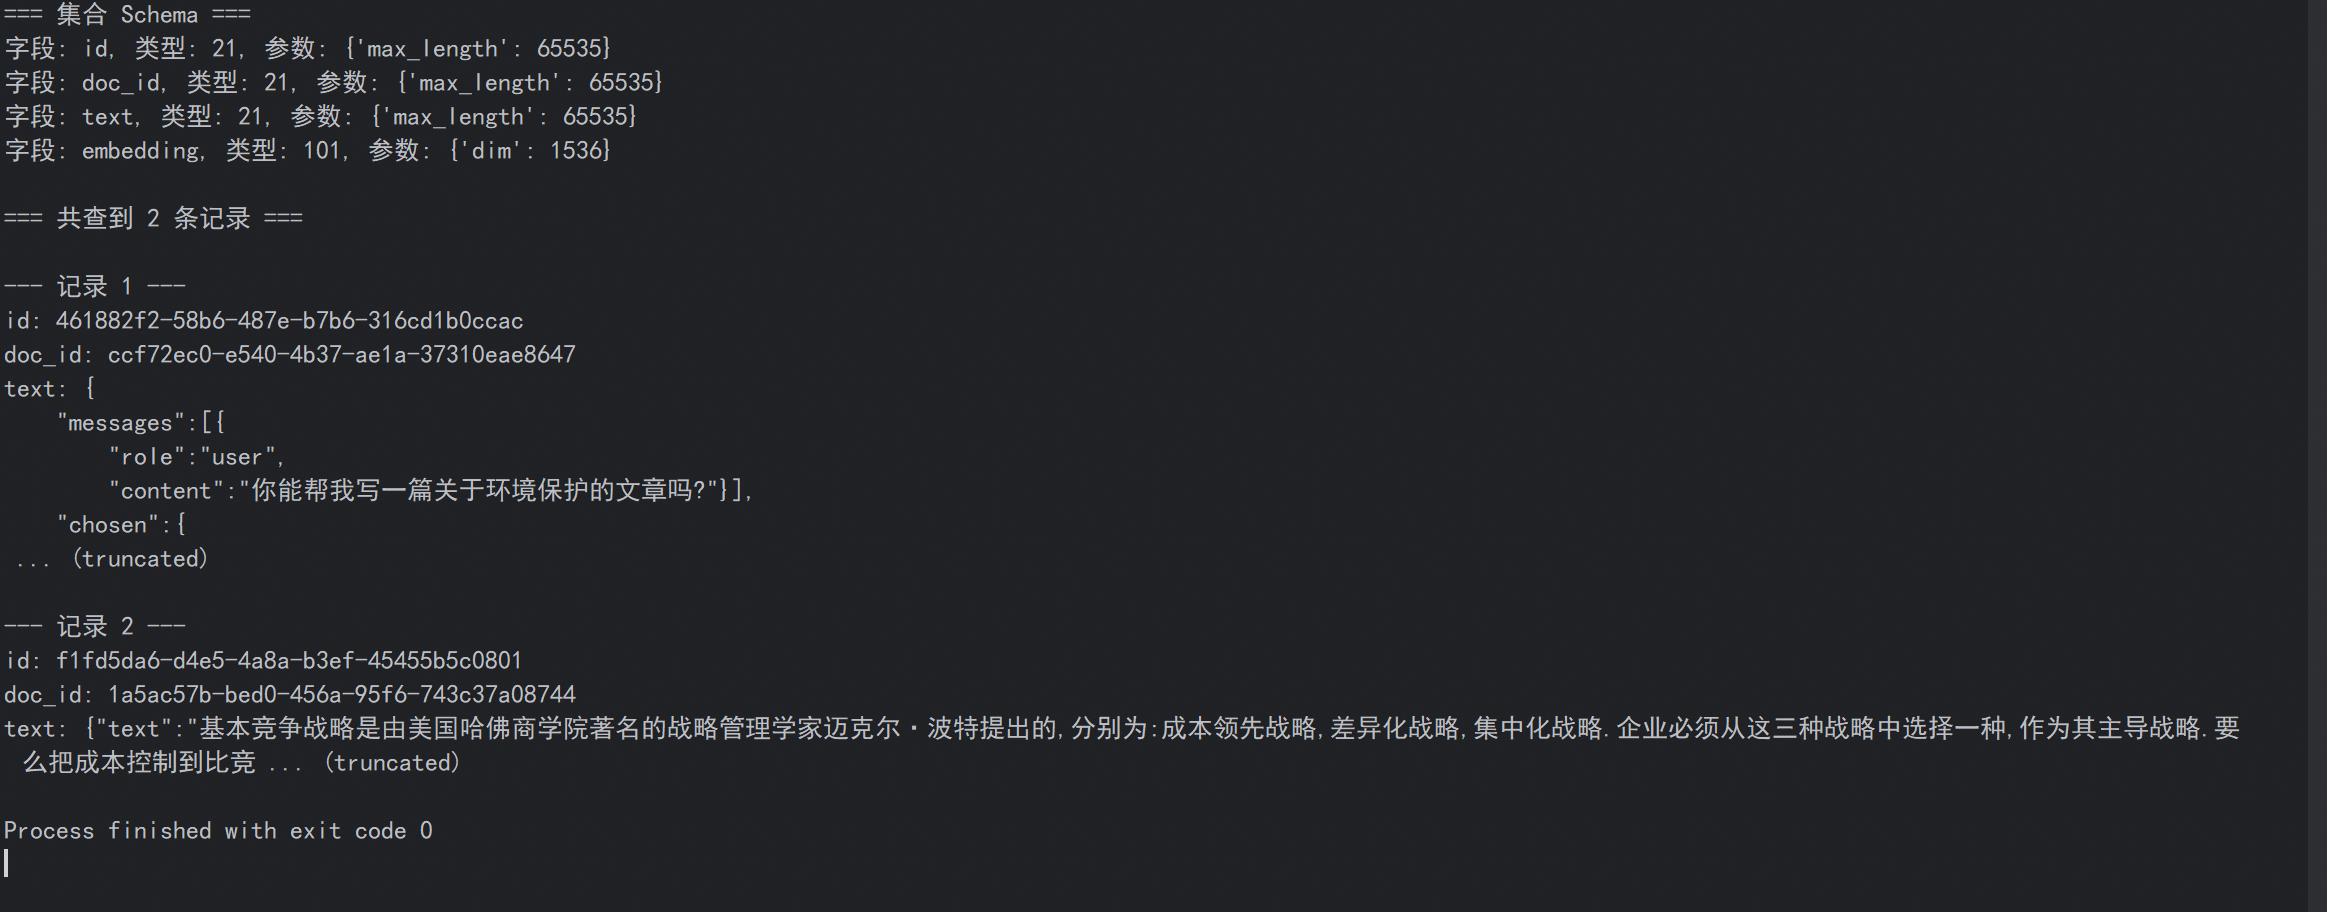
查询插入后的原始数据
from pymilvus import MilvusClient

# 1. 创建客户端
client = MilvusClient(uri="http://localhost:19530")

# 2. 指定集合名
collection_name = "llama_milvus"

# 3. 获取 schema(从而知道有哪些字段)
schema = client.describe_collection(collection_name)
print("=== 集合 Schema ===")
for field in schema['fields']:
    print(f"字段: {field['name']}, 类型: {field['type']}, 参数: {field.get('params', {})}")

# 4. 提取所有非向量字段(避免打印超长向量)
all_field_names = [f['name'] for f in schema['fields']]
output_fields = [name for name in all_field_names if name != "embedding"]  # 跳过 embedding

# 5. 查询所有数据(最多查 1000 条,按需调整)
# 注意:MilvusClient 的 query 默认不支持空 expr,需用 "id >= 0"
results = client.query(
    collection_name=collection_name,
    filter="",  # 在较新版本中,空字符串可表示“全部”;若报错则改用 "id >= 0"
    output_fields=output_fields,
    limit=2  # 根据你的数据量调整
)

# 6. 打印结果
print(f"\n=== 共查到 {len(results)} 条记录 ===")
for i, item in enumerate(results):
    print(f"\n--- 记录 {i+1} ---")
    for field in output_fields:
        value = item.get(field, "N/A")
        if isinstance(value, str) and len(value) > 200:
            value = value[:100] + " ... (truncated)"
        print(f"{field}: {value}")

汇聚全球AI编程工具,助力开发者即刻编程。
更多推荐

 14
14 0
0- 0


 已为社区贡献2条内容

所有评论(0)