
Nexus Repository公司内部maven私服搭建并上传自己的jar包
目录标题
jar包安装
一、为什么需要maven私服
为了代码安全,为了工具共享,公司想要搭建自己的maven私服。把jar包上传到一个仓库,供各个项目依赖使用。
二、搭建过程
本文搭建以 Linux 为例: 环境:centos7、jdk17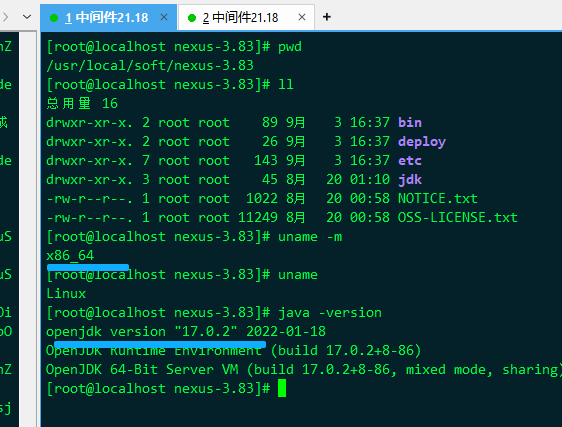
下载地址:https://help.sonatype.com/en/download-archives—repository-manager-3.html
nexus-3.83.1-03-linux-x86_64.tar
1 准备好环境和工具包
将下载的nexus-3.83.1-03-linux-x86_64.tar解压到自定义目录即可。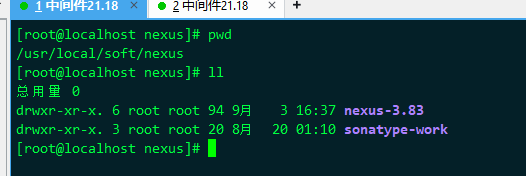
1-1. 解压命令:
tar -xvf nexus-3.83.1-03-linux-x86_64.tar
解压完之后(会有2个文件夹):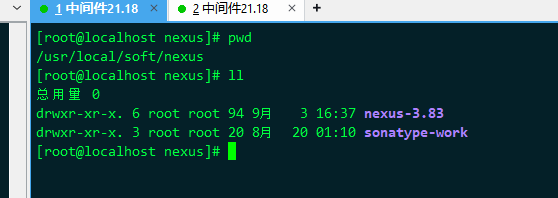
1-2. 私服配置(可以忽略)
通常可以不做任何修改,但个人习惯于修改 application-host 为127.0.0.1(关于0.0.0.0与127.0.0.1的区别自行检索).
如下属性可以自定义修改 :
- application-host : Nexus服务监听的主机
- application-port: Nexus服务监听的端口,
- nexus-context-path : Nexus服务的上下文路径
2 修改配置
-
更改私服默认端口(8081):
[root@localhost nexus-3.83]# vim etc/nexus-default.properties
	//更改端口号 port
	application-port=10081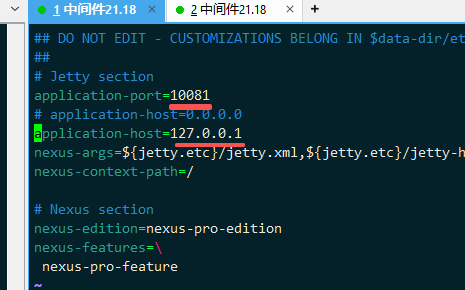
-
修改私服内存分配 (可选):
[root@localhost nexus-3.83]# vim bin/nexus.vmoptions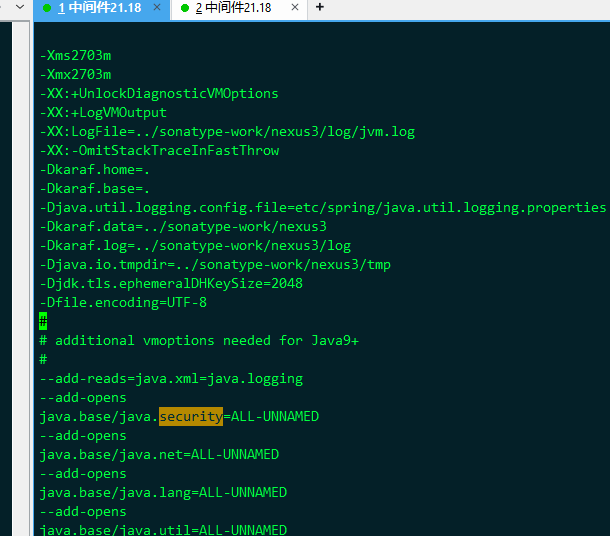
-
修改数据以及日志的存储位置
vim /usr/local/nexus3/bin/nexus.rc 【 run_as_user="root" 】 -
设置开机自启动 (可选)
ln -s /usr/local/nexus3/bin/nexus /etc/init.d/nexus3 chkconfig --add nexus3 chkconfig nexus3 on -
后台启动,启动比较慢等两分钟
/usr/local/nexus3/bin/nexus run & -
有防火墙的关掉
http://ip:8081
3. 启动nexus3
-
启动命令 :
(必须有jdk环境哈,如果没有安装jdk请先安装、配置jdk17)&为后台启动: ./nexus run & 也可以改为./nexus start & # 测试 前台启动 [root@localhost nexus-3.83]# ./bin/nexus run WARNING: ************************************************************ WARNING: Detected execution as "root" user. This is NOT recommended! WARNING: ************************************************************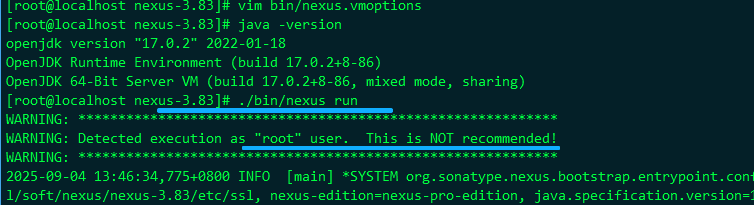
启动成功:2025-09-04 13:47:07,699+0800 INFO [jetty-main-1] *SYSTEM org.eclipse.jetty.server.AbstractConnector - Started ServerConnector@45e93858{HTTP/1.1, (http/1.1)}{127.0.0.1:10081} 2025-09-04 13:47:07,701+0800 INFO [jetty-main-1] *SYSTEM org.eclipse.jetty.server.Server - Started oejs.Server@66a17a8f{STARTING}[12.0.17,sto=5000] @34741ms 2025-09-04 13:47:07,701+0800 INFO [jetty-main-1] *SYSTEM org.sonatype.nexus.bootstrap.entrypoint.jetty.JettyServer - ------------------------------------------------- Started Sonatype Nexus COMMUNITY 3.83.1-03 -------------------------------------------------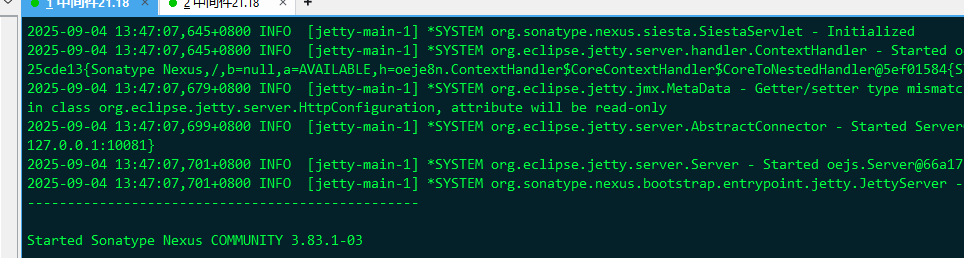
三、访问Nexus3 ip+端口
3-1 浏览器直接访问
-
http://192.168.xx.18:10081/
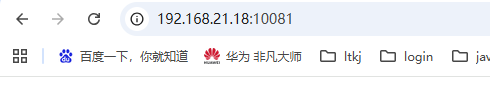
-
是不是因为前面修改了 host . ??
[root@localhost nexus-3.83]# vim etc/nexus-default.properties在服务器上验证一下:
[root@localhost ~]# curl http://127.0.0.1:10081在服务器上 用127 是通的。
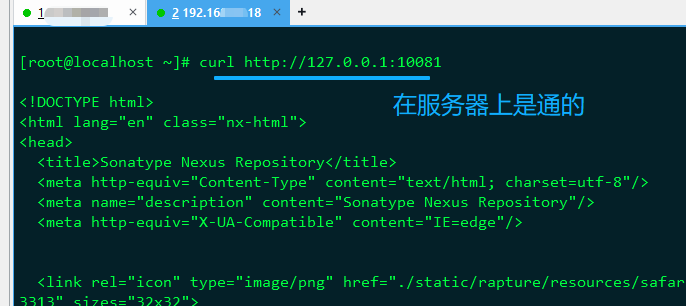
[root@localhost ~]# curl http://192.168.xxx.xx.xxx81在服务器上 用192.168.xx.18 是不通的。

-
再次修改,192.168.xx.18
[root@localhost nexus-3.83]# vim etc/nexus-default.properties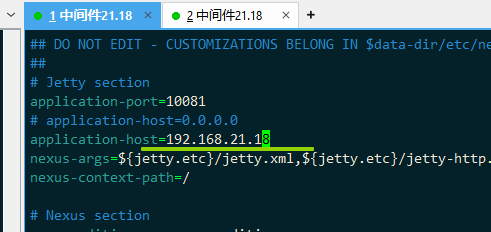
-
重启、验证
通了
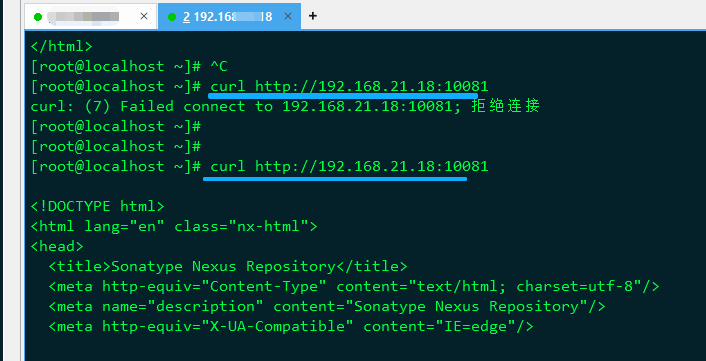
浏览器访问,也通了: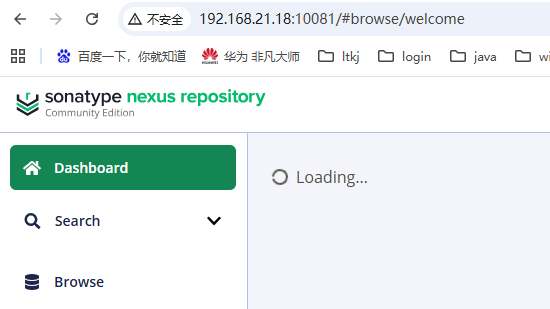
多等一会儿: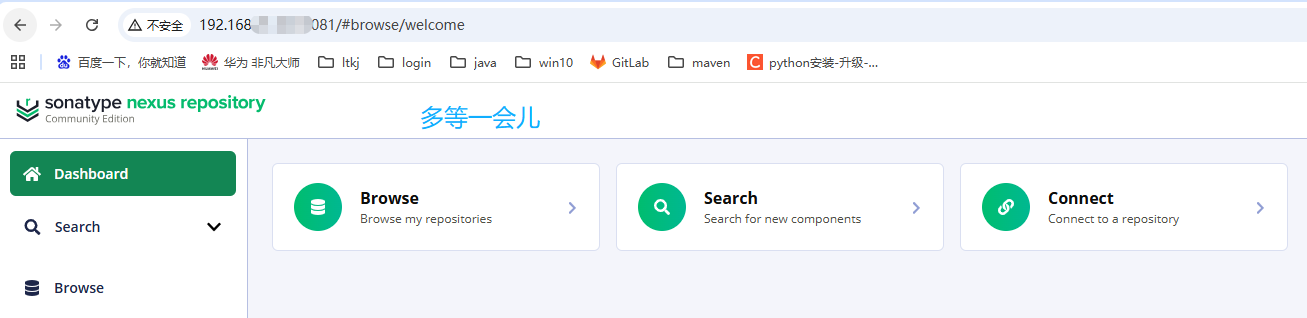
3-2 进页面登录
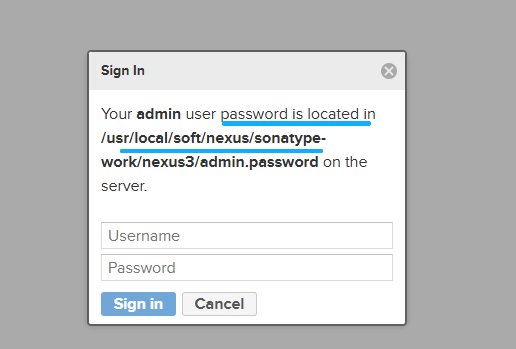
- 点击右上角【-> 登录 】
.
- 默认admin
默认账号:admin
默认密码去查看:cat /usr/local/soft/nexus/sonatype-work/nexus3/admin.password
...
登录后会提示设置新密码,和禁用匿名访问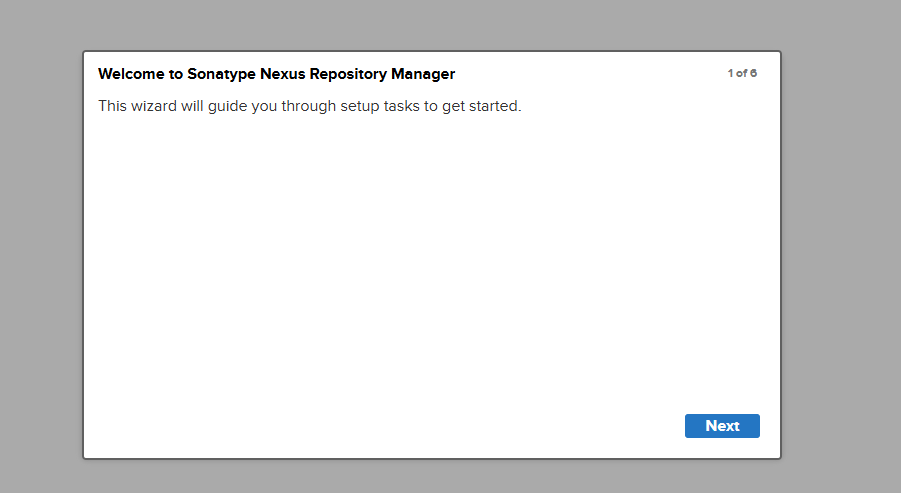
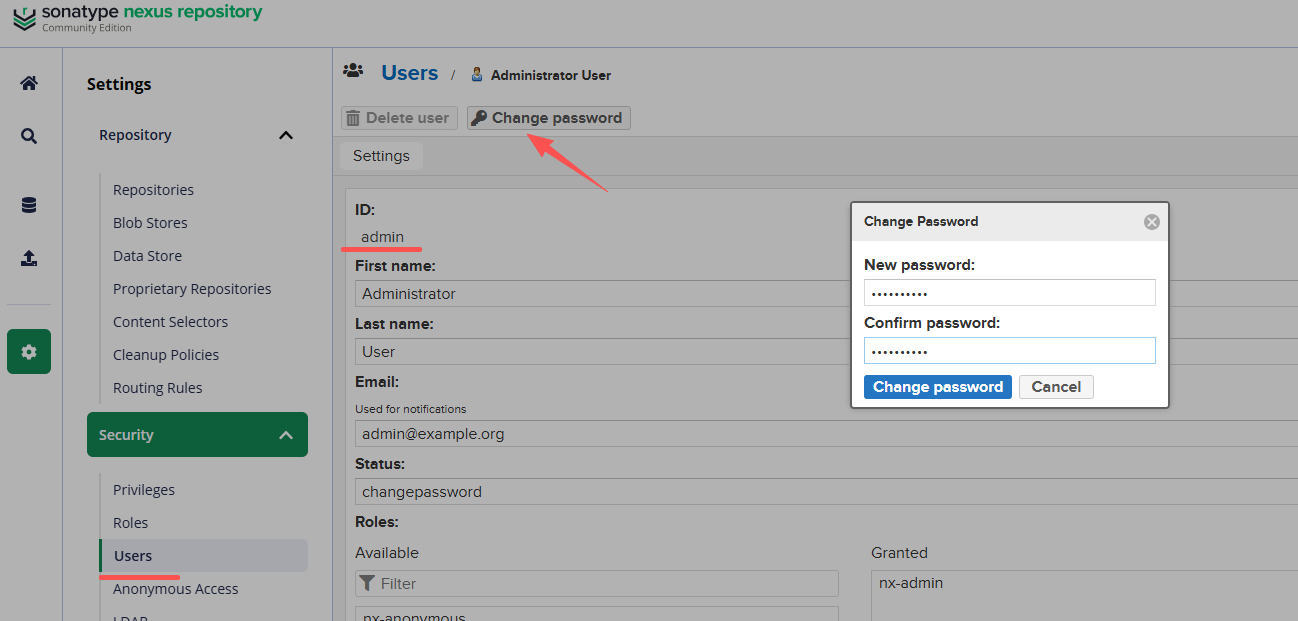
- 修改密码、添加账号 ltkj.nexus
3-1 在settings 中设置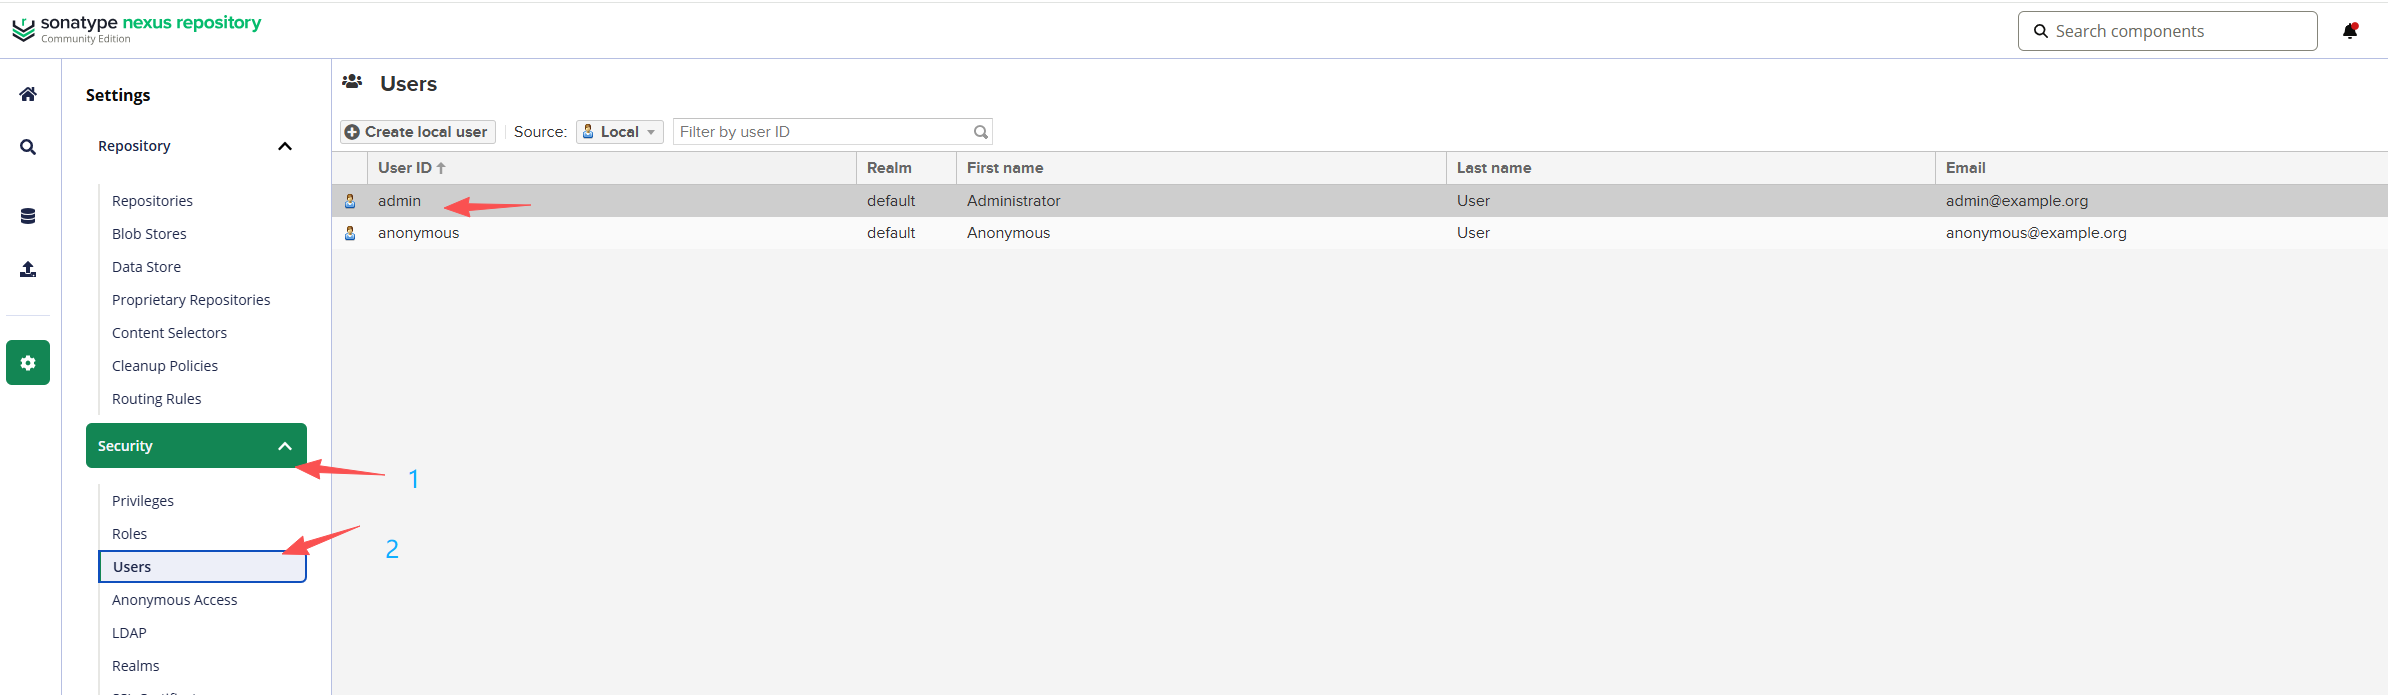
3-2 或者在右上角头像位置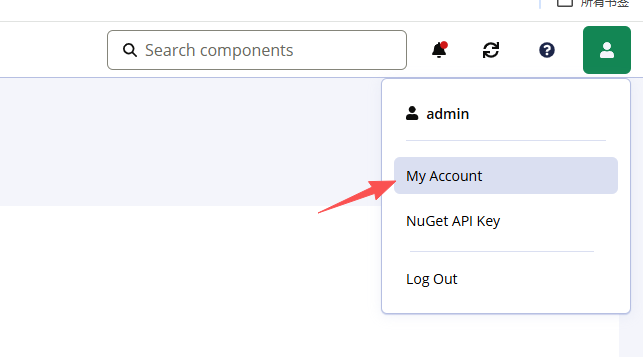
-
关于日志中的报错
2025-09-04 14:15:28,522+0800 INFO  [pool-3-thread-3] anonymous org.apache.http.impl.execchain.RetryExec - I/O exception (java.net.SocketException) caught when processing request to {s}->https://sonatype-download.global.ssl.fastly.net:443: 网络不可达
2025-09-04 14:15:28,522+0800 INFO  [pool-3-thread-3] anonymous org.apache.http.impl.execchain.RetryExec - Retrying request to {s}->https://sonatype-download.global.ssl.fastly.net:443
2025-09-04 14:15:48,526+0800 INFO  [pool-3-thread-3] anonymous org.apache.http.impl.execchain.RetryExec - I/O exception (java.net.SocketException) caught when processing request to {s}->https://sonatype-download.global.ssl.fastly.net:443: 网络不可达
2025-09-04 14:15:48,526+0800 INFO  [pool-3-thread-3] anonymous org.apache.http.impl.execchain.RetryExec - Retrying request to {s}->https://sonatype-download.global.ssl.fastly.net:443
2025-09-04 14:16:08,544+0800 WARN  [pool-3-thread-3] anonymous com.sonatype.nexus.plugins.outreach.internal.outreach.SonatypeOutreach - Could not download page bundle
org.apache.http.conn.ConnectTimeoutException: Connect to sonatype-download.global.ssl.fastly.net:443 [sonatype-download.global.ssl.fastly.net/173.231.12.107] failed: Connect timed out
	at org.apache.http.impl.conn.DefaultHttpClientConnectionOperator.connect(DefaultHttpClientConnectionOperator.java:151)
	at org.apache.http.impl.conn.PoolingHttpClientConnectionManager.connect(PoolingHttpClientConnectionManager.java:376)
	at org.apache.http.impl.execchain.MainClientExec.establishRoute(MainClientExec.java:393)
	at org.apache.http.impl.execchain.MainClientExec.execute(MainClientExec.java:236)
方法:
-
禁用需要国外网络访问的功能:
如果上述网络问题一时难以解决,或者认为这些可选功能无关紧要,可以考虑禁用会触发外网连接的功能。
根据日志中的 SonatypeOutreach,这可能是 Nexus 的某项 outreach 功能。可以尝试在 Nexus 的管理界面查找相关设置并禁用它。
注意:这只是规避了错误,并未真正解决网络问题。如果 Nexus 需要代理其他仓库(如 Maven Central),仍需解决网络连通性问题。
-
四、创建仓库:
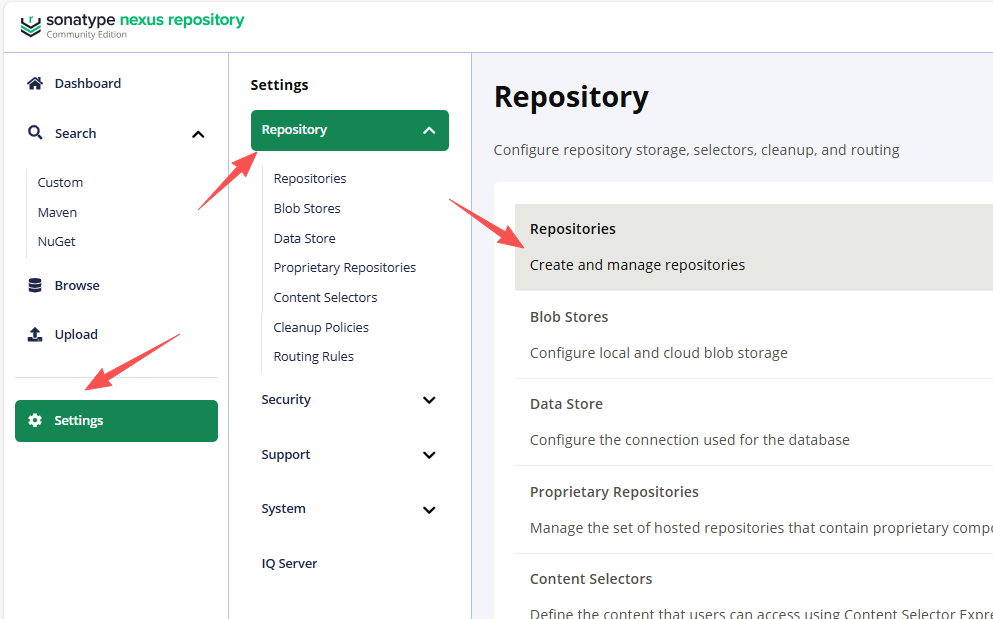
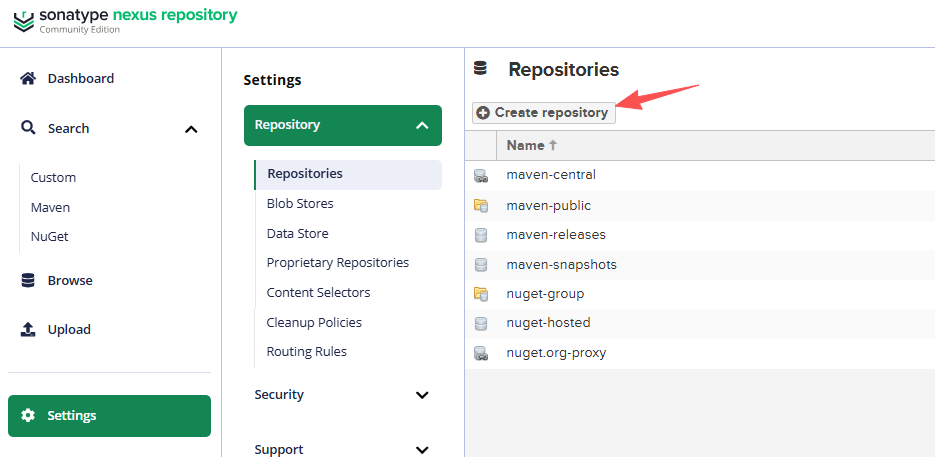
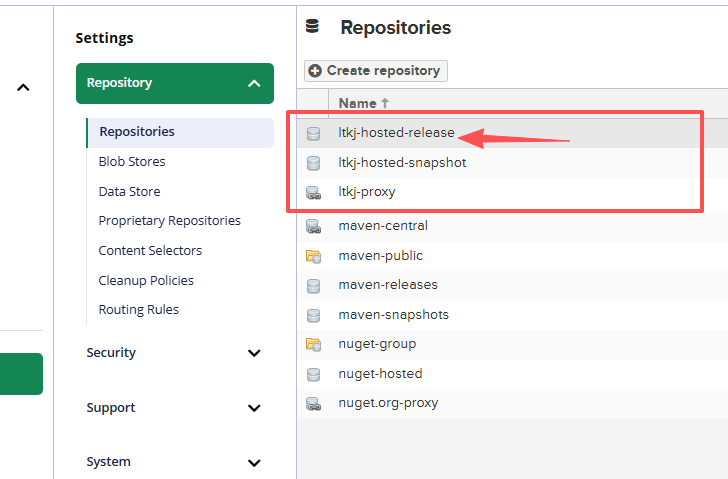
目前创建4个仓库(本地-快照仓库、本地-正式仓库、代理仓库、以及综合仓库)
- 本地-快照仓库:就是为发布的jar包,比如测试jar (我就忽略了,用版本号控制即可)
- 本地-正式仓库:就是第三方给我们提供的jar包,不需要在修改的jar包。
- 代理仓库:代理华为云、阿里云的或者mavne总仓库
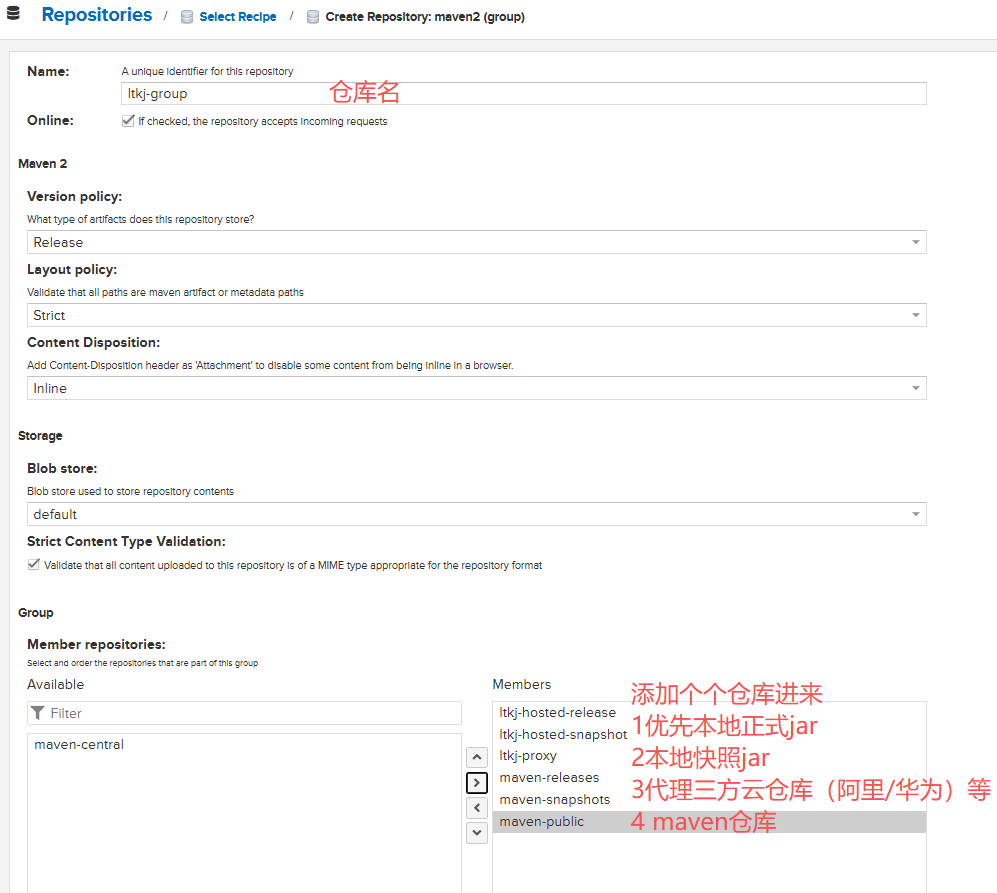
- 综合仓库:把上面合成一个仓库,都可以使用。
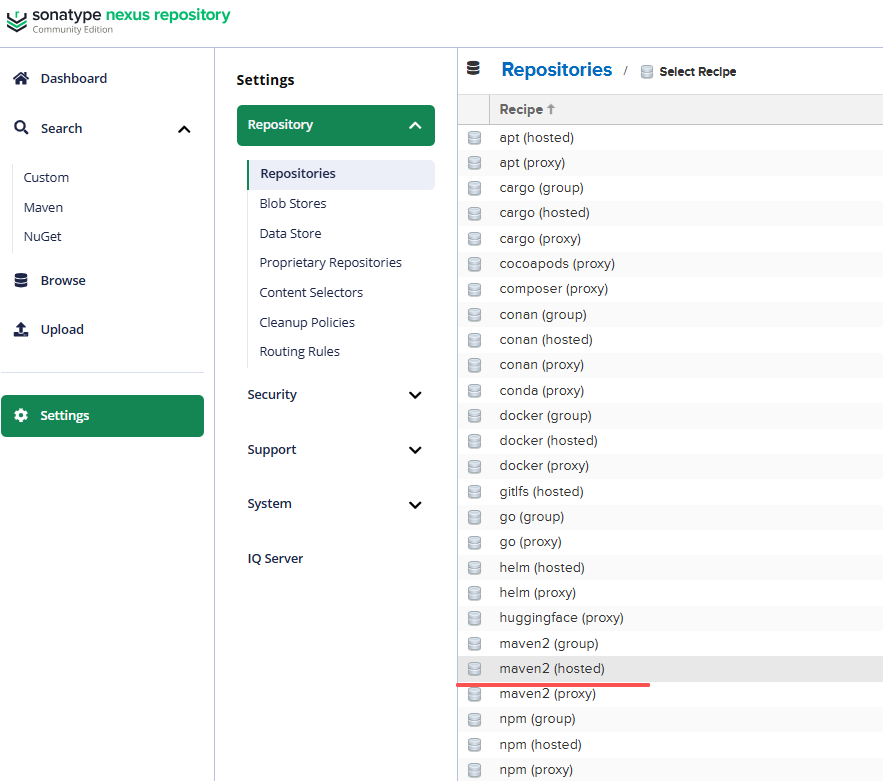
4.1、创建本地快照仓库-也就是测试jar包存放的仓库。
4.1.1、选择maven本地仓库:
4.1.2、创建本地快照仓库:
Storage:
- Name随便写
- Blob store是仓库jar包存放位置
不改就默认在 …/sonatype-work/nexus3/blobs/default/content
然后点创建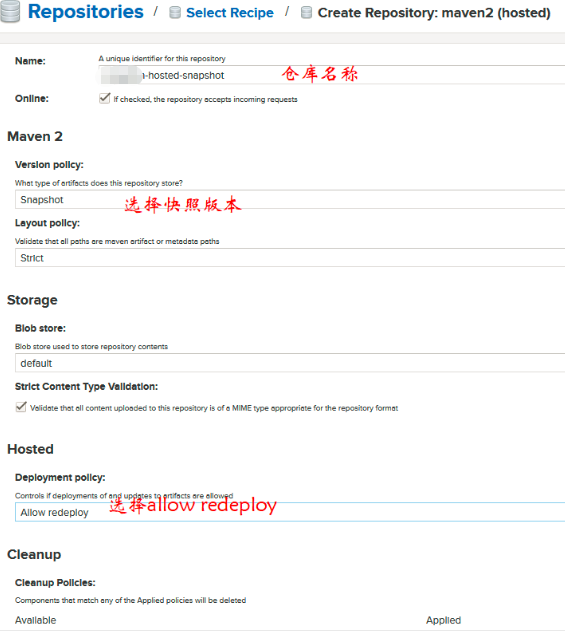
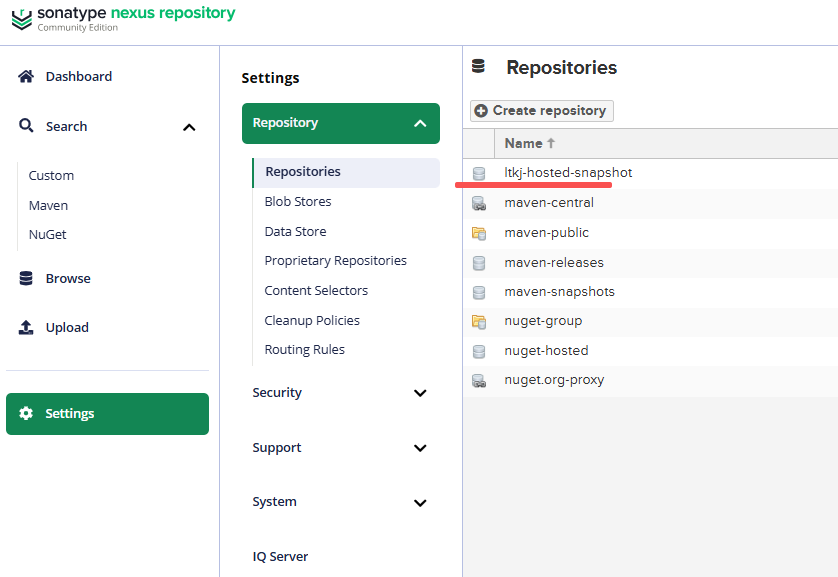
4.1.3、创建成功:
4.2、创建本地Release仓库:
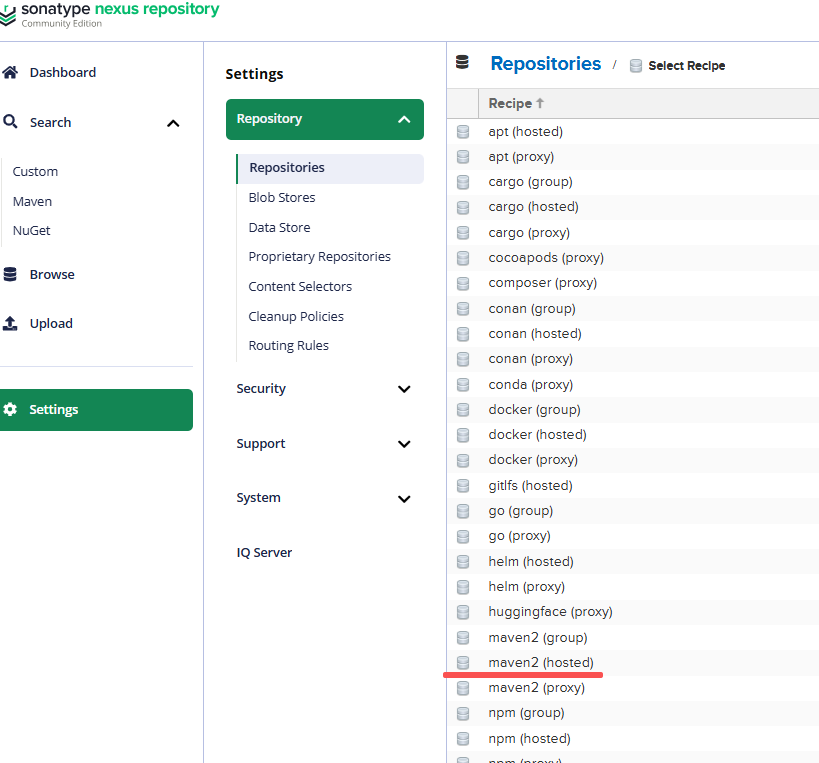
4.2.1、创建release版本仓库:
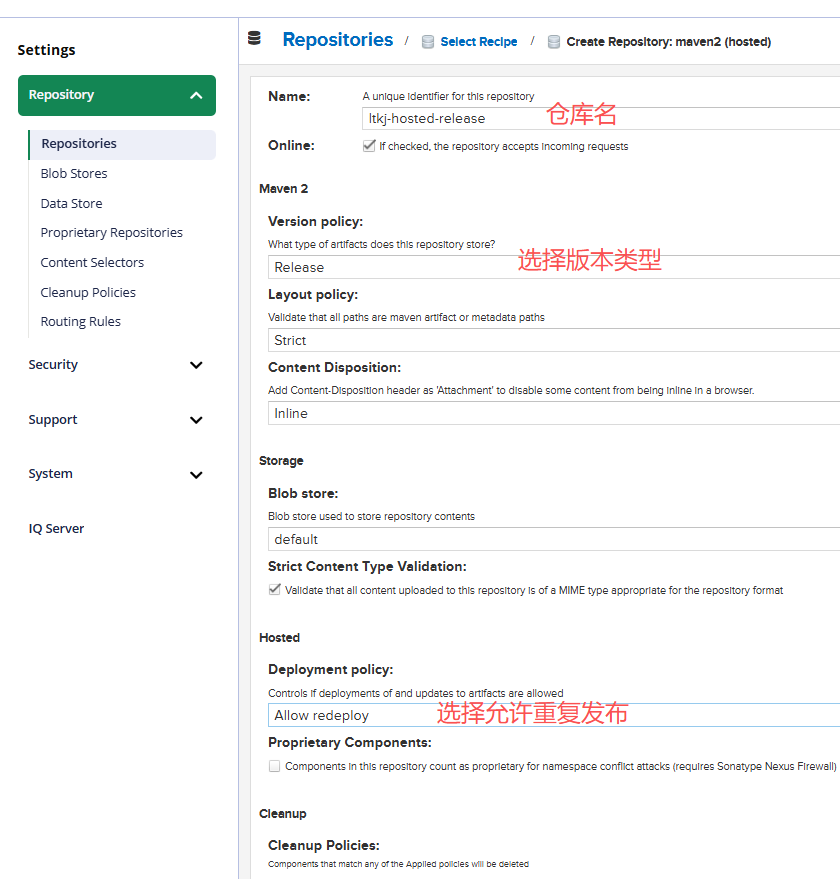
4.2.2、创建成功:
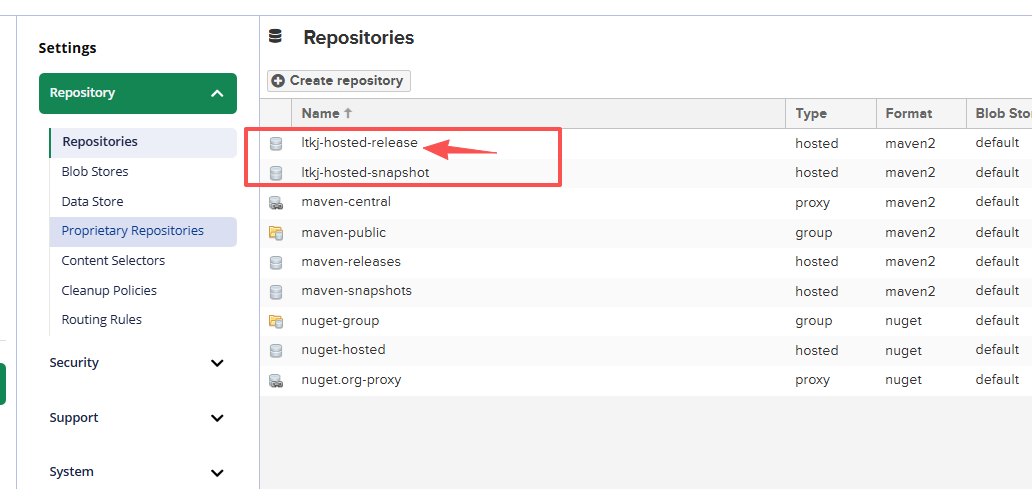
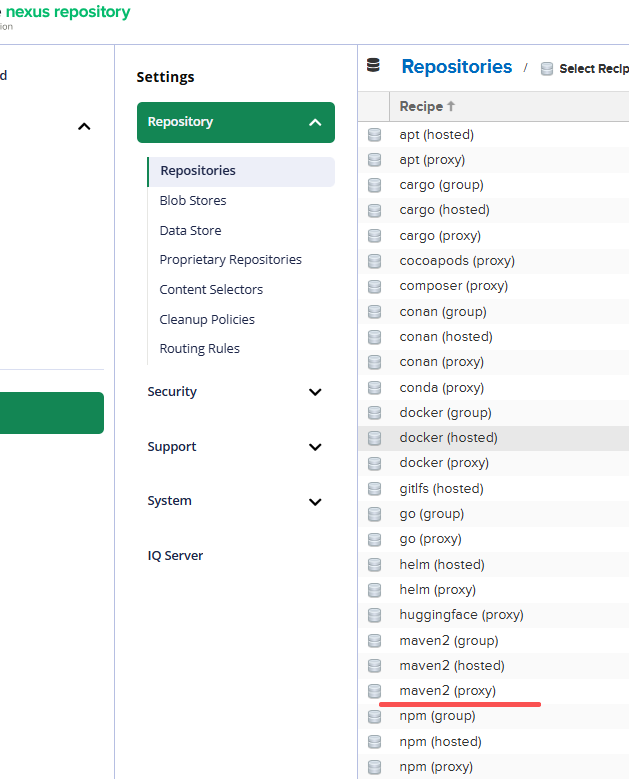
4.3、创建代理仓库(比如阿里云、华为云。。。)
4.3.1、创建代理仓库:
4.3.2、创建代理仓库:
Name就随便写,下面写阿里云的maven地址 http://maven.aliyun.com/nexus/content/groups/public/
拉到最下点Save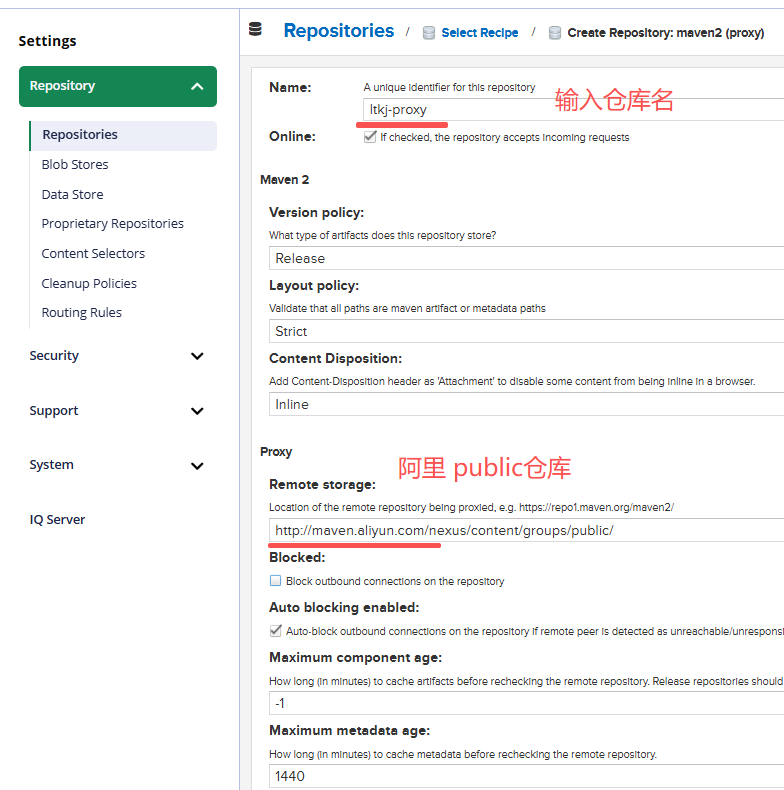
4.3.3、创建成功:
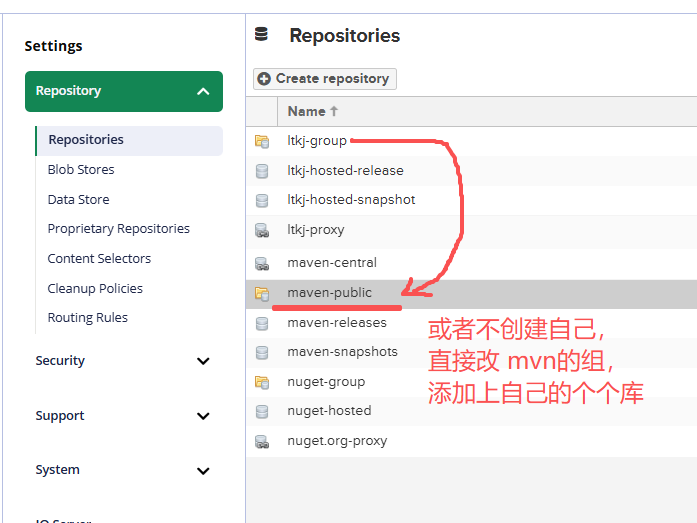
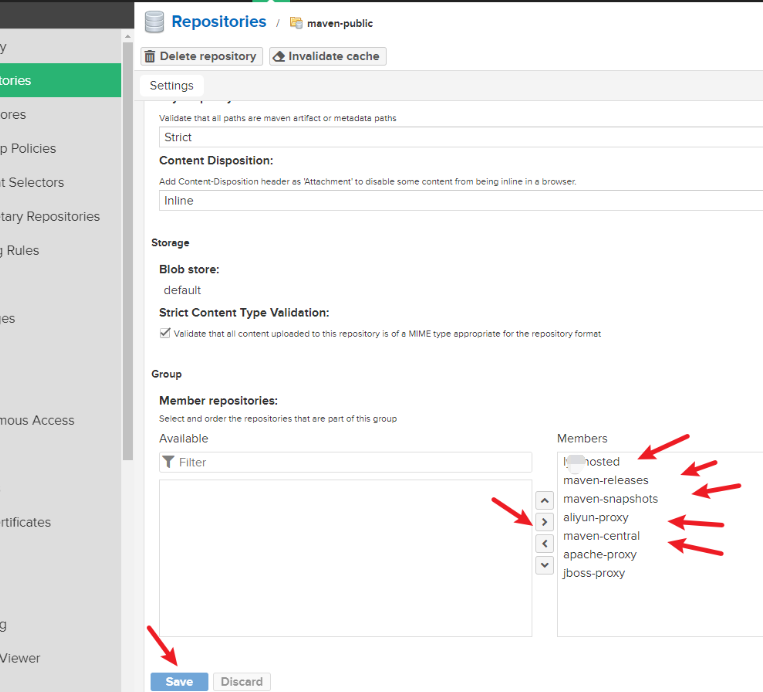
4.4、创建组合仓库:(可以创建自己的,也可以修改maven的组,把自己的个个库添加进去
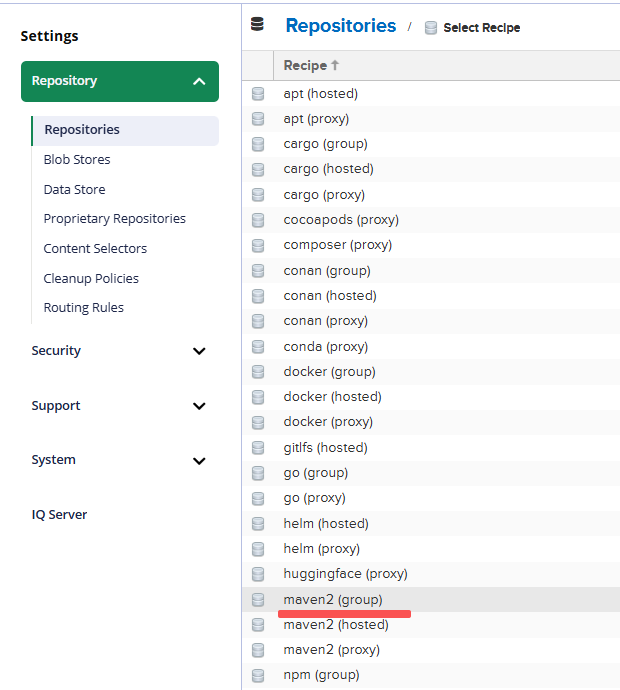
4.4.1、选择组合仓库的其他仓库地址
4.4.2、创建成功:
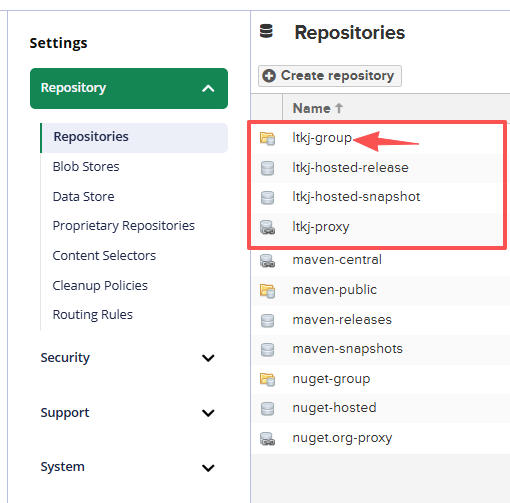
关于组合仓库:
1.
基本配置完了,把地址拷贝下来,maven中要用
http://192.168.xxx.xx.xxx81/repository/ltkj-group/

五、发布jar到私服:
5.1、先在本地创建一个新的mavne环境 (如果已有,可略过)
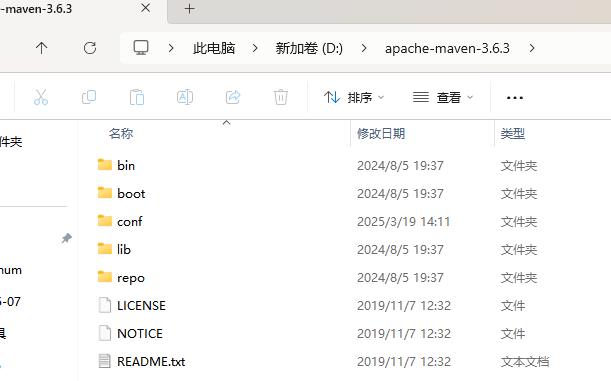
参考 Nexus公司内部maven私服搭建并上传自己的jar包之五
六、本地使用私服环境并且从私服下载jar包。
6.1、配置maven的setting配置文件:
6.1.1、增加综合仓库的服务器配置
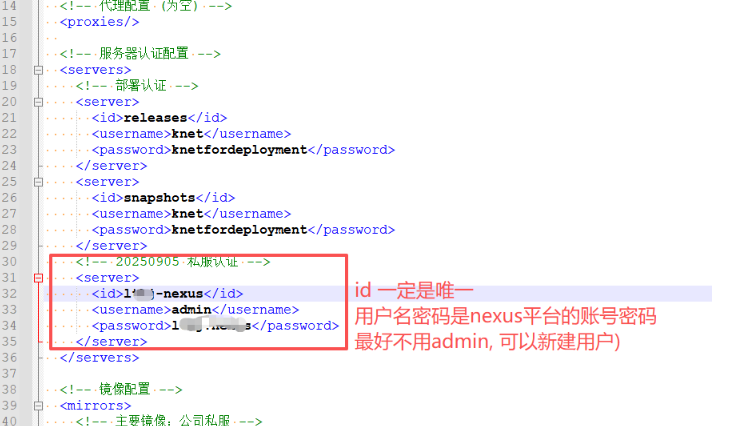
  <!-- 服务器认证配置 -->
  <servers>
    <!-- 部署认证 -->
    <server>
      <id>releases</id>
      <username>knet</username>
      <password>knetfordeployment</password>
    </server>
    <server>
      <id>snapshots</id>
      <username>knet</username>
      <password>knetfordeployment</password>
    </server>
    <!-- 20250905 私服认证 -->
    <server>
      <id>lxxx-xxxxs</id>
      <username>admin</username>
      <password>ltkj.nexus</password>
    </server>
  </servers>
6.1.2、增加私服的综合仓库地址:
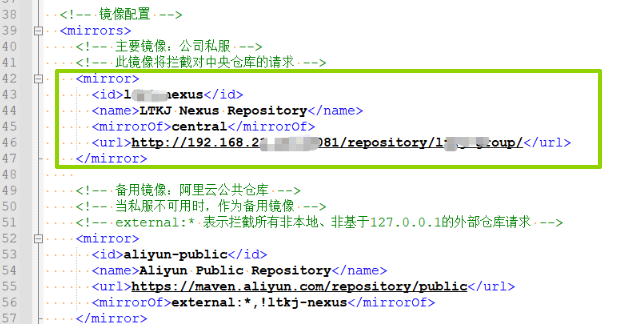
<mirrors>
    <!-- mirror
     | Specifies a repository mirror site to use instead of a given repository. The repository that
     | this mirror serves has an ID that matches the mirrorOf element of this mirror. IDs are used
     | for inheritance and direct lookup purposes, and must be unique across the set of mirrors.
     |
    <mirror>
      <id>mirrorId</id>
      <mirrorOf>repositoryId</mirrorOf>
      <name>Human Readable Name for this Mirror.</name>
      <url>http://my.repository.com/repo/path</url>
    </mirror>
     -->
	  	<!-- 20250904 -->
	     <!--主要镜像:公司私服   -->
	        <mirror>
	            <id>lxxx-xxxxs</id>
                <name>LTKJ Nexus Repository</name>
	            <mirrorOf>central</mirrorOf>
	            <url>http://192.168.2xx.xx:10081/repository/ltkj-group/</url>
	        </mirror>

            <!-- 备用镜像:阿里云公共仓库 -->
            <!-- 当私服不可用时,作为备用镜像 -->
            <mirror>
              <id>aliyun-public</id>
              <name>Aliyun Public Repository</name>
              <url>https://maven.aliyun.com/repository/public</url>
              <mirrorOf>external:*,!ltkj-nexus</mirrorOf>
            </mirror>
  </mirrors>
6.1.3、配置仓库列表:
  <!-- 配置文件集 -->
  <profiles>
    <!-- JDK配置 -->
    <profile>
      <id>jdk-17</id>
      <activation>
        <activeByDefault>true</activeByDefault>
        <jdk>17</jdk>
      </activation>
      <properties>
        <maven.compiler.source>17</maven.compiler.source>
        <maven.compiler.target>17</maven.compiler.target>
        <maven.compiler.compilerVersion>17</maven.compiler.compilerVersion>
      </properties>
    </profile>

    <!-- 配置私有仓库环境变量及下载源 20250904-->
    <profile>
      <id>ltkj-repositories</id>
      <repositories>
        <repository>
          <id>ltkj-nexus</id>
          <name>LTKJ Nexus Repository</name>
          <url>http://192.168.xxx.xx.xxx81/repository/ltkj-group/</url>
          <releases>
            <enabled>true</enabled>
          </releases>
          <snapshots>
            <enabled>true</enabled>
          </snapshots>
        </repository>
      </repositories>

      <pluginRepositories>
        <pluginRepository>
          <id>ltkj-nexus</id>
          <name>LTKJ Nexus Plugin Repository</name>
          <url>http://192.168.xxx.xx.xxx81/repository/ltkj-group/</url>
          <releases>
            <enabled>true</enabled>
          </releases>
          <snapshots>
            <enabled>true</enabled>
          </snapshots>
        </pluginRepository>
      </pluginRepositories>
    </profile>

  </profiles>

  <!-- 激活的配置集 -->
  <activeProfiles>
    <activeProfile>jdk-17</activeProfile>
    <activeProfile>ltkj-repositories</activeProfile>
  </activeProfiles>
6.1.4、敲黑板:IDEAmaven环境一定更换为刚刚修改的setting配置文件!!!
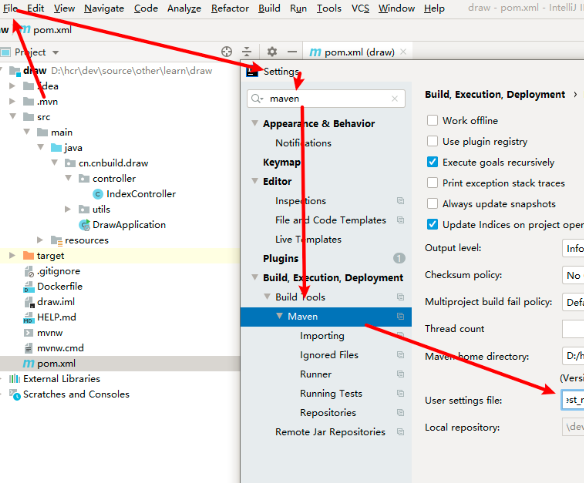
6.1.5、引入pom :
自己就会去私服下载jar包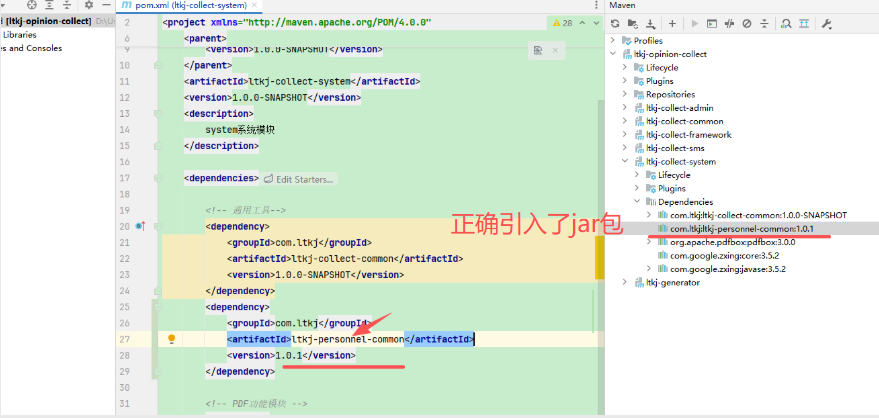
我们看一下本地maven仓库也是有对应的jar包的:
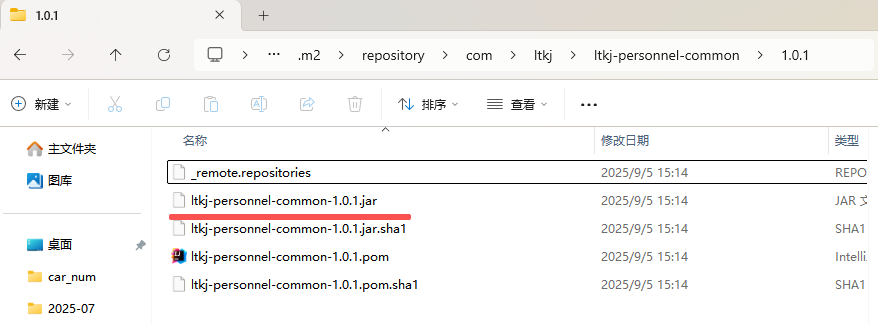
七、私服-下载jar包路径:
本地仓库===》私服发布版本===》私服正式版本===》私服代理仓库===》直到寻找结束。
终、、,以上centos7搭建私服,上传并使用私服jar包。
镜像安装

汇聚全球AI编程工具,助力开发者即刻编程。
更多推荐



 7
7 0
0- 0


 已为社区贡献2条内容

所有评论(0)