
linux操作系统----Nginx Web服务部署与配置
目录
一、 概述
Nginx 是开源、高性能、高可靠的 Web服务器 和反向代理服务器,而且支持热部署,几乎可以做到 7 * 24 小时不间断运行,即使运行几个月也不需要重新启动,还能在不间断服务的情况下对软件版本进行热更新。性能是 Nginx 最重要的考量,**其占用内存少、并发能力强、能支持高达 5w 个并发连接数,最重要的是, Nginx 是免费的并可以商业化,配置使用也比较简单**。
1.1 Nginx 特点***
-
高并发、高性能;
-
模块化架构使得它的扩展性非常好;
-
异步非阻塞的事件驱动模型(epoll)这点和 Node.js 相似;
-
相对于其它服务器来说它可以连续几个月甚至更长而不需要重启服务器使得它具有高可靠性;
-
热部署(就是在工作环境中进行迭代升级)、平滑升级;
-
完全开源,生态繁荣。
1.2 Nginx 作用
-
http服务器。Nginx可以独立提供http服务。可做网页静态服务器。
-
虚拟主机。可以实现在一台服务器虚拟出多个虚拟服务器。
-
反向代理,负载均衡。当网站的访问量达到一定程度后,单台服务器不能满足用户的请求时,需要用多台服务器集群可以使用nginx做反向代理。并且多台服务器可以平均分担负载,不会应为某台服务器负载高宕机而某台服务器闲置的情况。
-
nginx 中也可以配置安全管理、比如可以使用Nginx搭建API接口网关,对每个接口服务进行拦截。
Nginx的作用
| 静态服务 | 代理服务 | 安全服务 | 流行架构 |
|---|---|---|---|
| 浏览器缓存 | 协议类型 | 访问控制 | Nginx+PHP(Fastcgi_pass)LNMP |
| 防资源盗用 | 正向代理 | 访问限制 | Nginx+Java(Proxy_Pass)LNMT |
| 资源分类 | 反向代理 | 流量限制 | Nginx+Python(uwsgi_pass) |
| 资源压缩 | 负载均衡 | 拦截攻击 | |
| 资源缓存 | 代理缓存 | 拦截异常请求 | |
| 跨域访问 | 动静分离 | 拦截SQL 注入 |
二、Nginx服务搭建
2.1 Ningx安装
2.1.1 yum安装
[root@server ~]#yum install -y epel-release

或者
[root@server ~]#yum install -y nginx
                                        ##验证安装结果
[root@server ~]#rpm -q nginx
nginx-1.20.1-7.el7.x86_64
2.1.2 编译安装
[root@client ~]# tar xf nginx-1.27.3.tar.gz     解压
[root@client ~]# ls
anaconda-ks.cfg  ceph-release-1-1.el7.noarch.rpm  info.sh  nginx-1.27.3  nginx-1.27.3.tar.gz
[root@client ~]# cd nginx-1.27.3/
[root@client nginx-1.27.3]# ls
auto     CHANGES.ru          conf       contrib          html     man        SECURITY.md
CHANGES  CODE_OF_CONDUCT.md  configure  CONTRIBUTING.md  LICENSE  README.md  src

                                                                    编译安装
[root@client nginx-1.27.3]# ./configure --prefix=/usr/local/nginx
[root@client nginx-1.27.3]# make && make install

[root@client ~]# cd /usr/local/nginx/conf        进入配置文件目录
[root@client conf]# mv nginx.conf nginx.conf.bak        备份配置文件
[root@client conf]# cp nginx.conf.default nginx.conf    主要用nginx.conf.default这个文件
[root@client conf]# ll
总用量 72
-rw-r--r-- 1 root root 2656 6月  23 21:53 nginx.conf
-rw-r--r-- 1 root root 2656 6月  23 21:47 nginx.conf.bak
-rw-r--r-- 1 root root 2656 6月  23 21:47 nginx.conf.default
###命令优化
[root@localhost sbin]# ln -s /usr/local/nginx/sbin/nginx /usr/sbin/启用nginx
[root@client sbin]# nginx      启用
[root@client sbin]# ps aux | grep nginx
root      17433  0.0  0.0  20592   612 ?        Ss   22:33   0:00 nginx: master process nginx
nobody    17434  0.0  0.0  21036  1312 ?        S    22:33   0:00 nginx: worker process
root      17446  0.0  0.0 112824   984 pts/0    S+   22:33   0:00 grep --color=auto nginx
[root@client sbin]# nginx -s reload       重载
2.2 目录结构
2.2.1 yum安装
/etc/nginx/ ##配置文件目录
/var/lib/nginx ##临时数据文件目录
/var/log/nginx/ ##日志文件目录
/usr/share/nginx/html/ ##访问页面根目录
/etc/nginx/conf.d ##自定义配置文件目录
/etc/nginx/default.d ##默认配置文件目录
2.2.2 编译安装
/usr/local/nginx1.8/conf ##配置文件目录
/usr/local/nginx1.8/conf/conf.d ##自定义配置文件目录
/usr/local/nginx1.8/conf/default.d ##默认配置文件目录
/usr/local/nginx1.8/html ##访问页面根目录
/usr/local/nginx1.8/logs ##日志文件目录
/usr/local/nginx1.8/sbin ##命令存放目录
编译安装模块
#编译前先执行此命令
yum -y install pcre pcre-devel zlib zlib-devel  make gcc-c++  gd gd-devel perl-ExtUtils-Embed	#安装依赖环境

#在nginx-1.27.3  下执行下面操作,配置nginx模块
[root@client nginx-1.27.3]#./configure --prefix=/usr/local/nginx --with-compat --with-debug --with-file-aio  --with-http_addition_module --with-http_auth_request_module --with-http_dav_module --with-http_degradation_module --with-http_flv_module --with-http_gunzip_module --with-http_gzip_static_module --with-http_image_filter_module=dynamic --with-http_mp4_module --with-http_perl_module=dynamic --with-http_random_index_module --with-http_realip_module --with-http_secure_link_module --with-http_slice_module --with-http_ssl_module --with-http_stub_status_module --with-http_sub_module --with-http_v2_module --with-http_xslt_module=dynamic --with-mail=dynamic --with-mail_ssl_module --with-pcre --with-pcre-jit --with-stream=dynamic --with-stream_ssl_module --with-stream_ssl_preread_module --with-threads
#然后make && make install
编译安装
2.3 核心配置文件
[root@nginx1 nginx]# ls
conf.d
fastcgi.conf.default
koi-utf
mime.types.default
scgi_params
uwsgi_params.default
default.d
fastcgi_params
koi-win
nginx.conf  #这个配置文件太片面了
scgi_params.default
win-utf
fastcgi.conf
farams.default
mime.types
nginx.conf.default    #主要的是这个配置文件
uwsgi_params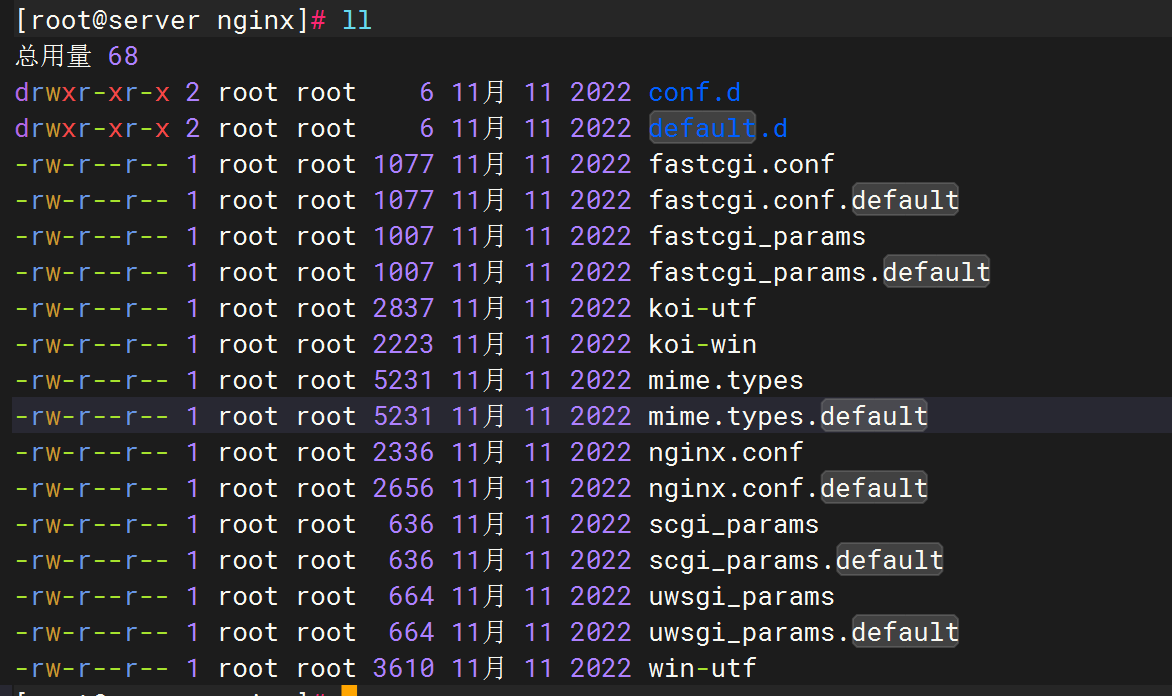
配置文件作用表
| 配置文件名称 | 配置文件作用 |
|---|---|
| fastcgi.conf | 此文件包含了FastCGI相关的配置,用于与FastCGI进程通信 |
| fastcgi.conf.default | 此文件是fastcgi.conf的备份副本 |
| fastcgi_params | 此文件包含了用于FastCGI的参数配置,包括fastcgi的传输协议、请求超时时间等 |
| fastcgi_params.default | 此文件是fastcgi_params的备份副本 |
| koi-utf | 此文件包含了UTF-8编码与KOI8-R编码之间的字符转换规则,用于处理中文文件名等问题 |
| koi-win | 此文件包含了Windows系统的字符转换规则,用于处理Windows系统的文件名问题 |
| mime.types | 此文件包含了Nginx支持的MIME类型配置,用于设置相应的Content-Type头 |
| mime.types.default | 此文件是mime.types的备份副本 |
| nginx.conf | Nginx的主要配置文件,其中包含了所有全局配置和访问控制规则,作为Nginx服务器的入口文件 |
| nginx.conf.default | 此文件是nginx.conf的备份副本 |
| scgi_params | 此文件包含了用于SCGI协议的参数配置 |
| scgi_params.default | 此文件是scgi_params的备份副本 |
| uwsgi_params | 此文件包含了用于uWSGI协议的参数配置 |
| uwsgi_params.default | 此文件是uwsgi_params的备份副本 |
| win-utf | 此文件包含了Windows系统的字符转换规则,用于处理Windows系统的文件名问题 |
2.3.1 nginx.conf配置文件详解
##全局配置,对全局生效##
user  nobody nobody;  # 指定运行 Nginx 进程的用户为 nobody,组为nobody
pid /var/run/nginx.pid # master主进程的的pid存放在nginx.pid的文件
worker_processes  1;  # 指定 Nginx 启动的 worker 子进程数量。
#worker_processes auto; # 与当前cpu物理核心数一致
worker_rlimit_nofile 20480; # 指定 worker 子进程可以打开的最大文件句柄数。
worker_rlimit_core 50M; # 指定 worker 子进程异常终止后的 core 文件,用于记录分析问题。
working_directory /opt/nginx/tmp; # 存放目录
worker_priority -10; # 指定 worker 子进程的 nice 值,以调整运行 Nginx 的优先级,通常设定为负值,以优先调用 Nginx。
#Linux 默认进程的优先级值是120,值越小越优先;nice 定范围为 -20 到 +19 。
#应用的默认优先级值是120加上 nice 值等于它最终的值,这个值越小,优先级越高。
worker_shutdown_timeout 5s; #指定 worker 子进程优雅退出时的超时时间。
timer_resolution 100ms; #worker 子进程内部使用的计时器精度,调整时间间隔越大,系统调用越少,有利于性能提升;反之,系统调用越多,性能下降。
daemon on; # 指定 Nginx 的运行方式,前台还是后台,前台用于调试,后台用于生产。默认是on,后台运行模式。
error_log  logs/error.log;  # 错误日志文件路径

##events:配置影响 Nginx 服务器与用户的网络连接;##
events {
	use epoll;     # 使用epoll的I/O模型(如果你不知道Nginx该使用哪种轮询方法,会自动选择一个最适合你操作系统的)
    worker_connections  1024;  # 允许的最大并发连接数
    accept_mutex on; # 是否打开负载均衡互斥锁,默认是off关闭的,这里推荐打开
}
##http:配置代理,缓存,日志定义等绝大多数功能和第三方模块的配置;##
http {
    include       mime.types;  # 包含 MIME 类型的定义,文件扩展名与类型映射表,处理当前文本请求类型
    default_type  application/octet-stream;   # 默认文件类型
    default_type  application/octet-stream;  # 默认的 MIME 类型
    log_format  main  '$remote_addr - $remote_user [$time_local] "$request" '  # 日志格式定义
                       '$status $body_bytes_sent "$http_referer" '
                       '"$http_user_agent" "$http_x_forwarded_for"';
    access_log  logs/access.log  main;  # 访问日志文件及使用的日志格式
    sendfile       on;  # 启用零拷贝传输,高效传输模式
    tcp_nopush     on;  # 启用 TCP nopush 选项,减少网络报文段的数量
    keepalive_timeout  0;  # 禁用持久连接的超时时间
    keepalive_timeout  65;  # 保持存活连接的超时时间
    gzip  on;  # 开启 Gzip 压缩
    include /etc/nginx/conf.d/*.conf;   # 加载自定义配置项
    ##upstream:配置后端服务器具体地址,负载均衡配置不可或缺的部分。##
    upstream back_end_server{
  		server 192.168.100.33:8081 #定义后端web服务器节点
	}
    ##server:配置虚拟主机的相关参数,一个 http 块中可以有多个 server 块;每个nginx相当于一个虚拟服务器的地位。##
    server {
        listen       80;  # 监听端口 80
        server_name  localhost;  # 服务器名为 localhost
        charset koi8-r;  # 字符集设置为 koi8-r	一般web站点我们配置utf8

        access_log  logs/host.access.log  main;  # 主机访问日志文件及使用的日志格式
        ##location:用于配置匹配的 uri ;##
        location / {
            root   html;  # 指定静态资源目录位置,它可以写在 http 、 server 、 location 等配置中。
            index  index.html index.htm;  # 默认的索引文件
            deny 172.168.22.11;   # 禁止访问的ip地址,可以为all
        	allow 172.168.33.44;# 允许访问的ip地址,可以为all
        }
        location /image {
  			alias /opt/nginx/static/image/;#它也是指定静态资源目录位置,使用alias末尾一定要添加 / ,只能写在 location 中。
		}
#当用户访问 www.jx.com/image/1.png 时,实际在服务器找的路径是 /opt/nginx/static/image/1.png
        error_page  404              /404.html;  # 设置 404 错误页面的位置为 /404.html
        error_page   500 502 503 504  /50x.html;  # 将服务器错误页面重定向到 /50x.html
        location = /50x.html {
            root   html;
        }
        location ~ \.php$ {
            proxy_pass   http://127.0.0.1;  # 将 PHP 脚本代理到监听在 127.0.0.1:80 上的 Apache 服务器
        }
        location ~ \.php$ {
            root           html;  # PHP 脚本位置
            fastcgi_pass   127.0.0.1:9000;  # 向 FastCGI 服务器传递 PHP 脚本
            fastcgi_index  index.php;  # 指定 FastCGI 服务器默认的脚本文件名
            fastcgi_param  SCRIPT_FILENAME  /scripts$fastcgi_script_name;  # FastCGI 参数配置
            include        fastcgi_params;  # 包含 FastCGI 相关的参数配置
        }
        location ~ /\.ht {
            deny  all;  # 阻止访问 .htaccess 文件
        }
    }
    server {
        listen       8000;  # 监听端口 8000
        listen       somename:8080;  # 监听 somename:8080
        server_name  somename  alias  another.alias;  # 服务器名设置
        location / {
            root   html;  # 根目录位置为 html 文件夹
            index  index.html index.htm;  # 默认的索引文件
        }
    }
    server {
        listen       443 ssl;  # 启动在 443 端口,并开启 SSL
        server_name  localhost;  # 服务器名为 localhost
        ssl_certificate      cert.pem;  # SSL 证书文件
        ssl_certificate_key  cert.key;  # SSL 证书的私钥文件
        ssl_session_cache    shared:SSL:1m;  # 配置 SSL 会话缓存
        ssl_session_timeout  5m;  # SSL 会话缓存的超时时间设置为 5 分钟
        ssl_ciphers  HIGH:!aNULL:!MD5;  # 配置 SSL 加密算法
        ssl_prefer_server_ciphers  on;  # 优先使用服务器端的加密套件
        location / {
            root   html;  # 根目录位置为 html 文件夹
            index  index.html index.htm;  # 默认的索引文件
        }
    }
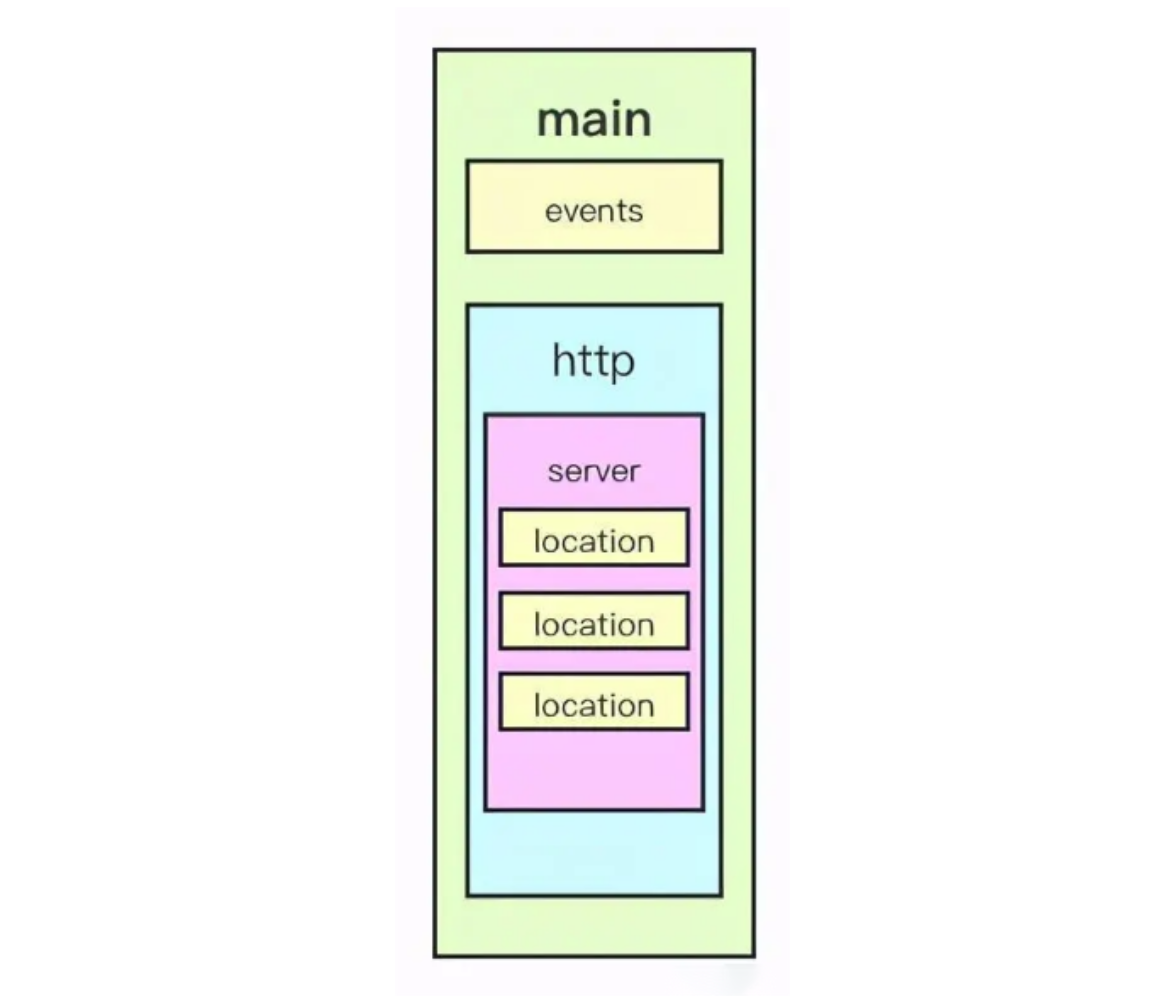
2.3.2 配置文件层级结构图
2.4 核心命令
| 命令 | 作用 |
|---|---|
| systemctl enable nginx | 开机自动启动 |
| systemctl disable nginx | 关闭开机自动启动 |
| systemctl start nginx | 启动Nginx |
| systemctl stop nginx | 停止Nginx |
| systemctl restart nginx | 重启Nginx |
| systemctl reload nginx | 重新加载Nginx |
| systemctl status nginx | 查看 Nginx 运行状态 |
| ps -elf | grep [n]ginx | 查看Nginx进程,但是不会显示grep本身的进程 |
| kill -9 pid | 根据上面查看到的Nginx进程号,杀死Nginx进程,-9 表示强制结束进程 |
| nginx -s reload | 向主进程发送信号,重新加载配置文件,热重启 |
| nginx -s reopen | 重启 Nginx |
| nginx | 启用 |
| nginx -s stop | 快速关闭 |
| nginx -s quit | 等待工作进程处理完成后关闭 |
| nginx -T | 查看当前 Nginx 最终的配置 |
| nginx -t | 检查配置是否有问题 |
| nginx -c configfilePath | 指定配置文件启动nginx |
2.5 Nginx信号
| 信号名 | 含义 |
|---|---|
| stop | 直接停止 |
| quit | 优雅的退出:有人在访问不会结束进程 |
| reopen | 分割日志 |
| reload | 重新加载配置文件 |
| term | 快速停止nginx进程,可能会中断现有连接,与stop信号类似。 |
| usr1 | 重新打开日志文件,用于日志切割或日志重定向,与reopen信号类似。 |
| usr2 | 平滑地升级nginx可执行文件。 |
| hup | 重新加载配置文件,优雅地应用新配置,与reload信号类似。 |
| winch | 当nginx以master/worker工作模式运行时,重新生成worker进程以适应新的配置。 |
| usr3 | 向worker进程发送自定义信号。 |
三、配置案例
当我们访问IP为192.168.235.140
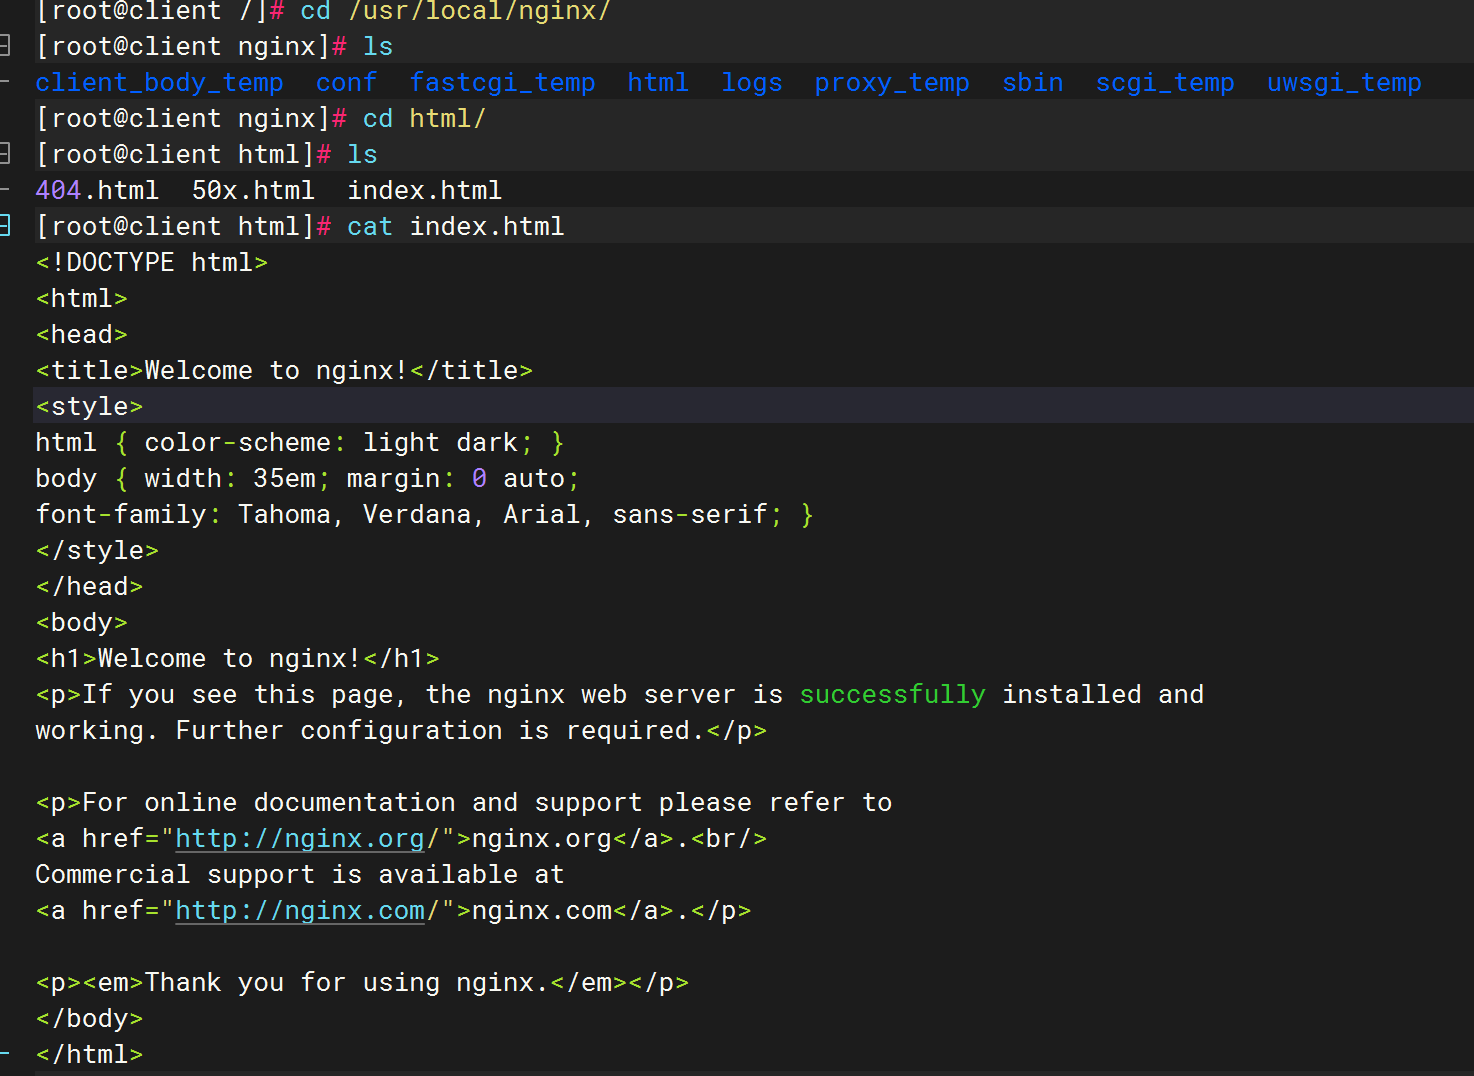
该页面表示nginx成功使用
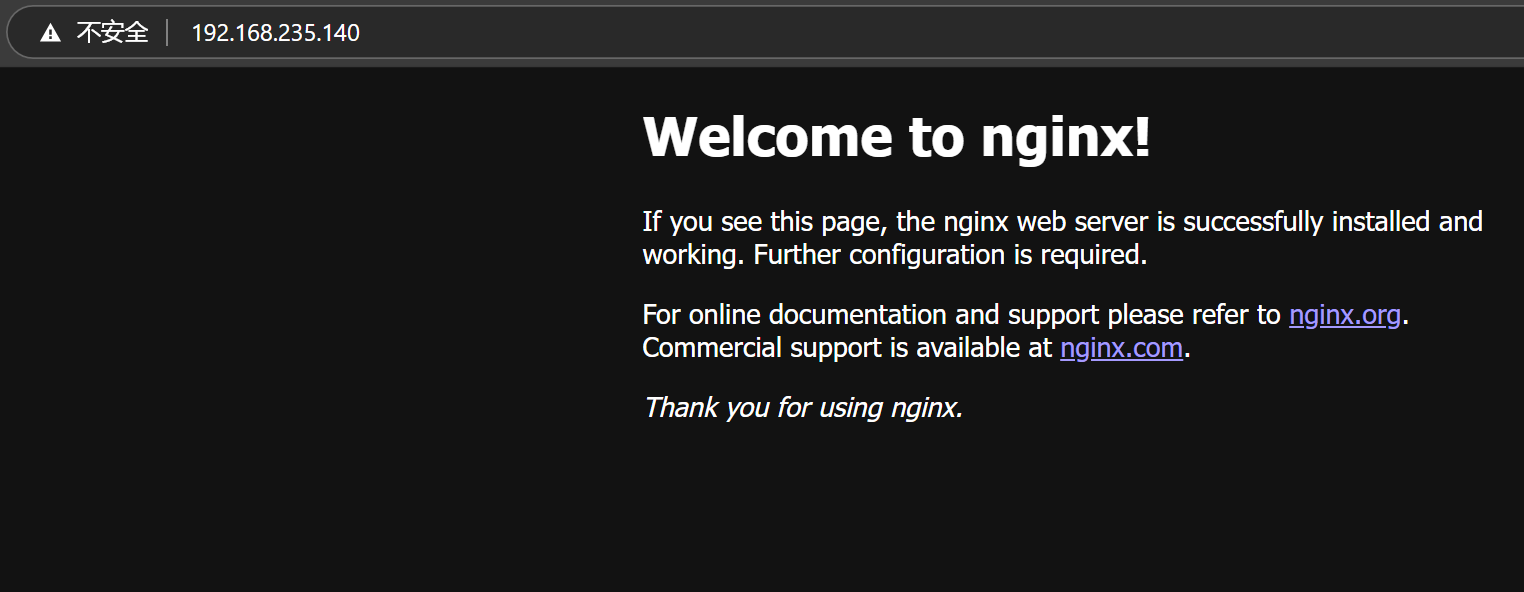
主要配置文件是 /usr/local/nginx/html/index.html
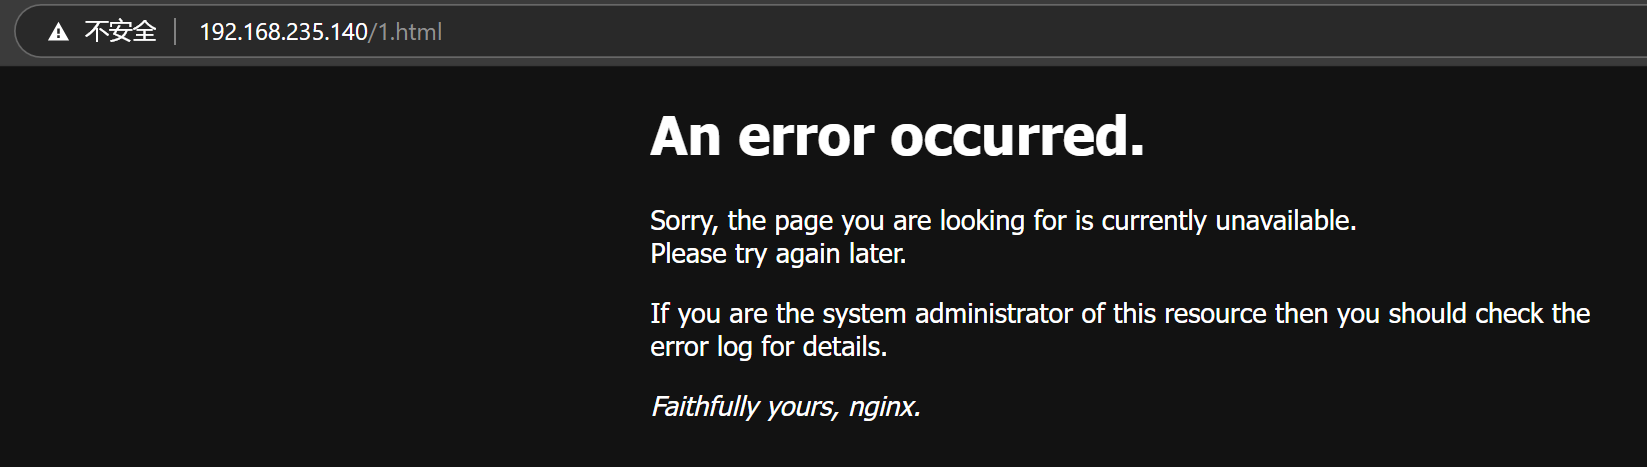
404.html报错页面
当通过/usr/local/nginx/html/index 通过index去看index里又没有你要访问的 .html
如果没有就会报错404,下图为没有1.html。所以报错404
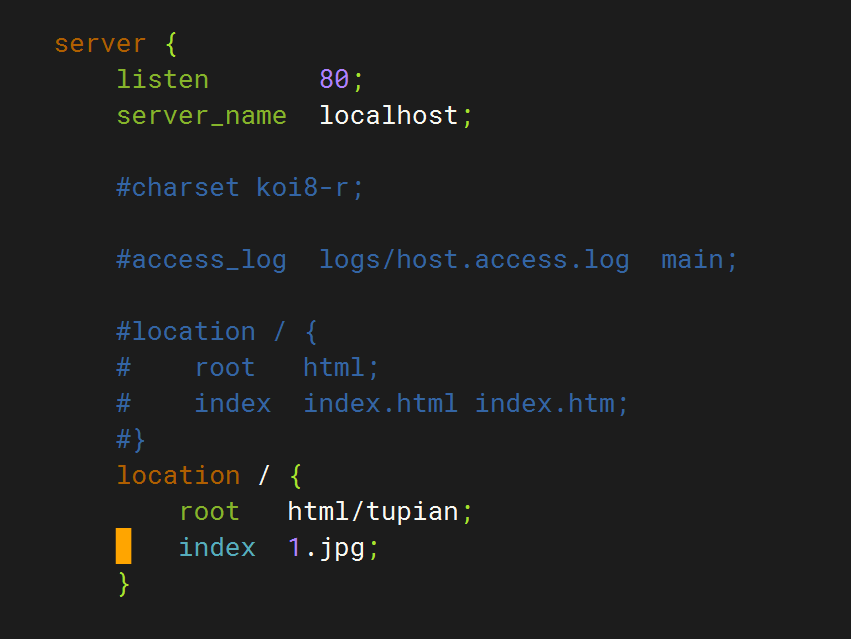
在/usr/local/nginx/html目录下创建目录tupian,进入导入一张名为1.jpg的图片
然后编辑配置文件
[root@server tupian]# vim /usr/local/nginx/conf/nginx.conf
修改location的位置,然后访问该ip地址


3.2 虚拟机主机头配置
3.2.1 基于IP地址
主要是ip
[root@client conf]# vim nginx.conf
[root@client conf]# cat nginx.conf

#user  nobody;
worker_processes  1;

#error_log  logs/error.log;
#error_log  logs/error.log  notice;
error_log  logs/error.log  info;

pid        logs/nginx.pid;


events {
    worker_connections  1024;
}


http {
    include       mime.types;
    default_type  application/octet-stream;

    log_format  main  '$remote_addr - $remote_user [$time_local] "$request" '
                      '$status $body_bytes_sent "$http_referer" '
                      '"$http_user_agent" "$http_x_forwarded_for"';

    #access_log  logs/access.log  main;

    sendfile        on;
    tcp_nopush     on;

    #keepalive_timeout  0;
    keepalive_timeout  65;

    gzip  on;

    server {
        listen       192.168.235.140:80;
        server_name  _;

        charset utf8;

        access_log  logs/host.access.log  main;

        location / {
            root   /usr/share/nginx/html;    访问页面路径,文件内容就是页面内容
            index  index.html index.htm;        访问页面路径,文件内容就是页面内容
        }

        error_page  404              /404.html;

       # redirect server error pages to the static page /50x.html

        error_page   500 502 503 504  /50x.html;
        location = /50x.html {
            root   /usr/share/nginx/html;
        }

        # proxy the PHP scripts to Apache listening on 127.0.0.1:80
        #
        #location ~ \.php$ {
        #    proxy_pass   http://127.0.0.1;
        #}

        # pass the PHP scripts to FastCGI server listening on 127.0.0.1:9000
        #
        #location ~ \.php$ {
        #    root           html;
        #    fastcgi_pass   127.0.0.1:9000;
        #    fastcgi_index  index.php;
        #    fastcgi_param  SCRIPT_FILENAME  /scripts$fastcgi_script_name;
        #    include        fastcgi_params;
        #}

        # deny access to .htaccess files, if Apache's document root
        # concurs with nginx's one
        #
        #location ~ /\.ht {
        #    deny  all;
        #}
    }


    # another virtual host using mix of IP-, name-, and port-based configuration

    server {
        listen       8000;
        listen       somename:8080;
        server_name  somename  alias  another.alias;

        location / {
            root   html;
            index  index.html index.htm;
        }
    }


    # HTTPS server
    #
    #server {
    #    listen       443 ssl;
    #    server_name  localhost;

    #    ssl_certificate      cert.pem;
    #    ssl_certificate_key  cert.key;

    #    ssl_session_cache    shared:SSL:1m;
    #    ssl_session_timeout  5m;

    #    ssl_ciphers  HIGH:!aNULL:!MD5;
    #    ssl_prefer_server_ciphers  on;

    #    location / {
    #        root   html;
    #        index  index.html index.htm;
    #    }
    #}

}
3.2.2 基于域名
在sever_name 后面添加域名
将域名改为www.c999.com
[root@client conf]# vim nginx.conf
[root@client conf]# cat nginx.conf

#user  nobody;
worker_processes  1;

#error_log  logs/error.log;
#error_log  logs/error.log  notice;
error_log  logs/error.log  info;

pid        logs/nginx.pid;


events {
    worker_connections  1024;
}


http {
    include       mime.types;
    default_type  application/octet-stream;

    log_format  main  '$remote_addr - $remote_user [$time_local] "$request" '
                      '$status $body_bytes_sent "$http_referer" '
                      '"$http_user_agent" "$http_x_forwarded_for"';

    #access_log  logs/access.log  main;

    sendfile        on;
    tcp_nopush     on;

    #keepalive_timeout  0;
    keepalive_timeout  65;

    gzip  on;

    server {
        listen       192.168.235.140:80;
        server_name  www.c999.com.cn        #在这行添加域名

        charset utf8;

        access_log  logs/host.access.log  main;

        location / {
            root   /usr/share/nginx/html;
            index  index.html index.htm;
        }

        error_page  404              /404.html;

       # redirect server error pages to the static page /50x.html

        error_page   500 502 503 504  /50x.html;
        location = /50x.html {
            root   /usr/share/nginx/html;
        }

        # proxy the PHP scripts to Apache listening on 127.0.0.1:80
        #
        #location ~ \.php$ {
        #    proxy_pass   http://127.0.0.1;
        #}

        # pass the PHP scripts to FastCGI server listening on 127.0.0.1:9000
        #
        #location ~ \.php$ {
        #    root           html;
        #    fastcgi_pass   127.0.0.1:9000;
        #    fastcgi_index  index.php;
        #    fastcgi_param  SCRIPT_FILENAME  /scripts$fastcgi_script_name;
        #    include        fastcgi_params;
        #}

        # deny access to .htaccess files, if Apache's document root
        # concurs with nginx's one
        #
        #location ~ /\.ht {
        #    deny  all;
        #}
    }


    # another virtual host using mix of IP-, name-, and port-based configuration

    server {
        listen       8000;
        listen       somename:8080;
        server_name  somename  alias  another.alias;

        location / {
            root   html;
            index  index.html index.htm;
        }
    }


    # HTTPS server
    #
    #server {
    #    listen       443 ssl;
    #    server_name  localhost;

    #    ssl_certificate      cert.pem;
    #    ssl_certificate_key  cert.key;

    #    ssl_session_cache    shared:SSL:1m;
    #    ssl_session_timeout  5m;

    #    ssl_ciphers  HIGH:!aNULL:!MD5;
    #    ssl_prefer_server_ciphers  on;

    #    location / {
    #        root   html;
    #        index  index.html index.htm;
    #    }
    #}
访问结果
[root@server etc]# vim /etc/hosts
[root@server etc]# curl www.c999.com
<!DOCTYPE html>
<html>
<head>
<title>Welcome to nginx!</title>
<style>
html { color-scheme: light dark; }
body { width: 35em; margin: 0 auto;
font-family: Tahoma, Verdana, Arial, sans-serif; }
</style>
</head>
<body>
<h1>Welcome to nginx!</h1>
<p>If you see this page, the nginx web server is successfully installed and
working. Further configuration is required.</p>

<p>For online documentation and support please refer to
<a href="http://nginx.org/">nginx.org</a>.<br/>
Commercial support is available at
<a href="http://nginx.com/">nginx.com</a>.</p>

<p><em>Thank you for using nginx.</em></p>
</body>
</html>
3.2.3 基于端口号
访问
user  nobody;
worker_processes  1;

#error_log  /var/log/nginx/error.log;
#error_log  /var/log/nginx/error.log  notice;
error_log  /var/log/nginx/error.log  info;

pid        /run/nginx.pid;


events {
    worker_connections  1024;
}


http {
    include       /etc/nginx/mime.types;
    default_type  application/octet-stream;

    log_format  main  '$remote_addr - $remote_user [$time_local] "$request" '
                      '$status $body_bytes_sent "$http_referer" '
                      '"$http_user_agent" "$http_x_forwarded_for"';

    #access_log  logs/access.log  main;

    sendfile        on;
    tcp_nopush     on;

    #keepalive_timeout  0;
    keepalive_timeout  65;

    gzip  on;

    server {
        listen       192.168.115.111:80;
        server_name  www1.jx.com;

        charset utf8;

        access_log  /var/log/nginx/access.log  main;

        location / {
            root   /usr/share/nginx/html;
            index  index.html index.htm;
        }

        error_page  404              /404.html;
        location = /404.html {
            root   /usr/share/nginx/html;
        }

        # redirect server error pages to the static page /50x.html
        #
        error_page   500 502 503 504  /50x.html;
        location = /50x.html {
            root   /usr/share/nginx/html;
        }

    }


    # another virtual host using mix of IP-, name-, and port-based configuration

    server {
        listen       192.168.115.114:81;
        server_name  www2.jx.com;

        location / {
            root   /var/www/html;
            index  index.html index.htm;
        }
    }


    # HTTPS server
    #
    #server {
    #    listen       443 ssl;
    #    server_name  localhost;

    #    ssl_certificate      cert.pem;
    #    ssl_certificate_key  cert.key;

    #    ssl_session_cache    shared:SSL:1m;
    #    ssl_session_timeout  5m;

    #    ssl_ciphers  HIGH:!aNULL:!MD5;
    #    ssl_prefer_server_ciphers  on;

    #    location / {
    #        root   html;
    #        index  index.html index.htm;
    #    }
    #}

}

汇聚全球AI编程工具,助力开发者即刻编程。
更多推荐

 27
27 0
0- 0


 已为社区贡献5条内容

所有评论(0)