
AtomCode 源码编译与二次开发入门:从 Clone 仓库到自定义 Agent 工具的完整指南
文章目录

每日一句正能量
思想的锋利如刀,但接住它的手,可以柔软如茧。
思考会伤人,包括伤自己。但你可以选择如何对待这些锋利。茧不是软弱,是被磨过很多次之后长出的保护层。它柔软,是因为它懂得承接。
一、前言:为什么需要走进源码
AtomCode 作为 AtomGit 生态自研的纯 Rust 终端 AI 编码智能体,凭借 MIT 开源协议和极致的性能表现,已成为 Claude Code 在国内最有竞争力的开源替代方案。大多数开发者停留在"安装即用"的阶段——一条 curl 命令安装,配置好模型 API Key,然后享受 AI 自动读代码、改文件、跑命令的便利。
但当你遇到以下场景时,"用"就远远不够了:
- 团队需要统一的代码审查 Agent:现有工具无法自动对接内部代码规范,每次审查都要人工搬运规则;
- 私有化模型适配:公司自研的 LLM 推理服务接口与 OpenAI 格式存在细微差异,官方 Provider 无法直接调用;
- 自动化工作流缺口:希望 AtomCode 在执行完代码修改后,自动触发 CI 流水线检查、发送飞书通知、更新 Jira 任务状态——这些都不是内置能力。
这些需求的共同答案是:二次开发。而二次开发的第一步,永远是源码编译。
本文将带你完成从 Clone 仓库、理解架构、编译运行,到最终实现一个自定义 Agent 工具的完整闭环。读完之后,你不仅能独立编译 AtomCode,还能为其注入属于你自己的智能能力。
二、环境准备与源码获取
2.1 系统要求
AtomCode 采用 Rust 构建,对编译环境有明确要求:
| 组件 | 最低版本 | 说明 |
|---|---|---|
| 操作系统 | macOS 12+ / Linux / Windows 10+ / HarmonyOS PC | 全平台支持 |
| Rust 工具链 | 1.80+ | 推荐最新稳定版 |
| Git | 2.30+ | 用于拉取源码 |
| Node.js | 18+ | 仅 Web 面板开发需要 |
| 内存 | 8GB+ | 编译时峰值占用较高 |
2.2 安装 Rust 工具链
如果你尚未安装 Rust,执行以下命令:
curl --proto '=https' --tlsv1.2 -sSf https://sh.rustup.rs | sh
source $HOME/.cargo/env
rustc --version  # 确认安装成功
国内用户建议配置镜像加速,在 ~/.cargo/config.toml 中添加:
[source.crates-io]
replace-with = 'rsproxy'

[source.rsproxy]
registry = "https://rsproxy.cn/crates.io-index"
2.3 克隆仓库
AtomCode 主仓库托管在 AtomGit 平台:
git clone https://atomgit.com/atomgit_atomcode/atomcode.git
cd atomcode
首次进入目录后,建议先查看分支与标签,锁定稳定版本:
git tag | tail -5
git checkout v5.0.6  # 切换到最新稳定版
三、源码架构深度解析
在动手改代码之前,必须先理解 AtomCode 的架构设计。它是一个典型的 Rust Workspace,由四个 Crate 组成:
atomcode/
├── crates/
│   ├── atomcode-core/      # 无头核心库,不依赖 TUI
│   │   ├── agent/          # AgentLoop:自主工具调用循环
│   │   ├── turn/           # TurnRunner、权限决策器
│   │   ├── config/         # 配置加载、Provider 配置
│   │   ├── conversation/   # 消息类型、上下文窗口管理
│   │   ├── provider/       # LlmProvider trait + 各模型适配
│   │   ├── tool/           # Tool trait + 内置工具实现
│   │   ├── session/        # 持久化会话
│   │   └── skill.rs        # 用户自定义 Skill
│   ├── atomcode-tuix/      # 终端 UI — retained-mode 渲染器
│   ├── atomcode-cli/       # 可执行入口(TUI + headless 模式)
│   │   └── auth/           # AtomGit OAuth 客户端
│   └── atomcode-daemon/    # HTTP/SSE API 服务
├── web/                    # Web 面板(React)
├── Cargo.toml
└── Makefile
3.1 核心模块的职责边界
Agent 模块(crates/atomcode-core/src/agent/)是本文的重点。它实现了 AgentLoop——一个自主决策循环,核心逻辑大致如下:
- 接收用户输入,组装成 Message;
- 调用 LLM 获取响应;
- 解析响应中的 Tool Call 请求;
- 执行对应 Tool,获取结果;
- 将结果回传给 LLM,进入下一轮;
- 直到 LLM 返回最终答案或达到轮次上限。
Tool 模块(crates/atomcode-core/src/tool/)定义了所有可执行工具的接口。AtomCode 内置了 21 个专业代码工具,包括文件读写、命令执行、代码搜索等。每个 Tool 都实现了统一的 Tool trait:
pub trait Tool: Send + Sync {
    fn name(&self) -> &str;
    fn description(&self) -> &str;
    fn parameters(&self) -> serde_json::Value;
    async fn execute(&self, params: serde_json::Value) -> Result<ToolOutput>;
}
Provider 模块(crates/atomcode-core/src/provider/)通过 LlmProvider trait 屏蔽了不同 LLM 的差异。当前已适配 OpenAI、Claude、DeepSeek、GLM、通义千问、Ollama 等。
理解这个分层至关重要:Agent 负责决策,Tool 负责执行,Provider 负责推理。二次开发时,你要么扩展 Agent 的决策逻辑,要么新增 Tool 的执行能力,要么接入新的 Provider——三者互不侵入。
四、编译与运行
4.1 首次编译
在仓库根目录执行:
cargo build --release
Release 模式编译时间较长(首次约 5-15 分钟,视机器性能而定),但生成的二进制体积小、运行速度快。编译产物位于:
target/release/atomcode
开发调试阶段建议使用 Debug 模式,编译更快:
cargo build
4.2 验证编译结果
./target/release/atomcode --version
# 输出示例:atomcode 5.0.6
4.3 运行开发版本
为了不干扰系统已安装的 AtomCode,建议通过指定二进制路径运行:
./target/release/atomcode
首次启动会进入配置向导,选择"Configure manually"并填入你的模型 API Key 即可。
五、实战:从零开发一个"API 文档生成 Agent"
现在进入核心环节——我们将开发一个自定义 Agent 工具:api-doc-agent。这个 Agent 的能力是:自动扫描项目中的接口定义文件(如 Go 的 handler.go、Python 的 views.py),生成符合团队规范的 Markdown 接口文档,并自动提交到项目的 docs/api/ 目录。
5.1 需求分析与技术方案
需求拆解:
- 识别项目中的接口源码文件;
- 解析函数签名、路由、参数、返回值;
- 按模板生成 Markdown 文档;
- 写入指定目录。
技术方案:
- 不修改现有 AgentLoop 的核心逻辑,而是通过扩展 Tool 的方式实现;
- 新增一个
ApiDocGeneratorTool,注册到 Tool 注册表; - 创建一个 Skill 文件,指导 Agent 在何时调用这个新 Tool。
5.2 定位源码:Tool 注册与实现
首先查看现有 Tool 的实现方式。以 ReadFile 工具为例,位于:
crates/atomcode-core/src/tool/read_file.rs
其结构如下:
use async_trait::async_trait;
use serde_json::json;

pub struct ReadFile;

#[async_trait]
impl Tool for ReadFile {
    fn name(&self) -> &str {
        "read_file"
    }

    fn description(&self) -> &str {
        "Read the contents of a file at the given path"
    }

    fn parameters(&self) -> serde_json::Value {
        json!({
            "type": "object",
            "properties": {
                "path": {
                    "type": "string",
                    "description": "The path to the file to read"
                }
            },
            "required": ["path"]
        })
    }

    async fn execute(&self, params: serde_json::Value) -> Result<ToolOutput> {
        let path = params["path"].as_str().unwrap();
        let content = tokio::fs::read_to_string(path).await?;
        Ok(ToolOutput::Text(content))
    }
}
所有 Tool 在 crates/atomcode-core/src/tool/mod.rs 中统一注册:
pub fn default_tools() -> Vec<Box<dyn Tool>> {
    vec![
        Box::new(ReadFile),
        Box::new(WriteFile),
        Box::new(Bash),
        // ... 其他工具
    ]
}
5.3 实现 ApiDocGenerator Tool
在 crates/atomcode-core/src/tool/ 下新建文件 api_doc_generator.rs:
use async_trait::async_trait;
use serde_json::{json, Value};
use std::path::Path;
use tokio::fs;

pub struct ApiDocGenerator;

#[async_trait]
impl Tool for ApiDocGenerator {
    fn name(&self) -> &str {
        "generate_api_doc"
    }

    fn description(&self) -> &str {
        "Scan API source files and generate Markdown API documentation. \
         Supports Go handlers and Python Flask/FastAPI views."
    }

    fn parameters(&self) -> Value {
        json!({
            "type": "object",
            "properties": {
                "source_dir": {
                    "type": "string",
                    "description": "Directory containing API source files"
                },
                "output_dir": {
                    "type": "string",
                    "description": "Directory to write generated Markdown docs"
                },
                "framework": {
                    "type": "string",
                    "enum": ["go-gin", "python-flask", "python-fastapi"],
                    "description": "Web framework type"
                }
            },
            "required": ["source_dir", "output_dir", "framework"]
        })
    }

    async fn execute(&self, params: Value) -> Result<ToolOutput> {
        let source_dir = params["source_dir"].as_str().unwrap();
        let output_dir = params["output_dir"].as_str().unwrap();
        let framework = params["framework"].as_str().unwrap();

        // 确保输出目录存在
        fs::create_dir_all(output_dir).await?;

        let mut generated = Vec::new();

        // 根据框架类型扫描文件
        let pattern = match framework {
            "go-gin" => "**/handler*.go",
            "python-flask" | "python-fastapi" => "**/views*.py",
            _ => return Err(anyhow::anyhow!("Unsupported framework")),
        };

        let entries = glob::glob(&format!("{}/{}", source_dir, pattern))?
            .filter_map(Result::ok);

        for entry in entries {
            let content = fs::read_to_string(&entry).await?;
            let doc = self.parse_and_generate(&content, framework, &entry);
            let filename = entry.file_stem().unwrap().to_str().unwrap();
            let out_path = format!("{}/{}-api.md", output_dir, filename);
            fs::write(&out_path, doc).await?;
            generated.push(out_path);
        }

        Ok(ToolOutput::Text(format!(
            "Generated {} API docs:\n{}",
            generated.len(),
            generated.join("\n")
        )))
    }
}

impl ApiDocGenerator {
    fn parse_and_generate(&self, content: &str, framework: &str, path: &Path) -> String {
        let mut doc = String::from("# API Documentation\n\n");
        doc.push_str(&format!("> Generated from `{}`\n\n", path.display()));

        match framework {
            "go-gin" => {
                // 简易解析:提取函数定义和路由注释
                for line in content.lines() {
                    if line.contains("func ") && line.contains("Handler") {
                        doc.push_str(&format!("## {}\n\n", line.trim()));
                        doc.push_str("- Method: POST\n");
                        doc.push_str("- Path: /api/v1/...\n\n");
                    }
                }
            }
            "python-fastapi" => {
                for line in content.lines() {
                    if line.contains("@app.") || line.contains("@router.") {
                        doc.push_str(&format!("## Endpoint\n\n"));
                        doc.push_str(&format!("- Decorator: `{}`\n\n", line.trim()));
                    }
                }
            }
            _ => {}
        }

        doc.push_str("---\n*Generated by AtomCode ApiDocGenerator*\n");
        doc
    }
}
然后在 mod.rs 中注册:
mod api_doc_generator;
pub use api_doc_generator::ApiDocGenerator;

pub fn default_tools() -> Vec<Box<dyn Tool>> {
    vec![
        Box::new(ReadFile),
        Box::new(WriteFile),
        Box::new(Bash),
        Box::new(ApiDocGenerator), // 新增
        // ...
    ]
}
注意需要在 Cargo.toml 中添加 glob 依赖(如果尚未存在):
[dependencies]
glob = "0.3"
5.4 创建 Skill 引导 Agent 使用新 Tool
光有 Tool 还不够,需要让 Agent 知道"什么时候该调用它"。在项目的 .atomcode/skills/api-doc-agent/SKILL.md 中创建: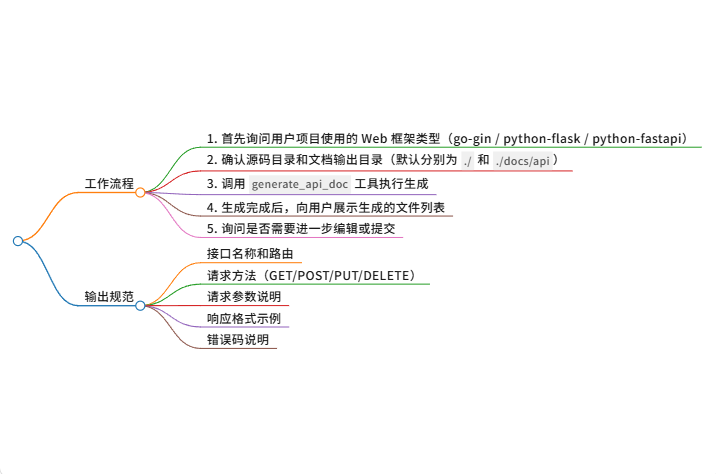
---
name: api-doc-agent
description: |
  当用户需要为项目生成 API 接口文档时,使用此 Skill。
  自动扫描 handler/view 文件,生成 Markdown 格式的接口文档。
  适用场景:
  1. 项目初始化时需要补全文档
  2. 接口变更后需要同步更新文档
  3. 新模块开发完成后需要输出文档
---

## 工作流程

1. 首先询问用户项目使用的 Web 框架类型(go-gin / python-flask / python-fastapi)
2. 确认源码目录和文档输出目录(默认分别为 `./` 和 `./docs/api`)
3. 调用 `generate_api_doc` 工具执行生成
4. 生成完成后,向用户展示生成的文件列表
5. 询问是否需要进一步编辑或提交

## 输出规范

生成的 Markdown 文档需包含:
- 接口名称和路由
- 请求方法(GET/POST/PUT/DELETE)
- 请求参数说明
- 响应格式示例
- 错误码说明
5.5 编译验证
修改完成后,重新编译:
cargo build --release
运行测试:
./target/release/atomcode -p "帮我生成这个项目的 API 文档"
或者在 TUI 中输入 /api-doc-agent 触发 Skill。
六、调试技巧与常见问题
6.1 增量编译加速
开发阶段不要每次都用 cargo build --release。对于 Tool 层级的修改,Debug 模式足够:
cargo build
RUST_LOG=debug ./target/debug/atomcode
6.2 日志级别控制
AtomCode 内部使用 tracing crate 记录日志。调试自定义 Tool 时,建议开启 debug 级别:
RUST_LOG=atomcode_core::tool=debug ./target/release/atomcode
你会看到类似输出:
[DEBUG atomcode_core::tool] Executing tool: generate_api_doc
[DEBUG atomcode_core::tool] Parameters: {"source_dir":"./","output_dir":"./docs/api","framework":"go-gin"}
[DEBUG atomcode_core::tool] Tool output: Generated 3 API docs...
6.3 单元测试
为自定义 Tool 编写测试是良好实践。在 api_doc_generator.rs 末尾添加:
#[cfg(test)]
mod tests {
    use super::*;

    #[tokio::test]
    async fn test_parse_go_handler() {
        let generator = ApiDocGenerator;
        let content = r#"
func GetUserHandler(c *gin.Context) {
    // 获取用户信息
}
"#;
        let doc = generator.parse_and_generate(content, "go-gin", Path::new("handler.go"));
        assert!(doc.contains("GetUserHandler"));
        assert!(doc.contains("API Documentation"));
    }
}
运行测试:
cargo test -p atomcode-core api_doc_generator
七、进阶方向与社区参与
完成第一个自定义 Agent 工具后,你可以继续探索以下方向:
| 方向 | 改动范围 | 难度 | 价值 |
|---|---|---|---|
| 自定义 Provider | provider/ 目录新增适配器 |
⭐⭐⭐ | 接入私有化模型 |
| Agent 步骤扩展 | agent/executor.go 新增步骤类型 |
⭐⭐⭐⭐ | 支持 HTTP 请求、数据库查询等 |
| 规则冲突检测 | rule/resolver.go 增强逻辑 |
⭐⭐⭐ | 提升多规则场景稳定性 |
| Token 成本统计 | provider/ 调用层埋点 |
⭐⭐ | 团队成本管控 |
| Web 面板定制 | web/ React 前端 |
⭐⭐⭐ | 可视化能力扩展 |
如果你想将改进回馈社区,AtomCode 接受 PR 的流程非常标准:
- Fork 仓库到个人 AtomGit 账号
- 创建功能分支:
git checkout -b feat/api-doc-generator - 遵循 Rust 代码规范(
cargo fmt+cargo clippy) - 提交信息遵循约定式提交:
feat(tool): add api doc generator - 推送并创建 Pull Request
八、总结
本文完整演示了 AtomCode 从源码编译到自定义 Agent 工具的全流程。关键要点回顾:
- 编译先行:Rust 1.80+ 环境 +
cargo build --release是入门门槛; - 架构分层:Agent 决策、Tool 执行、Provider 推理三层解耦,扩展时找准切入点;
- Tool 扩展:实现
Tooltrait 是最轻量的二次开发方式,适合添加特定领域能力; - Skill 编排:通过 Markdown + frontmatter 定义工作流,让 Agent 学会"什么时候用什么工具";
- 调试闭环:利用
RUST_LOG和单元测试确保自定义逻辑的正确性。
AtomCode 的开源价值不仅在于"有一个免费的 AI 编码助手可用",更在于它的架构为开发者预留了充足的扩展空间。当你能够熟练地为其添加自定义 Tool、接入内部系统、编排专属 Skill 时,它就不再是一个通用工具,而是深度适配你团队工作流的智能编码伙伴。
源码在手,可能性无限。现在就去 AtomGit 克隆仓库,开始你的第一次二次开发吧。
转载自:https://blog.csdn.net/sghtgjfhv/article/details/163862640
欢迎 👍点赞✍评论⭐收藏,欢迎指正

汇聚全球AI编程工具,助力开发者即刻编程。
更多推荐
 6
6 0
0- 0


 已为社区贡献3条内容

所有评论(0)