
黑马SpringBoot3+Vue3学习记录 三:整合Mybatis ideal数据库插件使用 Spring 三层架构
【黑马程序员SpringBoot3+Vue3全套视频教程,springboot+vue企业级全栈开发从基础、实战到面试一套通关】 https://www.bilibili.com/video/BV14z4y1N7pg/?p=7&share_source=copy_web&vd_source=e05c15f0310aaccfeffcd5be6bc8a392
06-07
记录
**1.**安装好MySQL后,需要启动MySQL服务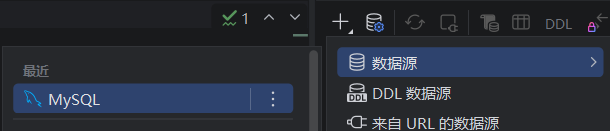
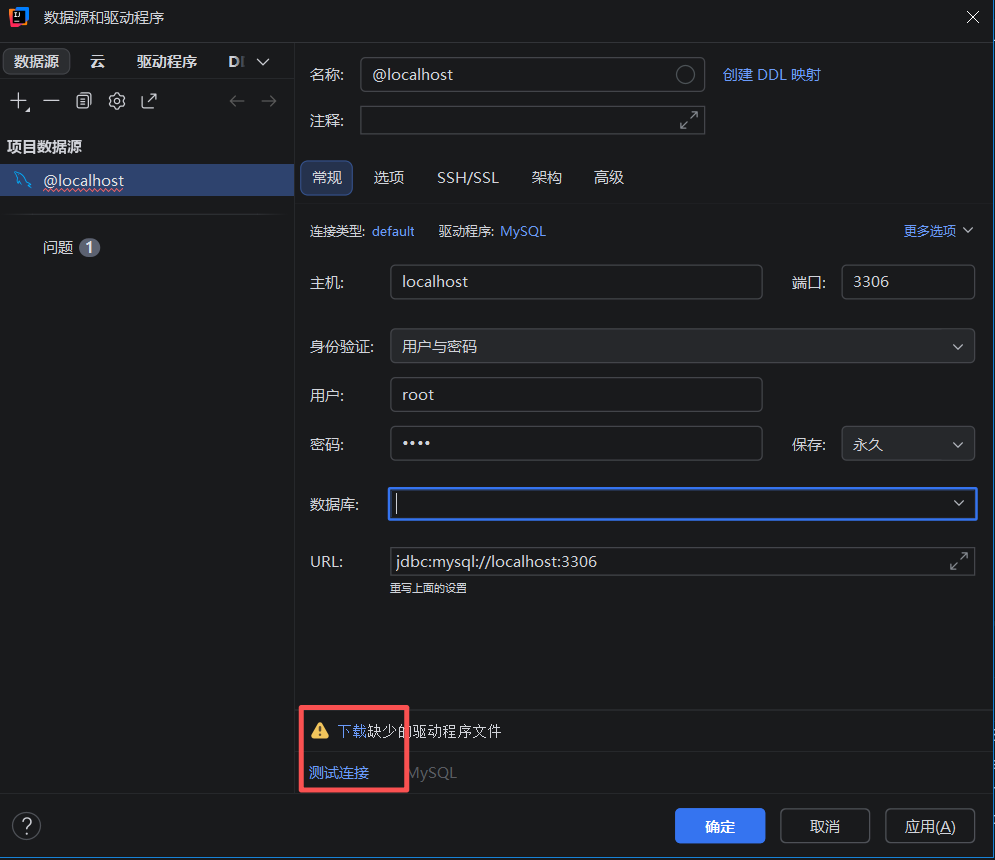
测试连接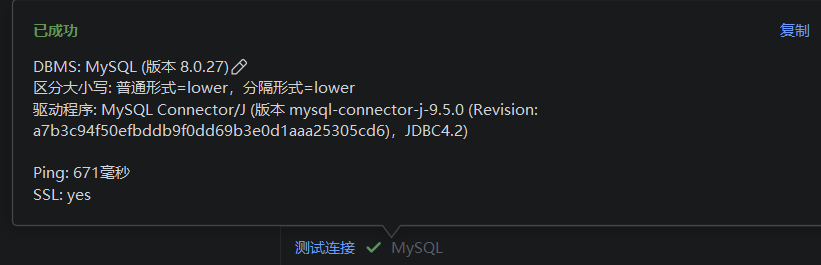
如果之前没有查询文件直接点击即可,如果油的话就点心间查询文件
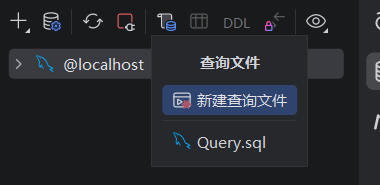
查询文件保存在.ideal/queries下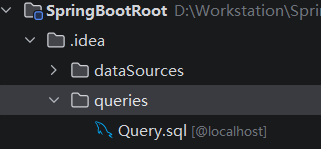
粘贴代码:02资料/整合mybatis资料下user.sql,**要特别指定编码utf8!**不然会原生mysql.exe不认识报错
SET NAMES utf8mb4;
create database if not exists itheimamybatis;

use itheimamybatis;

create table user(
                     id int unsigned primary key auto_increment comment 'ID',
                     name varchar(100) comment '姓名',
                     age tinyint unsigned comment '年龄',
                     gender tinyint unsigned comment '性别, 1:男, 2:女',
                     phone varchar(11) comment '手机号'
) comment '用户表';

insert into user(id, name, age, gender, phone) VALUES (null,'白眉鹰王',55,'1','18800000000');
insert into user(id, name, age, gender, phone) VALUES (null,'金毛狮王',45,'1','18800000001');
insert into user(id, name, age, gender, phone) VALUES (null,'青翼蝠王',38,'1','18800000002');
insert into user(id, name, age, gender, phone) VALUES (null,'紫衫龙王',42,'2','18800000003');
insert into user(id, name, age, gender, phone) VALUES (null,'光明左使',37,'1','18800000004');
insert into user(id, name, age, gender, phone) VALUES (null,'光明右使',48,'1','18800000005');
关于执行订阅,可以直接使用MySQLWorkbench或插件解决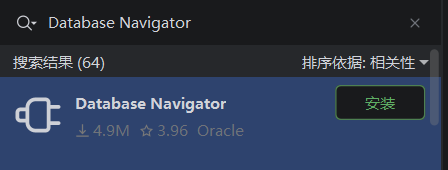
左侧DB Browser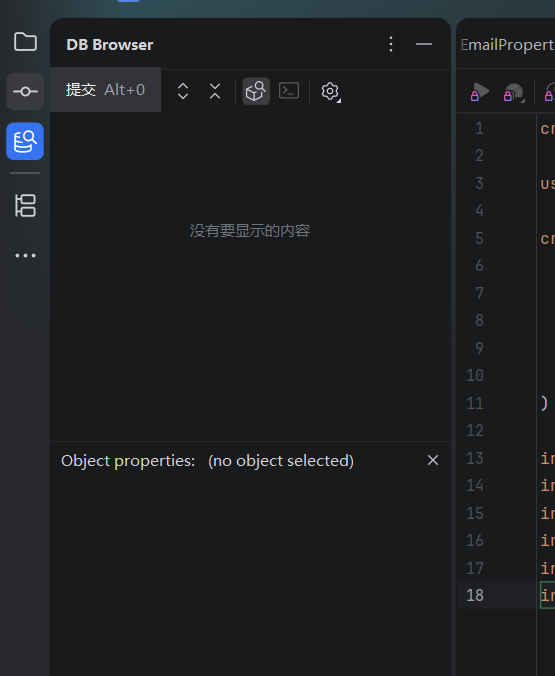
同样先连接数据库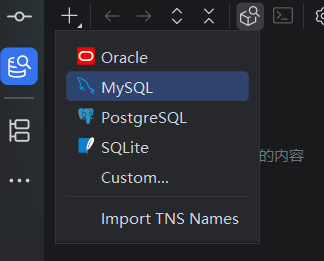
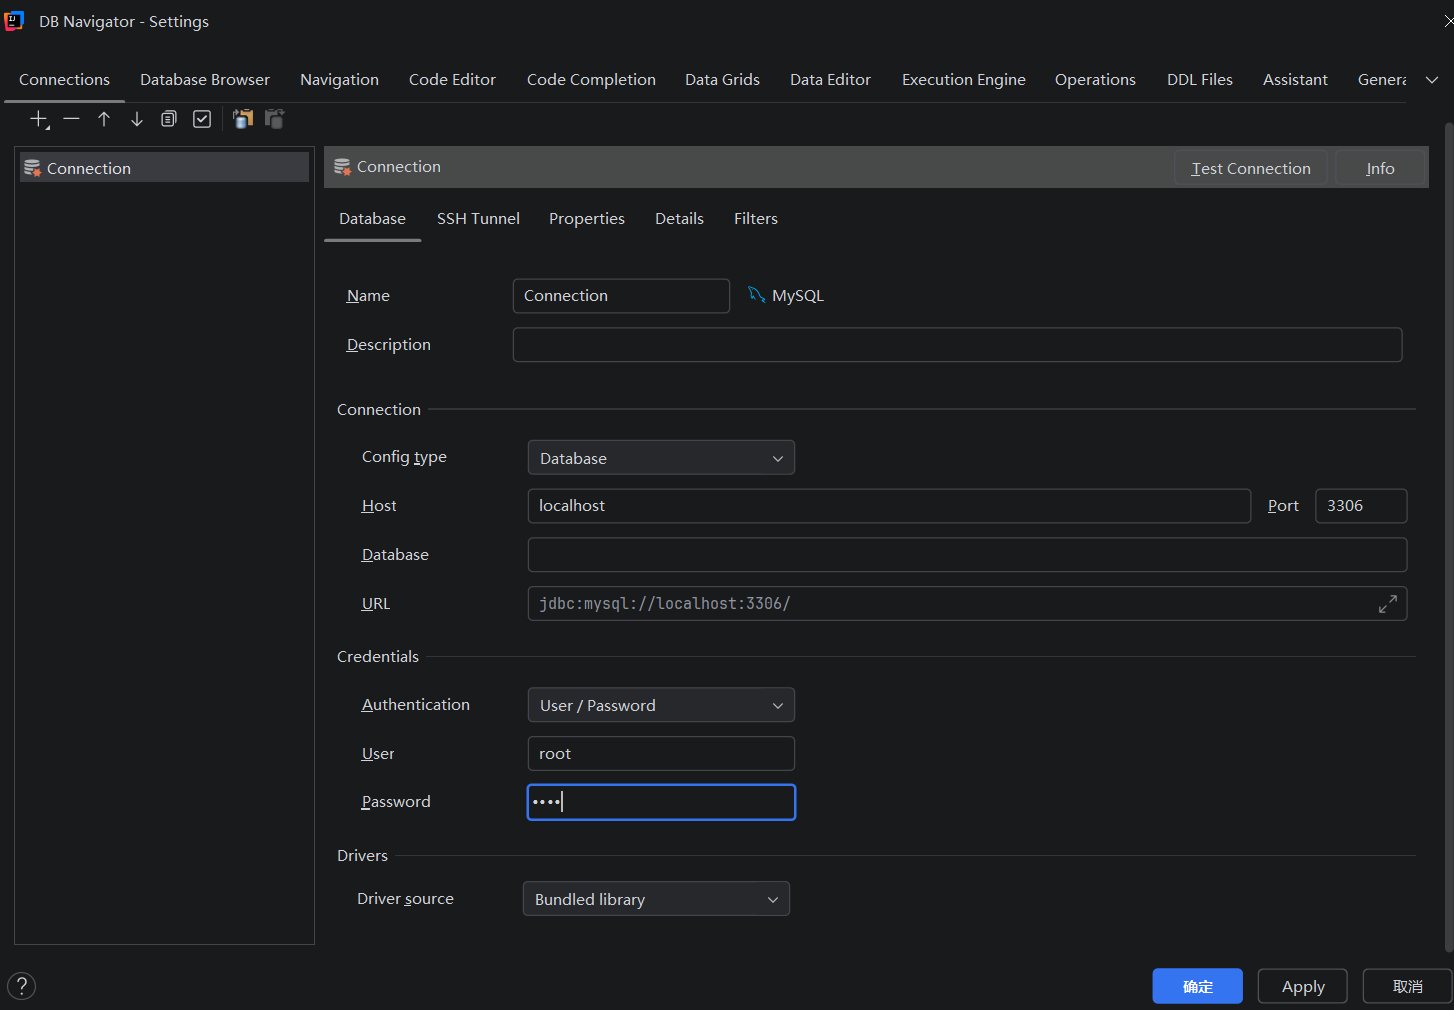
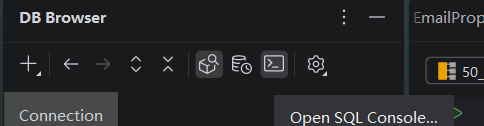
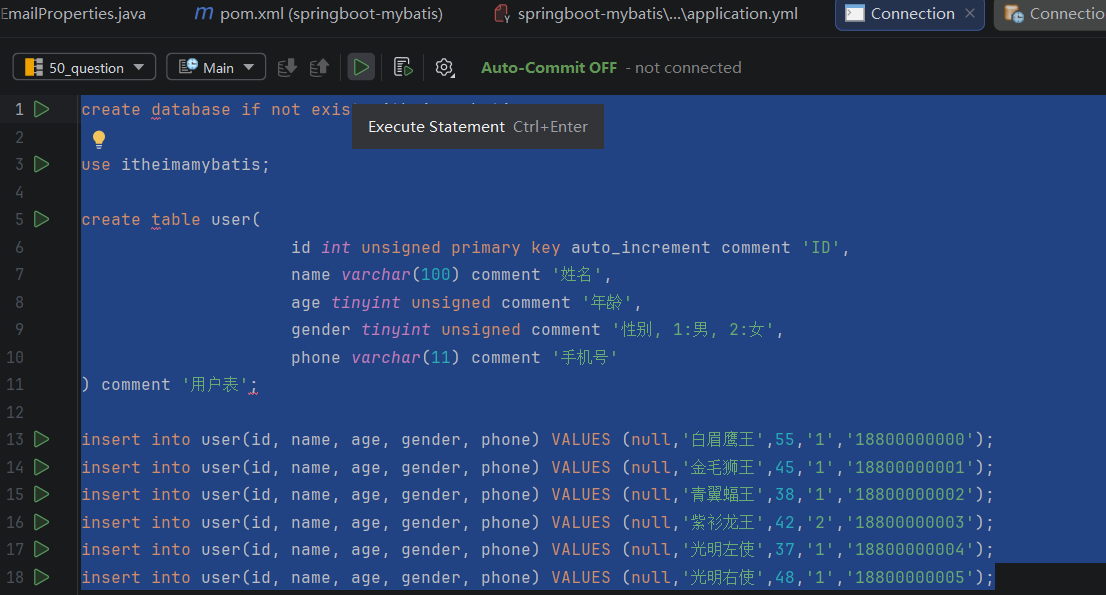
执行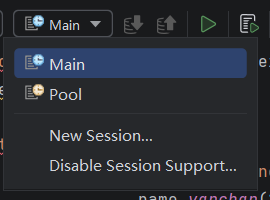
Main 和 Pool 代表了两种不同的数据库连接管理模式
Main(主会话 / 单连接)(选择这个)
含义:这是你的专属会话(Session)。当你选择 Main 时,插件会为当前这个 SQL 窗口维持一个固定的、长期的数据库连接。
特点:
状态保留:如果你在 Main 里执行了 USE itheimamybatis;,那么在这个窗口接下来的所有操作都会在这个库里。
事务锁定:如果你开启了一个事务(Transaction)但没提交,这个连接会被一直占用,直到你手动处理。
适用场景:调试复杂的 SQL 脚本、需要切换数据库(USE xxx)或者进行一系列有先后逻辑的操作。
- Pool(连接池)
含义:这是共享连接池模式。插件维护着一堆现成的连接,当你点“执行”时,它从池子里随便抓一个空闲的连接把 SQL 发过去,执行完立刻把连接还回去。
特点:
无状态:这是最坑的地方。因为每次执行可能用的不是同一个连接,所以你在上一秒执行了 USE itheimamybatis;,下一秒执行 SELECT 时,新分配给你的连接可能还在 sys 库里,导致报错“找不到表”。
高效复用:不需要频繁地开关连接,适合快速查看单条数据。
适用场景:只运行单条、独立的查询语句,不涉及数据库切换或复杂的事务逻辑。

这两个按钮都可以执行,一个是执行部分,一个是当完整脚本执行,执行的时候需要绑定cli
按脚本执行时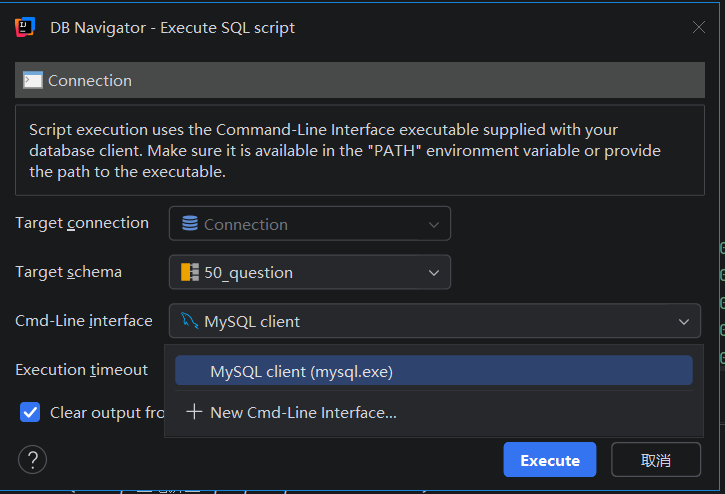
只执行选中部分的方式执行时的设置在DB Excution Console,它是DataBase Navigator自带的,需要先执行后才能出现,用于返回数据库执行结果,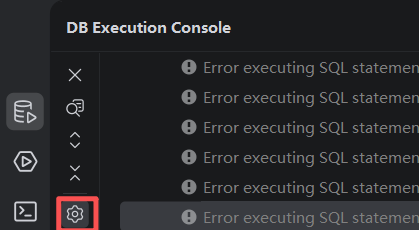
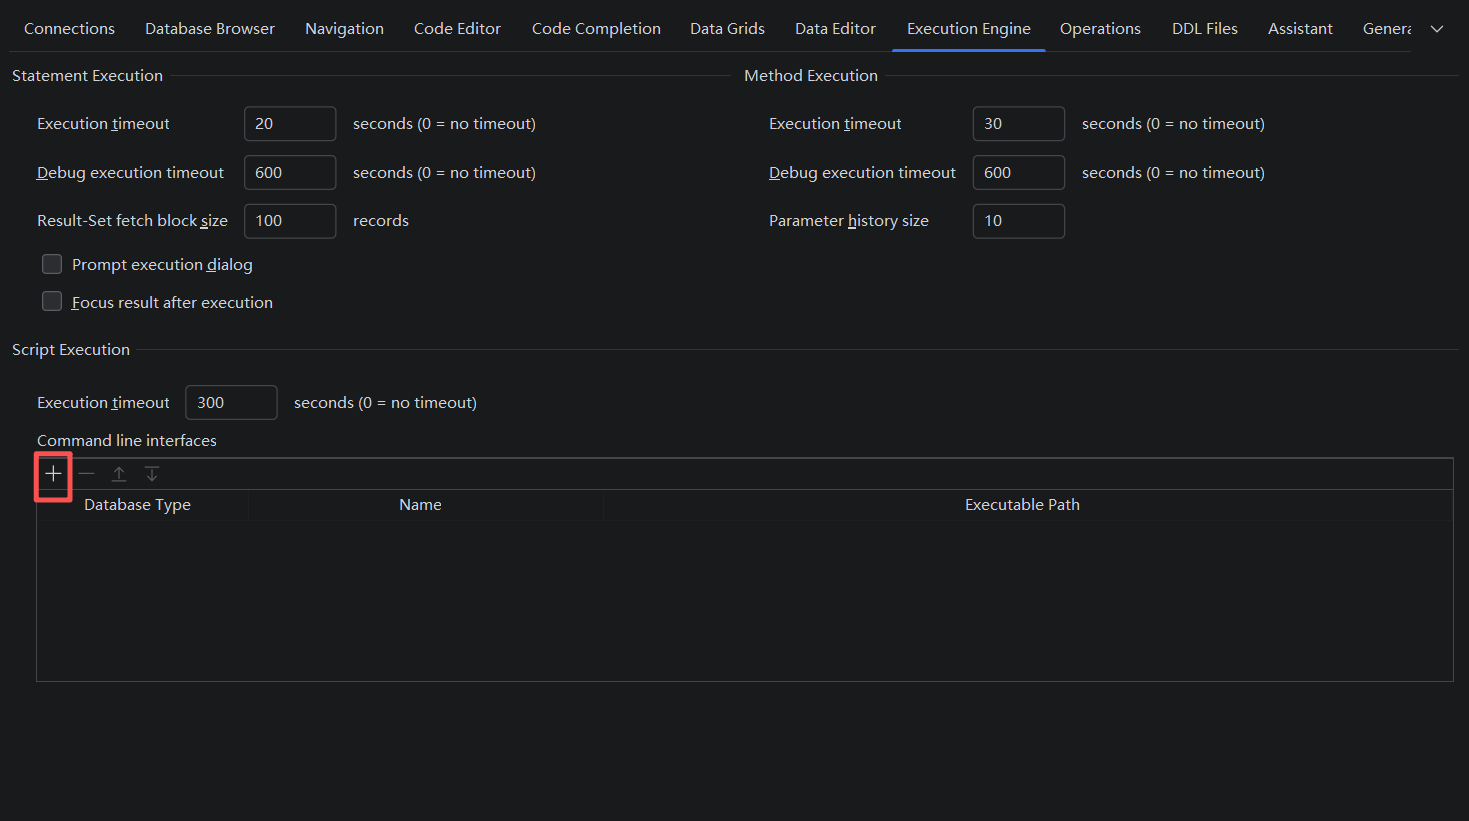
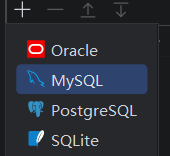
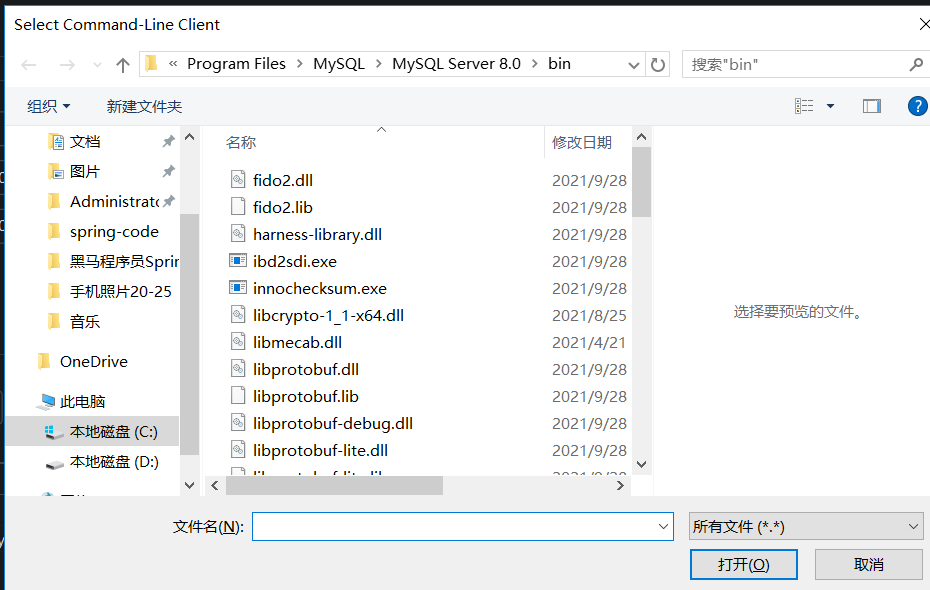
找到安装的MySQL Server8.0\bing\mysql.exe
使用部分执行执行多行操作的时候会因为插件断句问题而报错,一般是一句一句执行
执行成功后并没有出现itheimamybatis,要手动刷新才会出现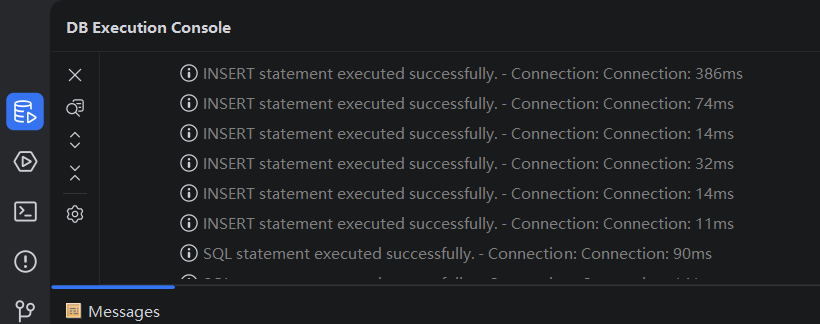
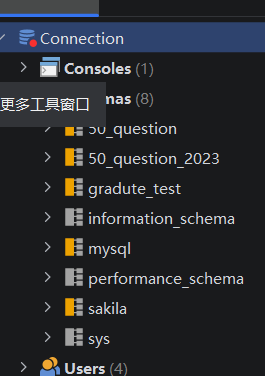
选中localhost后再刷新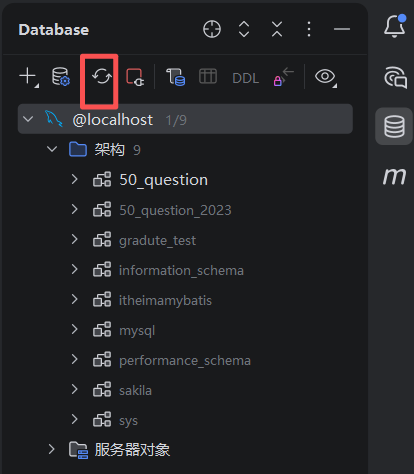
选中schema后再Reload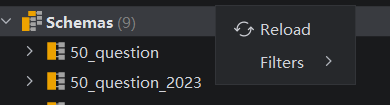
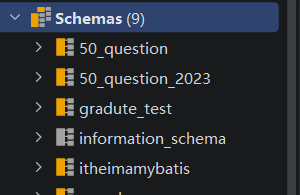
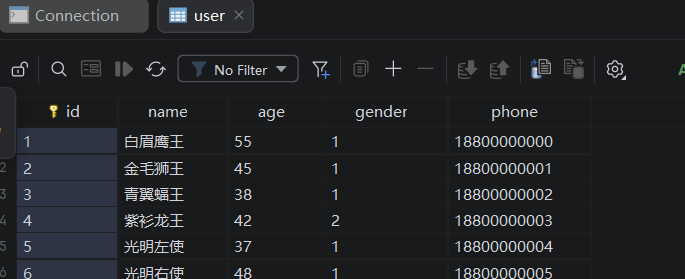
查看数据表内容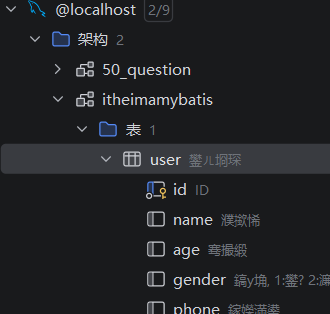
或者双击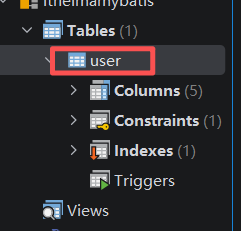
第一次查看需要设置过滤器防止太多,这里点 减号,这个表格的数据不多,可以删掉过滤器然后点确定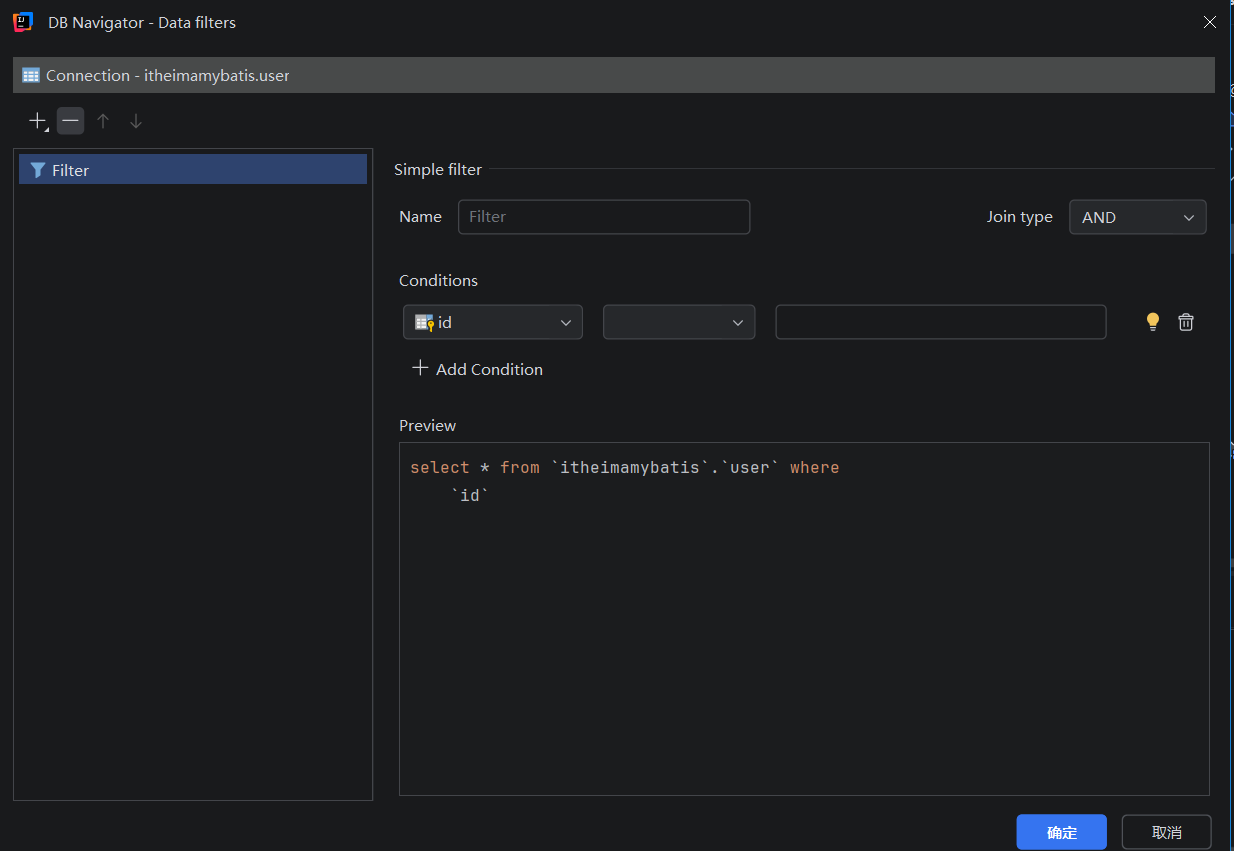
**2.**mybatis需要两个依赖
mybatis起步依赖
        <!--mysql驱动依赖-->
        <dependency>
            <groupId>com.mysql</groupId>
            <artifactId>mysql-connector-j</artifactId>
        </dependency>

        <!--mybatis的起步依赖-->
        <dependency>
            <groupId>org.mybatis.spring.boot</groupId>
            <artifactId>mybatis-spring-boot-starter</artifactId>
            <version>3.0.0</version>
        </dependency>
替换父类
···xml
org.rainsweet
java-learning-parent
1.0-SNAPSHOT
…/pom.xml
记得在父类加上模块
<module>springboot-mybatis</module>
刷新
写配置文件:
spring:
 datasource:
   driver-class-name: com.mysql.cj.jdbc.Driver
   url: jdbc:mysql://localhost:3306/itheimamybatis
   username: root
   password: 123456789
3.
- @Mapper注解写在interface上
将 Java 接口标记为 MyBatis 的 Mapper 接口,让 Spring 能够扫描并创建该接口的代理实现类避免手动编写 DAO 实现类
可以使用**@MapperScan**(“com.example.mapper”) // 扫描整个包,避免在每个接口加Mapper
DAO实现类:定义完接口后,手动实现这个类,加上注释后就不用具体实现这个类
| 启动阶段 | 运行时阶段 |
|---|---|
| Spring Boot启动 | 调用Mapper方法 |
| 扫描@Mapper | 代理对象拦截调用 |
| 生成代理类 | 解析@Select注解 |
| 注册到容器 | 执行SQL并返回 |
@Mapper 注解工作原理
1. 注解定义
java
@Target(ElementType.TYPE)  // 只能用在类/接口上
@Retention(RetentionPolicy.RUNTIME)  // 运行时保留
public @interface Mapper {
    // 空注解,只是一个标记
}
2. 核心处理流程
步骤1:Spring Boot 启动时扫描
java
// MyBatis 的核心类:MapperScannerConfigurer
public class MapperScannerConfigurer implements BeanDefinitionRegistryPostProcessor {

    @Override
    public void postProcessBeanDefinitionRegistry(BeanDefinitionRegistry registry) {
        // 1. 扫描指定包下的所有接口
        ClassPathMapperScanner scanner = new ClassPathMapperScanner(registry);

        // 2. 查找带有 @Mapper 注解的接口
        scanner.setAnnotationClass(Mapper.class);

        // 3. 扫描并注册 BeanDefinition
        scanner.scan("com.example.mapper");
    }
}
步骤2:为每个 Mapper 接口创建 BeanDefinition
java
// 扫描到 UserMapper 接口后
public class ClassPathMapperScanner extends ClassPathBeanDefinitionScanner {

    @Override
    protected Set<BeanDefinition> doScan(String... basePackages) {
        Set<BeanDefinition> beanDefinitions = super.doScan(basePackages);

        for (BeanDefinition definition : beanDefinitions) {
            // 关键:修改 Bean 的 class 类型
            // 原本是 UserMapper 接口,改成 MapperFactoryBean
            definition.setBeanClassName(MapperFactoryBean.class.getName());

            // 设置构造参数为 UserMapper 接口
            definition.getConstructorArgumentValues()
                .addGenericArgumentValue(definition.getBeanClassName());
        }
        return beanDefinitions;
    }
}
步骤3:MapperFactoryBean 创建代理对象
java
// MyBatis 的工厂 Bean
public class MapperFactoryBean<T> implements FactoryBean<T> {

    private Class<T> mapperInterface;  // UserMapper.class
    private SqlSession sqlSession;

    @Override
    public T getObject() throws Exception {
        // 核心:使用 SqlSession 创建 Mapper 代理对象
        return sqlSession.getMapper(mapperInterface);
    }

    @Override
    public Class<?> getObjectType() {
        return mapperInterface;
    }
}
步骤4:SqlSession 生成 JDK 动态代理
java
// DefaultSqlSession 类
public class DefaultSqlSession implements SqlSession {

    @Override
    public <T> T getMapper(Class<T> type) {
        // 从配置中获取 MapperRegistry
        return configuration.getMapper(type, this);
    }
}

// MapperRegistry 类
public class MapperRegistry {

    public <T> T getMapper(Class<T> type, SqlSession sqlSession) {
        // 获取 MapperProxyFactory
        MapperProxyFactory<T> mapperProxyFactory = knownMappers.get(type);

        // 创建 JDK 动态代理
        return mapperProxyFactory.newInstance(sqlSession);
    }
}

// MapperProxyFactory 类
public class MapperProxyFactory<T> {

    public T newInstance(SqlSession sqlSession) {
        // 创建 InvocationHandler
        MapperProxy<T> mapperProxy = new MapperProxy<>(sqlSession, mapperInterface);

        // 使用 JDK 动态代理生成代理对象
        return (T) Proxy.newProxyInstance(
            mapperInterface.getClassLoader(),
            new Class[] { mapperInterface },
            mapperProxy
        );
    }
}
3. 生成的代理对象结构
java
// 最终生成的代理对象(简化逻辑)
public class $Proxy123 implements UserMapper, InvocationHandler {

    private MapperProxy mapperProxy;

    @Override
    public User findById(Long id) {
        // 所有方法调用都会转发给 invoke
        return (User) mapperProxy.invoke(this,
            UserMapper.class.getMethod("findById", Long.class),
            new Object[]{id});
    }

    @Override
    public Object invoke(Object proxy, Method method, Object[] args) {
        // 实际执行逻辑
        return mapperProxy.invoke(proxy, method, args);
    }
}
- @Select(“select * from user where id = #{id}”)写在 Mapper 接口的方法上声明 要执行的 SQL 语句,MyBatis 会解析注解中的 SQL,并绑定到方法上
@Param 当方法有多个参数时需要加上@Param参数否则会报错
@Select 注解工作原理
1. 注解定义
java
@Target(ElementType.METHOD)  // 只能用在方法上
@Retention(RetentionPolicy.RUNTIME)  // 运行时保留
public @interface Select {
   String[] value();  // SQL 语句数组
}
2. 核心处理流程
步骤1:代理对象拦截方法调用
java
// MapperProxy 是核心的 InvocationHandler
public class MapperProxy<T> implements InvocationHandler, Serializable {

   private final SqlSession sqlSession;
   private final Class<T> mapperInterface;
   private final Map<Method, MapperMethod> methodCache;

   @Override
   public Object invoke(Object proxy, Method method, Object[] args) throws Throwable {
       // 1. 过滤 Object 类的方法(toString, hashCode 等)
       if (Object.class.equals(method.getDeclaringClass())) {
           return method.invoke(this, args);
       }

       // 2. 从缓存获取或创建 MapperMethod
       MapperMethod mapperMethod = cachedMapperMethod(method);

       // 3. 执行 MapperMethod
       return mapperMethod.execute(sqlSession, args);
   }

   private MapperMethod cachedMapperMethod(Method method) {
       return methodCache.computeIfAbsent(method,
           m -> new MapperMethod(mapperInterface, method, sqlSession.getConfiguration()));
   }
}
步骤2:解析 @Select 注解
java
// MapperMethod 类负责解析注解
public class MapperMethod {

   private final SqlCommand command;
   private final MethodSignature method;

   public MapperMethod(Class<?> mapperInterface, Method method, Configuration config) {
       // 解析 SQL 命令
       this.command = new SqlCommand(config, mapperInterface, method);
       this.method = new MethodSignature(config, mapperInterface, method);
   }

   // SqlCommand 内部类
   public static class SqlCommand {
       private final String name;  // 方法全限定名
       private final SqlCommandType type;  // SELECT, INSERT, UPDATE, DELETE

       public SqlCommand(Configuration configuration, Class<?> mapperInterface, Method method) {
           // 关键:解析方法上的注解
           MappedStatement ms = resolveMappedStatement(mapperInterface, method, configuration);

           if (ms == null) {
               // 检查是否有 @Select 等注解
               if (method.isAnnotationPresent(Select.class)) {
                   type = SqlCommandType.SELECT;
                   // 获取注解中的 SQL
                   Select select = method.getAnnotation(Select.class);
                   name = select.value()[0];  // SQL 语句
               }
           }
       }
   }
}
步骤3:构建完整的 MappedStatement
java
// Configuration 类中解析 @Select
public class Configuration {

   public void addMappedStatement(Class<?> mapperInterface, Method method) {
       // 1. 提取 @Select 注解
       Select select = method.getAnnotation(Select.class);
       if (select != null) {
           String[] sqlArray = select.value();
           String sql = sqlArray[0];

           // 2. 解析 SQL(处理动态标签)
           SqlSource sqlSource = createSqlSource(sql, method);

           // 3. 构建 MappedStatement
           MappedStatement.Builder builder = new MappedStatement.Builder(
               this,
               mapperInterface.getName() + "." + method.getName(),
               sqlSource,
               SqlCommandType.SELECT
           );

           // 4. 设置参数和结果映射
           builder.parameterMap(createParameterMap(method));
           builder.resultMaps(createResultMaps(method));

           // 5. 注册到配置
           mappedStatements.put(builder.build().getId(), builder.build());
       }
   }
}
步骤4:执行 SQL
java
// MapperMethod 执行
public Object execute(SqlSession sqlSession, Object[] args) {
   Object result = null;

   switch (command.getType()) {
       case SELECT:
           // 处理参数
           Object param = method.convertArgsToSqlCommandParam(args);

           // 根据返回类型选择执行方法
           if (method.returnsMany()) {
               // 返回集合
               result = sqlSession.selectList(command.getName(), param);
           } else if (method.returnsOptional()) {
               // 返回 Optional
               result = sqlSession.selectOne(command.getName(), param);
           } else {
               // 返回单个对象
               result = sqlSession.selectOne(command.getName(), param);
           }
           break;

       case INSERT:
       case UPDATE:
       case DELETE:
           // 增删改执行
           result = sqlSession.update(command.getName(),
               method.convertArgsToSqlCommandParam(args));
           break;
   }

   return result;
}
本处的使用
   package com.itheima.springbootmybatis.mapper;

import com.itheima.springbootmybatis.pojo.User;
import org.apache.ibatis.annotations.Mapper;
import org.apache.ibatis.annotations.Select;

@Mapper
public interface UserMapper {

    @Select("select * from user where id = #{id}")
    public User findById(Integer id);
    @Select("SELECT * FROM user WHERE name = #{name} AND age = #{age}")
    User selectByNameAndAge(@Param("name") String name, @Param("age") Integer age);

}
4.@Service注解-标记业务逻辑层的组件
Spring 三层架构中的位置
text
Controller (控制层) → 接收请求、参数校验、返回响应
↓
Service (业务层) → 业务逻辑、事务管理、权限控制 ← @Service 在这里
↓
Mapper/DAO (数据层) → 数据库操作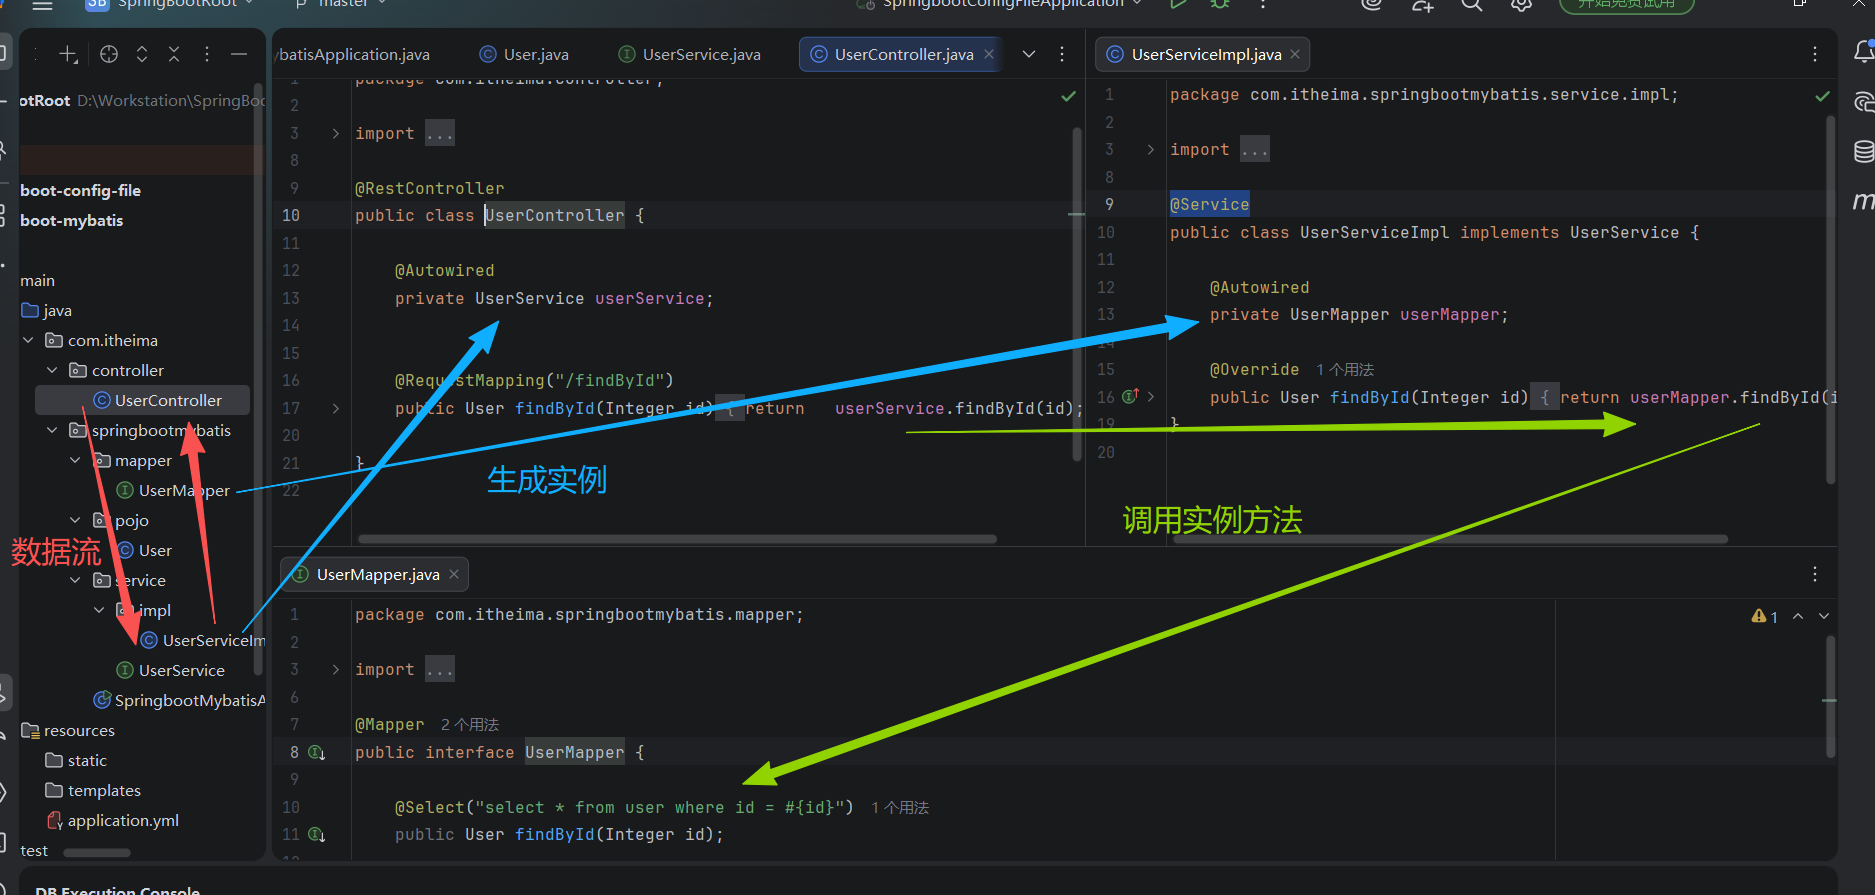
┌───────────────────────────────┐
│ 请求 → http://localhost:8080/findById?id=1 │
└───────────────────────────────┘
↓
┌──────────────────────────────┐
│ 【第1层:Controller层 - 控制层】 │
│ 📁 itheima/controller/UserController.java │
│ • 接收请求参数 id=1 │
│ • 调用UserService.findById(1) │
│ • 返回User对象 → SpringBoot自动转JSON │
│ • 职责:请求接收、参数校验、响应返回 │
└──────────────────────────────┘
↓ 调用
┌───────────────────────────────┐
│ 【第2层:Service层 - 业务层】 │
│ 📁 itheima/…/service/UserService.java (接口) │
│ 📁 itheima/…/service/impl/UserServiceImpl.java │
│ • 当前没有业务逻辑,直接转发给Mapper │
│ • 职责:业务逻辑处理、事务管理、权限控制 │
│ • 接口+实现:便于AOP代理、单元测试Mock │
└───────────────────────────────┘
↓ 调用
┌─────────────────────────────────┐
│ 【第3层:Mapper/DAO层 - 数据访问层】 │
│ 📁 itheima/…/mapper/UserMapper.java │
│ • @Select(“select * from user where id = #{id}”) │
│ • 执行SQL查询数据库 │
│ • 职责:数据库CRUD操作 │
└─────────────────────────────────┘
↓
┌──────────────────────────────────┐
│ 【辅助层:POJO层 - 数据实体】 │
│ 📁 itheima/…/pojo/User.java │
│ • 数据库表user的Java映射对象 │
│ • 贯穿三层:Controller→Service→Mapper→数据库 │
└──────────────────────────────────┘
企业规范(推荐):
com.itheima.springbootmybatis/ ← 统一根包
├── controller/ ← Controller层
├── service/ ← Service层
│ └── impl/ ← Service实现
├── mapper/ ← Mapper层
├── pojo/ ← 实体类
├── config/ ← ✅ 配置类(放 @Configuration 类)
│ └── WebMvcConfig.java
└── SpringbootMybatisApplication.java ← 启动类
SpringBootMybatisApplication可以到所在包和子包即所在文件夹内的所有文件
如果不在这个位置的文件需要使用@ComponentScan(basePackages = “包路径如com.itheima”)
启动类通常就是主类:一般命名为 Application、XxxApplication(比如 SpringBootRootApplication)。
Maven让JVM可以知道这是启动类,而SpringBootApplication是让SpringBoot识别到并进行后续操作,
启动类负责扫描:它默认会扫描自己所在的包及其所有子包,把带有 @Component、@Service 等注解的类自动注册为 Bean。
Maven 配置 + main 方法
↓
让 JVM 找到入口
↓
执行 main 方法
↓
SpringApplication.run(启动类.class)
↓
看到 @SpringBootApplication
↓
开启 Spring Boot 的各项功能
为了代码整洁和可维护性一般不建议在启动类里使用@Bean方法将第三方jar包注册为Bean对象
违反单一职责原则-启动类的唯一职责应该是:启动 Spring Boot 应用
正确的做法:拆分到配置类- @Bean 方法放到专门的 配置类 中
使用@Configuration表明是配置类,在在方法上利用@Bean对象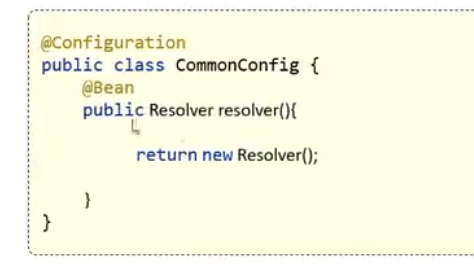
在正式的代码中应该使用@Autowired注释让SpringBoot自己把Bean对象注入到对象中使用是最符合Java规范的
@Service
public class CountryService {

    @Autowired  //
    private Country country;

    public void doSomething() {
        System.out.println(country.getName());//Bean对象默认的名字是注入注解如@Bean对应的方法名或者在@Bean(name = "myCountry")设置,默认首字母小写
    }
}
小型项目或快速原型场景可以接受如:简单的演示/测试项目、用于调试/验证某个第三方库、只有1-2个极其简单的第三方Bean、如果整个项目的第三方配置只有这一行,放在启动类里也可接受。
POJO = Plain Old Java Object(简单的Java对象)
数据库表 → Java对象的映射
数据库表 user POJO类 User
┌──────────────┐ ┌──────────────┐
│ id (int) │ ←映射→ │ id (Integer) │
│ name(varchar) │ │ name(String) │
│ age(tinyint) │ │ age(Short) │
│ gender │ │ gender(Short) │
│ phone │ │ phone(String) │
└──────────────┘ └──────────────┘
Controller → Service → Mapper → 数据库
↓ ↓ ↓
User User User ← POJO贯穿全过程
数据传输:Controller接收参数时用
数据封装:Service处理业务时用
数据映射:MyBatis自动把查询结果转成User对象
POJO的命名规范:
User.java - 对应user表
Order.java - 对应order表
Product.java - 对应product表
5.@Autowired 是 Spring 框架提供的依赖注入注解,用于自动装配 Bean 之间的依赖关系。告诉 Spring 自动查找并注入匹配的 Bean。之前写的那些Service和Mapper都是Bean对象
6.SpringBoot 启动流程:
第1步:扫描所有类,收集 Bean 定义
↓
第2步:创建 Bean 实例(注册阶段)
↓
第3步:处理依赖注入(填充属性)
↓
第4步:执行初始化方法
↓
第5步:应用启动完成
6.关于错误:
java: 程序包org.springframework.boot不存在,可能是由于缓存不同步
1.生存期:clean+install
2.删除项目目录下.ideal,重新在项目重构-包-依赖设置JDK
7.执行后输入网址http://localhost:8080/findById?id=1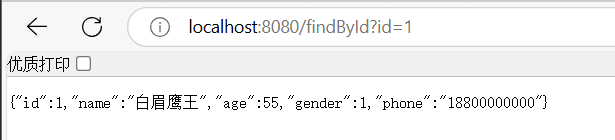
7.Bean扫描
Spring:
借助标签指明包路径:<context:component-scan base-package=“com.itheima”>
借助注解指明包路径@ComponentScan(basePackage=“com.itheima”)
然而SpringBoot依靠启动类不需要这些:
//启动类
@SpringBootApplication//添加注解
public class SpringBootQuickstartApplication {
public static void main(String[] args) {
SpringApplication.run(SpringbootQuickstartApplication.class, args);
}//将当前启动对象的字节码文件作为参数传入
}
@SpringBootApplication//添加注解是SpringBoot能扫描controller,service的核心原因,它是组合注解,相当于在启动类上添加@ComponentScan注解
@SpringBootConfiguration
@EnableAutoConfiguration
@ComponentScan
public @interface springBootApplication {
}
@ComponentScan不指定扫描的包路径时,扫描的是添加了@ComponentScan的类所在的包及其子包,默认只扫描启动类所在包及其子包,这个包只得是有该注释所在的目录下的所有文件,及子目录,上层目录不在范围内
@ComponentScan(basePackage = “path”)其他地方的包要扫描指定路径

汇聚全球AI编程工具,助力开发者即刻编程。
更多推荐



 10
10 0
0- 0


 已为社区贡献1条内容

所有评论(0)