
[Java EE 进阶] SpringBoot 配置文件全解析 : properties 与 yml 的使用与实战 (ULTRA)
配置文件主要是为了解决硬编码(将代码写死)带来的问题 , 把可能会改变的信息 , 放在一个集中的地方 , 当我们启动某个程序时 , 应用程序从配置文件中读取数据 , 并加载运行
本文将从配置文件的核心作用出发,详细讲解两种格式的语法、使用方式,结合实战案例对比差异,并补充实用开发技巧,帮你高效掌握 SpringBoot 配置文件的使用
一.配置文件的价值
配置文件的本质是 : 解耦可变配置与业务代码
在 Spring Boot 中 , 配置文件主要有以下作用
- 配置项目基础信息 : Tomcat 启动端口 , 项目上下文路径
- 配置第三方依赖 : 如数据库连接 URL , 用户名 , 密码 , Redis , MQ 的连接信息
- 配置自定义业务数据 : 如验证码的宽高 , 接口超时时间 , 文件上传大小限制
- 配置日志与环境 : 如日志级别 , 开发/测试/生产环境的差异化配置
二. SpringBoot 主流配置文件格式
SpringBoot 支持 application.properties , application.yml , application.yaml 三种配置文件(其中 yml 和 yaml 格式完全一致) ; properties 是默认格式 , yml 是实际开发中使用频率最高的格式
加载规则 :
- SpringBoot 启动时 , 会自动从 resource 目录加载文件
- properties 和 yml 可并存于一个项目 , 当配置冲突时以 properties 为准
- 实际开发中建议统一使用一种格式
三.传统配置 : properties 格式详解
properties 是最早器的配置文件格式 , 也是 SpringBoot 创建时默认生成的配置文件 , 其语法简单 , 兼容性高 , 适合简单的键值对配置
本章节只对 properties 做简单介绍
1.基本语法
以键值对形式配置 , key 和 value 通过 = 连接 , 使用 # 添加注解
spring.application.name=SpringIOC
# 配置Tomcat端口
server.port=9090
# 配置MySQL数据库连接
spring.datasource.url=jdbc:mysql://127.0.0.1:3306/testdb?characterEncoding=utf8&useSSL=false
spring.datasource.username=root
spring.datasource.password=root
2.读取配置文件
使用 @Value("${key}")注解即可读取配置文件内容 , 适用于单个零散的配置的读取
#自定义配置
my.config.name = SpringBoot
package com.boop.springioc.TestNode.Config;
import org.springframework.beans.factory.annotation.Value;
import org.springframework.context.annotation.Configuration;
import org.springframework.web.bind.annotation.RequestMapping;
import org.springframework.web.bind.annotation.RestController;
@RestController
@RequestMapping("/propertiesConfig")
public class propertiesConfig {
@Value("${my.config.name}")
private String configName;
@RequestMapping("/read")
public String readConfig(){
return "从properties读取的配置:" + configName;
}
}http://127.0.0.1:8080/propertiesConfig/read
3.缺点分析
properties 最大的问题是存在大量冗余的 key 前缀
四.主流配置 : yml 格式超详解
yml 是 YAML(Yey Another Markup Language)的简写 , 是一种树形结构的配置文件 , 采用缩进表示乘积 , 解决了 properties 的冗余问题 , 支持更多的数据类型(对象 , 集合 , Map) , 可读性好 , 是目前 SpringBoot 开发的首选格式
1. 核心基础语法
- 采用 key: value 格式 , 冒号后必须跟一个英文空格
- 用缩进表示层级关系 , 缩进只能用空格 , 不能用 Tab
- 使用#添加注释
- 大小写敏感
2. yml 配置不同的数据类型和 null
#字符串
string.value: Hello

#布尔值
boolean.value: true

#整数
int.value: 10

#浮点数
float.value: 1.232

#null
null.value: ~

#空字符串
empty.value: ''
注意 :
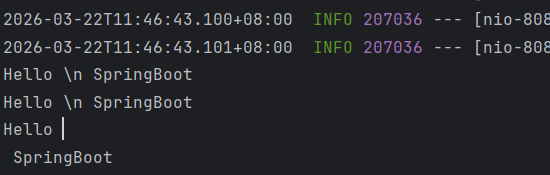
yml 中字符串可以加单引号''或双引号"" , 二者的核心区别是 : 是否转移特殊字符(\n , \t)
- 不加单引号 : 默认不专一特殊字符 , 使其变为普通字符串显示
- 单引号 : 强制转义特殊字符 , 使其失去原有含义
- 双引号 : 不转义特殊字符 , 保留其原有含义
string:

  # 不加引号:\n作为普通字符串
  str1: Hello \n SpringBoot

  # 单引号:\n被转义,普通字符串
  str2: 'Hello \n SpringBoot'

  # 双引号:\n表示换行,保留特殊含义
  str3: "Hello \n SpringBoot"
package com.boop.springioc.TestNode.Config;
import org.springframework.beans.factory.annotation.Value;
import org.springframework.web.bind.annotation.RequestMapping;
import org.springframework.web.bind.annotation.RestController;
@RestController
@RequestMapping("/ymlConfig")
public class ymlConfig {
@Value("${string.str1}")
private String str1;
@Value("${string.str2}")
private String str2;
@Value("${string.str3}")
private String str3;
@RequestMapping("/print")
public void printString(){
System.out.println(str1);
System.out.println(str2);
System.out.println(str3);
}
}http://127.0.0.1:8080/ymlConfig/print
报错解析 :

一般是配置文件中变量的名字和需要注入的名字不相同 , 注意前缀和大小写敏感
3. yml 配置读取
与 properties 相同
my:
  config:
    name: SpringIOC
package com.boop.springioc.TestNode.Config;
import org.springframework.beans.factory.annotation.Value;
import org.springframework.context.annotation.Configuration;
import org.springframework.web.bind.annotation.RequestMapping;
import org.springframework.web.bind.annotation.RestController;
@RestController
@RequestMapping("/propertiesConfig")
public class propertiesConfig {
@Value("${my.config.name}")
private String configName;
@RequestMapping("/read")
public String readConfig(){
return "从properties读取的配置:" + configName;
}
}http://127.0.0.1:8080/propertiesConfig/read
4.复杂类型的配置 : 对象/List/Map
4.1 配置对象
有两种写法 : 普通缩进和行内两种
person1:
  id: 1
  name: zhangsan
  age: 18

person2: {id: 2,name: Java,age: 165}
package com.boop.springioc.TestNode.model;
import lombok.Data;
import org.springframework.boot.context.properties.ConfigurationProperties;
import org.springframework.stereotype.Component;
@Component
@ConfigurationProperties(prefix = "person2")
//@ConfigurationProperties(prefix = "person1")
@Data
public class Person {
private Integer id;
private String name;
private Integer age;
}package com.boop.springioc.TestNode.Config;
import com.boop.springioc.TestNode.model.Person;
import org.springframework.beans.factory.annotation.Autowired;
import org.springframework.beans.factory.annotation.Value;
import org.springframework.boot.context.properties.ConfigurationProperties;
import org.springframework.web.bind.annotation.RequestMapping;
import org.springframework.web.bind.annotation.RestController;
@RestController
@RequestMapping("/ymlConfig")
public class ymlConfig {
//
@Autowired
private Person p1;
@RequestMapping("/print")
public void printString(){
System.out.println(p1);
// System.out.println(str1);
// System.out.println(str2);
// System.out.println(str3);
}读取对象配置 :
- 创建实体类 , 添加@Component(交给 Spring 管理) , @ConfigurationProperties(prefix = "person2") (指定 yml 中对应的前缀对象) , 并通过@Data 生成 toString()
- 在控制器中通过@Autowried 注入实体类 , 即可获取配置值
4.2 配置 List
通过缩进+短横线定义集合元素 , 同样支持两种写法
dbtypes1:
  name:
    - mysql
    - sqlserver
    - db2

dbtypes2: {name:[mysql,java,sql]}
package com.boop.springioc.TestNode.Config;
import lombok.Data;
import org.springframework.boot.context.properties.ConfigurationProperties;
import org.springframework.stereotype.Component;
import org.springframework.web.bind.annotation.RequestMapping;
import org.springframework.web.bind.annotation.RestController;
import java.util.List;
@Component
@ConfigurationProperties(prefix = "dbtypes1")
@Data
public class ListConfig {
private List<String> name;
}package com.boop.springioc.TestNode.Component;
import com.boop.springioc.TestNode.Config.ListConfig;
import org.springframework.beans.factory.annotation.Autowired;
import org.springframework.web.bind.annotation.RequestMapping;
import org.springframework.web.bind.annotation.RestController;
@RequestMapping("/list")
@RestController
public class ListController {
@Autowired
private ListConfig listConfig;
@RequestMapping("/readList")
public String readList(){
return listConfig.toString();
}
}http://127.0.0.1:8080/list/readList
4.3 配置 Map 集合
maptypes3:
  map:
    k1: aa
    k2: bjs
    l2: kl

maptypes4: {map: {k1: kk1, k2: kk2, k3: kk3}}
package com.boop.springioc.TestNode.Config;
import lombok.Data;
import org.springframework.boot.context.properties.ConfigurationProperties;
import org.springframework.stereotype.Component;
import java.util.HashMap;
@Component
@ConfigurationProperties(prefix = "maptypes3")
@Data
public class MapConfig {
private HashMap<String, String> map;
}package com.boop.springioc.TestNode.Component;
import com.boop.springioc.TestNode.Config.MapConfig;
import org.springframework.beans.factory.annotation.Autowired;
import org.springframework.web.bind.annotation.RequestMapping;
import org.springframework.web.bind.annotation.RestController;
import java.util.HashMap;
import java.util.Map;
@RestController
@RequestMapping("/map")
public class mapController {
@Autowired
private MapConfig mapConfig;
@RequestMapping("/readMap")
public String readStudent(){
return mapConfig.toString();
}
}http://127.0.0.1:8080/map/readMap
5.优缺点
优点 :
- 可读性高 , 写法简单 , 易于理解
- 支持更多的数据类型
- 支持更多编程语言(Go , Python , Ruby , JS)
缺点 :
- 不适合写复杂文件
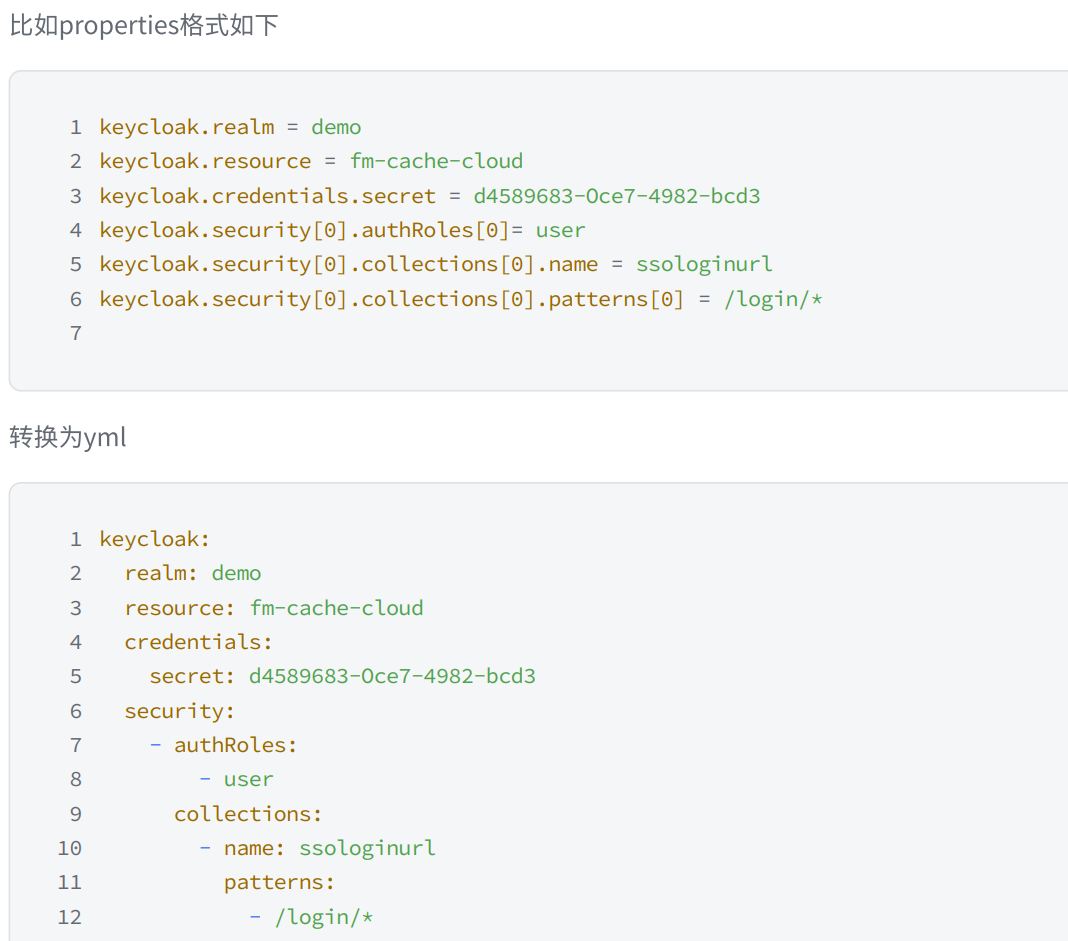
- 注意层级划分
五.properties 与 yml 核心对比
|
对比维度 |
properties |
yml |
|
语法格式 |
扁平键值对(key=value) |
树形结构(key: value,缩进表示层级) |
|
冗余性 |
存在大量重复 key 前缀,冗余度高 |
树形结构,无冗余前缀 |
|
数据类型 |
仅支持基础类型(字符串、数字、布尔) |
支持基础类型 + 对象 / List/Map 等复杂类型 |
|
读取方式 |
仅 @Value 注解 |
基础类型用 @Value,复杂类型用 @ConfigurationProperties |
|
格式要求 |
宽松,无缩进 / 空格要求 |
严格,冒号后必须有空格,缩进只能用空格 |
|
优先级 |
高(与 yml 冲突时生效) |
低(与 properties 冲突时失效) |
|
适用场景 |
简单配置、超复杂嵌套配置、需兼容老项目 |
绝大多数日常开发场景、复杂类型配置、追求可读性 |
六.实战案例 : 配置文件实现验证码功能
1.需求说明
- 后端生成图形验证码 , 验证码宽高通过 yml 配置
- 生成的验证码存储在 session 中
- 前端输入验证码 , 点击提交后端校验是否正确 , 正确则跳转页面
2.接口定义
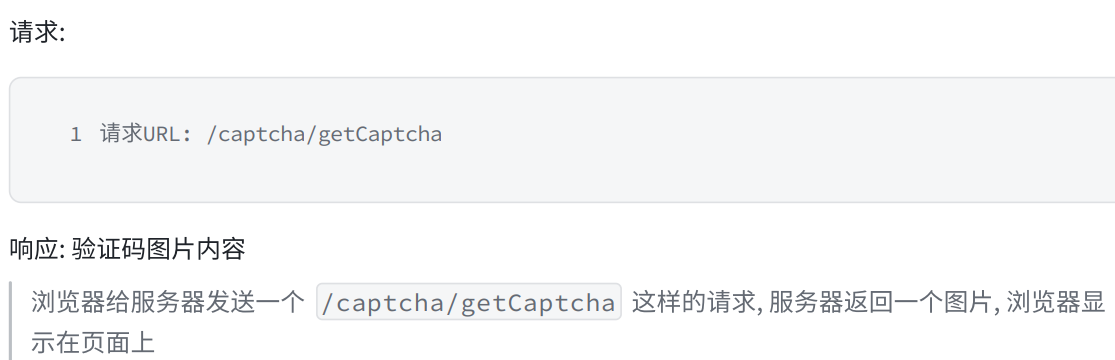
2.1 生成验证码
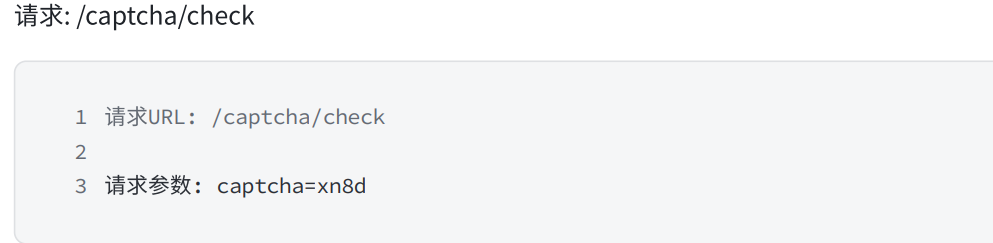
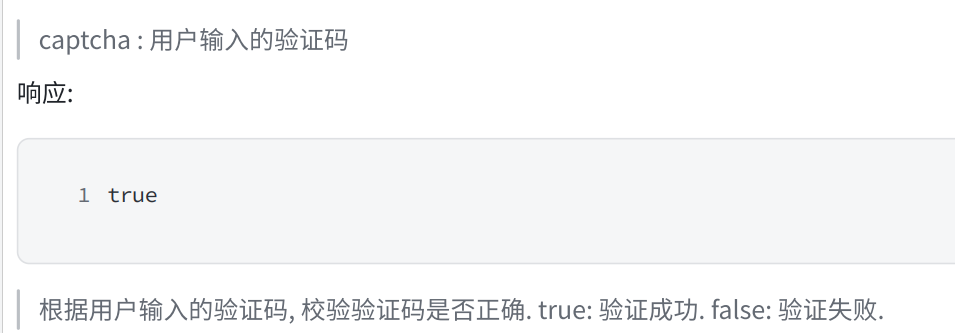
2.2 校验验证码是否正确
2.工具介绍(Hutool)
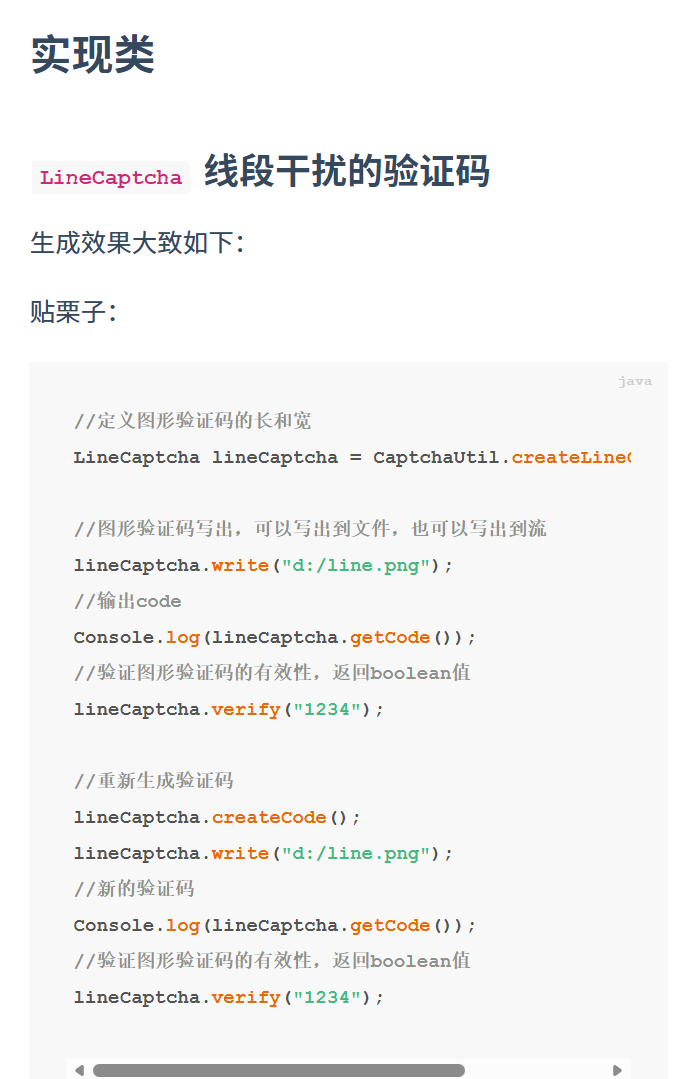
Hutool 是一个 Java 工具包类库 , 对文件 , 流 , 加密解密 , 转码 , 正则 , 线程 , XML 等 JDK 方法进行封装组成的 Util 工具类
3. 代码
① 完整 pom 文件
<?xml version="1.0" encoding="UTF-8"?>
<project xmlns="http://maven.apache.org/POM/4.0.0" xmlns:xsi="http://www.w3.org/2001/XMLSchema-instance"
  xsi:schemaLocation="http://maven.apache.org/POM/4.0.0 https://maven.apache.org/xsd/maven-4.0.0.xsd">
  <modelVersion>4.0.0</modelVersion>
  <parent>
    <groupId>org.springframework.boot</groupId>
    <artifactId>spring-boot-starter-parent</artifactId>
    <version>4.0.3</version>
    <relativePath/> <!-- lookup parent from repository -->
  </parent>
  <groupId>com.boop</groupId>
  <artifactId>Book</artifactId>
  <version>0.0.1-SNAPSHOT</version>
  <name>Book</name>
  <description>Book</description>
  <url/>
    <licenses>
      <license/>
    </licenses>
    <developers>
      <developer/>
    </developers>
    <scm>
      <connection/>
        <developerConnection/>
          <tag/>
            <url/>
            </scm>
              <properties>
                <java.version>17</java.version>
              </properties>
              <dependencies>
                <dependency>
                  <groupId>org.springframework.boot</groupId>
                  <artifactId>spring-boot-starter-webmvc</artifactId>
                </dependency>

                <dependency>
                  <groupId>org.projectlombok</groupId>
                  <artifactId>lombok</artifactId>
                  <optional>true</optional>
                </dependency>
                <dependency>
                  <groupId>org.springframework.boot</groupId>
                  <artifactId>spring-boot-starter-webmvc-test</artifactId>
                  <scope>test</scope>
                </dependency>

                <dependency>
                  <groupId>cn.hutool</groupId>
                  <artifactId>hutool-all</artifactId>
                  <version>5.8.42</version>
                </dependency>
              </dependencies>

              <build>
                <plugins>
                  <plugin>
                    <groupId>org.apache.maven.plugins</groupId>
                    <artifactId>maven-compiler-plugin</artifactId>
                    <configuration>
                      <annotationProcessorPaths>
                        <path>
                          <groupId>org.projectlombok</groupId>
                          <artifactId>lombok</artifactId>
                          <version>${lombok.version}</version> <!-- 可在 properties 中定义版本,或直接写具体版本号 -->
                        </path>
                      </annotationProcessorPaths>
                    </configuration>
                  </plugin>
                  <plugin>
                    <groupId>org.springframework.boot</groupId>
                    <artifactId>spring-boot-maven-plugin</artifactId>
                    <configuration>
                      <excludes>
                        <exclude>
                          <groupId>org.projectlombok</groupId>
                          <artifactId>lombok</artifactId>
                        </exclude>
                      </excludes>
                    </configuration>
                  </plugin>
                </plugins>
              </build>
            </project>
② 实体类
将配置项挪到配置文件中 ; 把生成的验证码存储在 Session 中 , 校验时使用
captcha:
  width: 200
  height: 80
  session:
    key: CAPTCHA_SESSION_KEY
    date: CAPTCHA_SESSION_Date
package com.boop.captcha.model;
import lombok.Data;
import org.springframework.boot.context.properties.ConfigurationProperties;
import org.springframework.context.annotation.Configuration;
@ConfigurationProperties("captcha")
@Configuration
@Data
public class CaptchaProperties {
private Integer width;
private Integer height;
private Session session;
@Data
public static class Session{
private String key;
private String date;
}
}③controller
package com.boop.captcha.controller;

import cn.hutool.captcha.CaptchaUtil;
import cn.hutool.captcha.LineCaptcha;
import com.boop.captcha.model.CaptchaProperties;
import jakarta.servlet.http.HttpServletResponse;
import jakarta.servlet.http.HttpSession;
import org.springframework.beans.factory.annotation.Autowired;
import org.springframework.util.StringUtils;
import org.springframework.web.bind.annotation.RequestMapping;
import org.springframework.web.bind.annotation.RestController;

import java.io.IOException;
import java.util.Date;

@RestController
@RequestMapping("/captcha")
public class CaptchaController {
    @Autowired
    private CaptchaProperties captchaProperties;

    //验证码有效期 : 60秒
    private static final long VALID_TIME = 60*1000;

    //生成验证码
    @RequestMapping("/getCaptcha")
    public void getCaptcha(HttpSession session , HttpServletResponse response) throws IOException {
        response.setContentType("image/jpeg");
        response.setHeader("Pragma","No-cache");

        try {
            //定义图形验证码的长和宽
            LineCaptcha lineCaptcha = CaptchaUtil.createLineCaptcha(captchaProperties.getWidth(),captchaProperties.getHeight());

            //存储验证码和生成时间到Session
            session.setAttribute(captchaProperties.getSession().getKey(),lineCaptcha.getCode() );
            session.setAttribute(captchaProperties.getSession().getDate(),new Date());

            //输出验证码到浏览器
            lineCaptcha.write(response.getOutputStream());

        } catch (IOException e) {
            throw new RuntimeException(e);
        }finally {
            //关闭流
            response.getOutputStream().close();
        }
    }


    //校验验证码
    @RequestMapping("/check")
    public boolean checkCaptcha(HttpSession session , String captcha){

        if(!StringUtils.hasLength(captcha)){
            return false;
        }
        String code = (String)session.getAttribute(captchaProperties.getSession().getKey());
        Date date = (Date)session.getAttribute(captchaProperties.getSession().getDate());
        if(captcha.equalsIgnoreCase(code)
                &&date!=null
                &&System.currentTimeMillis()-date.getTime()<VALID_TIME){
            return true;
        }
        return false;

    }

}
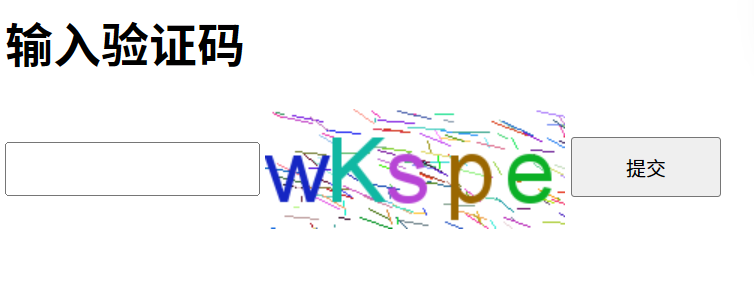
http://127.0.0.1:8080/captcha/getCaptcha , 显示验证码

http://127.0.0.1:8080/captcha/check , 校验验证码
④ 前端代码
<!DOCTYPE html>
<html lang="en">

  <head>
    <meta charset="utf-8">

    <title>验证码</title>
    <style>
      #inputCaptcha {
        height: 30px;
        vertical-align: middle;
      }
      #verificationCodeImg{
        vertical-align: middle;
      }
      #checkCaptcha{
        height: 40px;
        width: 100px;
      }
    </style>
  </head>

  <body>
    <h1>输入验证码</h1>
    <div id="confirm">
      <input type="text" name="inputCaptcha" id="inputCaptcha">
      <img id="verificationCodeImg" src="/captcha/getCaptcha" style="cursor: pointer;" title="看不清?换一张" />
      <input type="button" value="提交" id="checkCaptcha">
    </div>
    <script src="https://cdn.bootcdn.net/ajax/libs/jquery/3.6.4/jquery.min.js"></script>
    <script>

      $("#verificationCodeImg").click(function(){
        $(this).hide().attr('src', '/captcha/getCaptcha?dt=' + new Date().getTime()).fadeIn();
      });

      $("#checkCaptcha").click(function () {
        $.ajax({
          type:"post",
          url:"/captcha/check",
          data:{
            captcha: $("#inputCaptcha").val()
          },
          success:function(result){
            if(result){
              location.href = "success.html";
            }else {
              alert("验证码错误 ,请重新输入")

            }
          }
        });
      });

    </script>
  </body>

</html>
<!DOCTYPE html>
<html lang="en">
<head>
<meta charset="UTF-8">
<meta name="viewport" content="width=device-width, initial-scale=1.0">
<title>验证成功页</title>
</head>
<body>
<h1>验证成功</h1>
</body>
</html>http://127.0.0.1:8080/index.html

汇聚全球AI编程工具,助力开发者即刻编程。
更多推荐



 34
34 0
0- 0


 已为社区贡献30条内容

所有评论(0)