
第一个YOLO工业视觉项目:从图片检测到实时视频流识别
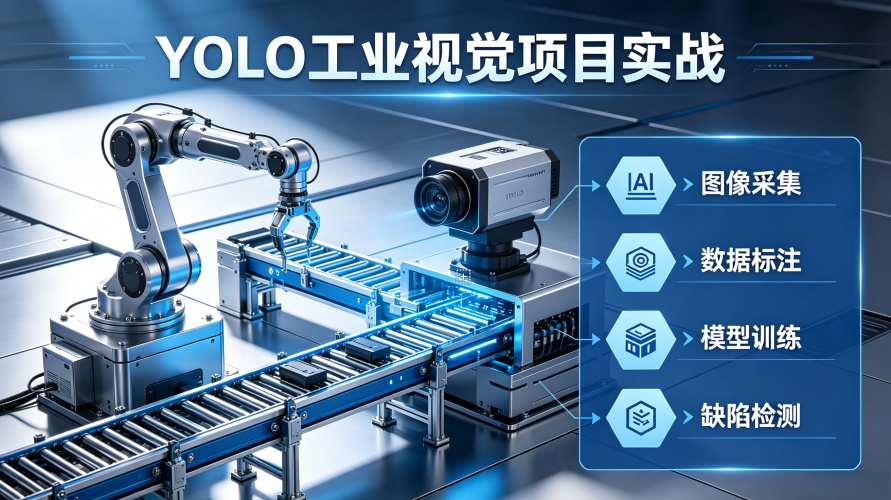
很多人搭建好YOLO环境、学完OpenCV基础后,都会陷入一个尴尬的境地:“我会运行官方的示例代码了,但不知道怎么开始自己的第一个工业视觉项目。”
我见过太多新手,对着官方的yolo predict命令发呆,不知道如何把它变成一个能解决实际问题的程序。他们能检测出图片里的猫和狗,但面对产线上的产品缺陷,却不知道从何下手。
其实,第一个工业视觉项目不需要多么复杂。你只需要掌握三个核心步骤:单张图片检测→批量图片处理→实时视频流识别。这三个步骤覆盖了工业视觉项目90%的基础需求,掌握了它们,你就能独立完成绝大多数简单的工业检测任务。
本文我会带你从零开始,完成你的第一个YOLO工业视觉项目。从最简单的单张图片检测,到批量处理整个文件夹的图片,再到实时读取工业相机流进行检测,每一步都有完整的可运行代码和工业场景的优化技巧。
一、项目整体架构与流程
我们的第一个项目目标是:实现一个通用的工业缺陷检测系统,支持三种工作模式:
- 单张图片检测模式
- 批量图片检测模式
- 实时视频/相机检测模式
二、准备工作
在开始写代码之前,我们需要做一些准备工作:
2.1 环境确认
确保你的环境已经正确配置:
- Python 3.12.4
- PyTorch 2.6.0 (GPU版)
- Ultralytics YOLO 8.3.0
- OpenCV 4.10.0
如果你还没有配置好环境,可以参考我之前的文章:《5分钟搞定YOLO环境配置:Anaconda+PyTorch+CUDA完整安装指南》
2.2 模型准备
我们使用YOLOv11n作为基础模型,它体积小、速度快,非常适合入门和快速验证。在第一次运行代码时,YOLO会自动下载预训练模型。
如果你需要检测特定的工业缺陷,后续可以用自己的数据集训练自定义模型,代码不需要做任何修改,只需要替换模型文件即可。
三、第一步:单张图片检测
单张图片检测是所有YOLO项目的基础,也是调试模型和参数的最佳方式。
3.1 基础检测代码
import cv2
from ultralytics import YOLO

def detect_single_image(image_path, model_path="yolo11n.pt", conf_threshold=0.5, iou_threshold=0.45):
    """
    单张图片YOLO检测
    :param image_path: 图片路径
    :param model_path: 模型路径
    :param conf_threshold: 置信度阈值
    :param iou_threshold: IOU阈值
    :return: 标注后的图片和检测结果
    """
    # 1. 加载YOLO模型
    model = YOLO(model_path)

    # 2. 读取图片
    image = cv2.imread(image_path)
    if image is None:
        print(f"错误:无法读取图片 {image_path}")
        return None, None

    # 3. 运行YOLO推理
    # device=0表示使用第一个GPU,device='cpu'表示使用CPU
    results = model(image, conf=conf_threshold, iou=iou_threshold, device=0)

    # 4. 解析检测结果
    detections = []
    for result in results:
        for box in result.boxes:
            # 获取边界框坐标
            x1, y1, x2, y2 = map(int, box.xyxy[0])
            # 获取置信度
            confidence = float(box.conf[0])
            # 获取类别ID和名称
            class_id = int(box.cls[0])
            class_name = result.names[class_id]

            detection = {
                "class_name": class_name,
                "confidence": confidence,
                "bbox": (x1, y1, x2, y2)
            }
            detections.append(detection)

    # 5. 绘制标注结果
    annotated_image = results[0].plot()

    # 6. 打印检测结果
    print(f"\n检测完成,共发现 {len(detections)} 个目标:")
    for i, det in enumerate(detections):
        print(f"目标 {i+1}: {det['class_name']}, 置信度: {det['confidence']:.2f}, 位置: {det['bbox']}")

    return annotated_image, detections

# 测试单张图片检测
if __name__ == "__main__":
    image_path = "test_image.jpg"  # 替换为你的图片路径
    result_image, detections = detect_single_image(image_path)

    if result_image is not None:
        # 显示结果
        cv2.namedWindow("单张图片检测结果", cv2.WINDOW_NORMAL)
        cv2.imshow("单张图片检测结果", result_image)
        cv2.waitKey(0)
        cv2.destroyAllWindows()

        # 保存结果
        cv2.imwrite("detection_result.jpg", result_image)
        print("结果已保存为 detection_result.jpg")
3.2 工业场景参数说明
- conf_threshold(置信度阈值):工业场景中建议设置在0.3-0.7之间。阈值太高会导致漏检,太低会导致误检。对于缺陷检测,通常会设置较低的阈值(0.3-0.4),然后通过后续规则过滤误检。
- iou_threshold(IOU阈值):用于非极大值抑制,工业场景中建议设置在0.4-0.5之间。
- device:指定推理设备。有GPU的话一定要设置为
device=0,速度会比CPU快5-10倍。
四、第二步:批量图片检测
在工业生产中,我们经常需要批量处理一批产品的检测图片,然后生成检测报告。
4.1 批量检测代码
import os
import csv
from datetime import datetime

def detect_batch_images(input_folder, output_folder, model_path="yolo11n.pt", conf_threshold=0.5):
    """
    批量检测文件夹中的所有图片
    :param input_folder: 输入图片文件夹
    :param output_folder: 输出结果文件夹
    :param model_path: 模型路径
    :param conf_threshold: 置信度阈值
    """
    # 创建输出文件夹
    os.makedirs(output_folder, exist_ok=True)

    # 加载YOLO模型(只加载一次,提高效率)
    model = YOLO(model_path)

    # 获取所有图片文件
    image_extensions = ('.jpg', '.jpeg', '.png', '.bmp')
    image_files = [f for f in os.listdir(input_folder) if f.lower().endswith(image_extensions)]

    if not image_files:
        print("错误:输入文件夹中没有找到图片文件")
        return

    print(f"开始批量检测,共 {len(image_files)} 张图片")

    # 准备检测报告
    report_path = os.path.join(output_folder, "detection_report.csv")
    with open(report_path, 'w', newline='', encoding='utf-8') as csvfile:
        writer = csv.writer(csvfile)
        writer.writerow(['图片名称', '检测时间', '目标数量', '目标类别', '置信度', '边界框'])

        # 遍历所有图片
        for i, image_file in enumerate(image_files):
            print(f"\n正在处理第 {i+1}/{len(image_files)} 张图片: {image_file}")

            image_path = os.path.join(input_folder, image_file)
            image = cv2.imread(image_path)

            if image is None:
                print(f"警告:无法读取图片 {image_file}")
                continue

            # 运行推理
            results = model(image, conf=conf_threshold, device=0, verbose=False)

            # 解析结果
            detections = []
            for result in results:
                for box in result.boxes:
                    x1, y1, x2, y2 = map(int, box.xyxy[0])
                    confidence = float(box.conf[0])
                    class_id = int(box.cls[0])
                    class_name = result.names[class_id]

                    detections.append({
                        "class_name": class_name,
                        "confidence": confidence,
                        "bbox": (x1, y1, x2, y2)
                    })

            # 绘制标注
            annotated_image = results[0].plot()

            # 保存结果图片
            output_path = os.path.join(output_folder, image_file)
            cv2.imwrite(output_path, annotated_image)

            # 写入报告
            detection_time = datetime.now().strftime("%Y-%m-%d %H:%M:%S")
            if detections:
                for det in detections:
                    writer.writerow([
                        image_file,
                        detection_time,
                        len(detections),
                        det['class_name'],
                        f"{det['confidence']:.2f}",
                        f"{det['bbox']}"
                    ])
            else:
                writer.writerow([image_file, detection_time, 0, "", "", ""])

    print(f"\n批量检测完成!")
    print(f"结果已保存到: {output_folder}")
    print(f"检测报告已保存到: {report_path}")

# 测试批量检测
if __name__ == "__main__":
    input_folder = "input_images"  # 输入图片文件夹
    output_folder = "output_results"  # 输出结果文件夹
    detect_batch_images(input_folder, output_folder)
4.2 工业优化技巧
- 模型只加载一次:不要在循环中每次都加载模型,这会严重影响速度。
- 关闭verbose输出:批量处理时关闭YOLO的详细输出,避免控制台刷屏。
- 生成CSV报告:工业项目中必须生成可追溯的检测报告,CSV格式是最通用的。
- 异常处理:添加图片读取失败的异常处理,避免单张图片错误导致整个程序崩溃。
五、第三步:实时视频流识别
这是工业视觉项目最核心的部分,也是和普通计算机视觉项目最大的区别。工业场景中绝大多数都是实时处理相机流。
5.1 实时视频/相机检测代码
import time
import numpy as np

def detect_realtime(source=0, model_path="yolo11n.pt", conf_threshold=0.5, skip_frames=1):
    """
    实时视频/相机检测
    :param source: 视频文件路径或相机ID(0表示第一个USB相机)
    :param model_path: 模型路径
    :param conf_threshold: 置信度阈值
    :param skip_frames: 跳帧数,每隔skip_frames帧检测一次,提高速度
    """
    # 加载YOLO模型
    model = YOLO(model_path)

    # 打开视频或相机
    cap = cv2.VideoCapture(source)

    if not cap.isOpened():
        print(f"错误:无法打开视频源 {source}")
        return

    # 设置相机参数(如果是相机)
    if isinstance(source, int):
        cap.set(cv2.CAP_PROP_FRAME_WIDTH, 1280)
        cap.set(cv2.CAP_PROP_FRAME_HEIGHT, 720)
        cap.set(cv2.CAP_PROP_FPS, 30)

    print("实时检测已启动,按 'q' 键退出")
    print("按 's' 键保存当前帧")

    # 统计变量
    frame_count = 0
    fps_start_time = time.time()
    fps = 0

    # 上一帧的检测结果(用于跳帧时显示)
    last_detections = []
    last_annotated_frame = None

    while True:
        # 读取一帧
        ret, frame = cap.read()
        if not ret:
            print("视频流结束或无法读取")
            break

        frame_count += 1

        # 跳帧处理:每隔skip_frames帧检测一次
        if frame_count % (skip_frames + 1) == 0:
            # 运行YOLO推理
            results = model(frame, conf=conf_threshold, device=0, verbose=False)

            # 解析结果
            last_detections = []
            for result in results:
                for box in result.boxes:
                    x1, y1, x2, y2 = map(int, box.xyxy[0])
                    confidence = float(box.conf[0])
                    class_id = int(box.cls[0])
                    class_name = result.names[class_id]

                    last_detections.append({
                        "class_name": class_name,
                        "confidence": confidence,
                        "bbox": (x1, y1, x2, y2)
                    })

            # 绘制标注
            last_annotated_frame = results[0].plot()

            # 计算FPS
            if frame_count % 30 == 0:
                fps = 30 / (time.time() - fps_start_time)
                fps_start_time = time.time()

        # 使用上一帧的检测结果绘制当前帧
        if last_annotated_frame is not None:
            display_frame = last_annotated_frame.copy()
        else:
            display_frame = frame.copy()

        # 添加实时信息
        cv2.putText(display_frame, f"FPS: {fps:.1f}", (10, 30),
                    cv2.FONT_HERSHEY_SIMPLEX, 1, (0, 255, 0), 2)
        cv2.putText(display_frame, f"目标数量: {len(last_detections)}", (10, 70),
                    cv2.FONT_HERSHEY_SIMPLEX, 1, (0, 255, 0), 2)

        # 工业报警逻辑:如果检测到缺陷,显示红色报警
        if len(last_detections) > 0:
            cv2.putText(display_frame, "警告:检测到缺陷!", (10, 110),
                        cv2.FONT_HERSHEY_SIMPLEX, 1, (0, 0, 255), 2)
            # 可以在这里添加PLC报警信号输出

        # 显示结果
        cv2.namedWindow("实时YOLO检测", cv2.WINDOW_NORMAL)
        cv2.imshow("实时YOLO检测", display_frame)

        # 按键处理
        key = cv2.waitKey(1) & 0xFF
        if key == ord('q'):
            # 退出程序
            break
        elif key == ord('s'):
            # 保存当前帧
            timestamp = datetime.now().strftime("%Y%m%d_%H%M%S")
            save_path = f"snapshot_{timestamp}.jpg"
            cv2.imwrite(save_path, display_frame)
            print(f"当前帧已保存为: {save_path}")

    # 释放资源
    cap.release()
    cv2.destroyAllWindows()
    print("实时检测已结束")

# 测试实时检测
if __name__ == "__main__":
    # 检测USB相机
    detect_realtime(source=0)

    # 检测本地视频文件
    # detect_realtime(source="test_video.mp4")
5.2 工业场景关键优化
- 跳帧处理:这是提高实时检测速度最有效的方法。工业产线的产品移动速度通常不会很快,每隔1-2帧检测一次完全可以满足需求,速度可以提升2-3倍。
- FPS统计:实时显示FPS,方便评估系统性能。
- 报警逻辑:添加工业场景必备的报警功能,检测到缺陷时可以触发声光报警或向PLC发送信号。
- 快照功能:支持手动保存当前帧,方便调试和记录问题。
- 资源释放:程序结束时一定要释放相机资源,否则会导致相机无法再次打开。
六、工业级项目整合
现在我们把前面的三个功能整合到一个完整的程序中,通过命令行参数选择不同的工作模式。
import argparse

def main():
    parser = argparse.ArgumentParser(description="YOLO工业视觉检测系统")
    parser.add_argument("--mode", type=str, required=True,
                        choices=["image", "batch", "video"],
                        help="工作模式: image(单张图片), batch(批量图片), video(实时视频)")
    parser.add_argument("--source", type=str, required=True,
                        help="输入源: 图片路径/文件夹路径/视频路径/相机ID")
    parser.add_argument("--model", type=str, default="yolo11n.pt",
                        help="YOLO模型路径")
    parser.add_argument("--conf", type=float, default=0.5,
                        help="置信度阈值")
    parser.add_argument("--output", type=str, default="output",
                        help="输出文件夹(仅批量模式)")
    parser.add_argument("--skip", type=int, default=1,
                        help="跳帧数(仅视频模式)")

    args = parser.parse_args()

    print("="*50)
    print("YOLO工业视觉检测系统")
    print("="*50)
    print(f"工作模式: {args.mode}")
    print(f"输入源: {args.source}")
    print(f"模型: {args.model}")
    print(f"置信度阈值: {args.conf}")
    print("="*50)

    if args.mode == "image":
        result_image, detections = detect_single_image(args.source, args.model, args.conf)
        if result_image is not None:
            cv2.namedWindow("检测结果", cv2.WINDOW_NORMAL)
            cv2.imshow("检测结果", result_image)
            cv2.waitKey(0)
            cv2.destroyAllWindows()
            cv2.imwrite("result.jpg", result_image)

    elif args.mode == "batch":
        detect_batch_images(args.source, args.output, args.model, args.conf)

    elif args.mode == "video":
        # 如果source是数字,转换为整数
        if args.source.isdigit():
            source = int(args.source)
        else:
            source = args.source
        detect_realtime(source, args.model, args.conf, args.skip)

if __name__ == "__main__":
    main()
使用方法:
# 单张图片检测
python yolo_detector.py --mode image --source test.jpg --model yolo11n.pt --conf 0.5

# 批量图片检测
python yolo_detector.py --mode batch --source input_images --output output_results --conf 0.4

# 实时相机检测
python yolo_detector.py --mode video --source 0 --conf 0.3 --skip 1

# 本地视频检测
python yolo_detector.py --mode video --source test_video.mp4 --conf 0.5 --skip 2
七、常见问题与踩坑指南
7.1 推理速度慢怎么办?
- 确保使用GPU加速:检查
torch.cuda.is_available()是否返回True - 使用更小的模型:YOLOv11n < YOLOv11s < YOLOv11m < YOLOv11l < YOLOv11x
- 降低输入分辨率:在推理时添加
imgsz=640或imgsz=480参数 - 使用跳帧处理:设置
skip_frames=1或skip_frames=2 - 模型量化:将模型转换为INT8量化版本,速度可以提升2-3倍
7.2 相机帧率低怎么办?
- 降低相机分辨率:从1080P降到720P,帧率会明显提升
- 使用USB3.0接口:工业相机一定要接在USB3.0接口上
- 关闭其他占用CPU/GPU的程序
- 使用多线程:将图像读取和推理放在不同的线程中
7.3 漏检和误检问题
- 调整置信度阈值:漏检就降低阈值,误检就提高阈值
- 调整IOU阈值:重叠目标多就降低IOU阈值
- 训练自定义模型:预训练模型是在COCO数据集上训练的,对工业缺陷的检测效果不好,一定要用自己的数据集训练
- 添加后处理规则:通过面积、形状、位置等规则过滤误检
7.4 程序崩溃或内存泄漏
- 添加异常处理:在关键代码块添加try-except
- 及时释放资源:程序结束时一定要释放相机和窗口资源
- 避免在循环中创建大对象
- 定期重启程序:工业生产环境中可以设置每天凌晨自动重启程序
八、总结与下一步
恭喜你!你已经完成了第一个完整的YOLO工业视觉项目。回顾一下我们学到的内容:
- 单张图片检测:基础中的基础,用于调试和验证
- 批量图片检测:用于离线处理和生成检测报告
- 实时视频流识别:工业项目的核心,支持相机和视频文件
- 工业级优化:跳帧处理、FPS统计、报警功能、资源管理
这个项目已经可以直接用于很多简单的工业检测场景了。接下来你可以:
- 收集和标注自己的工业缺陷数据集
- 训练自定义的YOLOv11模型
- 添加ROI区域检测功能,只检测产品所在的区域
- 添加与PLC、机器人等工业设备的通信功能
- 将模型部署到边缘计算设备上
在后续的文章中,我会详细介绍这些内容,带你一步步从入门到精通工业视觉开发。
👉 点击我的头像进入主页,关注专栏第一时间收到更新提醒,有问题评论区交流,看到都会回。

汇聚全球AI编程工具,助力开发者即刻编程。
更多推荐

 10
10 0
0- 0


 已为社区贡献24条内容

所有评论(0)