
【深度学习】PyTorch 图像分类进阶:从本地脚本到 Flask Web 服务部署
文章目录
PyTorch 图像分类预测脚本
完整代码一览
import torch
import torch.nn.functional as F
from PIL import Image
from torch import nn
from torchvision import transforms, models

model = None
use_gpu = False

def load_model():
    """加载预训练模型"""
    global model
    model = models.resnet18()
    num_ftrs = model.fc.in_features
    model.fc = nn.Sequential(nn.Linear(num_ftrs, out_features=102))
    checkpoint = torch.load('best.pth')
    model.load_state_dict(checkpoint['state_dict'])
    model.eval()
    if use_gpu:
        model.cuda()

def prepare_image(image, target_size):
    if image.mode != 'RGB':
        image = image.convert('RGB')
    image = transforms.Resize(target_size)(image)
    image = transforms.ToTensor()(image)
    image = transforms.Normalize(mean=[0.485, 0.456, 0.406], std=[0.229, 0.224, 0.225])(image)
    image = image[None]  # 增加 batch 维度
    if use_gpu:
        image = image.cuda()
    return image

def predict(image):
    data = {"success": False}
    image = prepare_image(image, target_size=(224, 224))
    preds = F.softmax(model(image), dim=1)
    results = torch.topk(preds.cpu(), k=3, dim=1)
    results = (results[0].detach().cpu().numpy(), results[1].detach().cpu().numpy())
    data['predictions'] = list()
    for prob, label in zip(results[0][0], results[1][0]):
        r = {"label": str(label), "probability": float(prob)}
        data['predictions'].append(r)
    data["success"] = True
    return data

if __name__ == '__main__':
    load_model()
    img_path = r"./flower_data/train_filelist/image_00014.jpg"
    test_img = Image.open(img_path)
    res = predict(test_img)
    print(res)
导入依赖库与全局变量
import torch
import torch.nn.functional as F
from PIL import Image
from torch import nn
from torchvision import transforms, models

model = None
use_gpu = False
model = None:全局变量,用于存放加载后的模型。
use_gpu = False:是否启用 GPU 加速,这里设为 False(如需启用需自行安装 CUDA 环境并设为 True)。
模型加载函数 load_model
def load_model():
    global model
    model = models.resnet18()# 创建一个 ResNet18 模型实例(使用 ImageNet 预训练权重
    num_ftrs = model.fc.in_features # ResNet18 的全连接层(fc)的输入特征数(默认为 512)
    model.fc = nn.Sequential(nn.Linear(num_ftrs, out_features=102)) # 将原来的全连接层替换为一个新的线性层,输出为 102 个类别
    checkpoint = torch.load('best.pth') # 加载训练好的模型权重文件
    model.load_state_dict(checkpoint['state_dict']) # 将权重加载到模型中
    model.eval() # 将模型设置为评估模式
    if use_gpu:
        model.cuda()
图像预处理函数 prepare_image
def prepare_image(image, target_size):
    if image.mode != 'RGB': # 如果图像模式不是 RGB(比如 RGBA 或 L),先转换为 RGB,确保三通道输入
        image = image.convert('RGB')
    image = transforms.Resize(target_size)(image) # 将图像缩放到 (224, 224),这是 ResNet 的标准输入尺寸
    image = transforms.ToTensor()(image) # 将 PIL 图像或 NumPy 数组转换为 PyTorch 张量
    image = transforms.Normalize(mean=[0.485, 0.456, 0.406], std=[0.229, 0.224, 0.225])(image)# 按均值和标准差进行标准化,使数据分布接近标准正态分布
    image = image[None]  # 增加 batch 维度
    if use_gpu:
        image = image.cuda()
    return image # 返回预处理后的张量
预测函数 predict
def predict(image):
    data = {"success": False} #创建一个字典 data,包含 "success" 键,默认为 False,用于表示是否成功完成预测
    image = prepare_image(image, target_size=(224, 224)) #调用 prepare_image 预处理图片
    preds = F.softmax(model(image), dim=1) #在类别维度(dim=1)上计算 softmax,将 logits 转换为概率
    results = torch.topk(preds.cpu(), k=3, dim=1) #返回概率最大的前 3 个类别及其索引
    results = (results[0].detach().cpu().numpy(), results[1].detach().cpu().numpy())
    data['predictions'] = list()
    for prob, label in zip(results[0][0], results[1][0]):
        r = {"label": str(label), "probability": float(prob)}
        data['predictions'].append(r)
    data["success"] = True
    return data
返回结果是一个元组 (values, indices),分别对应概率值和类别索引。我们将其转为 NumPy 数组,方便遍历。
遍历前 3 个结果,构建一个列表,每个元素是一个字典,包含 “label”(类别索引)和 “probability”(概率值)。
将列表赋值给 data[‘predictions’],并将 “success” 设为 True。
返回 data 字典,便于后续转为 JSON 格式进行网络传输。
主程序入口
if __name__ == '__main__': #保证只有在直接运行此脚本时才执行以下代码,被导入时不执行
    load_model()
    img_path = r"./flower_data/train_filelist/image_00014.jpg"
    test_img = Image.open(img_path)
    res = predict(test_img)
    print(res)
调用 load_model() 加载模型权重。
指定一张测试图片的路径,用 Image.open 读取图片(PIL 格式),然后调用 predict 函数得到预测结果。
打印结果字典。
运行结果:
{'success': True, 'predictions': [{'label': '22', 'probability': 0.8882589936256409}, {'label': '91', 'probability': 0.07465873658657074}, {'label': '13', 'probability': 0.016419561579823494}]}
Flask Web 服务封装
完整代码一览
import io
import flask
import torch
import torch.nn.functional as F
from PIL import Image
from torch import nn
from torchvision import transforms, models

app = flask.Flask(__name__)
model = None
use_gpu = False

def load_model():
    """加载预训练模型"""
    global model
    model = models.resnet18()
    num_ftrs = model.fc.in_features
    model.fc = nn.Sequential(nn.Linear(num_ftrs, out_features=102))
    checkpoint = torch.load('best.pth')
    model.load_state_dict(checkpoint['state_dict'])
    model.eval()
    if use_gpu:
        model.cuda()

def prepare_image(image, target_size):
    if image.mode != 'RGB':
        image = image.convert('RGB')
    image = transforms.Resize(target_size)(image)
    image = transforms.ToTensor()(image)
    image = transforms.Normalize(mean=[0.485, 0.456, 0.406], std=[0.229, 0.224, 0.225])(image)
    image = image[None]
    if use_gpu:
        image = image.cuda()
    return image

@app.route("/predict", methods=["POST"])
def predict():
    data = {"success": False}
    if flask.request.method == 'POST':
        if flask.request.files.get("image"):
            image_bytes = flask.request.files["image"].read()
            image = Image.open(io.BytesIO(image_bytes))
            image = prepare_image(image, target_size=(224, 224))

            preds = F.softmax(model(image), dim=1)
            results = torch.topk(preds.cpu().data, k=3, dim=1)
            results = (results[0].detach().cpu().numpy(), results[1].detach().cpu().numpy())

            data['predictions'] = list()
            for prob, label in zip(results[0][0], results[1][0]):
                r = {"label": str(label), "probability": float(prob)}
                data['predictions'].append(r)
            data["success"] = True
            response = {
                "message": "success",
                "code": 200,
                "data": data
            }
            return flask.jsonify(response)
    return flask.jsonify(data)

if __name__ == '__main__':
    print("Loading PyTorch model and Flask starting server ...")
    print("Please wait until server has fully started")
    load_model()
    app.run(host='0.0.0.0', port=5012, debug=True)
新增导入模块
import io
import flask
io:Python 标准库,提供 BytesIO,用于在内存中读写二进制数据。
flask:Web 框架,需要提前安装(pip install flask)。
创建 Flask 应用实例
app = flask.Flask(__name__)
初始化一个 Flask 应用对象,name 告诉 Flask 当前模块的名称,用于定位资源文件。
复用 load_model 和 prepare_image
这两个函数与第一份代码完全一样,我们直接复制过来。这体现了代码复用思想:核心逻辑不变,只在外围增加 Web 交互层。
定义路由 /predict
@app.route("/predict", methods=["POST"])
def predict():
    data = {"success": False}
    if flask.request.method == 'POST': #首先检查请求方法是否为 POST
        if flask.request.files.get("image"): #然后检查 flask.request.files 中是否包含名为 "image" 的文件
            image_bytes = flask.request.files["image"].read() #读取文件的二进制内容
            image = Image.open(io.BytesIO(image_bytes)) #将二进制字节包装成类文件对象,供 PIL.Image.open 读取
            image = prepare_image(image, target_size=(224, 224)) #调用 prepare_image 进行预处理,然后执行前向传播

            # ... 预测逻辑(与第一份相同)...
            data["success"] = True
            return flask.jsonify({"message": "success", "code": 200, "data": data}) #将结果存入 data 字典
    return flask.jsonify(data) #将 Python 字典转为 JSON 格式的 HTTP 响应,并设置正确的 Content-Type
@app.route(“/predict”, methods=[“POST”]) 装饰器:将下面定义的 predict 函数绑定到 URL /predict,并限制只接受 POST 请求。
启动 Web 服务
if __name__ == '__main__':
    print("Loading PyTorch model and Flask starting server ...")
    load_model()
    app.run(host='0.0.0.0', port=5012, debug=True)
先调用 load_model() 加载模型(服务启动时只加载一次,所有请求共享)。
app.run() 启动 Flask 内置服务器:
host=‘0.0.0.0’:监听所有网络接口,允许其他设备访问。
port=5012:使用端口 5012。
debug=True:开启调试模式,代码修改后自动重启,方便开发。
运行结果:
 * Serving Flask app 'Flaskweb'
 * Debug mode: on
WARNING: This is a development server. Do not use it in a production deployment. Use a production WSGI server instead.
 * Running on all addresses (0.0.0.0)
 * Running on http://127.0.0.1:5012
 * Running on http://192.168.31.33:5012
Press CTRL+C to quit
 * Restarting with stat
Loading PyTorch model and Flask starting server ...
Please wait until server has fully started
D:\lanzhi_study\深度学习\flower_data\Flaskweb.py:25: FutureWarning: You are using `torch.load` with `weights_only=False` (the current default value), which uses the default pickle module implicitly. It is possible to construct malicious pickle data which will execute arbitrary code during unpickling (See https://github.com/pytorch/pytorch/blob/main/SECURITY.md#untrusted-models for more details). In a future release, the default value for `weights_only` will be flipped to `True`. This limits the functions that could be executed during unpickling. Arbitrary objects will no longer be allowed to be loaded via this mode unless they are explicitly allowlisted by the user via `torch.serialization.add_safe_globals`. We recommend you start setting `weights_only=True` for any use case where you don't have full control of the loaded file. Please open an issue on GitHub for any issues related to this experimental feature.
  checkpoint = torch.load('best.pth')
 * Debugger is active!
 * Debugger PIN: 949-937-993
测试你的 Web 服务
服务启动后,可以用两种方式测试:
方式一:使用 curl 命令(命令行)
在 命令提示符(cmd) 或终端中执行:
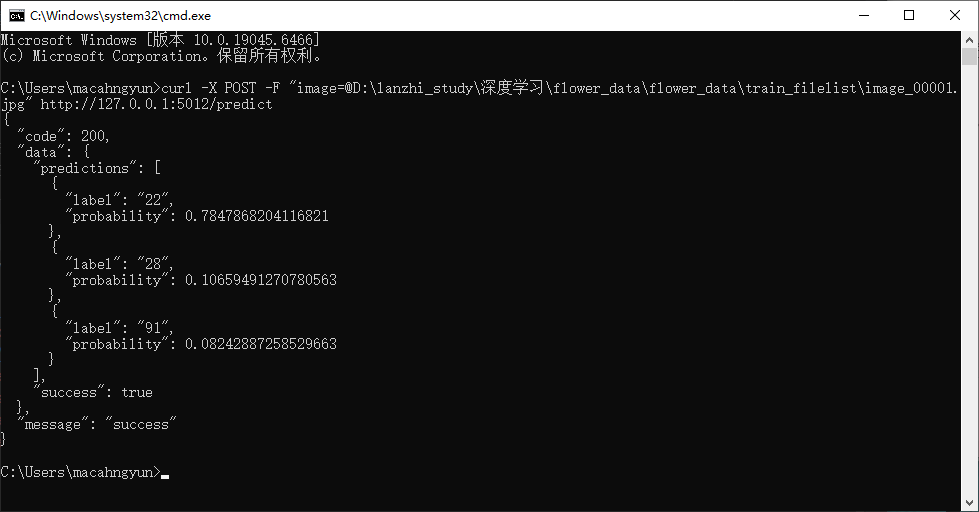
curl -X POST -F "image=@D:\lanzhi_study\深度学习\flower_data\flower_data\train_filelist\image_00001.jpg" http://127.0.0.1:5012/predict
-X POST:指定请求方法为 POST。
-F “image=@图片路径”:以 form-data 方式上传文件,@ 后面跟本地图片的绝对路径。
http://127.0.0.1:5012/predict:接口地址。
你会收到 JSON 格式的预测结果。
运行结果:
方式二:使用 Postman(图形化工具)
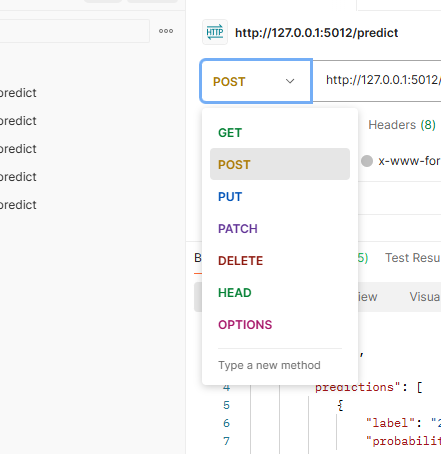
请求方式:改为 POST。
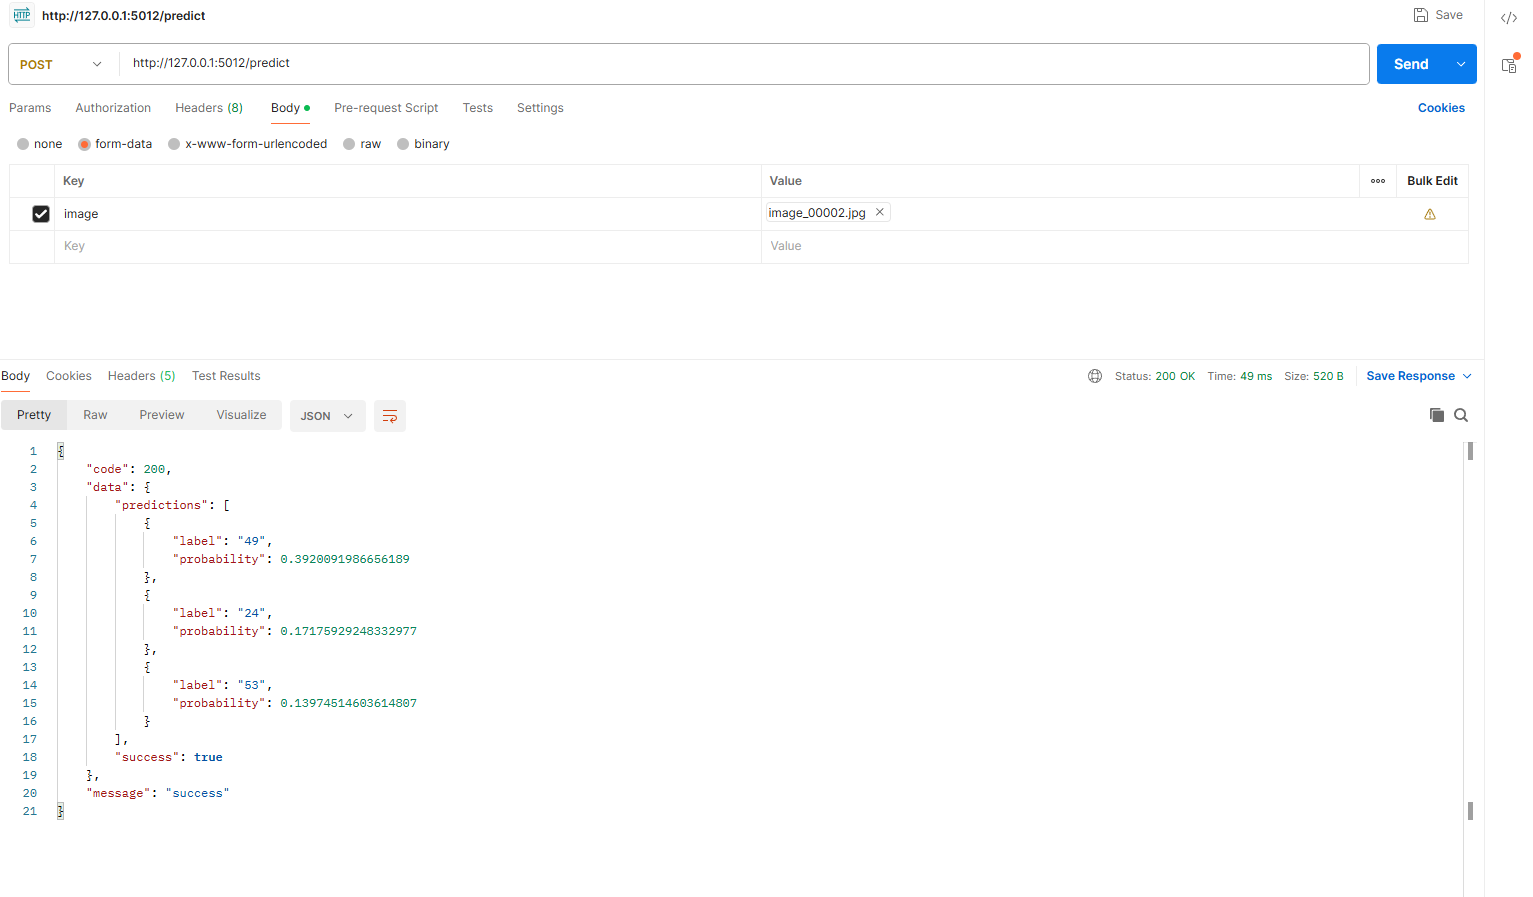
URL:http://127.0.0.1:5012/predict。

Body → form-data:

Key:输入 image,Key 右侧的下拉框:选择 File(不是 Text)。

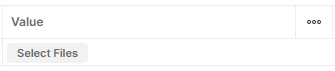
Value:点击 Select Files,选择一张本地图片。
点击 Send 按钮,下方会返回预测结果。

汇聚全球AI编程工具,助力开发者即刻编程。
更多推荐

 22
22 0
0- 0


 已为社区贡献32条内容

所有评论(0)